Extending for under £50,000: 13 top tips for budgeting your home extension
Looking at extending for under £50,000? Making your house bigger needn’t cost the earth. Follow our tips on how to add a £50K extension, and take inspiration from these cost-effective projects

Get small space home decor ideas, celeb inspiration, DIY tips and more, straight to your inbox!
You are now subscribed
Your newsletter sign-up was successful
If you're planning extending for under £50,000, our guide is here to help you make the most of your money while increasing your living space as much – and as stylishly – as possible. These tips include everything from budgeting to design limitations, while managing your expectations of what building a £50K extension will give you.
Read our ultimate guide to how to extend a house for lots more budgeting, planning and design information. Get a definite idea of what your budget can do with our extension cost calculator.
1. Use an extension cost calculator to get the numbers right
The first question is: can you do what you really build the extension you want for under £50,000? The best way to find out, before you even approach builders, is to get a good idea of costs via an extension cost calculator.
Ours is free to use – you simply answer a few simple questions, including where in the country you live, the kind of extension you want to build, and how much work you'll be doing yourself, and it will give you an accurate finished extension cost.
2. Allocate budget to the extension's interior finish, not just the build
Don’t forget that, once your extension is actually built, you will need some money to complete the finishing work. Having a badly finished interior, even on an extension under £50,000, will damage the resale value of your house.
The amount of money you need to set aside depends on the purpose of the new room: a kitchen will, of course, need a greater budget than a bedroom, for example. The best approach is to budget carefully from the outset, including interior fittings in your extension calculations.
To keep costs down but to make the space look more expensive, invest in visible, eye-catching details. A feature pendant light or good quality door hardware can lift the appearance of a room, and make sure all of the decorative finishes, plastering, paint and flooring, are all done to the highest standard you can afford.
Get small space home decor ideas, celeb inspiration, DIY tips and more, straight to your inbox!
Find suppliers for everything from bi-fold doors to paint in our house extension suppliers sourcebook.
3. Keep control of costs with careful project management
‘Knowing exactly what the project will cost before you start is essential when funds are limited,’ says Rachel Haynes, director of Thread Architects. ‘If you are saving money by project managing the extension yourself and employing sub-contractors, you may need to provide all the materials to the builders as and when they require them. You will need to make sure you understand building terminology, what the builder will be doing and when, and what they’ll need to complete each task. All this takes forward planning as manufacturing and delivery times need to be factored into the process.
If you don’t have the time or skills to project manage, find a competent builder who will take on the day-to-day running of the site. Have a contract in place for the work that sets out the process and costs. An architect or separate project manager could help you administer the contract and/or oversee the work. They can answer technical queries and advise on issues relating to changes or extras. This may involve more consultancy fees but a well-managed project will help ensure the build doesn’t increase.’
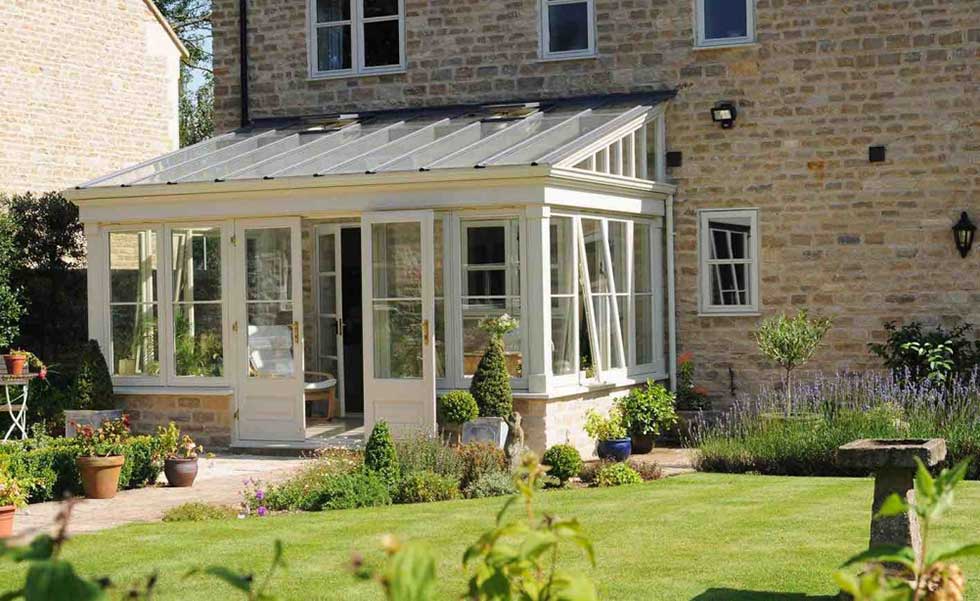
This bespoke conservatory from David Salisbury adds a light-filled and very versatile space to this home in Somerset. It cost £40,000 to build
4. How to build an extension yourself
Building an extension yourself – or at least cutting labour costs by doing some of the work yourself – isn't beyond the capabilities of anyone with experience of DIY. ‘There is nothing a proficient DIYer cannot do themselves when extending or improving their own home,’ says experienced home renovator Michael Holmes. ‘But while it is possible to reduce labour costs through DIY, as the client you must keep up to speed with any decision making necessary, too. Holding up other trades through indecision or poor control of the schedule can end up being more expensive if a lack of decisiveness means delays or abortive work.’
Find out what you can do yourself below, and use our guide to find out how to cut extension costs.
Easy DIY jobs (for those with time, but limited skills):
- Site tidying and cleaning;
- Labouring (loading out roof tiles or blocks, mixing mortar etc);
- Landscaping and planting.
For those with basic carpentry skills:
- Second fix carpentry, for example fitting skirting and architrave;
- Building fitted furniture and kitchen units;
- Fixing curtain poles and hanging curtains.
For those with basic electrical skills:
- Fitting sockets and switches (second fix);
- Adding light fittings (second fix).
For those with basic DIY skills:
- Preparation and decoration (painting and papering);
- Ceramic wall tiling.
5. Avoid making design changes down the line
‘To limit professional fees, try to "freeze" an agreed design at an early stage, when the drawings have the level of detail necessary to be submitted for planning permission or a certificate of lawful development,’ says architect Alan Cronshaw of ACRONYM Architecture & Design.
‘After this, the design is usually given to a structural engineer for their input, and the level of detail on the drawings will increase to show compliance with building regulations. If you make big changes during or after this stage, there’s more work involved in altering the design, which will cost money.’
Working hard on a detailed spec before any work begins, from the design of skirting boards to the placement of electrical points, is labour-intensive but worthwhile: it cuts down on expensive, snap decisions later down the line and helps your contractors know exactly where they are.
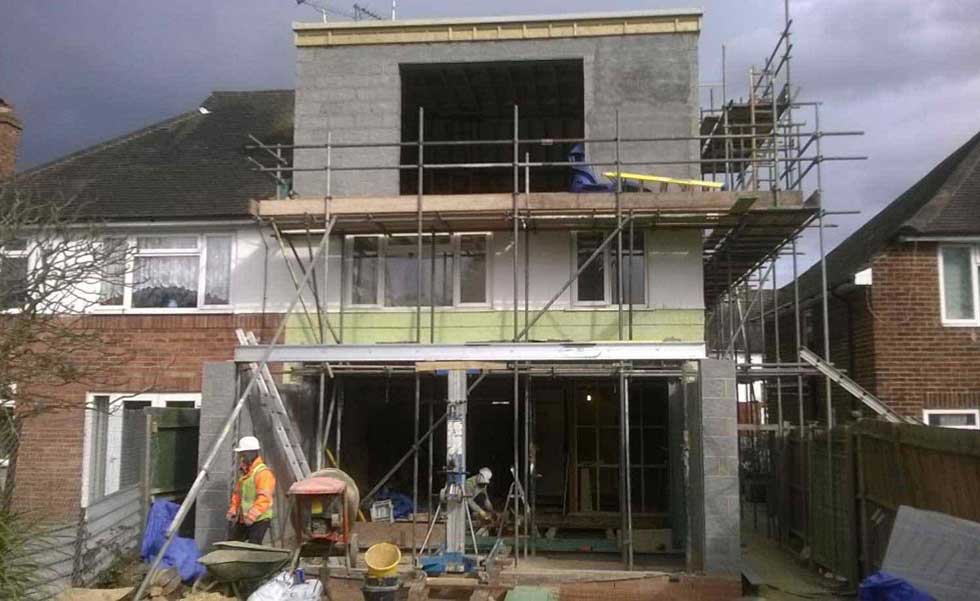
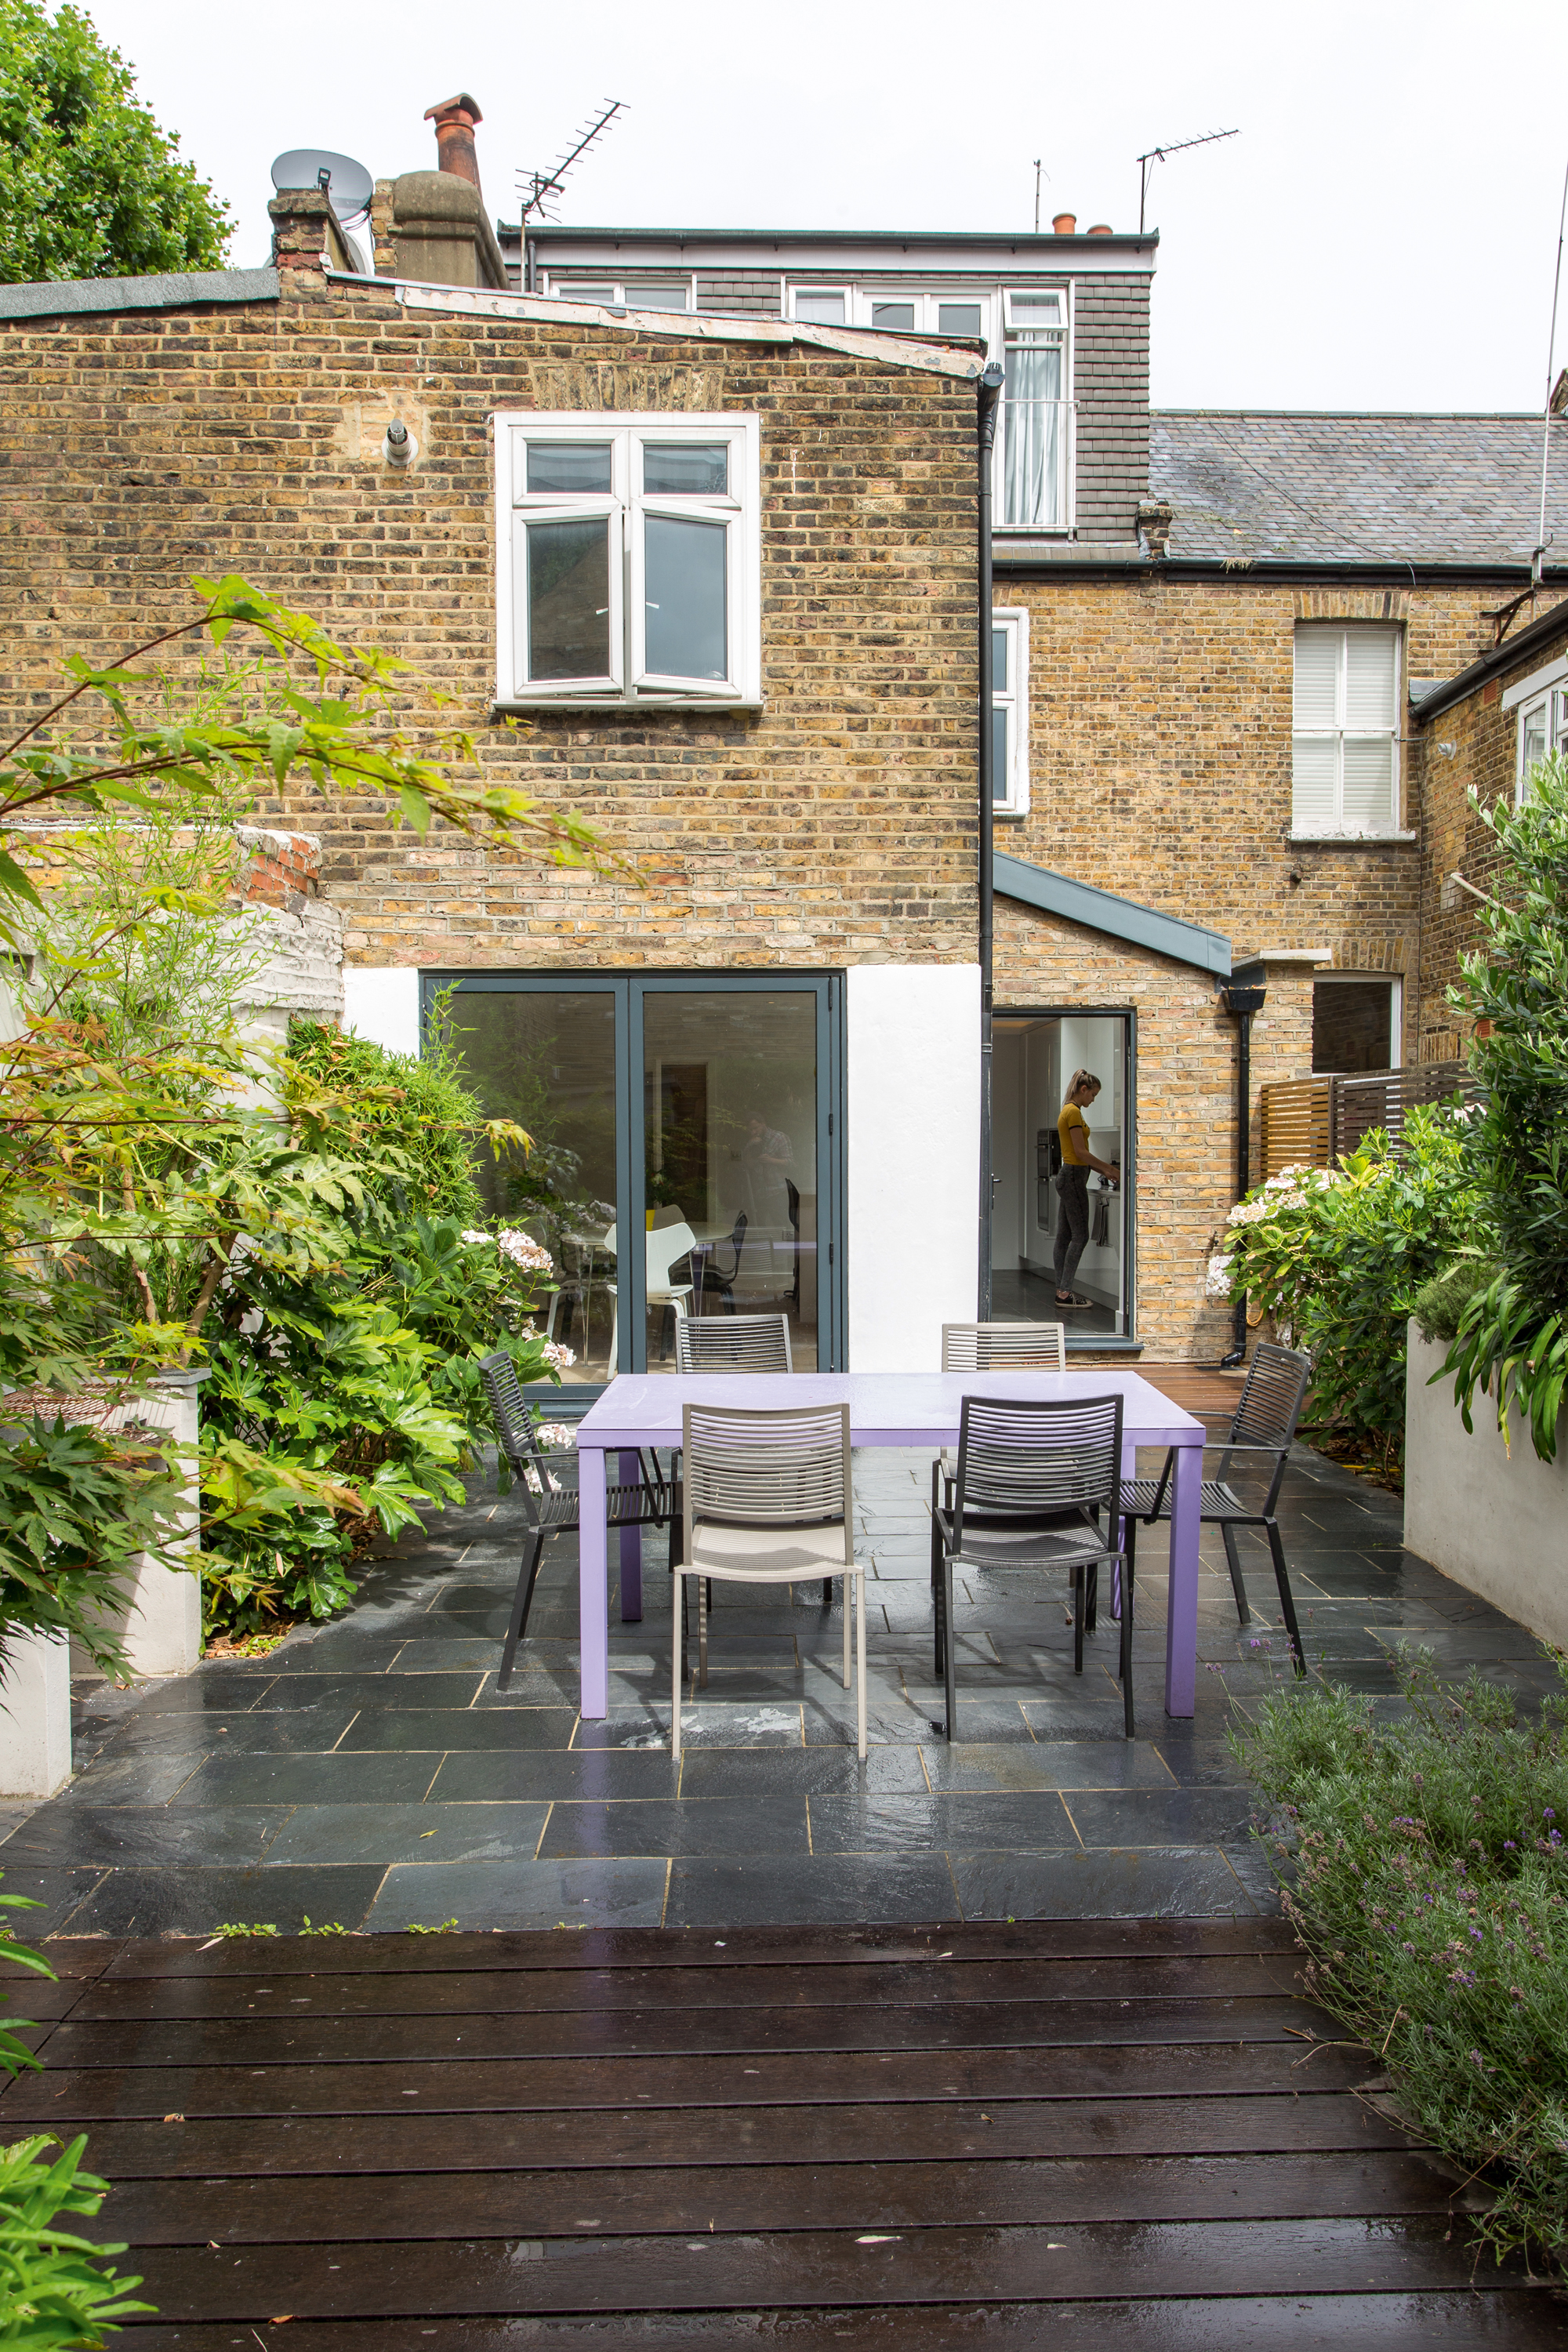
The owner of this home in north London renovated to create plenty of space for visiting family. The ground-floor addition made room for a kitchen-diner that opened up to the garden. Completed by N London Construction, the extension cost around £48,000
6. Factor in the functions of rooms
‘Choosing to create a living room or dining room in the new space is the cheapest option’ says property expert Marta de Sousa. ‘If you are considering designing a new kitchen, you’ll have the cost of fitting new pipes and wiring for the water, gas, and drainage, and the electrics needed for appliances, as well as the kitchen cabinets, worktops and splashbacks. With a bathroom, you’ll have to consider the added expense of tiling, the bathroom fittings, heating and running the large waste pipe through your floor.'
7. Use salvaged or reclaimed materials
‘To save money without sacrificing quality, look for cast-off architectural pieces that fit your house’s period and style,’ says designer Charlotte Starling, of Velvet & Dash. ‘I find the most readily available are old doors. Their heavy, solid wood seems so substantial, plus the textures and finishes have a feeling that only comes with age.’
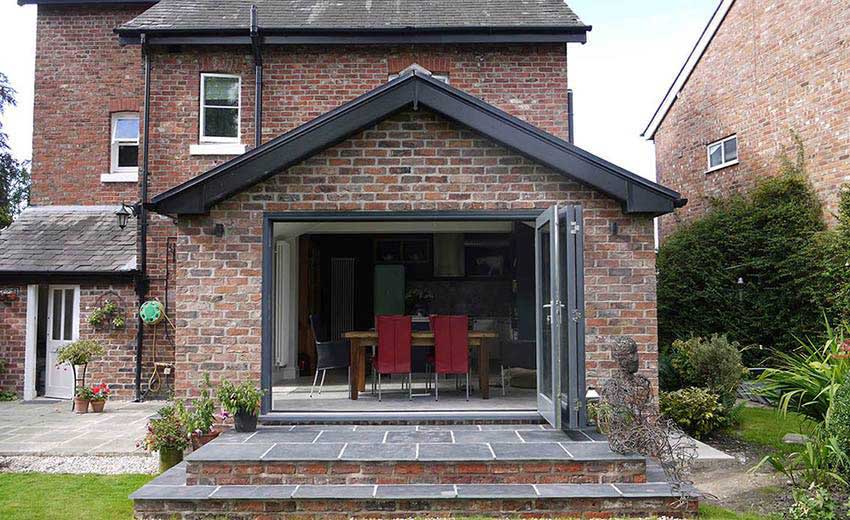
When the owners of this house in Cheadle Hulme wanted a single-storey extension to add kitchen and dining space, they hired Hende, a building company with experience of the local planning process. The project cost £40,602
8. Choose a simple shape, size and structure
‘Keep the extension footprint as close to a square as possible – this facilitates a clean roof design that avoids complex detailing, such as valleys and hips,’ says Ian Rock, director of surveying website rightsurvey.
‘An insulated flat roof, perhaps with fixed skylight, is the cheapest option. But it shouldn’t add greatly to the cost if you opt for a shallow lean-to roof clad with inexpensive concrete interlocking tiles, which offer good coverage and are quick and easy to lay.
‘Blockwork walls with an external render coating tend to be less expensive than brick and block, or timber frame. To minimise labour costs, position door and window openings so their edges correspond to the width and height of the blocks.
‘Building a larger extension can actually reap economies of scale. The roof and foundations are the priciest parts, so a two-storey extension can make a lot of sense because the infill wall construction is relatively inexpensive, even with the added cost of an upper floor.’
9. Be certain about what's included
‘Get a fixed quote from your builder, and a very clear contract or letter that is signed by both parties to say what will be done for that money and what will be extra,’ says Kate Faulkner, managing director of independent advice site Property Checklists.
‘Consider who is responsible for signing off the building regulations with the local authority; if something needs to be redone, who pays? It should be the builder.’
Regardless of the insurance your builder has, make sure you have project insurance for the extension, as your normal household insurance won’t cover the work.
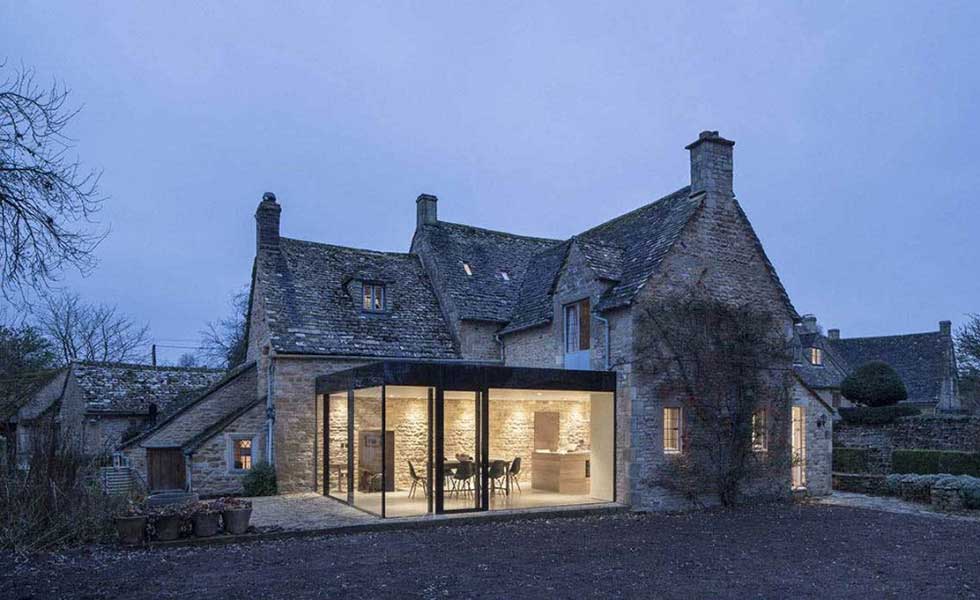
10. Get clever with glazing
‘Use natural light and soft furnishings to enhance a simple extension,’ says architect Des Ewing, owner of Des Ewing Residential Architects.
‘Large spans of glazing can be very expensive – to keep the cost down, have less areas of glass and concentrate the natural light in specific places, such as the living area, where you will spend most of your time. Rooflights are a great way to bring natural light into the depths of room.’ And don’t forget to factor in artificial lighting to highlight key features and provide illumination.
See our gallery of light filled extensions and our glass extension design ideas for more tips.
11. Select materials with longevity for the interior
‘An all-white kitchen always looks fresh, while stainless steel is timeless and functional,’ says interior designer Amelia Carter.
‘A simple kitchen can be easily dressed up with colourful tiles, or beautiful work surfaces. Granite is a great option for kitchen worktops as it’s a much harder surface than marble and not as porous, so lasts over time with fewer stains and water marks. For walls, glass tiles in bathrooms and kitchens are practical, and can be cheaper than ceramic or porcelain tiles.’
See our white kitchen design ideas to get more ideas.
12. Don't be put off adding a small extension
A small extension isn't the most cost-effective of builds (you'll need to maximise your spend with a double-storey extension for that), but it shouldn't be dismissed if that's all your budget can stretch to. Adding just a few square metres to a downstairs space, with, for example, a rear single storey extension or side return extension can make a small kitchen diner generous enough to incorporate a living space, too. Use our guides to find out lots more information:
- Small extension design ideas
- Single storey extensions: how to plan, design and budget yours
- Side return extensions: planning, design and budgeting tips
13. Get a fixed price building contract
Fixing the price up front with your builder will help you budget properly. A fixed price contract means the building company and you agree to a set price for the work before the project begins. This is not always easy to carry out in practice, and won't work if you change your mind or make additions or delays to the project. But if you and the builder have gone into great detail prior to the job beginning and planned it minutely, it should mean that you stick as closely as possible to your budget. Still, it's always worth having a contingency budget to cover unexpected costs.
Looking for more extension advice and budgeting tips?

Lucy is Global Editor-in-Chief of Homes & Gardens having worked on numerous interiors and property titles. She was founding Editor of Channel 4’s 4Homes magazine, was Associate Editor at Ideal Home, before becoming Editor-in-Chief of Realhomes.com in 2018 then moving to Homes & Gardens in 2021. She has also written for Huffington Post, AOL, UKTV, MSN, House Beautiful, Good Homes, and many women’s titles. Find her writing about everything from buying and selling property, self build, DIY, design and consumer issues to gardening.