A 5-step split wood bead wreath for fall
For a cool Scandi seasonal addition to your home.

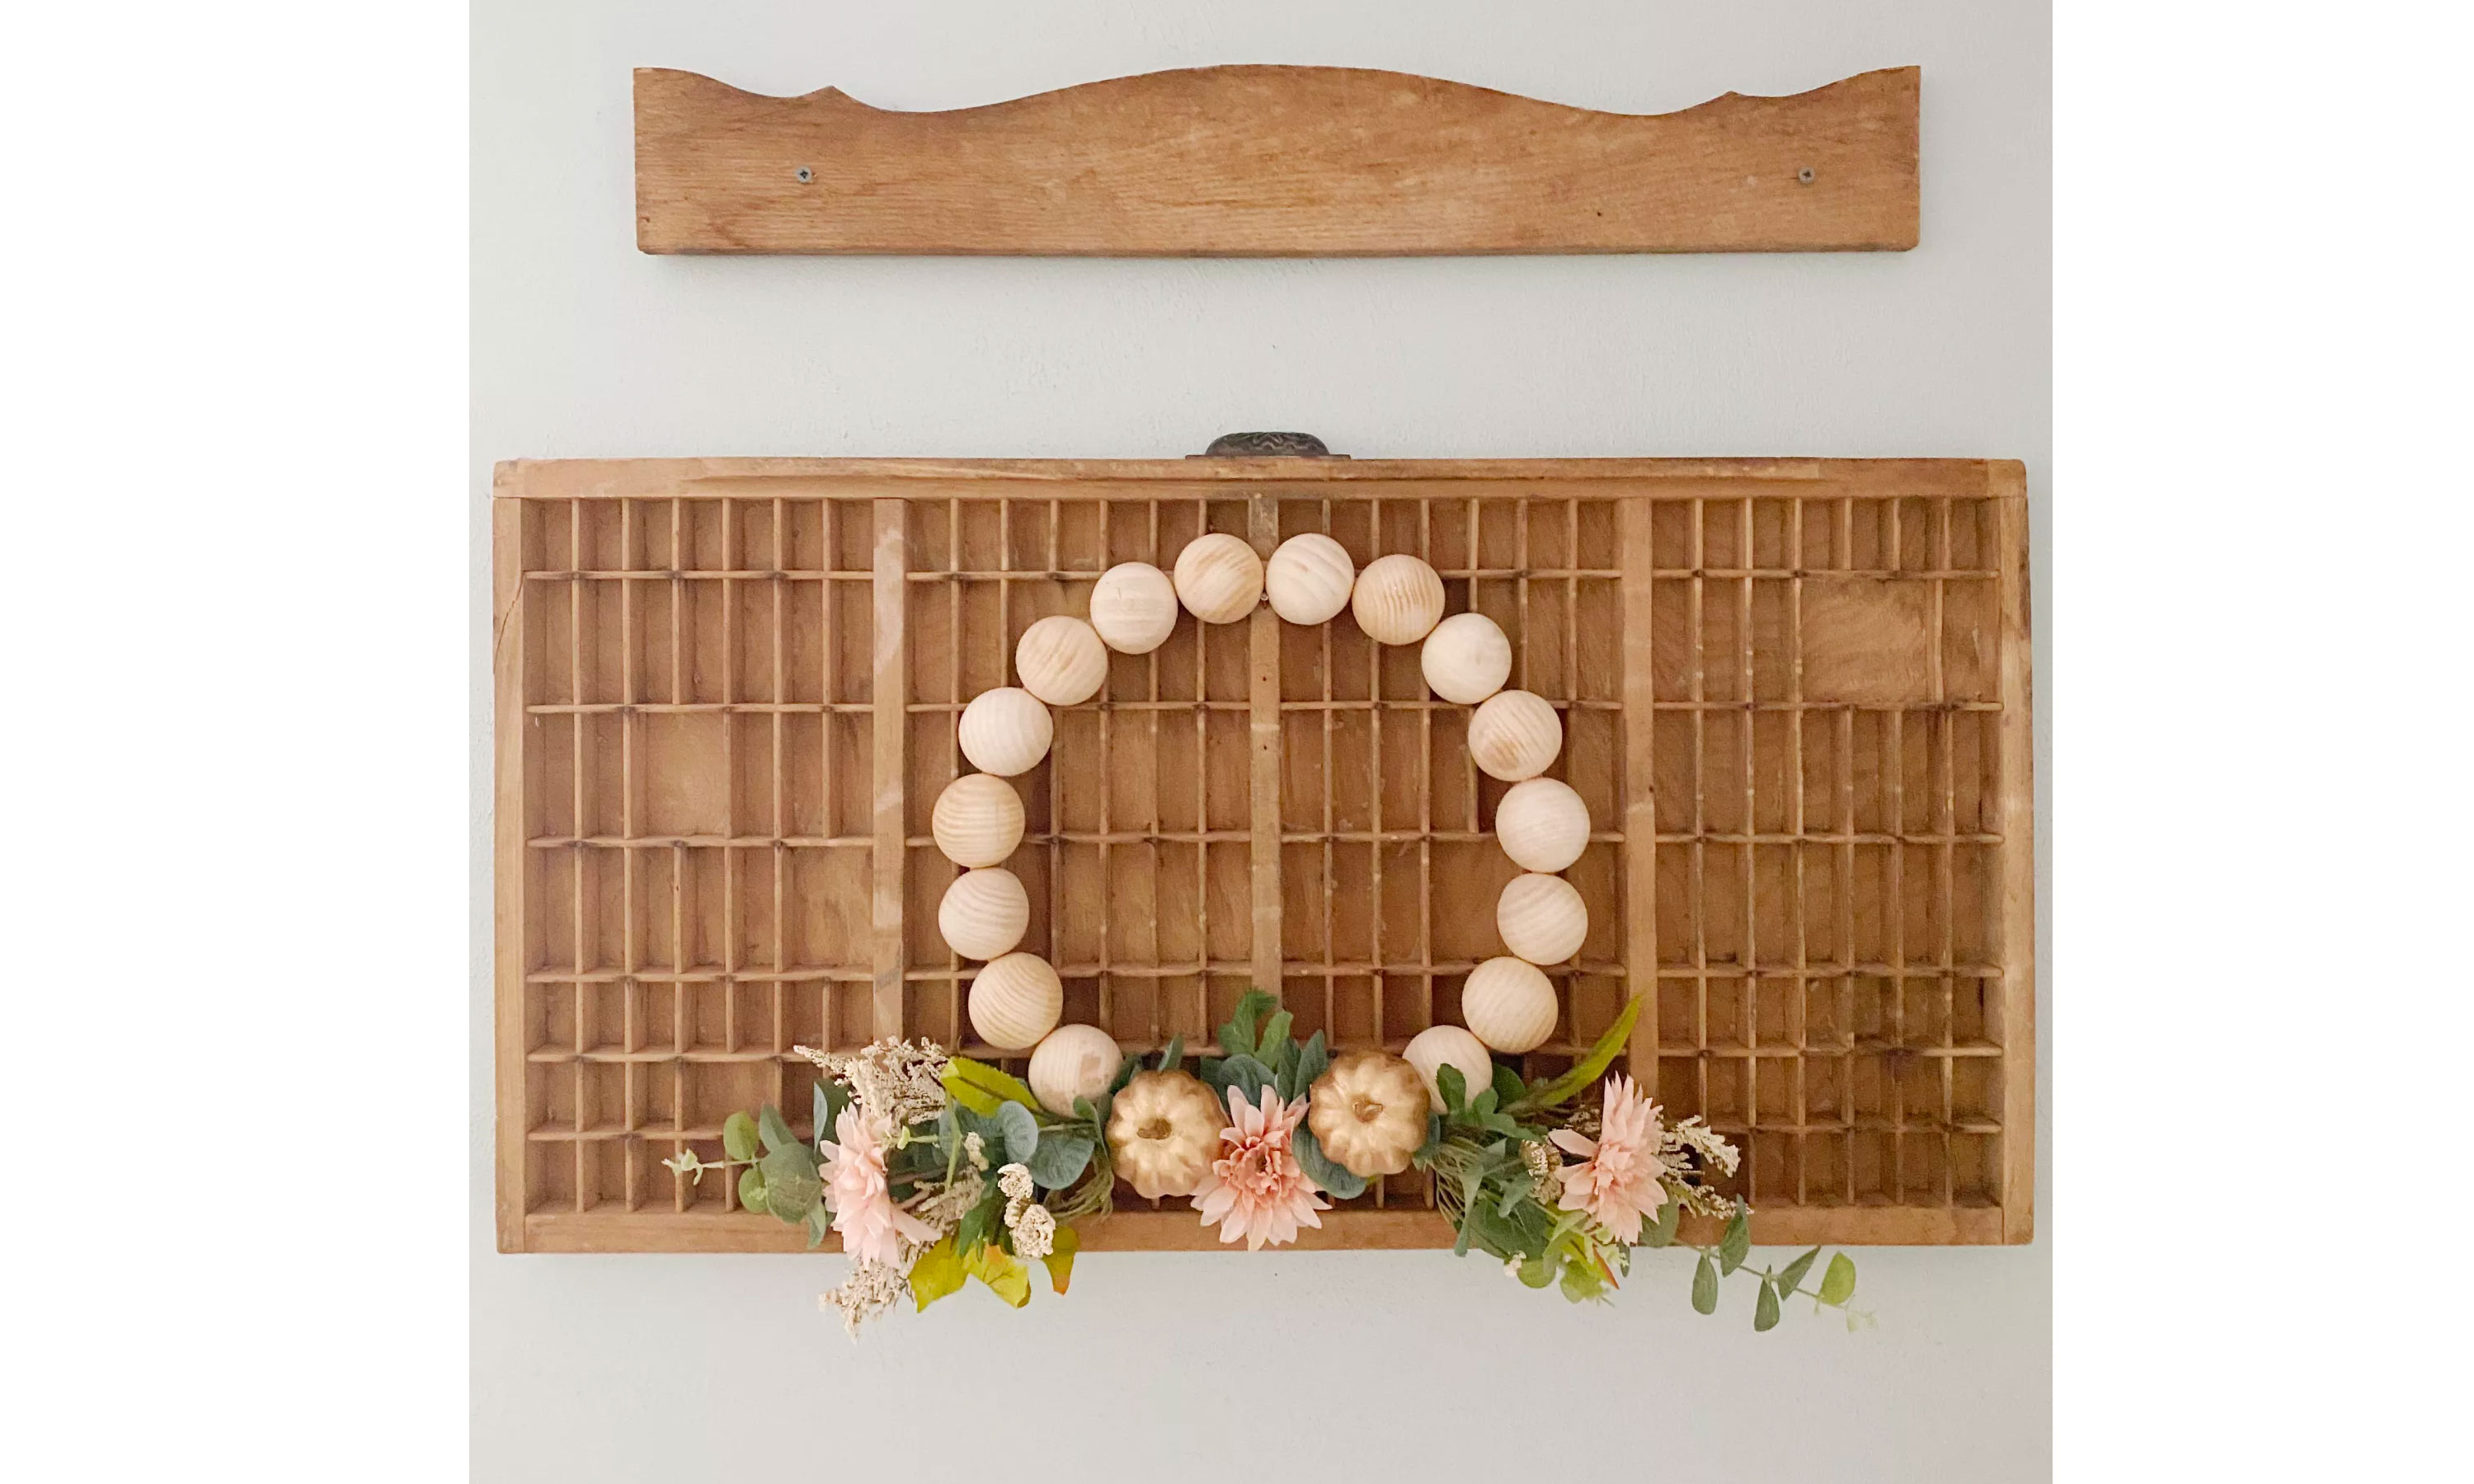
If you like to bring a sense of nature into your home but in a modern way, this is the DIY for you. Making a split wood bead wreath for fall not only looks great but, is surprisingly super simple and pretty on-budget too.
I love crafting and experimenting with different DIY fall wreaths each year for my autumnal display at home. This one is a favorite because it's cool, durable and lets you get a little creative.
Change the finish up by choosing different colored sprigs and guests will think it's a whole new addition to any other fall wreaths and seasonal decor around your home.
How to make a split wood bead wreath for fall
If you're a crafter at heart and always keen to start on the latest DIY fall decorating ideas, you'll likely be stocked up on a few of the supplies you need anyhow.
You will need:
1. 16 - 2 1/2" Unfinished split wood beads: Amazon is an easy choice!
2. Cardboard wreath frame which are easy to find on Amazon
3. Fall floral sprigs and greenery
4. 2 x faux mini pumpkins from Amazon or The Home Depot
5. Rub 'N Buff paint brush
6. Hot glue gun like Ryobi One's Cordless hot glue gun
7. Floral wire and cutters
1. Prepare the wreath frame
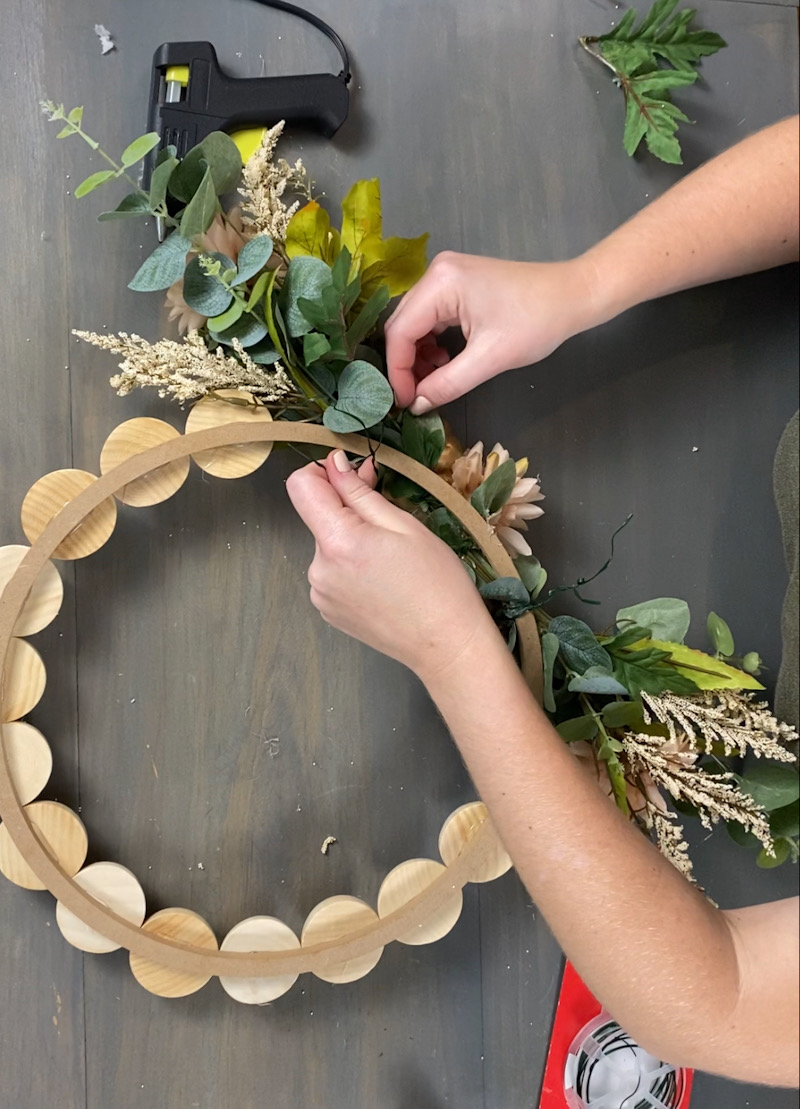
Start by laying out your wreath frame. Then using your hot glue, attach the split wood balls to the frame, butting them up against each other until you get 3/4 around the frame. Leave the rest open for the DIY fall wreath floral arrangement.
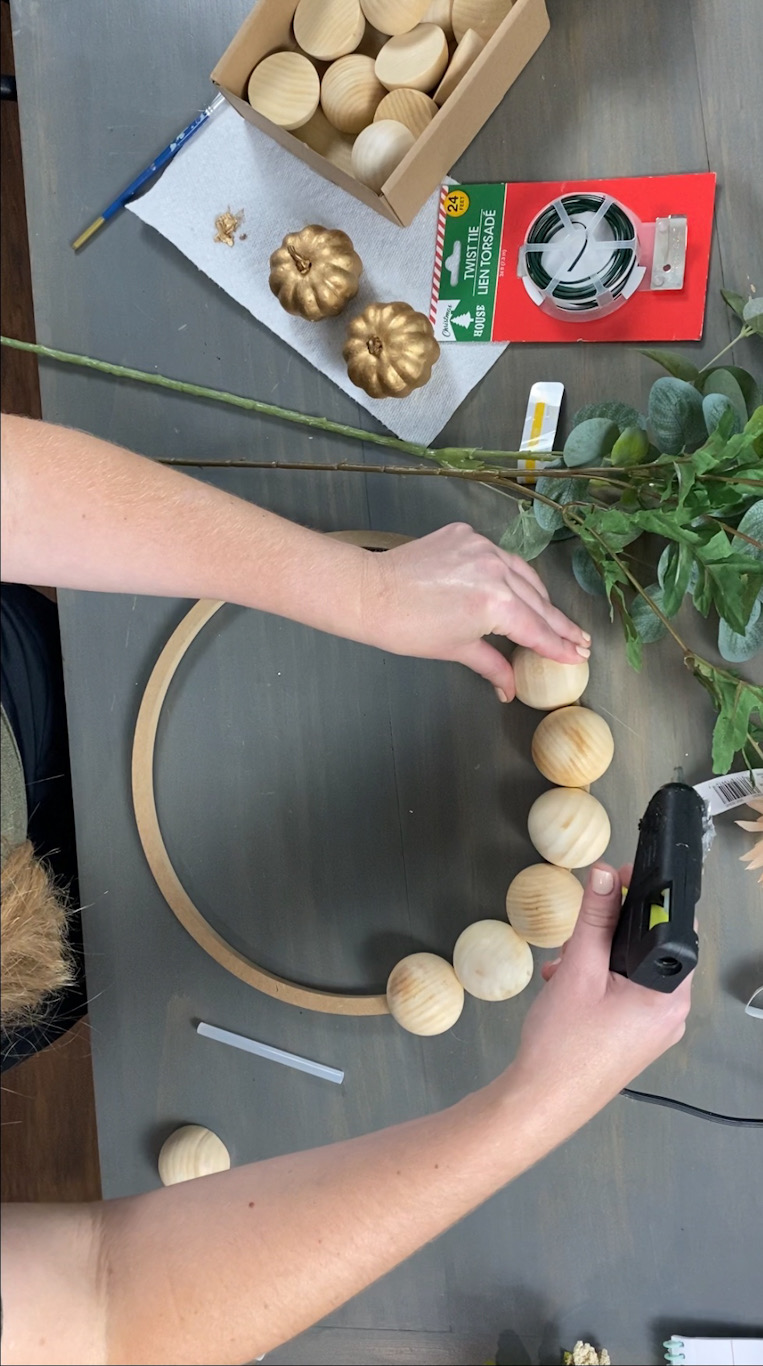
2. Divide and arrange the florals
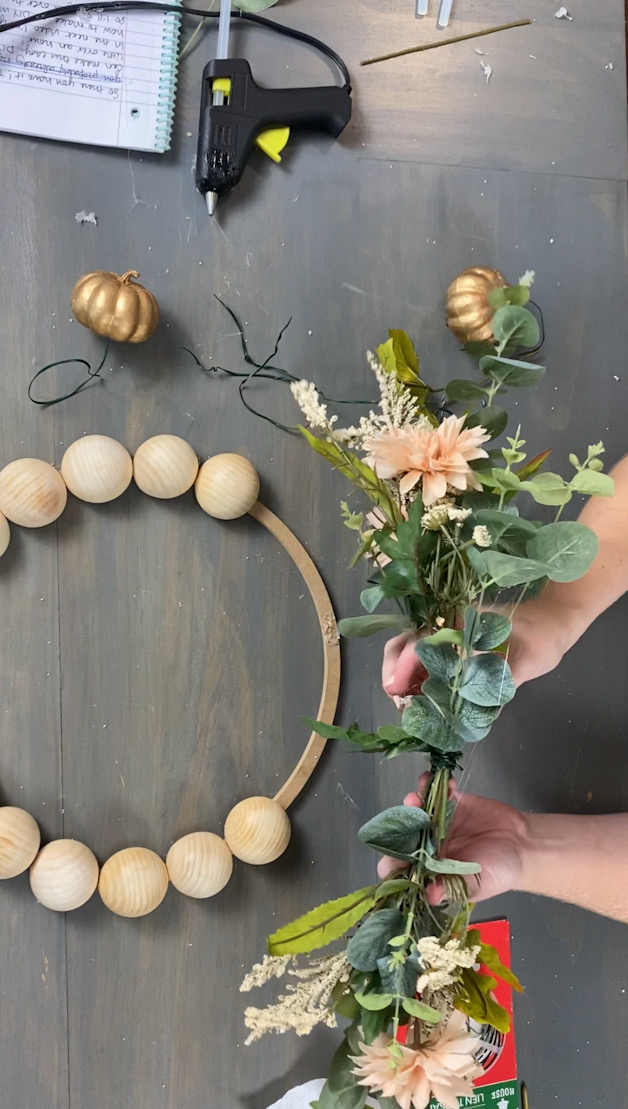
Cut and divide your florals evenly, reserving a flower for the center. Form two equal arrangements and secure with floral wire towards the bottom of each bouquet.
Lay each bouquet opposite of one another, overlapping the stems and secure them together with floral wire.
Get small space home decor ideas, celeb inspiration, DIY tips and more, straight to your inbox!
3. Paint your mini pumpkins
Next, paint your mini pumpkins with Rub 'N Buff. Allow to dry completely then poke floral wire through the bottom of each pumpkin and secure with hot glue. Wrap the pumpkins around the floral arrangement, one on either side, covering the stems.
If you choose to paint real pumpkins, we can help too!
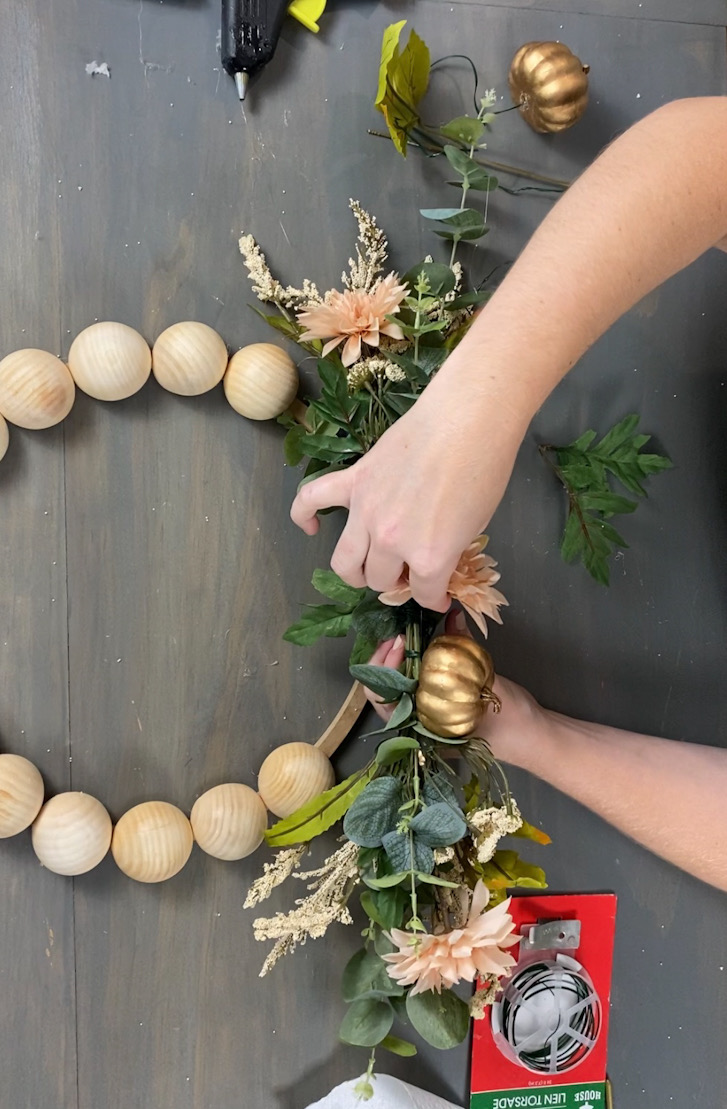
4. Secure the reserved flower
Poke floral wire through the flower that you reserved from earlier. Secure with hot glue and attach to the center of the arrangement.
5. Attach your arrangement to the wreath
Now you're ready to attach your arrangement to the wreath. Spread hot glue over the part of the wreath you left uncovered. Press the arrangement onto the frame and then use floral wire on either side of the arrangement to finish securing the floral arrangement to the wreath.
Styling your split wood bead wreath
Hanging a wreath like this one over a mantel looks awesome but it would work equally as well on your front porch!
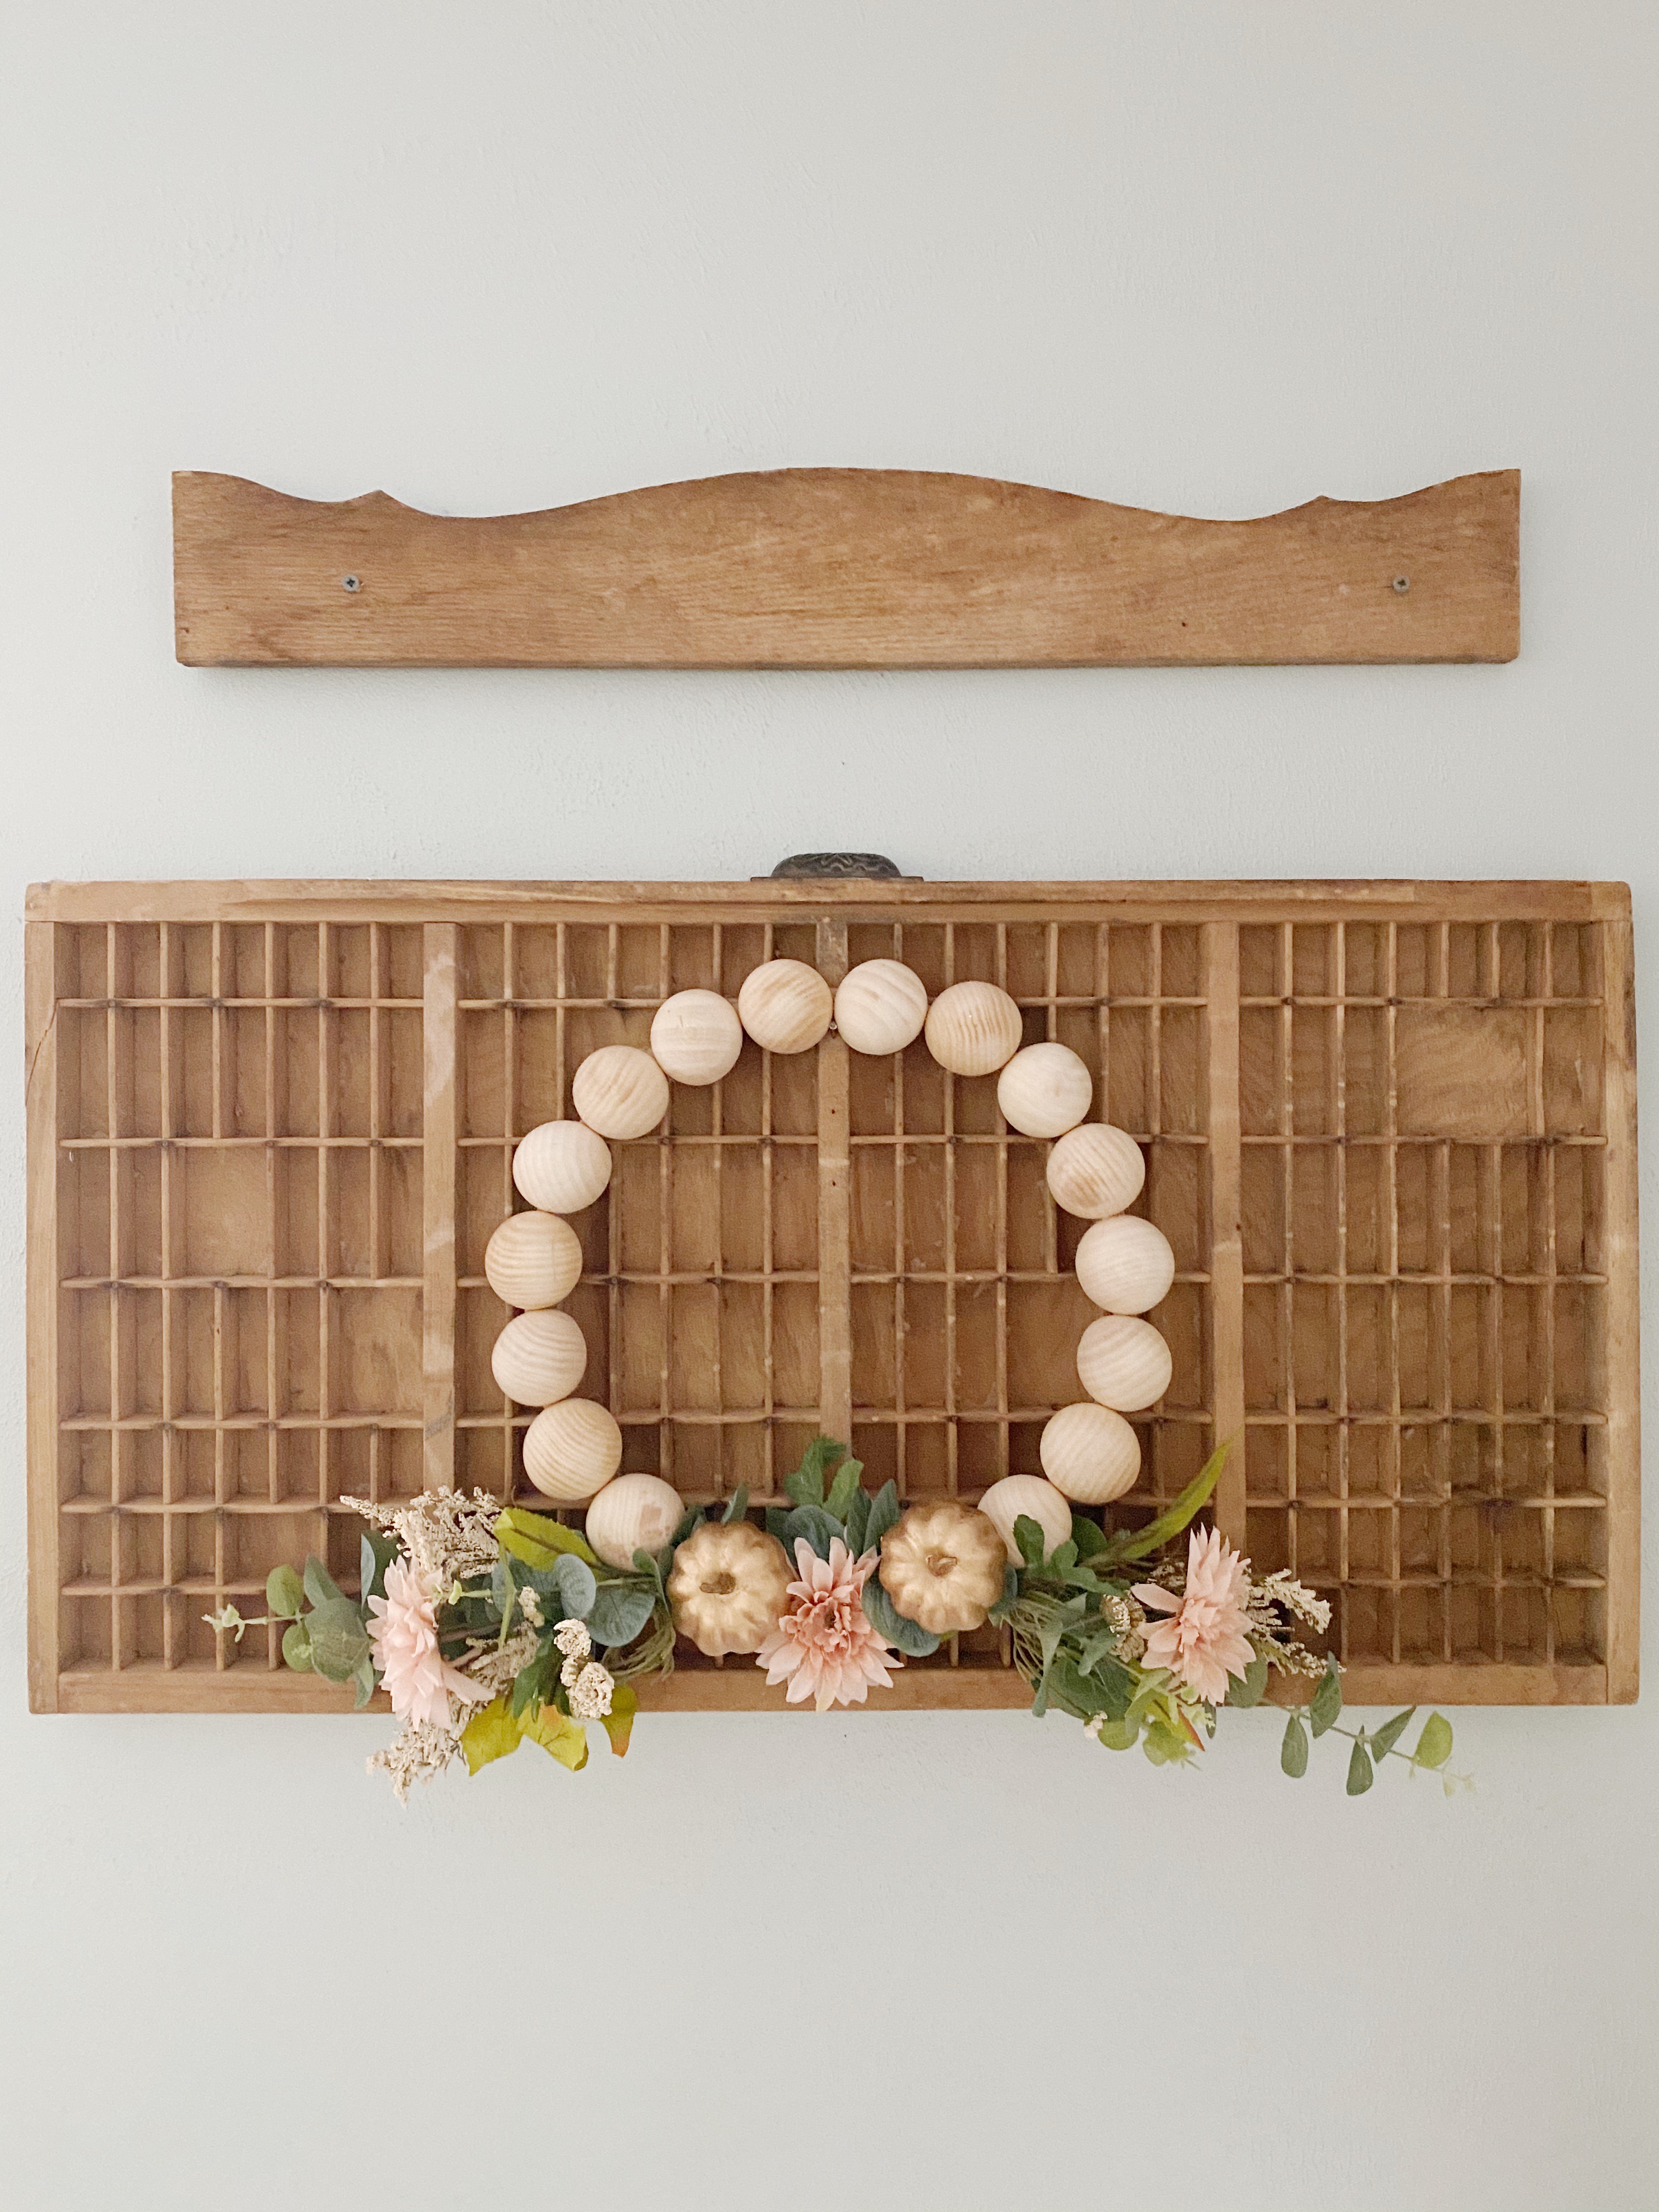
Mix it up and find out where to buy fall home decor to make your autumnal display pop a little more.

Dori Turner writes blog posts and feature articles on affordable design and DIY from her home in the heart of Oklahoma. She has a passion for teaching others how they can transform their home on a budget.