-
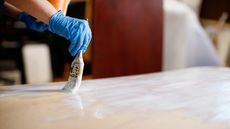
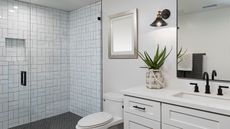 How to paint bathroom tile for a quick and budget-friendly refresh
By finding out how to paint bathroom tile you are on your way to a quick and easy bathroom makeover that is kind on the bank balance too
-
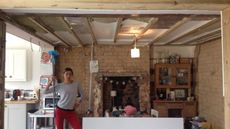 5 DIY renovation jobs that were so much easier than I expected
Are you the proud new owner of a fixer upper? Here are the five DIY jobs I thought were going to be far harder than they really were
-
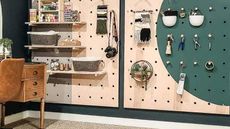 10 easy DIY small space storage ideas anyone can do
After DIY small space storage ideas that are simple and quick to complete? Check out our pick of the best which will have your home looking shipshape in no time at all
-
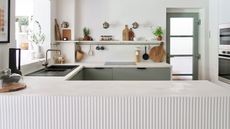 A $200 fluted panel transformed my drab kitchen in just one weekend
How to install a fluted kitchen panel: A speedy and achievable DIY tutorial even for DIY novices
-
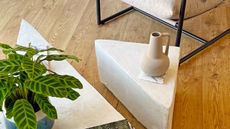 How to make a DIY coffee table using cardboard and plaster. I did it in 7 easy steps with beautiful results
An achievable and budget-friendly DIY coffee table tutorial using repurposed cardboard and ready-mixed plaster
-
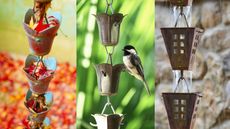 How to make a rain chain — 6 steps to creating a unique downspout
Wondering how to make a rain chain? Our experts explain the six simple steps to adding a calming, eco-friendly addition to your backyard.
-
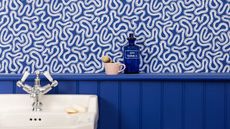 How to wallpaper a small bathroom for long-lasting results: 8 steps to success
Learning the best way to wallpaper a small bathroom means that even in the trickiest of spaces, you will end up with a room you can't wait to spend time in
-
 How to paint countertops for a complete kitchen transformation
Wondering how to paint countertops? Our simple guide takes you through everything you need to know about the job, including the best products to use
-
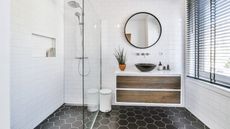 How to tile a small bathroom floor in nine easy steps
Looking for an easy guide on how to tile a small bathroom floor? Just follow our nine simple steps to success to ensure maximum impact
-
 This Emily Henderson wallpaper hack is renter-friendly perfection — bring it to life in your home in 4 simple steps
This Emily Henderson wallpaper hack uses fabric to make a statement, and it's completely renter-friendly. Our experts explain how to make it happen
-
 I learned how to decoupage and it's so easy to do in 7 simple steps
Want to know how to decoupage? We'll show you through the steps you'll need to create a pretty, unique piece, plus show you everything you'll need to shop
-
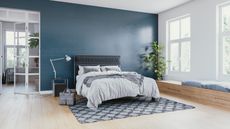
 What is color drenching? Interior designers love this bold trend
If you're curious about color drenching, our interior designers explain what it is, how to do it, and what to shop to bring it into your home
-
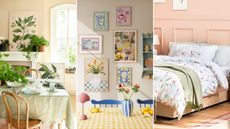 7 spring home decor ideas to refresh your home for the season
These spring home decor ideas from interior designers are perfect for brightening up any dull apartment or living space for the new season ahead
-
 8 renter-friendly small space DIYs — design experts say these are so easy to do
Looking for renter-friendly small space DIYs? We've spoken with design pros to find out what you can do to make your space shine without upsetting your landlord
-
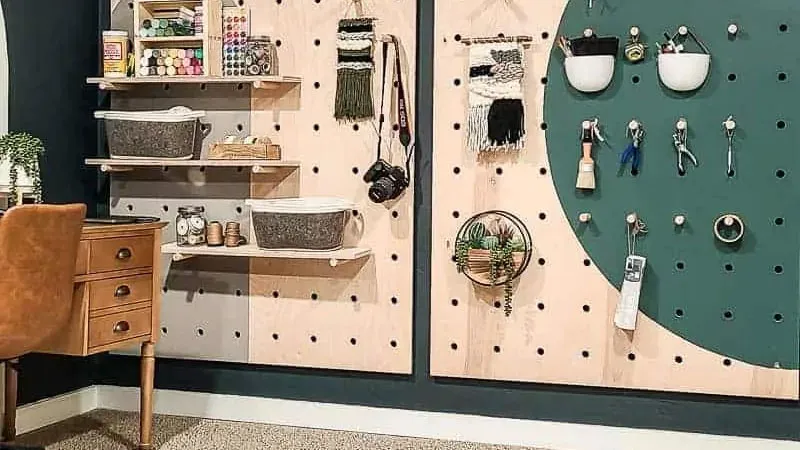
 How to create wall storage ideas — 5 easy tips from the experts
Keen to utilize more vertical storage space? Here's how to create wall storage ideas that work well for every area of your home, from your bedroom to bathroom
-
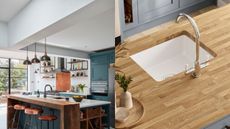 How to seal a butcher block countertop for a hygienic and attractive surface
Discover how to seal a butcher block countertop and protect this kitchen surface from daily wear and tear. See our expert tips and tricks
-
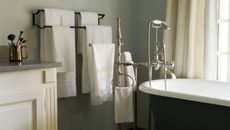 How to fit a towel rack in a small bathroom — 4 pro tips if short on space
The pros reveal 4 tips on how to fit a towel rack in a small bathroom when it seems next to impossible — their recs are A+
-
 6 small living room DIY projects — inspired ideas from an interior designer
Does your small living room need a refresh? These 6 small living room DIY projects will have your living room serving looks
-
 How to hang a wreath on a door (without damaging it)
Hang a wreath on a door or mantel without damaging it with our simple tips and tricks. Use some ribbon or adhesive hooks to to pretty up your pad
-
 How to make a Christmas garland — a foraged design perfect for a mantel
Our 7-step guide on how to make a Christmas garland from foraged greenery will help you add the perfect festive touch to your home.
-
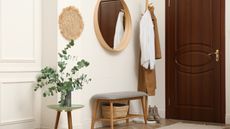 DIY small entryway ideas — as told by experts
See our DIY small entryway ideas to give your entrance a quick and easy makeover. See the simple touches recommended by experts to upgrade your space.
-
 How to smooth walls without plastering, according to design experts
Try these ways to smooth walls without plastering — the best ways to prep your walls without needing a skim coat
-
 No carve pumpkin decorating ideas from TikToK for when you're feeling spooky but lazy
We round up some TikTok-favorite no carve pumpkin decorating ideas with expert-backed tips
-
 8 budget fixes for drafty windows — including a $2.99 beauty product I use every single day
Stop drafty windows fast without replacing them. From rope caulk to nail polish, these handy solutions will help seal up cracks and leaks
-
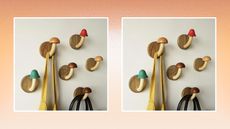 These adhesive hooks are functional, fab, and great for decorating a rental
12 of the best adhesive hooks, categorized by material and all with a sticky backing for easy installation and removal
-
 How to hang things in an apartment
Keen to hang things in your rental apartment but don't want to upset your landlord? Here's how to hang things in an apartment without damage!
-
 How to hang curtains in your rental like a total pro
Wondering how to hang curtains in a rental home without damaging walls or paying for professional installation? Look no further. Our how-to guide will help you out.
-
 7 totally genius ways to cover ugly carpet in a rental
These cheap and cheerful ways to disguise rental carpet could make all the difference to how your home feels, and ideal if you can't rip it up
-
 Dom Wood from Dick & Dom dares the nation to dive into DIY with help from HIPPO
The TV presenter has been sharing his DIY hacks and tips and jumping on the HIPPOBAGs hype
SPONSORED