
-
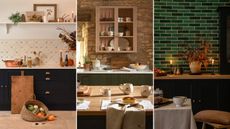
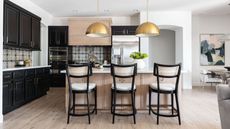
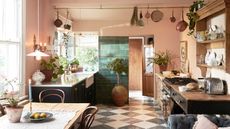 7 rustic kitchen ideas that bring back timeless charm to the heart of your home
Rediscover the warmth of rustic kitchen design. Our experts share their top tips for bringing this charming style back to life
-
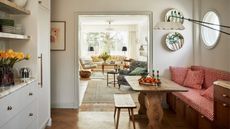 7 breakfast nook ideas for a relaxing start to the day
We share our top breakfast nook ideas that will add a great addition to your kitchen and kickstart your morning
-
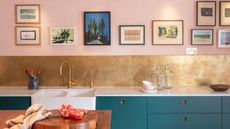
 Alicia Silverstone’s kitchen is a masterclass in nostalgiacore — designers adore its “simplicity and coziness”
The Clueless star's space plays with vintage-style touches brilliantly
-
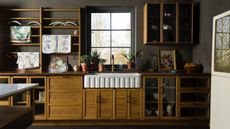 9 brown kitchen cabinet ideas that will introduce you to this versatile color
Delve into our brown kitchen cabinet ideas and you'll fall in love with this elegant scheme
-
 Kitchen cabinet lighting: 8 ideas for a beautifully illuminated space
A cozy and ambient kitchen has to consider lighting. Here are some cabinet lighting ideas to spark your imagination
-
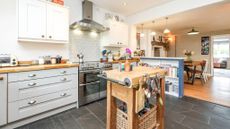
 8 cozy kitchen ideas - how to make your space feel warm and inviting
Design your cozy kitchen with these expert-approved tips. See decor ideas and how to style your space
-
 Say hello to fridgescaping — the kitchen trend that will “romanticize your life”
Everything you need to know about the decor trend that's taking over Instagram and TikTok
-
 We asked the experts why Kylie Kelce’s kitchen design works so well – here's what they said
Step inside Kylie Kelce's kitchen for a look at how the star has decorated her space. Plus, see why design experts are loving this set-up
-
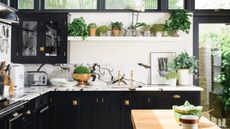
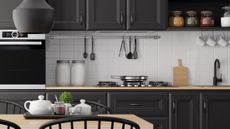 9 bold and unapologetic black kitchen cabinet ideas
Dare to go dark and choose black as your dominant color for your next kitchen project. See our design ideas, as approved by interiors experts
-
 Jennifer Garner just made cooking on-the-go look easy with these outdoor cooking appliances
See the cooking appliances Jennifer Garner uses while camping outdoors. See how to make everything from smoothies to hashbrowns
-
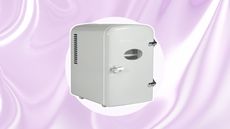 This countertop mini fridge from Amazon is perfect for dorm dwellers and so on-trend
Keep your snacks fresh with this cooling cutie
-
 Hailey Bieber's kitchen is “the epitome of California cool” according to interior designers
The model and influencer has a cooking space that's chic and inviting
-
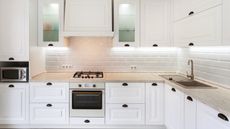
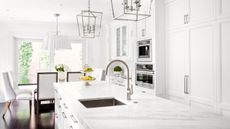 White kitchen cabinet ideas - 8 stylish ways to embrace a light-colored kitchen
Is your heart set on a bright white kitchen? Here are some ideas to inspire you
-
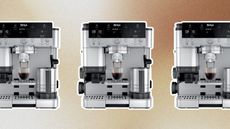 Ninja has just released its first barista-style coffee machine – here’s everything you need to know
Discover everything you need to know about the Ninja Luxe Cafe espresso machine. This brand-new launch combines three machines into one
-
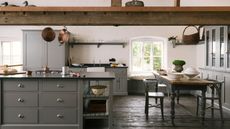
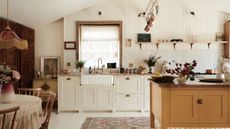
 5 fall kitchen decor ideas that are perfect for adding coziness to your cooking space
Warm colors, seasonal vignettes, fresh foliage, and more
-
 10 black kitchen countertop ideas to add a luxe look
From granite to marble and peel and stick, our black kitchen countertop ideas will enhance your space
-
 9 blue kitchen cabinet ideas that will elevate your space
From barely there blue to a rich mid shade, our blue kitchen cabinet ideas will give you plenty of choice
-
 5 kitchen trim ideas to elevate your space
Reinvent your cabinets with these kitchen trim ideas that make cupboard fronts and units look marvellous. See how to upgrade your space, ASAP
-
 Nara Smith's kitchen is chic and timeless — designers say it lets “the beauty of food preparation takes center stage”
The TikTok star's cooking space is filled with elegant features and finishes
-
 10 black kitchen cabinet ideas – standout looks for a dramatic scheme
Go dark and dramatic with our black kitchen cabinet ideas that show you how to use this brave color successfully for a dramatic scheme
-
 I’m sharing my worst DIY kitchen design mistakes so you don't make them too
Avoid making the same kitchen design mistakes I did from wooden countertops to picking the right appliances and installing a stove
-
 10 gray kitchen cabinet ideas – from barely there to charcoal, we've got you covered
This elegant shade isn't going away, check out our 10 gray kitchen cabinet ideas from barely there to charcoal, for a neutral color scheme
-
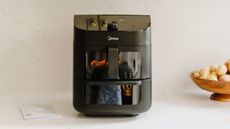 I tried the Midea Two-Zone Air Fryer and it's a time-saving dream
We tried the Midea Two-Zone Air Fryer and cooked a variety of foods to test all the cooking features. See our thoughts and all the pros and cons
-
 The 5 kitchen trends designers say will be huge in 2025
These kitchen trends for 2023 will help you upgrade your cookingspace, no matter how small.will create a new look for 2022 and beyond.
-
 Dreo ChefMaker Combi Fryer review — easy to use for all kinds of dishes
We tested the Dreo ChefMaker Combi Fryer first-hand. See all the pros and cons of this easy-to-use machine including features and cooking settings
-
 Fabulous kitchen floating shelves ideas – 10 ways to use this handy storage solution
Uber stylish and oh so practical, our kitchen floating shelves ideas will give you oodles of inspiration from decor inspiration to storage solutions
-
 I love Eurosummer dinnerware and my guests eat it up
These Eurosummer dinnerware picks will bring the Mediterranean directly to your table for everyday use or entertaining at dinner parties
-
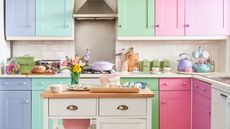 How to style colorful kitchen appliances, according to interior designers
Do you have colorful kitchen appliances in your cooking space that you want to style properly? These pro-approved tips will help you make yours shine
-
 Should kitchen floors match the walls? We look at the pros and cons
We delve into whether your kitchen floors should match the walls with expert advice. See the top design tips for planning this key area


