How to refresh wood floors using gel stain for a simple and budget-friendly DIY
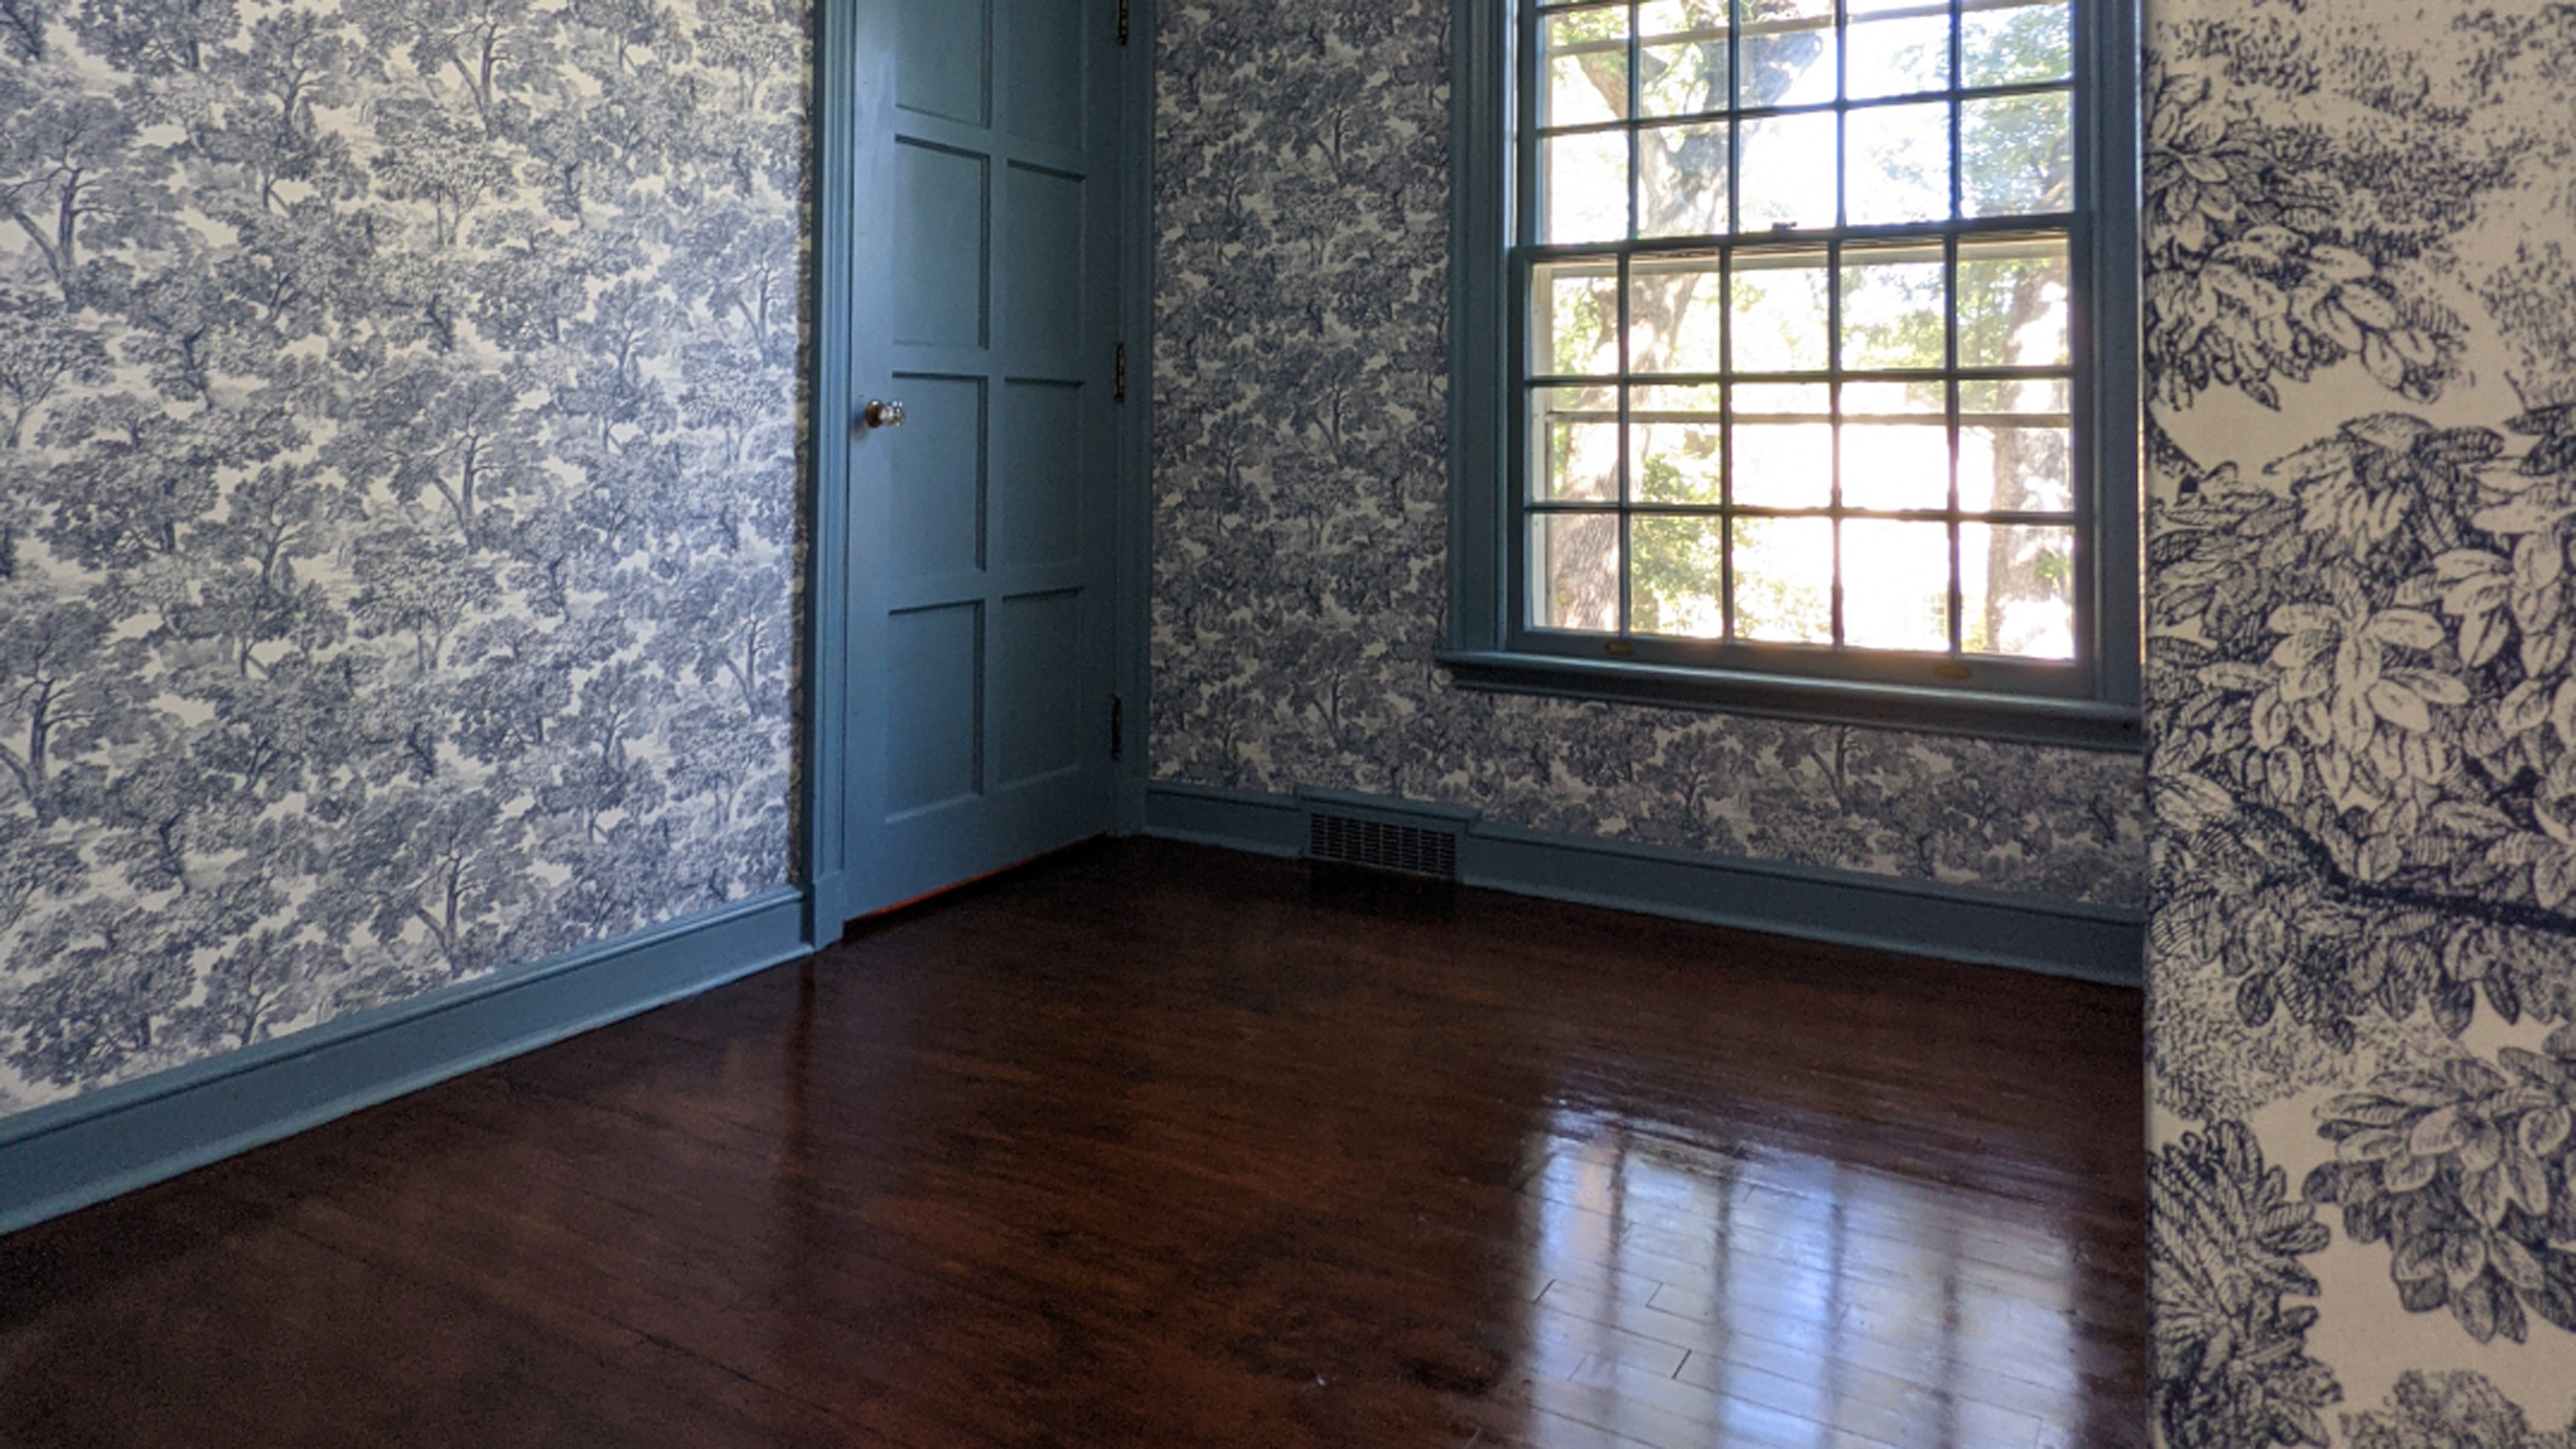
Stain wooden floors using a gel stain to bring them back to life, for under $50.
Get small space home decor ideas, celeb inspiration, DIY tips and more, straight to your inbox!
You are now subscribed
Your newsletter sign-up was successful
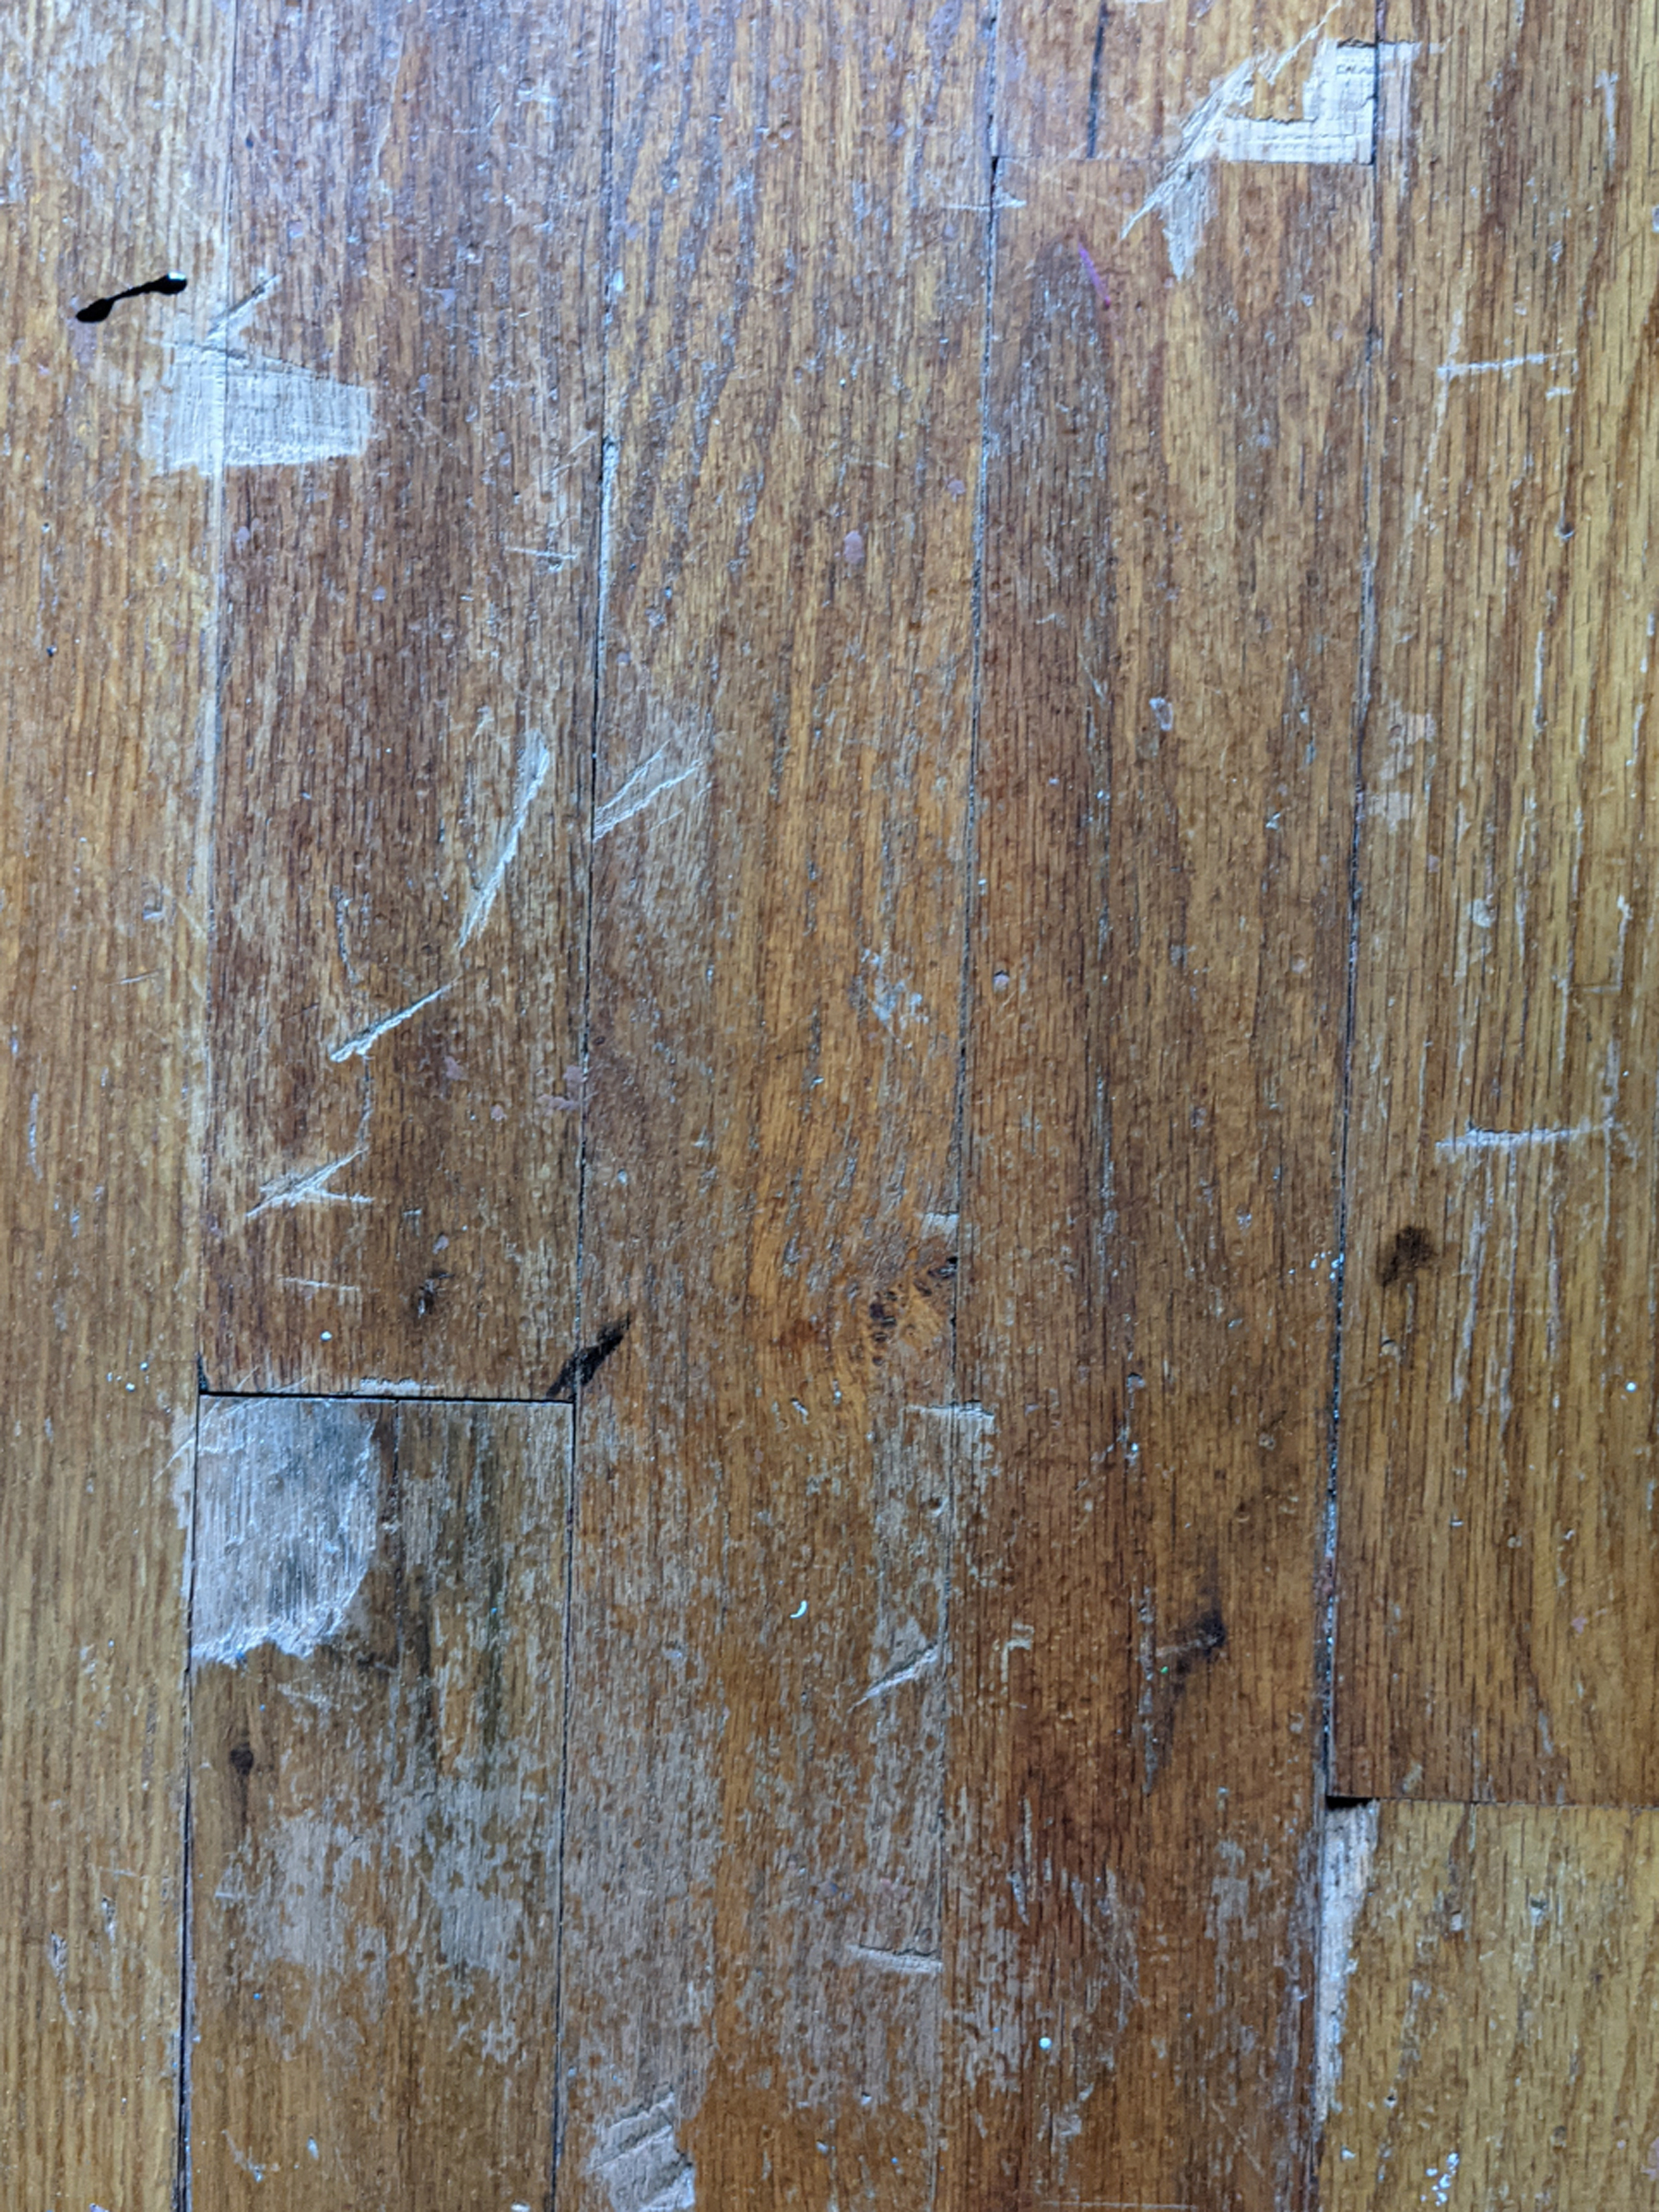
Need to stain a wood floor in your home? True confession: Our floors were the color of a bad spray tan. Somewhere during our house's 85 year existence, the floors in three, upstairs rooms were refinished in an unflattering shade of burnt ochre and now featured chips and deep scratches.
Once the carpets were pulled, I was left with a line of demarcation upstairs – worn out orange, juxtaposed with chocolatey brown, patina goodness. And compared to the original 1935 finish throughout the rest of our house, team refinished-orange lost by a landslide. The line between good and evil always made our upstairs feel incohesive and unfinished.
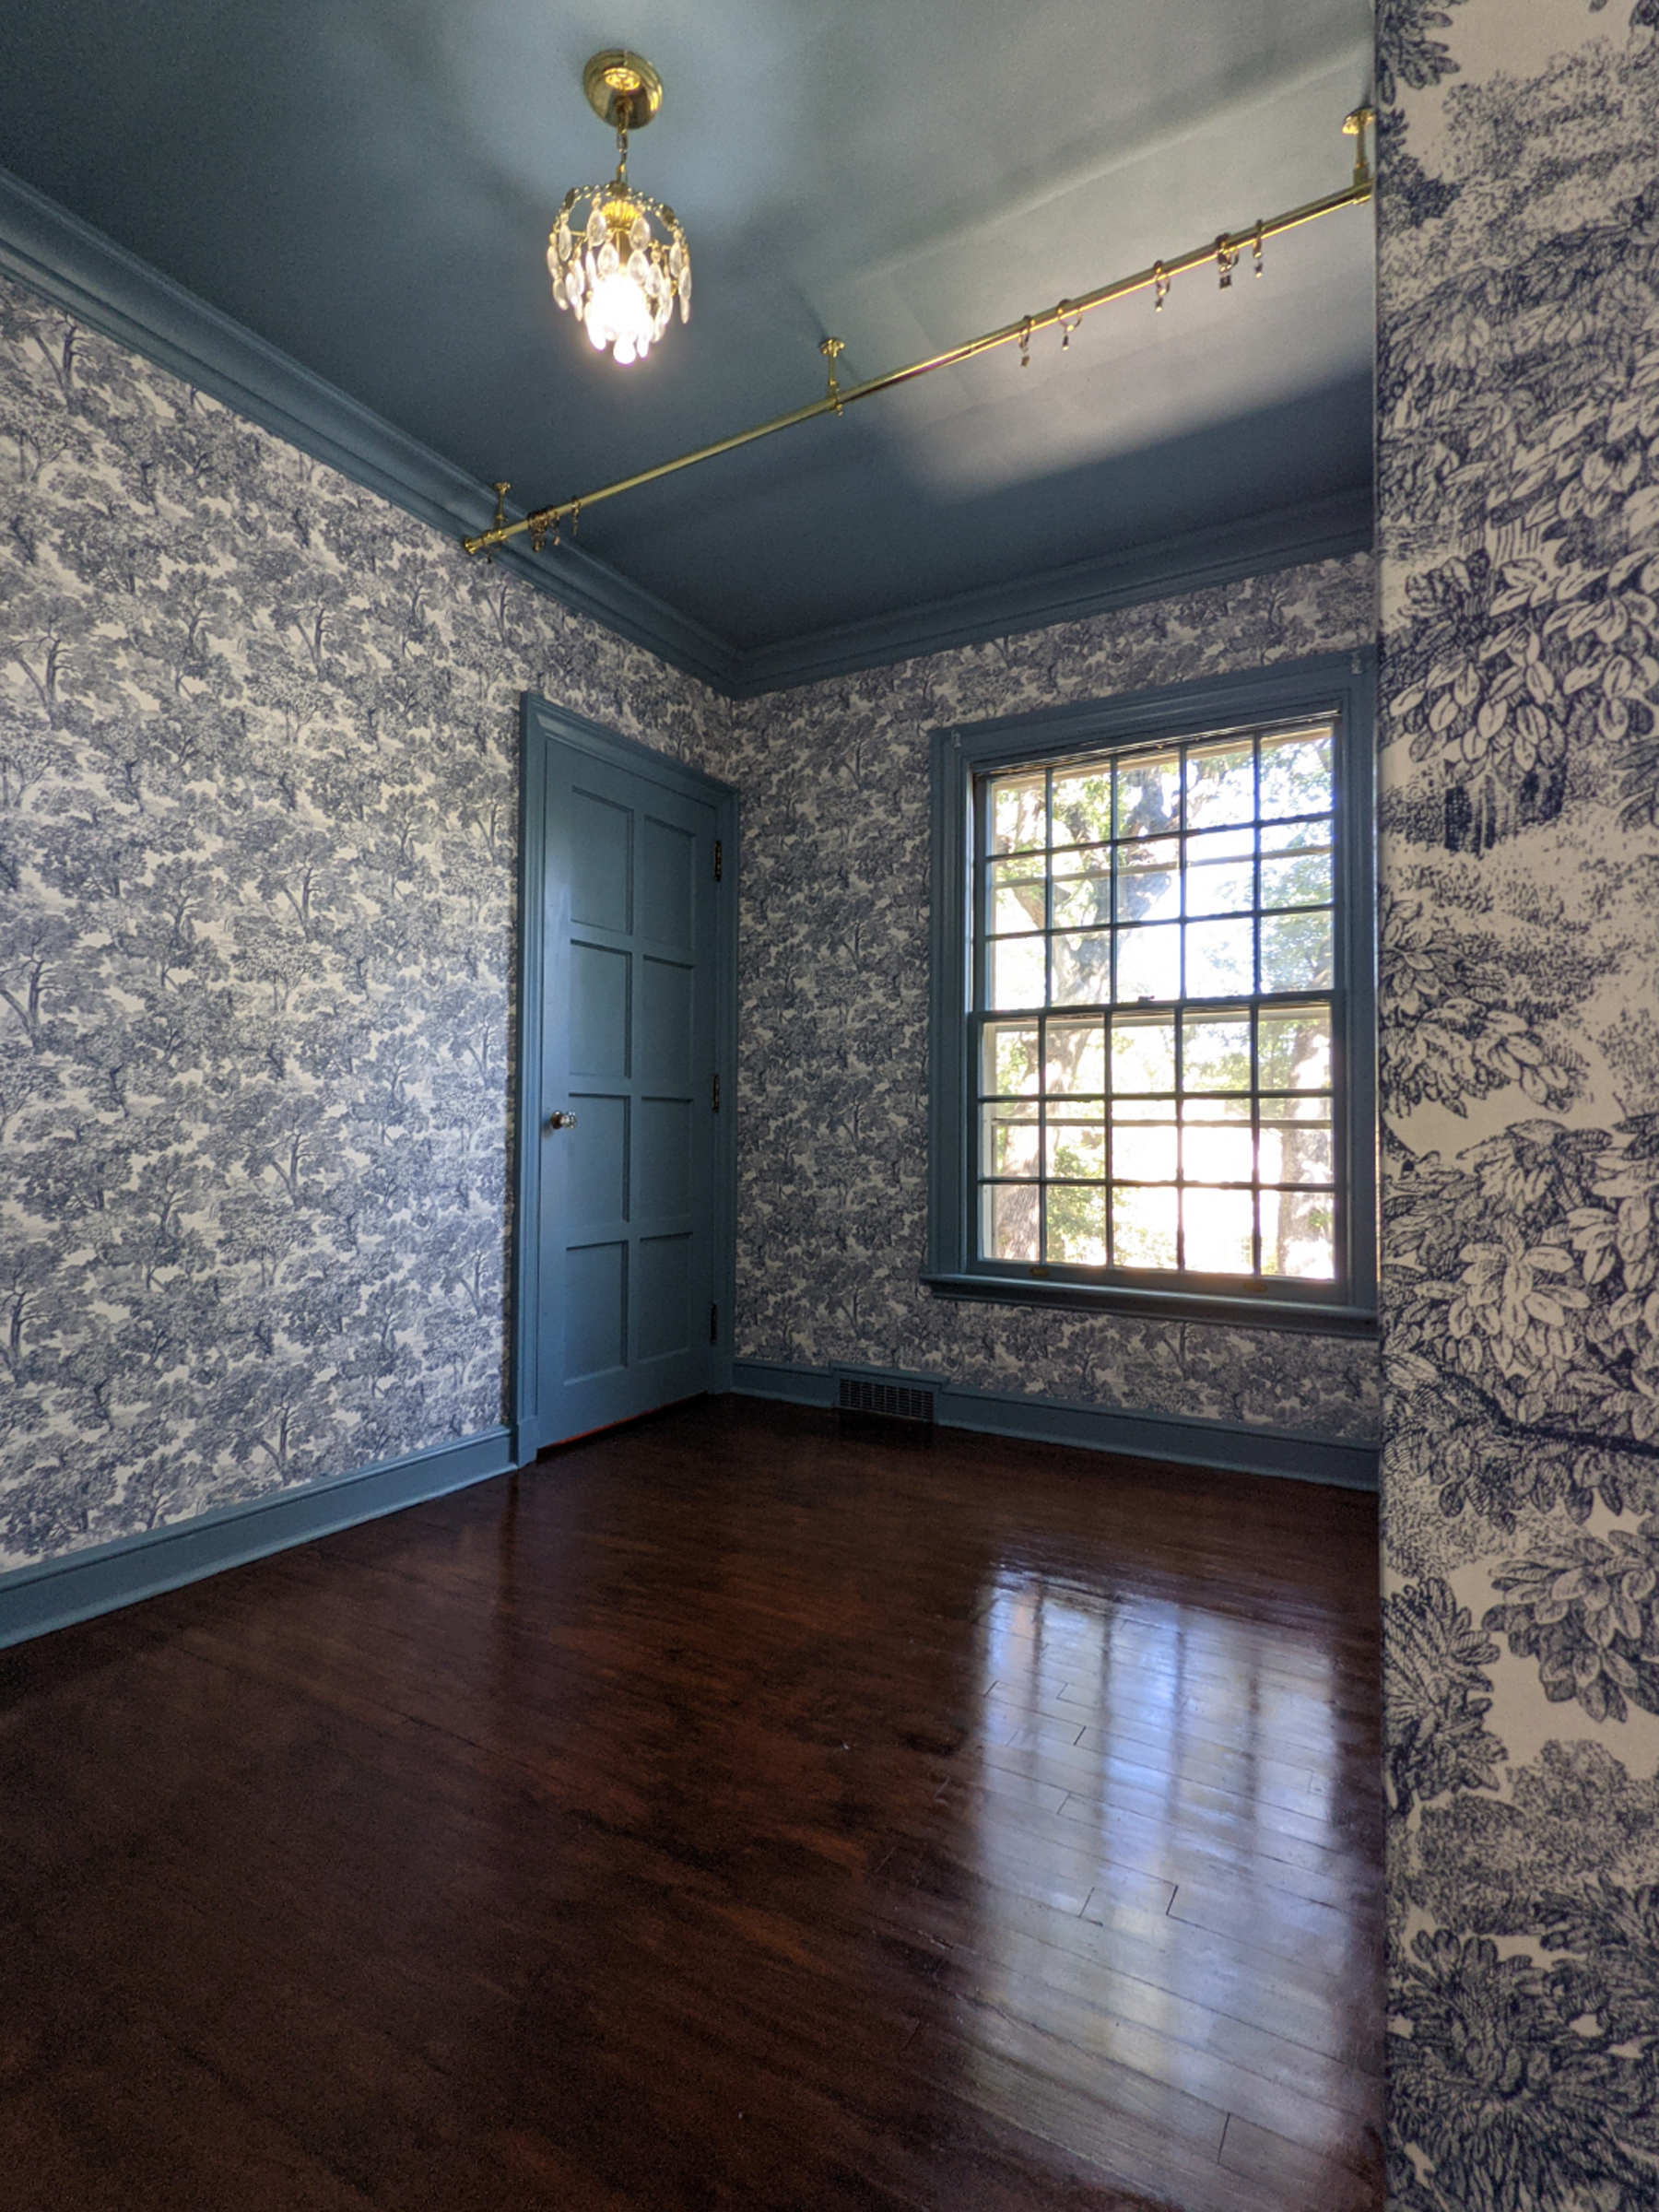
I started work, this fall, on the kid's pint size bunk room (it’s just seven feet wide) which featured the refinished, orange floors. As I spent hours installing the perfect toile wallpaper and painting all the trim a custom shade of blue, I became itchy to fix the floors as well.
I didn’t want to go through the nuisance and expense of refinishing the wooden floors – a project we slated for when our little kids were past the destruction phase. I’ve seen a few tutorials pop up over the years using gel stain to refresh floors and I thought I’d give it a go.
Gel stain is a great product to use on worn floors, because it doesn’t preclude refinishing down the road. Gel stain sits on top of the wood instead of penetrating like traditional stain. Additionally, it is lower prep, doesn’t drip, and creates more opaque finishes.
I’ve used gel stain in so many projects over the years. I painted checkerboard floors in our sunroom.
I covered our dining room and sunroom paneled walls with gray and black gel stain, respectively. I aged a fireplace mantel, spot blended, flawed hardwood floors, and refreshed furniture pieces. Gel stain continues to be my secret, DIY weapon.
Get small space home decor ideas, celeb inspiration, DIY tips and more, straight to your inbox!
*I suggest trying out this gel stained floor method in a hidden spot in a closet. Every floor is different and this DIY will require flexibility and experimentation.
How to stain a wood floor in 4 easy steps
What you'll need
- Steam mop
- Vinegar
- Deglosser
- Hand sander
- Gel stain in Antique Maple
- Gel stain in Coffee
- Bristle brush
- Wallpaper smoother
- Wax top coat
- Lint free cloth
1. Prep your floors
Clean floors thoroughly. I used a steam cleaner with a mixture of water and vinegar. Allow to dry thoroughly. My floors were worn and rough to the touch.
The glossier the floors, the more preparation that is required to ensure your paint will adhere. I started with a no sand approach, but decided to go the extra step and applied a deglosser.
Apply by wiping on with a textured cloth or abrasive pad. The solution breaks down the finish on the surface, which allows your new product to adhere.
2. Apply gel stain
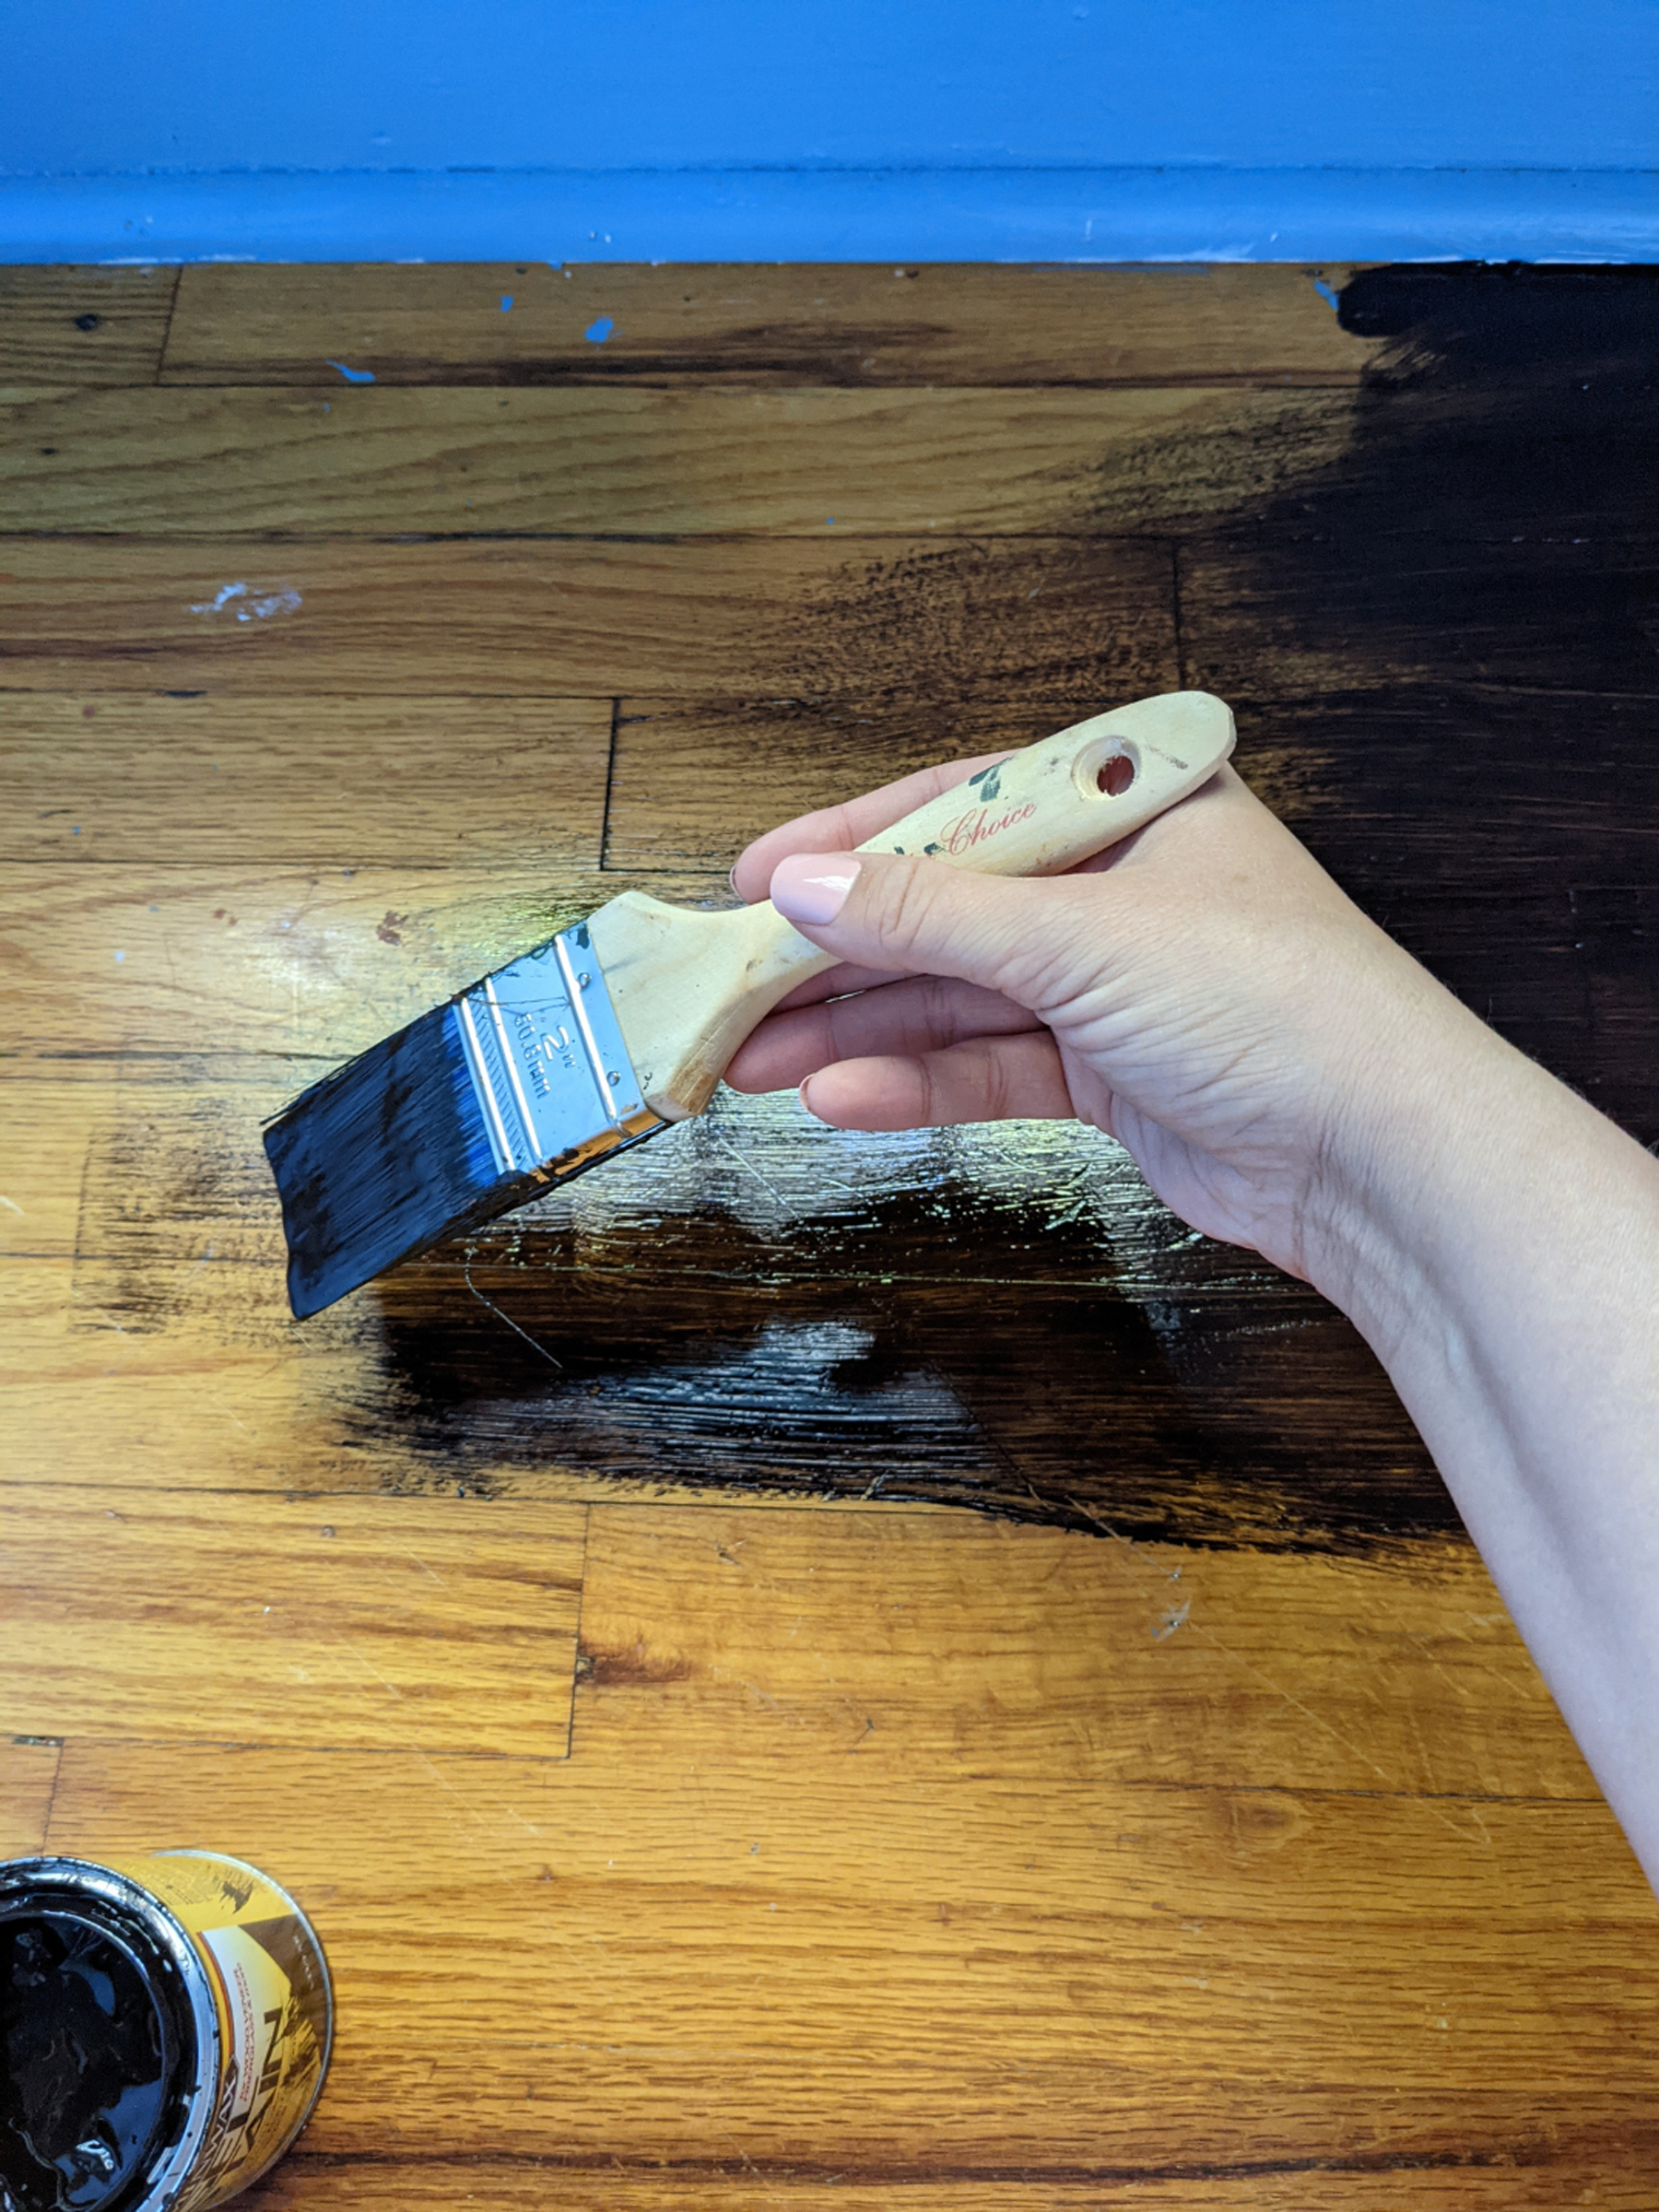
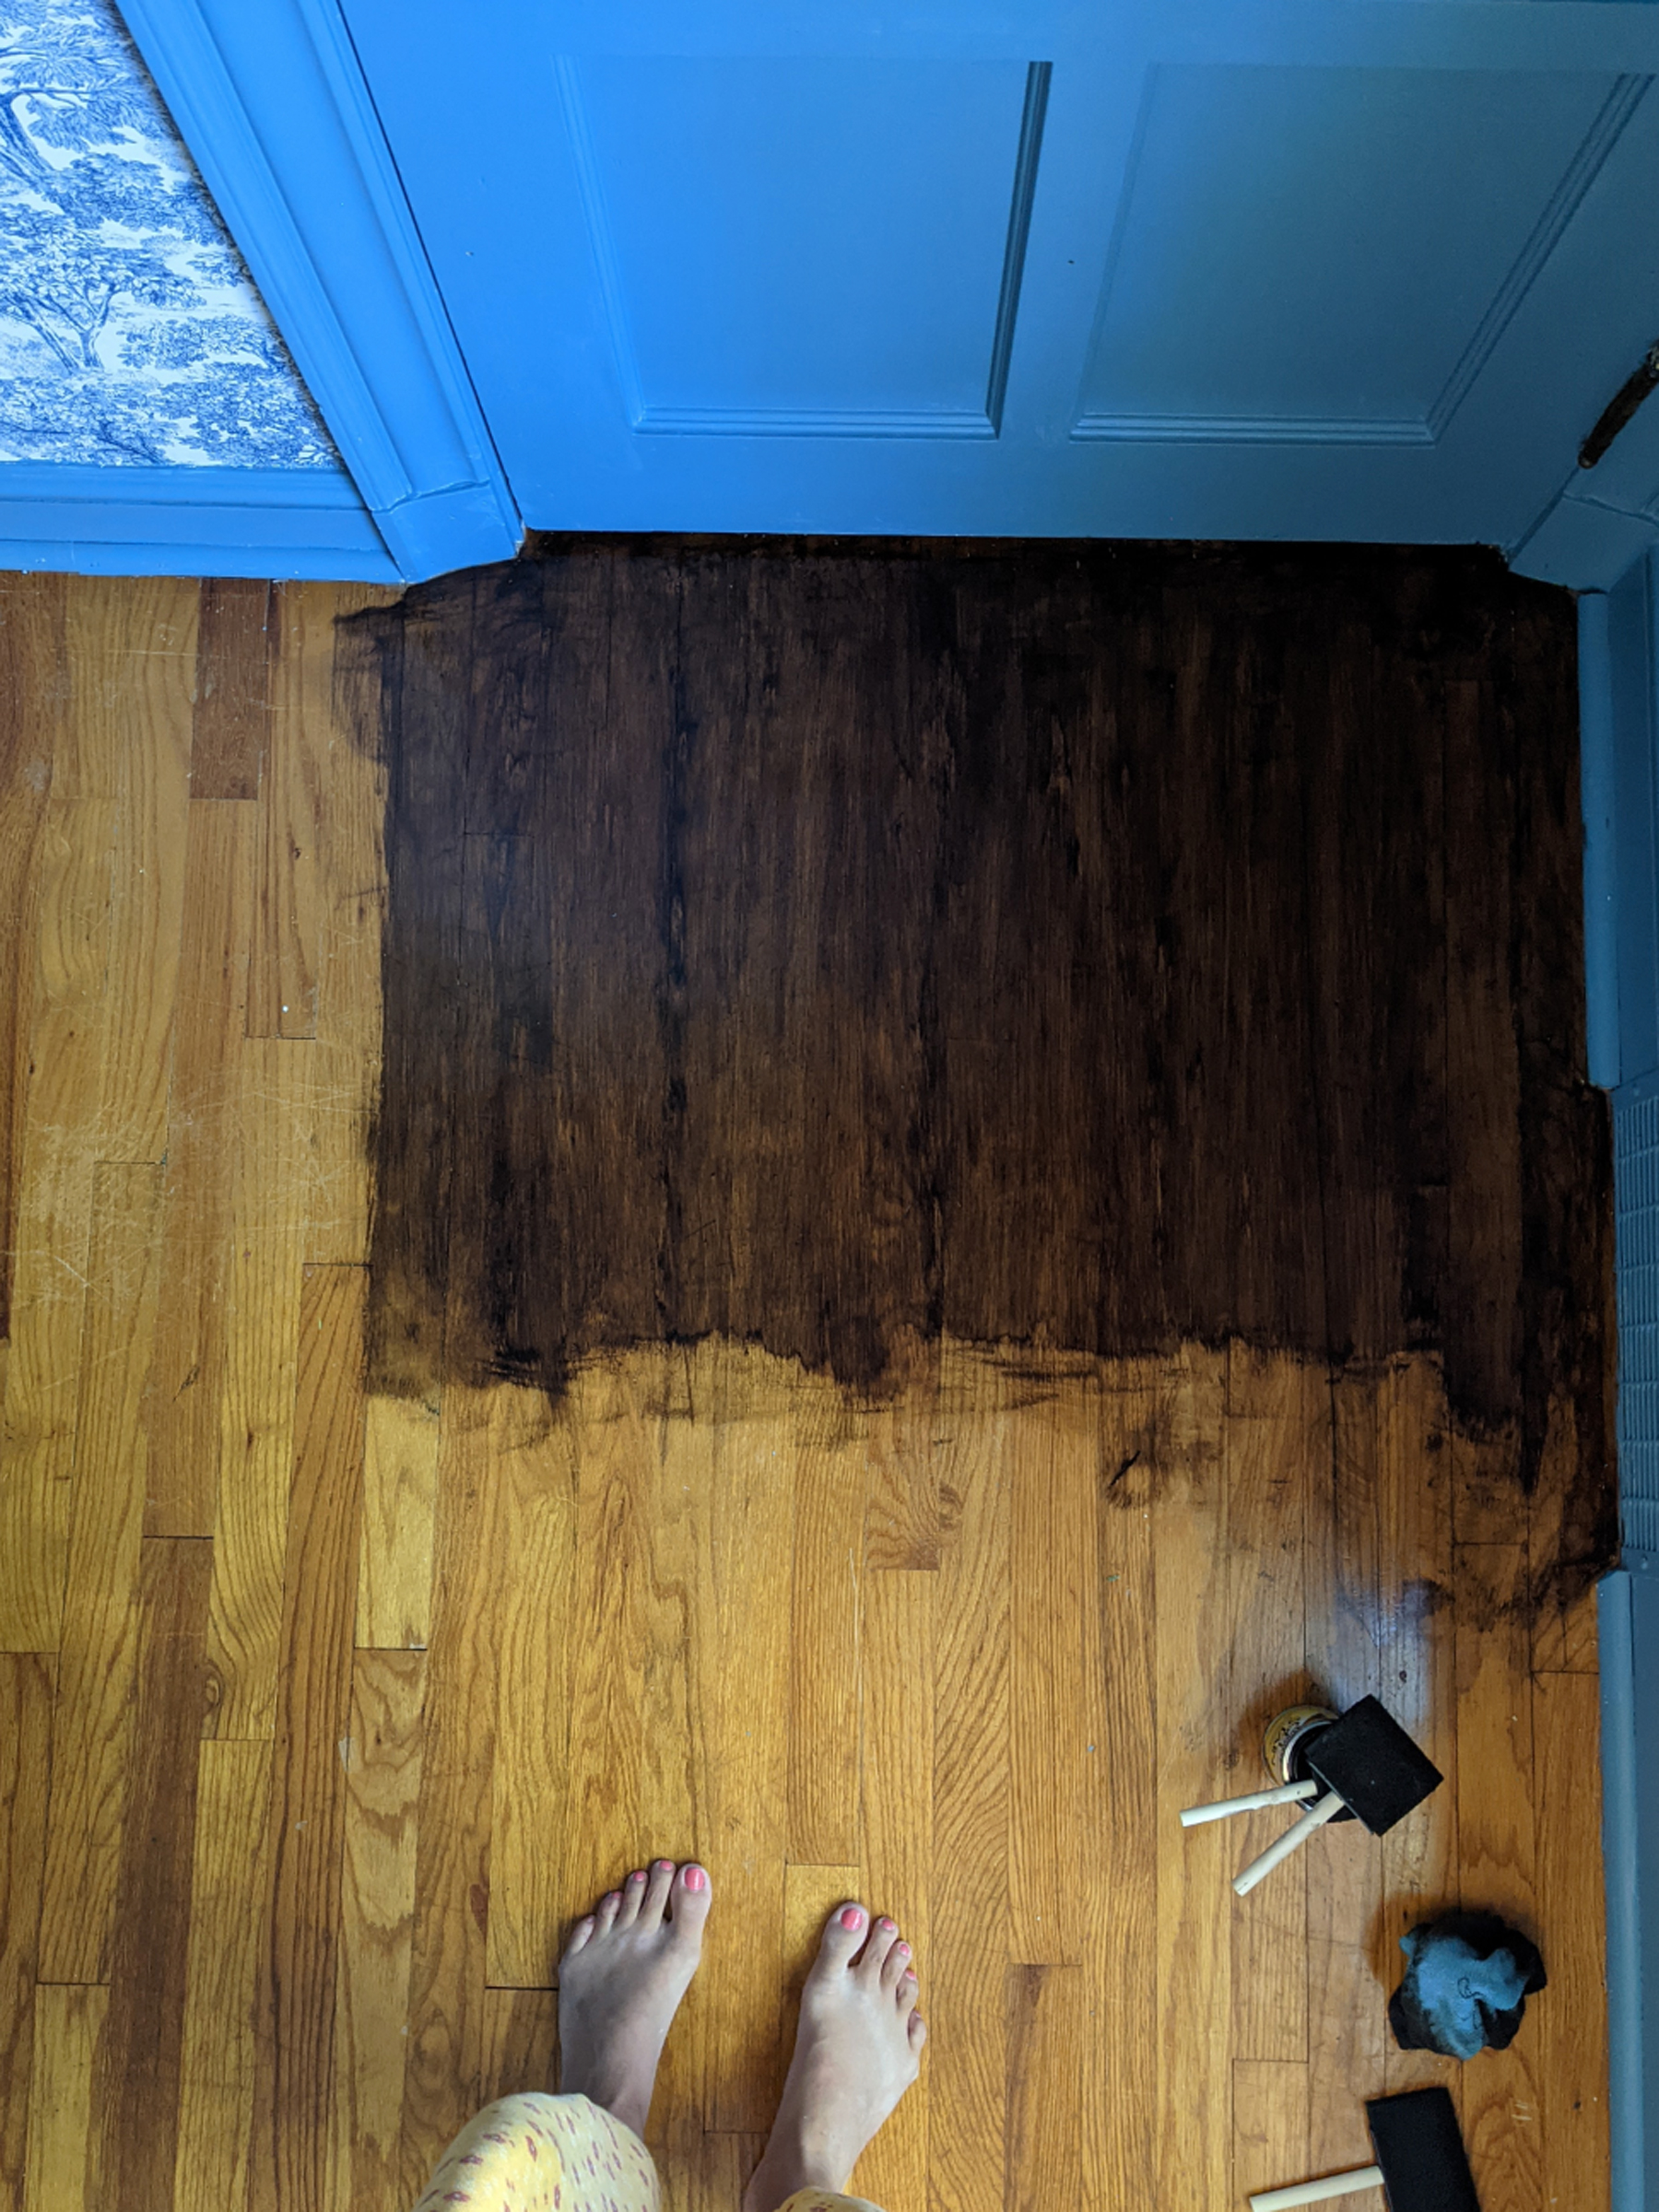
Apply gel stain. I brushed on the first layer of gel stain in Coffee. I first started with foam brushes. Gel stain is oil based and I was trying to avoid cleaning brushes with mineral spirits.
I ended up switching to a two inch bristle brush and felt that it gave me more even results. The most important part of the brushing step is to maintain a wet edge so you don’t see start and stop lines.
Tip: I used a wallpaper smoother as a guard to avoid getting gel stain on the quarter round without taping.
3. Wipe off the excess stain
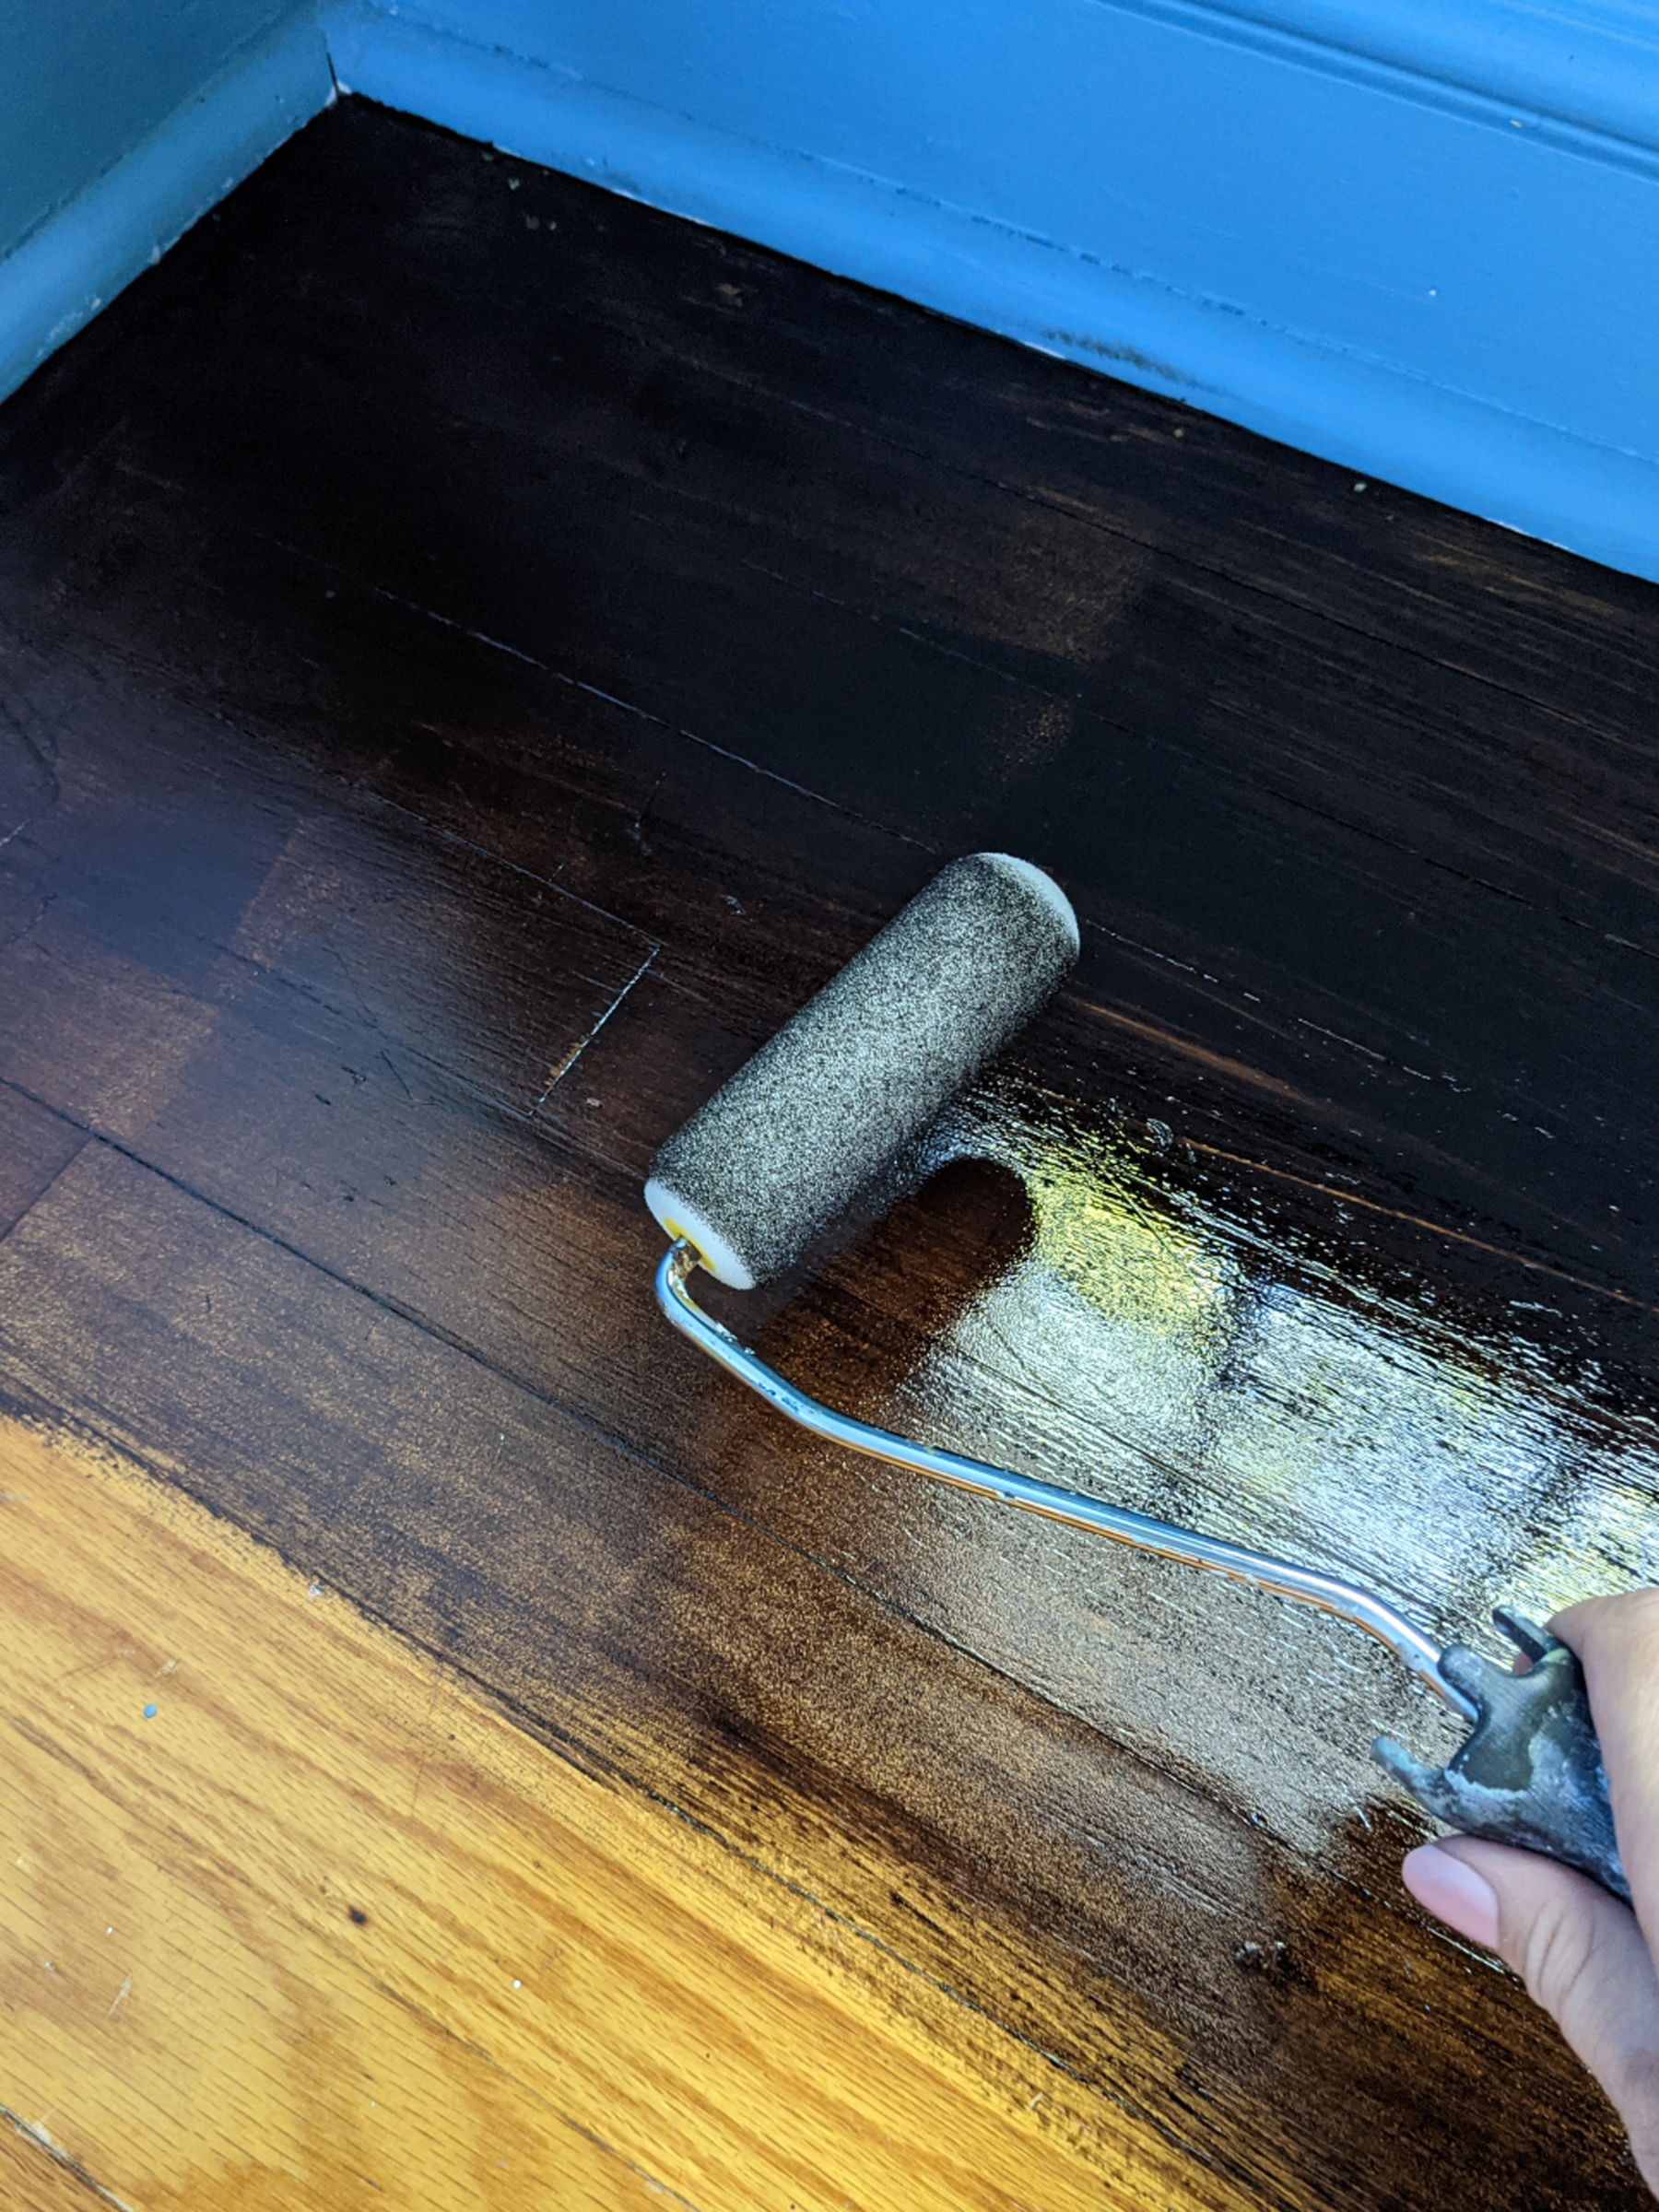
I tried a few techniques to wipe off the excess stain. I received the most even results from using a small foam roller, switching for a fresh roller once it no longer absorbed the excess. Allow 24 hours to dry.
4. Apply a second coat
I didn’t want the floors to get any darker than the first coat, and I needed to replicate the color and variation of our original floors. I went with Antique Maple for this purpose and repeated the application process of the first coat.
5. Apply the topcoat
I let the gel stain cure for a week before applying a top coat. I tried a matte poly coat in a hidden spot of the closet and also tested floor wax.
I liked the look of the wax best and the application and dry time is easier and faster. I wiped the wax on with a lint free cloth, waited for it to dry and buffed with another lint free cloth.
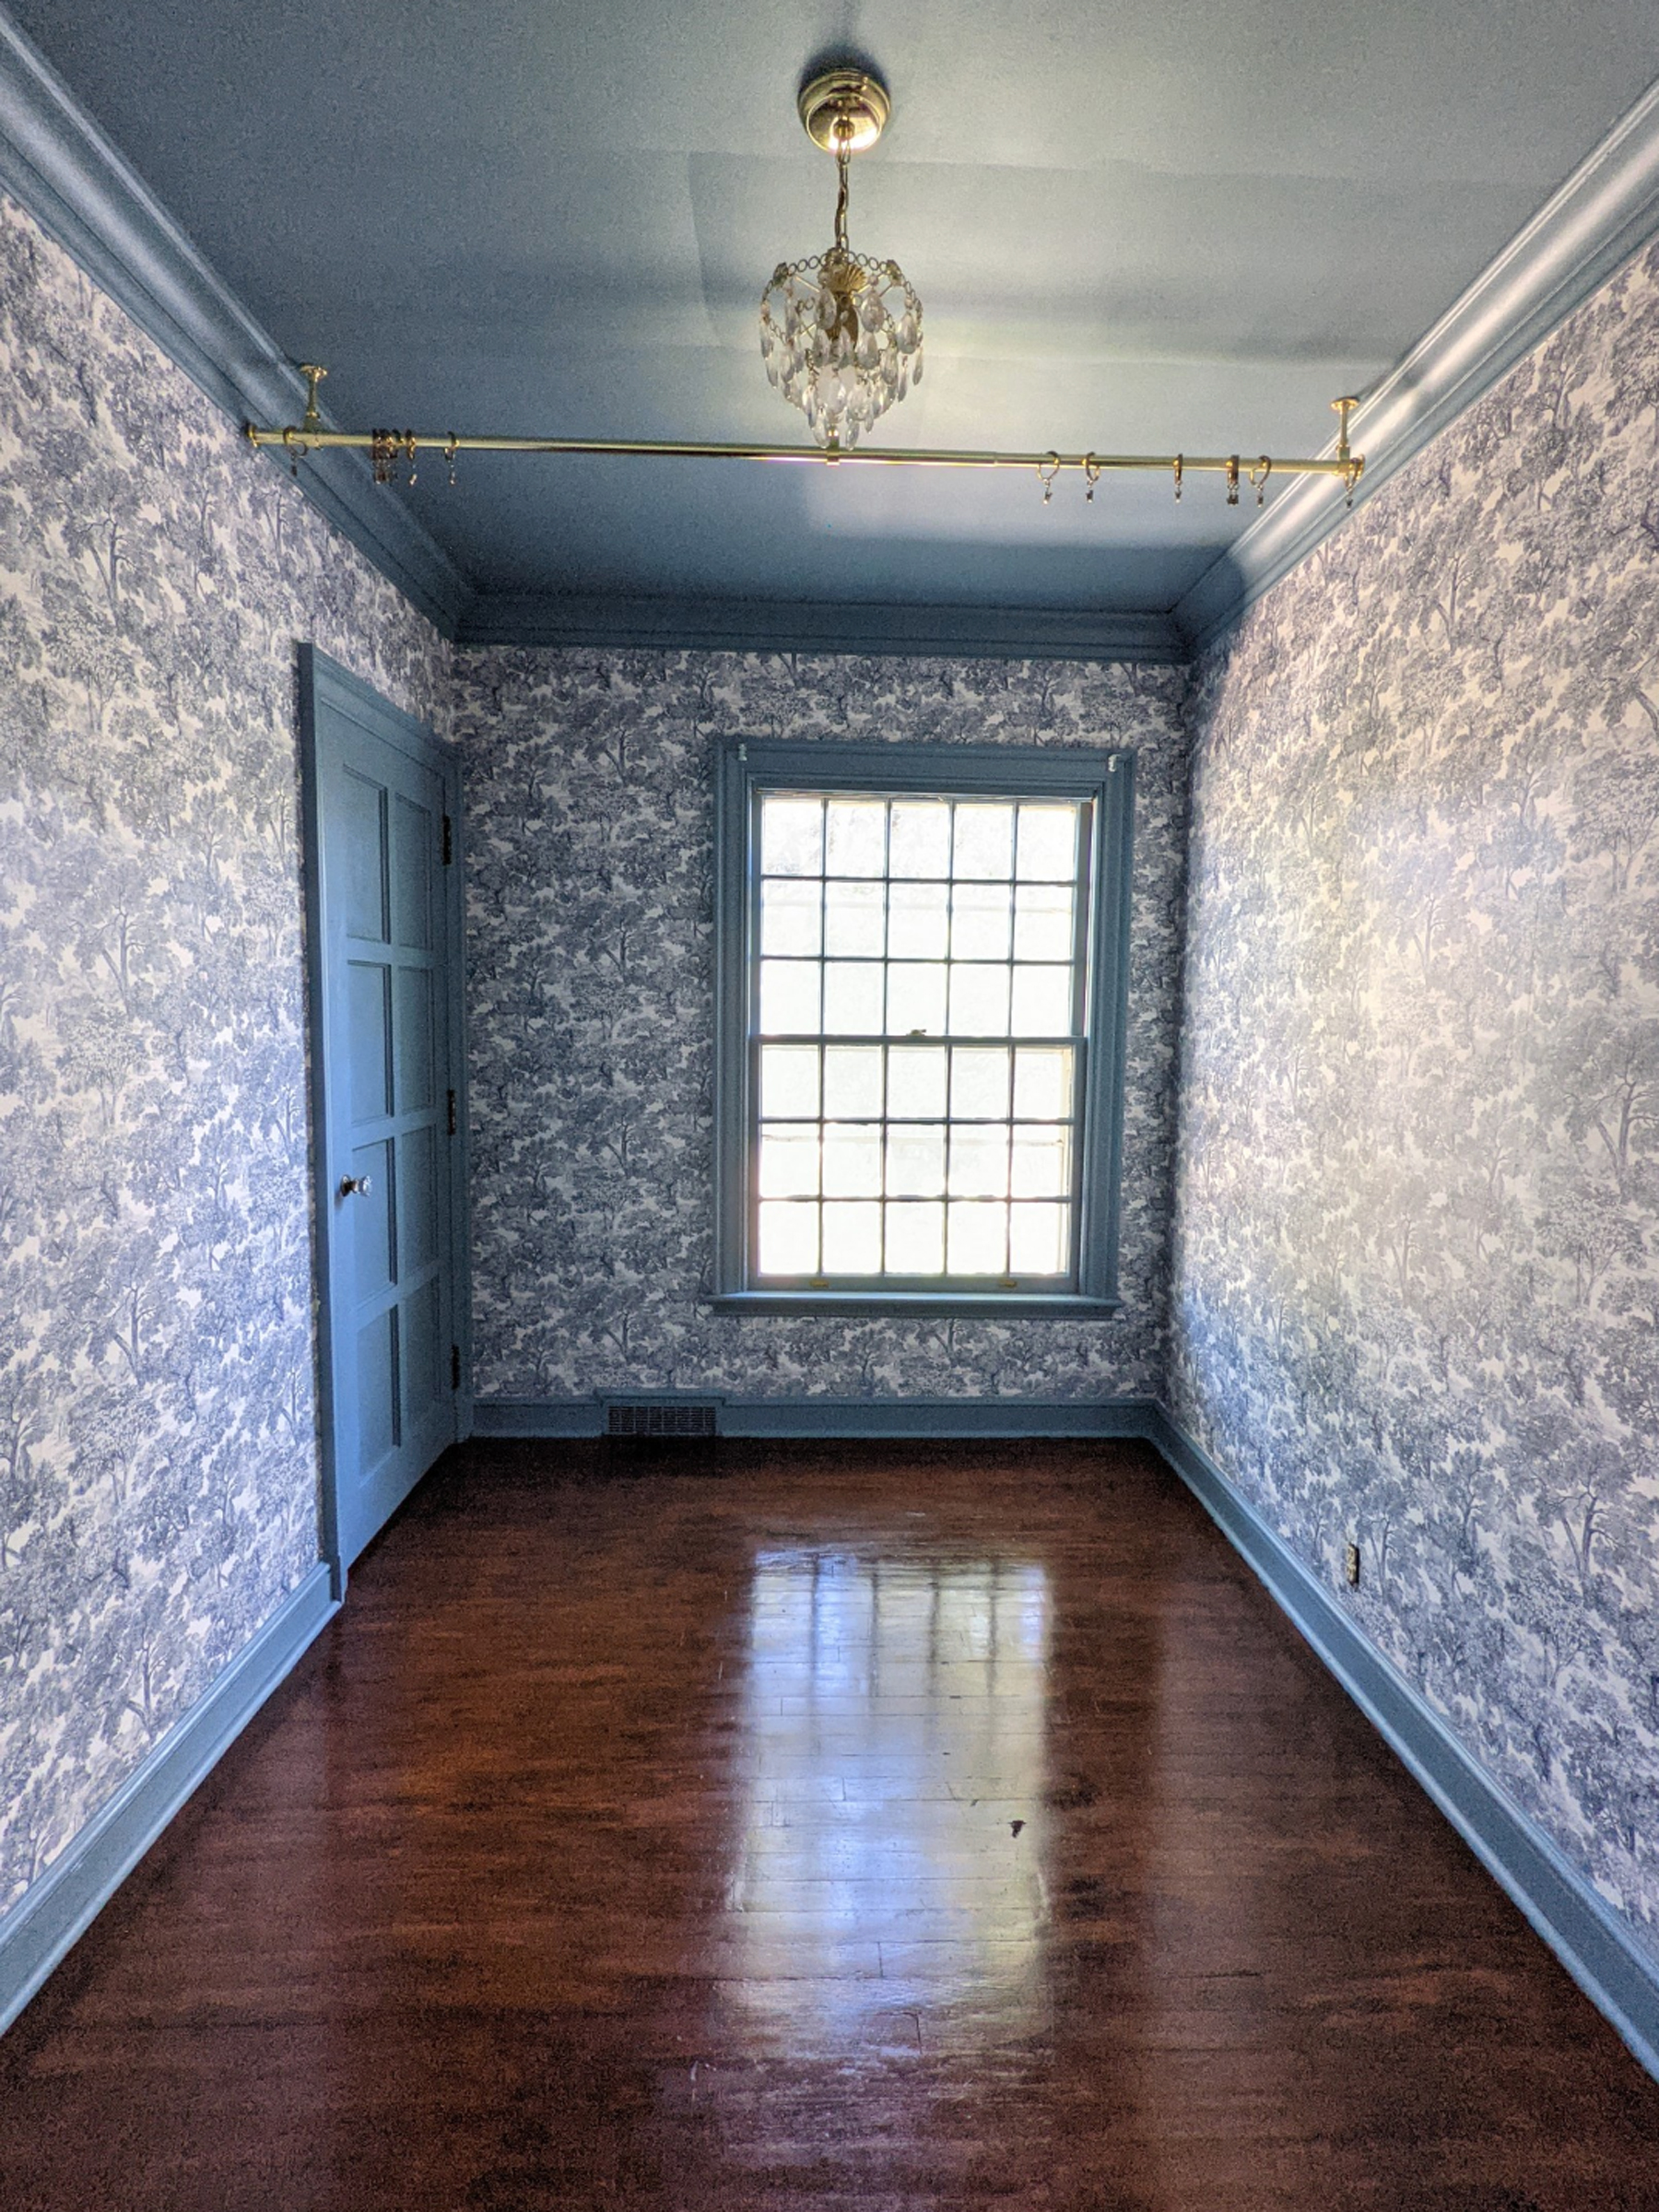
I’m so happy I took on the floors as part of our playroom idea. They blend seamlessly with our original floor and make the upper level of our house feel more cohesive and intentional.
Ruthie Jackson is an Iowa-based DIYer, furniture flipper, certified interior decorator, and lover of all things vintage. She's currently renovating her family's 1930s colonial home, which she documents on Instagram at @miracleonthirtyfourth.