-
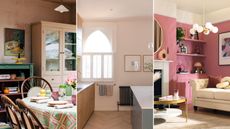
 I spoke to the OMITB production designer about Mabel's apartment makeover — here's how to recreate the look
Wondering how to recreate Mabel's apartment makeover in 'Only Murders in the Building?' I spoke to the production designer about getting the look on a budget.
-
 This renter-friendly painted wallpaper technique is going viral on TikTok — design pros love it
Interiors experts explain how to do this easy and breezy idea
-
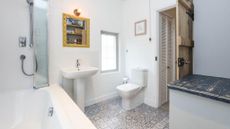
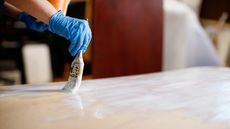
 How to paint bathroom tile for a quick and budget-friendly refresh
By finding out how to paint bathroom tile you are on your way to a quick and easy bathroom makeover that is kind on the bank balance too
-
 5 DIY renovation jobs that were so much easier than I expected
Are you the proud new owner of a fixer upper? Here are the five DIY jobs I thought were going to be far harder than they really were
-
 5 bathroom renovation mistakes I won’t be making again
I'm here to share the bathroom renovation mistakes that still annoy me today - so you won't do the same. Save yourself time and money with these top tips
-
 10 easy DIY small space storage ideas anyone can do
After DIY small space storage ideas that are simple and quick to complete? Check out our pick of the best which will have your home looking shipshape in no time at all
-
 A $200 fluted panel transformed my drab kitchen in just one weekend
How to install a fluted kitchen panel: A speedy and achievable DIY tutorial even for DIY novices
-
 How to make a DIY coffee table using cardboard and plaster. I did it in 7 easy steps with beautiful results
An achievable and budget-friendly DIY coffee table tutorial using repurposed cardboard and ready-mixed plaster
-
 How long does it take for an AC to cool a room? 5 expert-approved tips to boost performance
Want to know how long does it take for an AC to cool a room? We've asked HVAC experts what to expect, plus pick out fans in case you can't wait to be cooled
-
 I'm calling chalky blue as the color of the season — and interior designers agree it’s “chic and calming”
Chalky blue is the color designers are all reaching for this season. We've asked pros why it's so popular and curated gorgeous picks to channel the look at home
-
 The 5 outdated paint colors of 2024 designers loathe — and what they're loving instead
Want to know the outdated paint colors going out of style in 2024? Designers have spilled on the shades they're not using anymore
-
 How to cool down a house without AC — 8 techniques to try this summer
Want to know how to cool down a house without AC? We've asked experts for their top tips, plus shopped useful cooling buys to help you chill out
-
 My first apartment makeover: 5 renovation mistakes I learned the hard way, and how you can avoid them
These are 5 things to avoid in your apartment makeover. Trust me, I learned these the hard way during my first renovation project
-
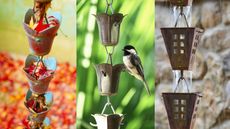 How to make a rain chain — 6 steps to creating a unique downspout
Wondering how to make a rain chain? Our experts explain the six simple steps to adding a calming, eco-friendly addition to your backyard.
-
 Brooklinen weighted blanket review — a stylish and soothing throw
See what we thought of the Brooklinen weighted blanket after testing it at home. Discover the benefits of this stylish option and how to take care of it
-
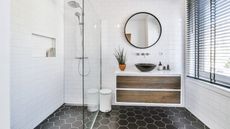
 How to wallpaper a small bathroom for long-lasting results: 8 steps to success
Learning the best way to wallpaper a small bathroom means that even in the trickiest of spaces, you will end up with a room you can't wait to spend time in
-
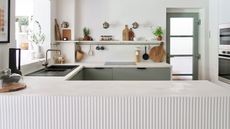
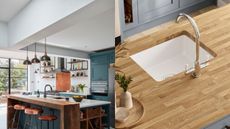
 How to paint countertops for a complete kitchen transformation
Wondering how to paint countertops? Our simple guide takes you through everything you need to know about the job, including the best products to use
-
 How to tile a small bathroom floor in nine easy steps
Looking for an easy guide on how to tile a small bathroom floor? Just follow our nine simple steps to success to ensure maximum impact
-
 This Emily Henderson wallpaper hack is renter-friendly perfection — bring it to life in your home in 4 simple steps
This Emily Henderson wallpaper hack uses fabric to make a statement, and it's completely renter-friendly. Our experts explain how to make it happen
-
 I learned how to decoupage and it's so easy to do in 7 simple steps
Want to know how to decoupage? We'll show you through the steps you'll need to create a pretty, unique piece, plus show you everything you'll need to shop
-
 Freddie Mercury's house has hit the market, and one color reigns supreme. Here's how to use it in your home
Freddie Mercury's house has hit the market, and gold reigns supreme. Here's how to make the color work it in a smaller space, according to pros
-
 8 renter-friendly small space DIYs — design experts say these are so easy to do
Looking for renter-friendly small space DIYs? We've spoken with design pros to find out what you can do to make your space shine without upsetting your landlord
-
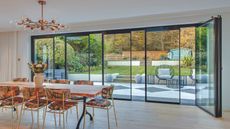 Discover IDSystems' window glazing options for your kitchen extension
Take a look at how IDSystems' window glazing options can transform your home improvement project. Your guide to bi-fold, sliding, heritage, and slide-and-turn doors
-
 Ed Westwick's house reno is a minimalist dream with all of 2024's most popular trends — here's how to get the look
Ed Westwick's house is a minimalist haven that nails all of 2024's trends — here's what to shop to copy the look
-
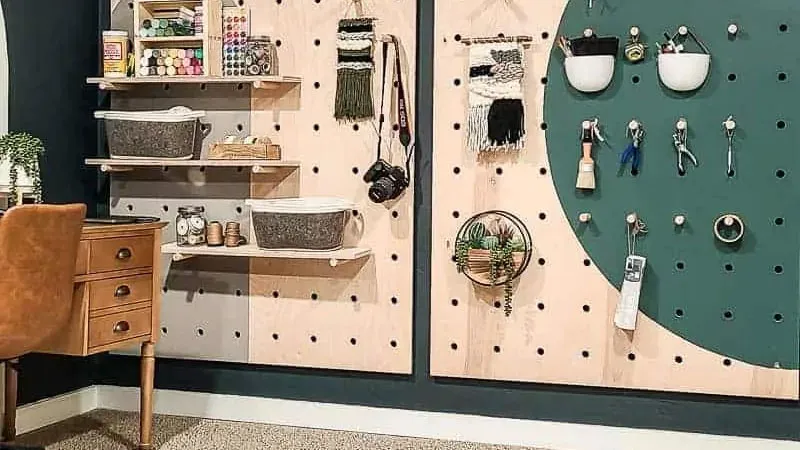
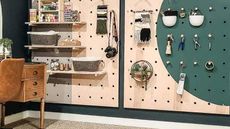
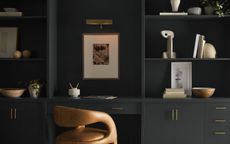
 How to create wall storage ideas — 5 easy tips from the experts
Keen to utilize more vertical storage space? Here's how to create wall storage ideas that work well for every area of your home, from your bedroom to bathroom
-
 How to seal a butcher block countertop for a hygienic and attractive surface
Discover how to seal a butcher block countertop and protect this kitchen surface from daily wear and tear. See our expert tips and tricks
-
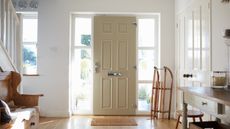 5 ways to stop drafty doors fast — seal air leaks with help from the experts
Learn how to stop drafty doors if you're feeling a chill. Sealing air leaks is easily done DIY with quick fixes from home experts.
-
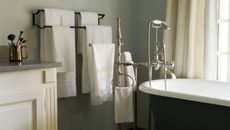 How to fit a towel rack in a small bathroom — 4 pro tips if short on space
The pros reveal 4 tips on how to fit a towel rack in a small bathroom when it seems next to impossible — their recs are A+
-
 How to use the 2024 colors of the year without paint
Here is how to use the 2024 colors of the year to update your home without paint. If you don't want to break out the paintbrush, these paint-free ideas will inspire.