Wall planters: how to DIY an indoor plant wall
Want to DIY your own wall planters? Check out this easy step-by-step guide...

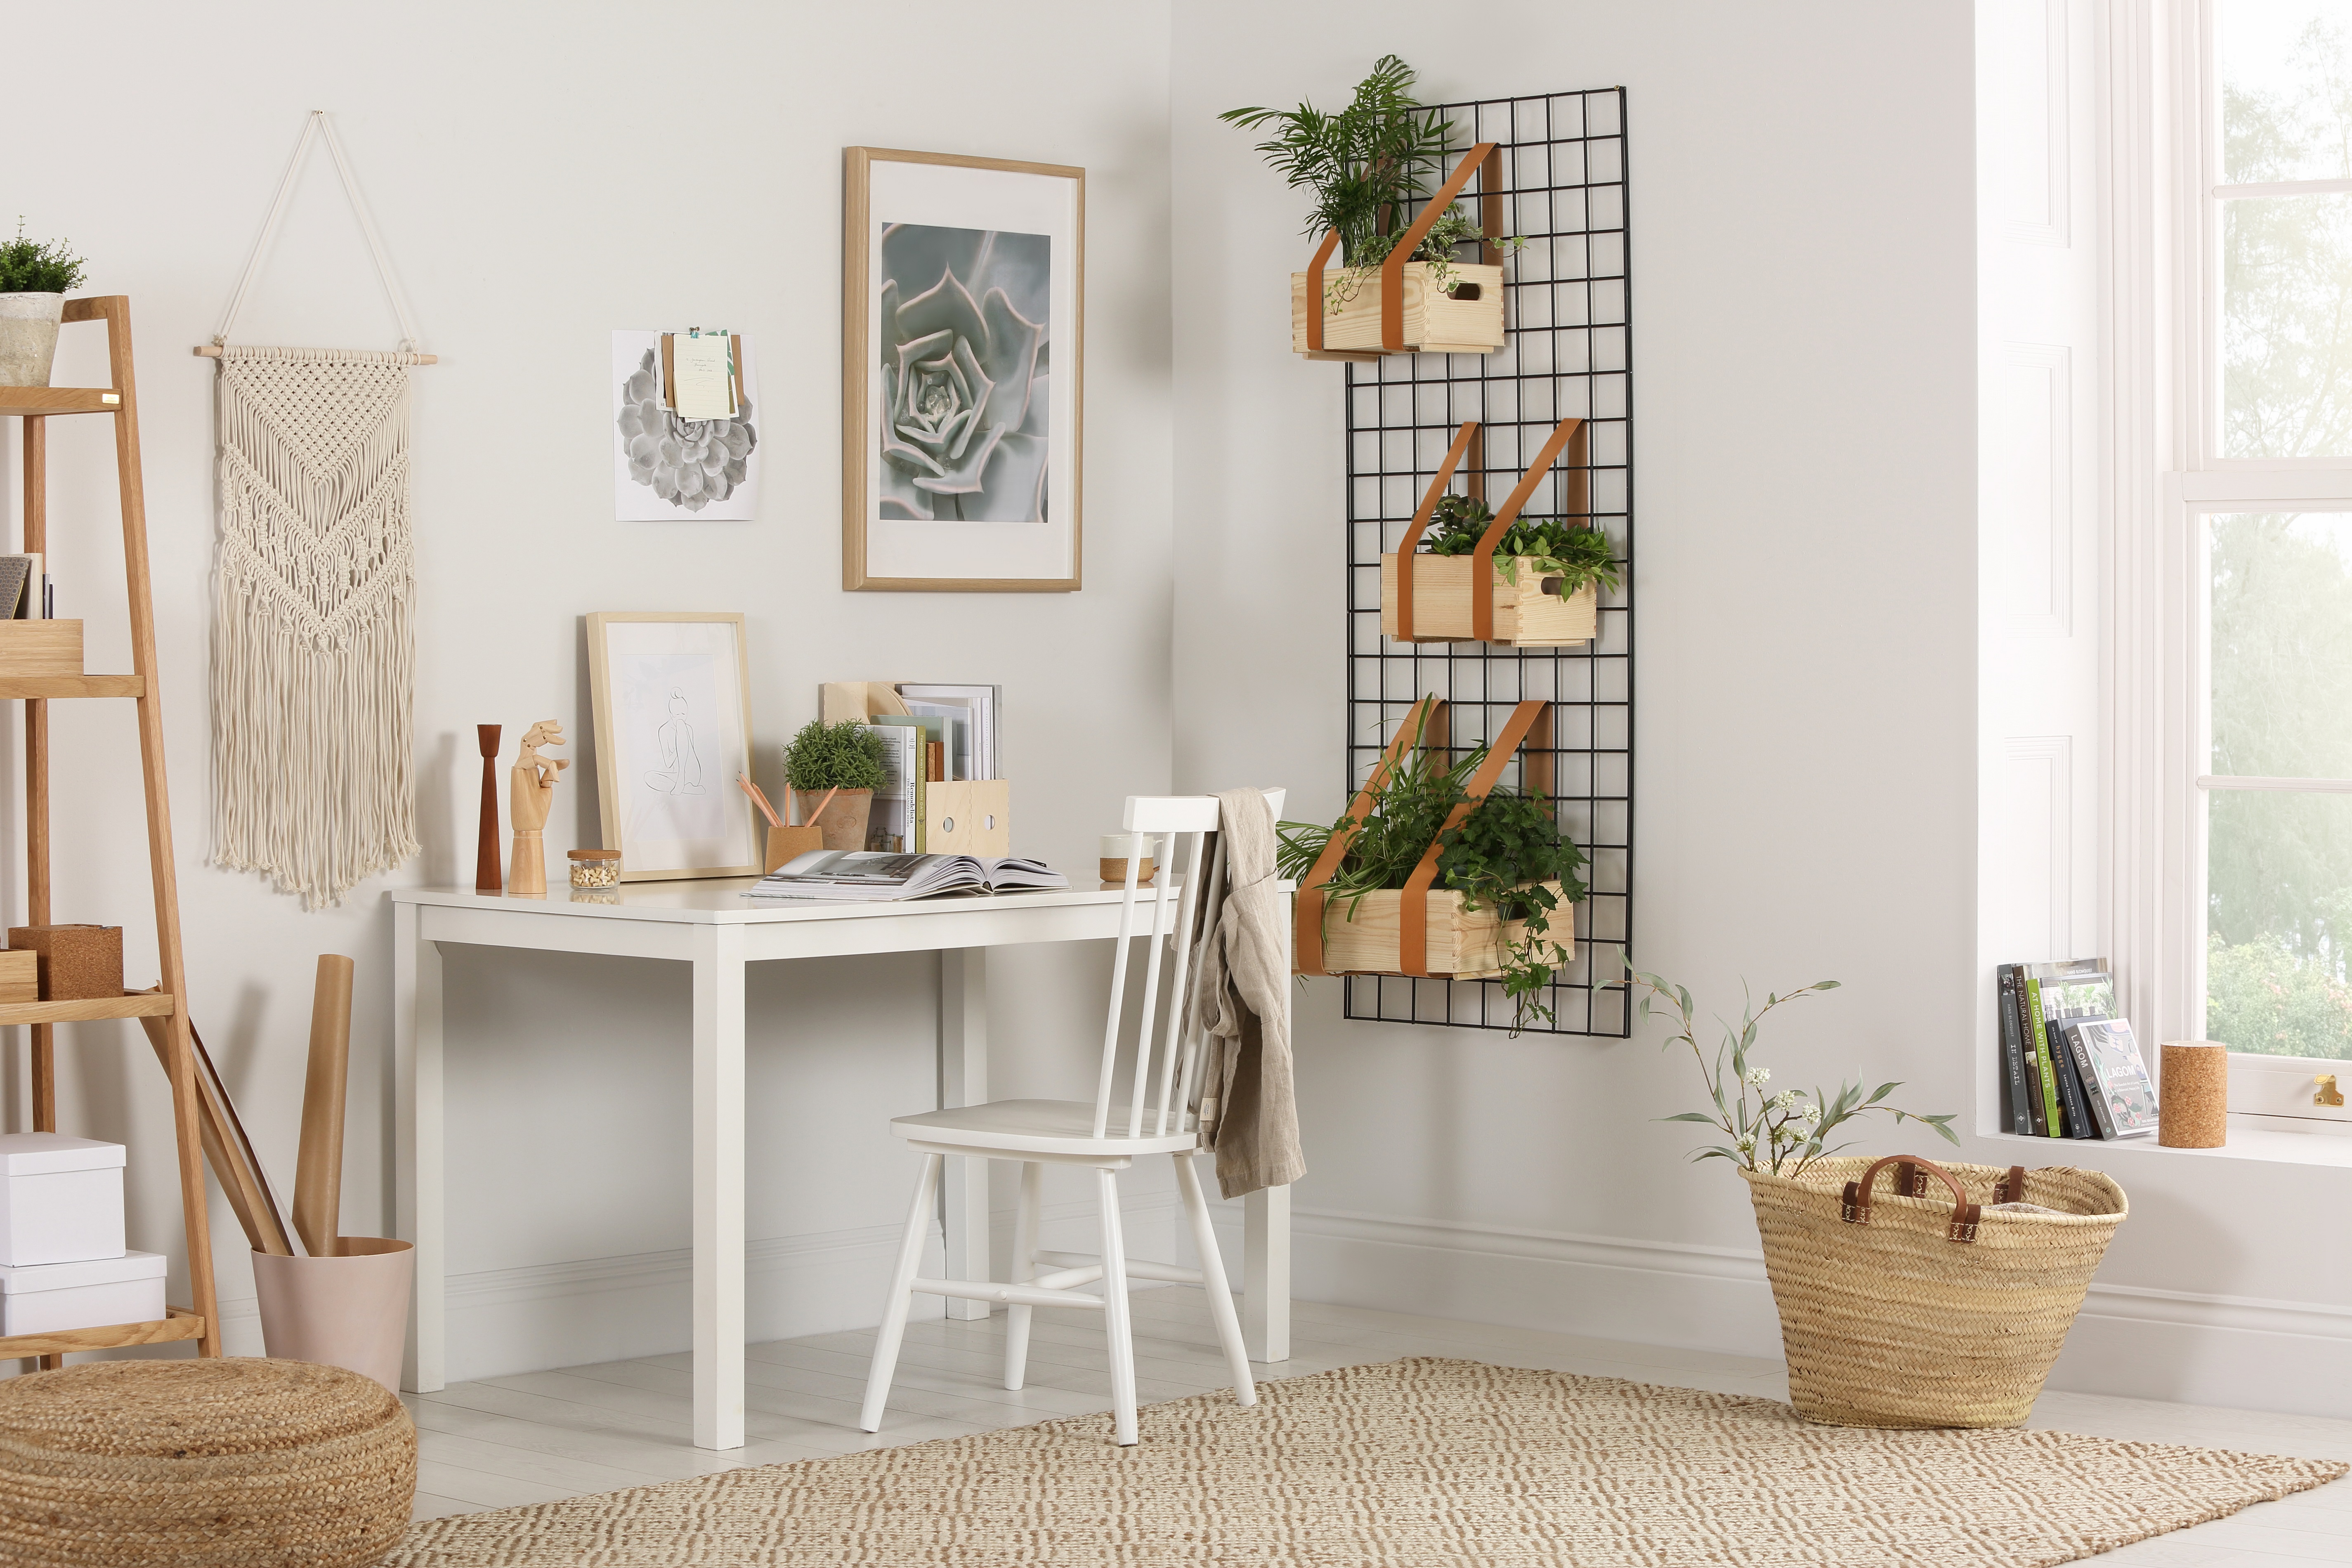
Wall planters have been popular in design-conscious households for ages. Every Instagram famous home has some kind of living wall or expansive collection of hanging house plants and we want in on this long-lived trend.
But how to get the look on a budget? DIY a wall planter yourself, obviously*. This is the perfect weekend project, whether the weather's good or bad, it's super quick to do and inexpensive. And we love love love the end result (very Instagrammable, might we add)...
For more weekend projects and crafty ideas, head over to our craft hub page.
You will need:
- A wire memo board (optional)
- Small wooden crates
- House plants
- One roll of tan fake leather or canvas, with a thickness of 5cm (try Etsy)
- Six leather screw brass rivets
- Hole puncher pliers
- Utility knife
Step one: Plan your wall planter's design
Before you start making your wall planter, plan out where you want your plants to sit on the wire board – or wall if you're fixing direct to the surface. Think about the height of the plants that you want in each crate; you want to make sure they have enough space to grow without looking cramped. Use our indoor garden guide for inspiration.
If you aren't blessed with green fingers, you could always use fake plants or go and check out our guide to everything you need to know about common house plants – maybe you will surprise yourself and keep them alive for more than a week.
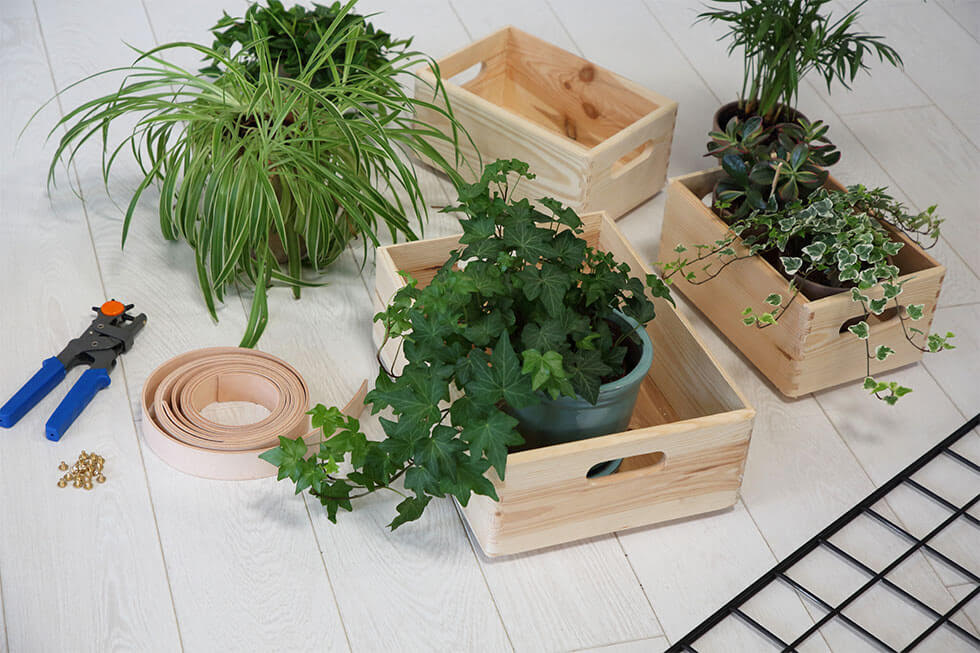
Step one: Plan your design
Step two: measure the planter's straps
Thread the leather roll or canvas around the crate, and loop it behind the wire rack. Pull it tight until the wooden crate sits nicely against the rack. Once you’re satisfied with the positioning, overlap both ends of the straps by a good 5cm, and cut off the excess with a utility knife. Repeat this twice for every crate.
If you are doing without the wire rack, you'll need to position the straps with the crates in place and mark on the wall where you want to drill and screw. You'll need an extra pair of hands to help with this.
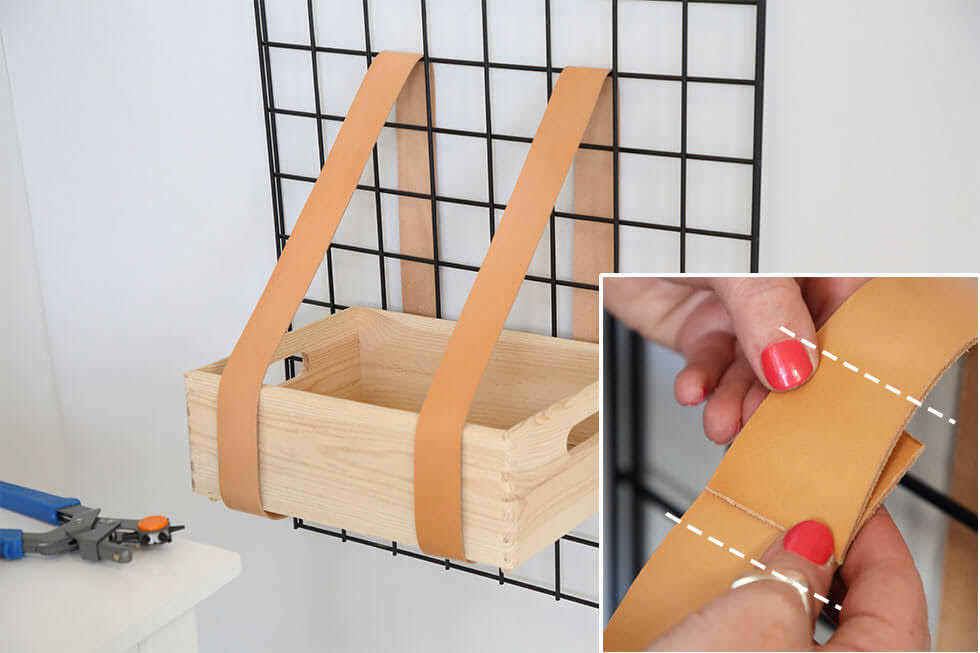
Step two: measure the straps
Step three: secure the straps in place
Move the small crates out of the way so you can secure the straps. To do this, use the hole puncher pliers, punch a hole into the centre of where the two ends of the straps overlap. Then secure the straps using one of the screw rivets. Repeat this process for all your crates.
If you're fixing direct to the wall, use the hole punch to make the holes for the wall screws to go through.
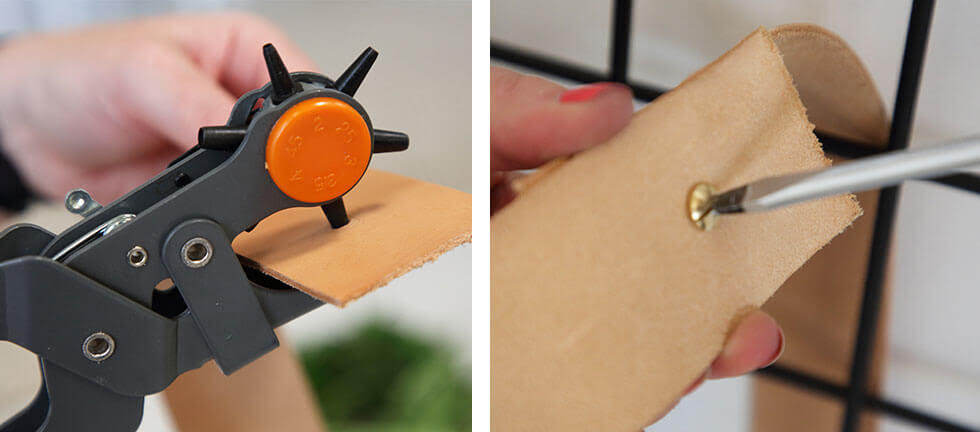
Step three: secure the straps in place
Step four: position the planter crates
You should now have the wire rack with your secured leather straps in place; or your straps screwed directly to the wall. Now you can place your crates in between the leather straps. If you're using a wire rack, shuffle round the leather straps so the rivets are underneath the crates.
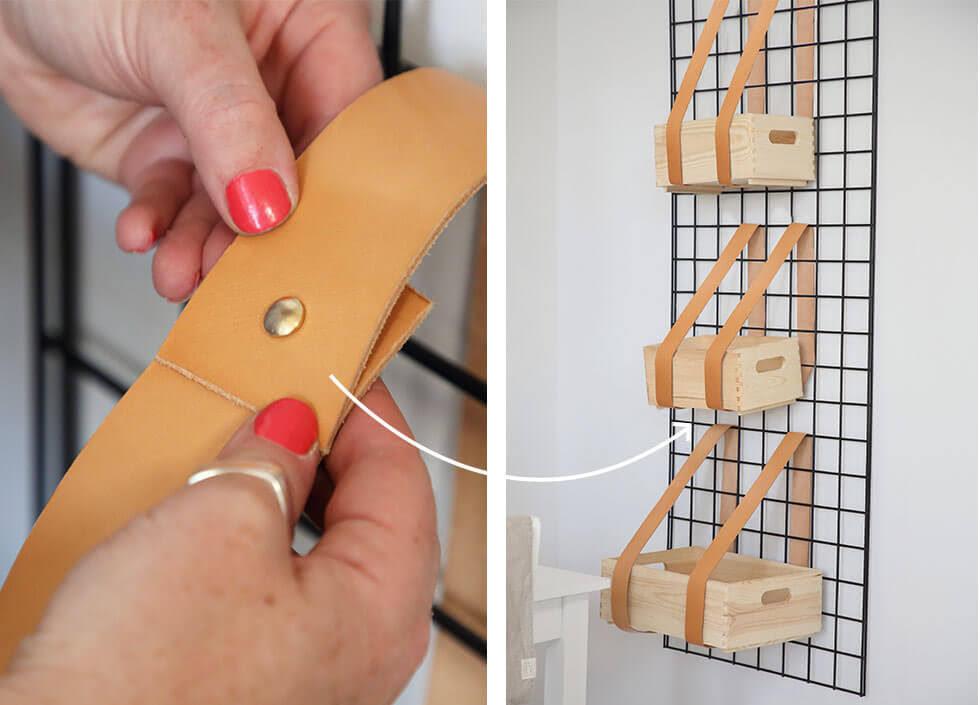
Step four: position the crates
Step five: add plants to your new wall planter
The final step in creating your wall planter is to add in your greenery. Just make sure you plant up your foliage in sealed pots first to avoid any leakage. If you need inspiration just check out our guide to the best indoor plants to add some wow-factor greenery to your walls.
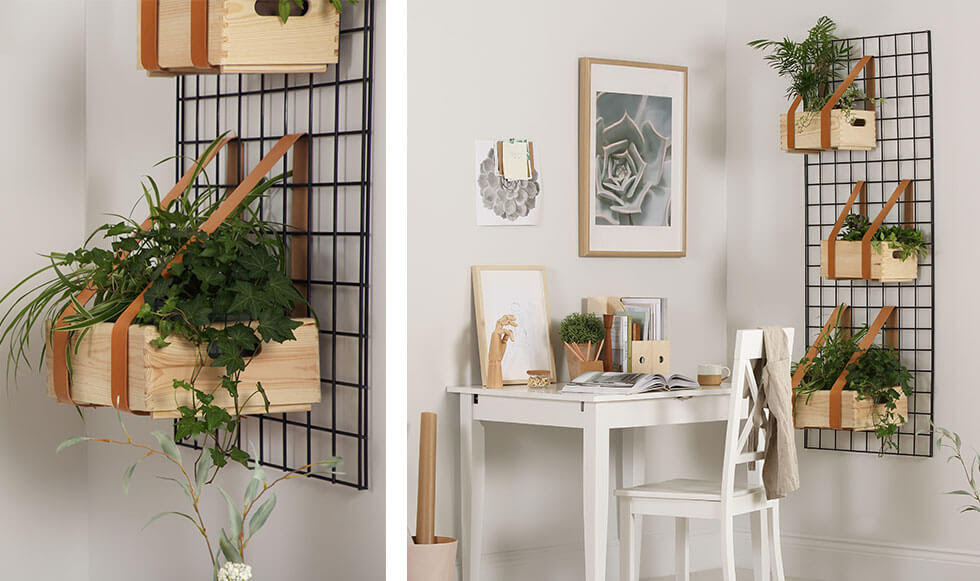
Step five: add plants to your new wall planter
*DIY step by step thanks to Furniture Choice
More crafty projects:
Get small space home decor ideas, celeb inspiration, DIY tips and more, straight to your inbox!

Hebe joined the Real Homes team in early 2018 as Staff Writer before moving to the Livingetc team in 2021 where she took on a role as Digital Editor. She loves boho and 70's style and is a big fan of Instagram as a source of interiors inspiration. When she isn't writing about interiors, she is renovating her own spaces – be it wallpapering a hallway, painting kitchen cupboards or converting a van.