How to paint a wall arch - A quick DIY you can do with leftover paint
Arches are a major architectural trend, but if your home doesn't have one, you can still fake the look with paint. Here's how to paint a wall arch.

We always end up with a bunch of left-over paint sample pots from our DIY projects that we are never sure what to do with. On a day off work I wanted to do something creative so decided to paint a wall arch using the leftover samples to liven up an otherwise blank, boring white wall.

Painted wall arches have become popular over the last few years as a cheap but effective way to change a space. They can be majestic displays of your artistry skills or something simple and playful. Murals have been used as replacement for bed headboards, they've become a cheerful kids bedroom idea or, like in my case, adding a focal point to an otherwise large white wall.
If you love this easily achieved look as much as I do, here's the step-by-step on how I did it.
Article continues belowDIY painted wall arch: Materials
- Paint sample(s) or leftover paint
- Painter's tape or masking tape
- Paintbrush
DIY painted wall arch: Instructions
Step 1: Make a plan
I decided to draw a few arches with some complementary colours inspired by one of my favourite art pieces we have in the house. First off, I drew the shapes I wanted to create on a piece of paper to finalise the design. I decided to have four arches intersecting each other rather than having them all side by side.
Step 2: Draw the design in pencil first
Once I was happy with the design I drew the shapes lightly on the wall using a pencil. For the straight sections I used a spirit level to get straight vertical parallel lines. For the rounded top sections I used a round lamp shade to trace around.
If you don’t have anything suitable to trace around put a tack into the wall and knot a string around it. At the other end of the string tie your pencil at your desired length and use that to create the circular shape. Voila!
- Does the rest of your room need a coat of paint? Here's how to paint a room
Step 3: Tape it off and start painting

Next, add a good quality masking tape for the straight sections. As the arches are intersecting the masking tape for one arch means you cannot paint the next arch while the masking tape is in place. Each arch needs to be painted in phases so I painted arches 1 and 3 first, removed the masking tape and once dry added masking tape for arches 2 and 4.
My top tip for this project is to remove the masking tape while your final coat is still wet, this way you get a nice crisp line without any peeling. Paint the main body of the arches using a roller and get as close to the top of the arch line with the roller as you can.
Step 4: Paint the arches

For the top of the arch I used a flat artists brush and a lot of patience! This takes a lot of precision so give yourself a lot of time. Do not put too much paint on your brush and slowly trace along the line. Make sure to step back from the wall every once in a while to get a better perspective as you work.

You may need to a second coat on the edges. This mural took me about a day to do mainly due to the length of time it took to paint the arches. There is masking tape for curves that you can buy which would make the process much quicker but I wanted this project to be a freebie.
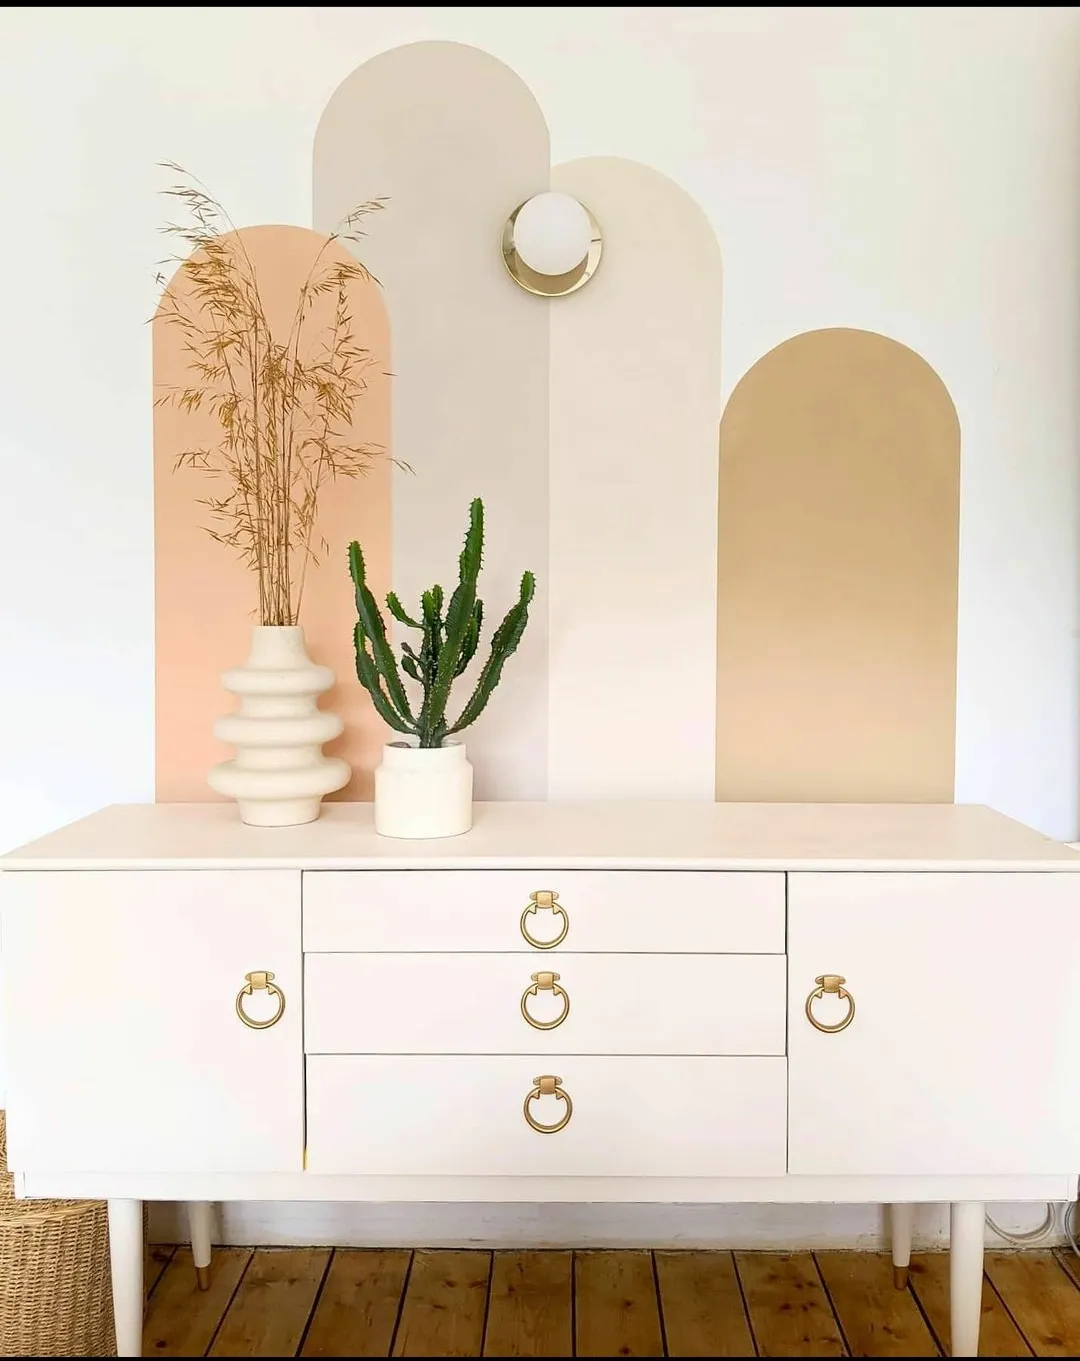
How simple is that? I love the style this mural added to a formerly boring corner of our home.
To finish off we added the houseof.com Brass Opal Disk Wall Light in the centre of the mural. This light fitting isn’t actually wired in but I am a big believer in using beautiful wall lights as a decoration also.
