Knowing how to sand floors is a must if you've taken on a renovation. Whether you've opted to install reclaimed wooden floorboards to your living room, hallway or bedroom and want to improve their appearance or simply want to give your original floorboards a new lease of life, cleaning, sanding and sealing then is an effective solution easily achieved by a keen DIYer.
Providing a thorough guide to sanding wooden floorboards, expert Michael Holmes discusses everything from the costs of hiring the right equipment to how to use it effectively.
Find more things flooring related on our dedicated hub page; and look to our DIY hub page for all things renovation-related.
Article continues belowYou will need:
- Hammer
- Bradawl
- Crowbar
- Saw
- Sanding machine hire
- Sanding belts
- Disposable face masks
- Protective eyewear
- Plastic sheeting

1. Start by preparing the room
After clearing the room, seal it off with plastic sheeting and tape it down to contain dust – you can also hire a portable dust partition for around £20 a week from HSS.com.
Remove carpets and grippers and ensure that you drive any nail or screw heads down 2-3mm below the floor surface – not doing so will shred the sandpaper disks or belts, adding to your costs. Replace any missing or damaged boards.
2. Choose the correct sandpaper and grit
If you're hiring a sanding set, you can expect to pay an average of £82 for a weekend. A pack of five sanding belts in each of the six grades will be around £35-£50.
We'd recommend starting with the finest grit possible, based on the condition of the wood. This said, for rough boards it's advisable to start with a coarse grit and work your way through four or five grades – from 24 to 40, 60 and 80 up to 120 grit, or it will take forever. In the case of previously sanded boards, start with a 60 or 80 grit.
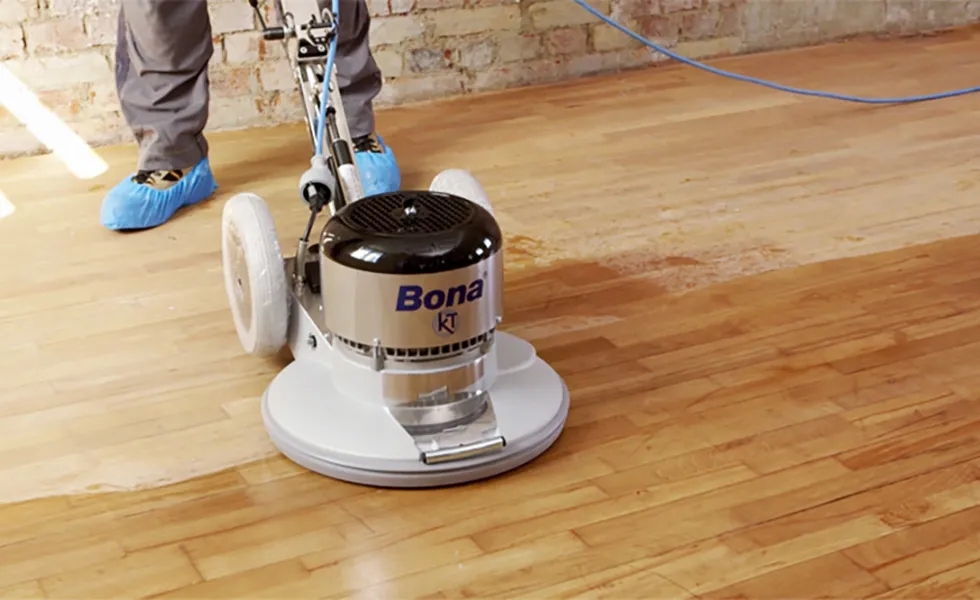
3. Start sanding
Tilt the machine up before starting and then gradually lower it towards the floorboards. To level the floor, work at a 15-45° angle to the grain and work left to right. Repeat in the opposite direction until the boards are level.
Bear in mind the following tips:
- Keep the machine moving and don’t sand against the grain.
- Fill large gaps between the boards first with wedge-shaped fillets of matching wood glued into place. When sanded level they’ll blend in.
- Vacuum and clean with white spirit ready for your chosen sealant and finish.
4. Work on the edges and corners
For a high quality finish, it's wort renting edge and corner sanders that allow you to tackle these more difficult areas easily and effectively.
5. Finish the job with a finer grade
To finish the job, use a finer grade, ensuring that you operate in the direction of the grain. On average, it takes one to two days to sand a standard sized living room.
6. Apply a finish
Apply your finish of choice, allowing the space two to three hours without traffic.
How to fix creaky floorboards
Creaky floorboards are the downside to stripped wood floors. You'll see all sorts of hacks in the internet suggesting hacks like sprinkling talcum powder into the gaps (and other interesting ideas...) but the truth is that creaky floorboards are usually noisy because they're not nailed to the joist below properly – and sorting that is the only thing that's going stop the squeak long term. So, here's a quick guide to fix them – permanently.
You will need:
- A hammer
- A tape measure
- Suitable screws
- A drill (cordless is easiest) or rotary tool and piloting bit
1. After a quick fix? If the floorboard is in otherwise good condition, remove the nails and replace them with screws instead. If, however, the holes where the nails sat have become larger and damaged over time, you'll need to take slightly more drastic action.
2. And here it is... remove the nails, pull up the board and judge whether it's a lost cause and needs replacing entirely – or (fingers crossed) whether you can use the existing nail holes as screw holes to fix it down tightly. While the board's up, check the location of the joist – and also any pipes and cables you'll need to avoid with the new fixings (mark them all on the board with a pencil so you know where to put (or not to put) the new screw holes). If you're not lifting the board, you can be fairly sure to assume that the joist is in line with all the original nail holes – screwing along that line should help you avoid pipes and cables, but use a pipe and cable detector to be 100% sure.
3. With the floorboard back in place, drill a clearance hole into it as near to the edge/old nail hole as you can directly above the joist, avoiding any damaged parts of the board or joist – and avoiding cables/pipes.
4. Put a screw into the hole (choose screws with heads that will countersink into the board, not sit proud) and screw it down tightly.
5. Each board might need more than one screw to hold it tightly in place and to get rid of the squeak, so repeat as necessary.
6. Still squeaky? NOW you can sprinkle talcum powder along the joint and work it in with a knife.