Looking for advice on how to deal with plaster in old homes? If you're the owner of a period property and are planning a renovation – whether of the whole house or a single room – you'll likely have lots of questions. Well, we're here to answer them.
Original plaster contributes immeasurably to the qualities of an old building. Unlike modern cement-based products and gypsum plasters, which are hard, inflexible and non-breathable, traditional lime and clay formulas have a soft, characterful appearance, offer a degree of flexibility and are breathable.
The breathability of wall and ceiling finishes is a very important issue in period homes. Old brick, stone and ancient wattle and daub walls rely on moisture being able to evaporate through them. This helps to prevent damp and condensation.

Most problems with old plasterwork can be easily fixed, but sadly, the wrong techniques and inappropriate modern materials are all too frequently used for repairs. This can mean moisture is sealed in, resulting in damage and decay.
Find out more about renovating a house in our specialist guide. Don't miss our decorating hub page for tons more advice, too.
What type of plaster does my home have?
- Lime plaster is the traditional finish for houses pre-1919, but may have been used up until the 1950s when plasterboard and gypsum took over. See our guide to lime plaster to find out more.
- A pinkish colour is likely to indicate a plaster bound with gypsum.
- An off-white colour is typical of a lime plaster.
- An earthy colour suggests an earth binder.
- If your old house has been replastered with modern materials, or if you have damp walls (find out more in our guide), it might be worth replacing with lime plaster.

A pigmented clay plaster by Clayworks gives a matt, mellow feel to walls. A range of 27 natural colours are available
Look out for historic markings
Original plasterwork may contain fascinating evidence relating to the building’s history, such as traces of historic decorative schemes, as well as superstitious candle smoke marks and apotropaic symbols intended to ward off evil spirits.
Look out for wall paintings in pre-Georgian houses. Early plaster layers may be finished with decorative wall paintings, now often hidden behind multiple layers of paint and later plaster.
If you find anything of note, do call in a specialist to investigate.
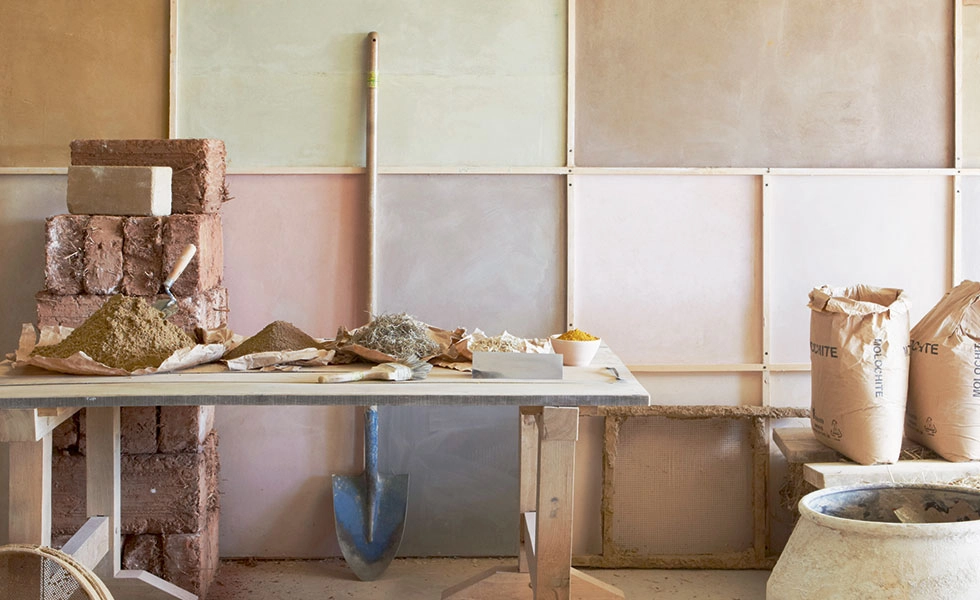
How traditional plaster is made
More from Period Living

Period Living is the UK's best-selling period homes magazine. Get inspiration, ideas and advice straight to your door every month with a subscription.
Old plasters are generally made with lime and sand, with animal hair added as a binder to provide extra strength and reduce shrinking and cracking. Sometimes in high-status work it is gauged with gypsum. Plaster may also be clay based, with animal dung and a lime binder.
Traditional plasters are applied directly to solid backings, such as masonry or cob (unfired earth), or flexible supports, including timber laths or reed.
The aggregates found in old finishes vary according to the materials that were available locally. There might, therefore, be a high proportion of very coarse or very fine particles, the use of which would not comply with modern standards for sands and aggregates.
Most aggregates are ‘as raised’ (i.e. dug out of the ground on or near the site). They include silica sand, other mineral-based sands and crushed stone.

When to replaster walls and ceilings
Plasterwork should last indefinitely, but when deterioration does occur it can take various forms:
- cracking
- loose plaster or delaminating coats
- staining
- crumbling or flaking
- mechanical damage and missing areas
Deterioration often looks worse than it is and repair rather than replacement is often possible.
Any replacement, where justified, should normally comprise the same material and number of coats. Adequate hair or other reinforcement is crucial on flexible backgrounds.
Always try to avoid the use of plasterboard. Unlike traditional plaster finishes it is flat and can look out of place in a period building. This is especially true with old ceilings.
Generally ceilings are relatively easy to replaster. Where necessary laths can be replaced – these are best fixed with screws to avoid vibrations. Lime plaster is then applied over them and matched in with the surrounding surface.
Our guide to how to repair plaster covers everything from cracks and bulges to loose plaster and damp in greater detail.

How much does plastering cost?
- Hiring a specialist plasterer with experience in dealing with traditional finishes on period homes is more expensive than standard plasterings.
- For a standard job using gypsum-based finishes, expect to pay between £450-£750 for walls in an average room, and £200-£350 for the ceiling.
- The price can double for lime or specialist clay coatings.
How to plaster an old home with lime
Employ an experienced lime plasterer. Lots of plasterers will say they can do it, but most of them can’t. Request a reference from a recent job. Alternatively, ask an on-site trainer to work alongside a team of plasterers who are keen to learn. Your lime supplier should be able to recommend a local trainer.
Take advantage of technical advice from lime suppliers when you order your plaster.
- You will need to apply two to three coats, depending on how flat you want the finished work. Finest quality uses three coats, but generally two coats will suffice.
- If you’re on a strict budget use a reed mat instead of riven laths on the ceiling – that is, if you decide to lime plaster that too. This will save several thousands of pounds. Fix it to the bottom of the joists using laths and screws.
- The mix for the first coat, or ‘scratch coat’, should be one part lime putty to three parts sharp, well-graded sand, mixed with plenty of animal hair. This is called ‘haired coarse stuff’.
- For a smooth finish, apply a setting coat of one part lime to two parts fine sand, called ‘fine stuff’. This can also be bought ready mixed.
- Unless your plasterer advises you otherwise, buy your plaster ready mixed by the tonne and delivered to site.
- Don’t leave bags of haired plaster sitting around for more than four weeks – the hair will start to rot due to the alkalinity of the lime.
Additional words by Douglas Kent and Marianne Suhr