
-
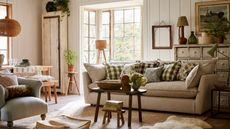
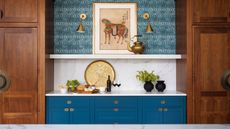
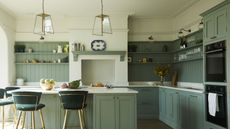 36 gorgeous kitchen island ideas that you and your guests will love
Looking for kitchen island ideas that will make your space both beautiful and functional? We've asked the pros for their favorite tricks, tips, and advice
-
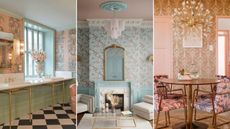
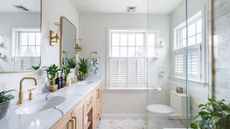 How to maximize space in a small bathroom — 7 pro tips that may surprise you
Want to know how to maximize space in a small bathroom? We've spoken with design pros to find out what to do, as well as picking out handy buys
-
 Jennifer Garner's dining room is filled with “cohesive and intentional” features that showcase her personality
Designers love how the actor's space is rustic yet refined
-
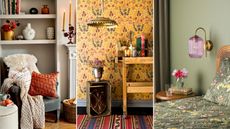
 Vanessa Hudgens’ wallpaper puts a trendy twist on a classic style — designers love her effortless approach
The actor's nature-inspired print is characterful and chic
-
 RuPaul's dining room is filled with colorful and conversation touches that bring “all the fun vibes”
Designers love the star's gorgeous and glamorous decorations
-
 I'm calling it — Beetlejuicecore is 2024's hottest Halloween trend
This playful style is perfect for getting into the spooky spirit
-
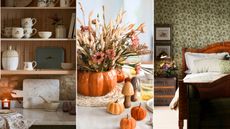
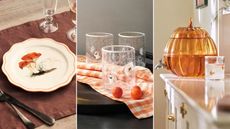 Looking for table decorations for fall? These 9 editor-backed options are beautiful choices
Bring the season into your dining room with these pretty picks
-
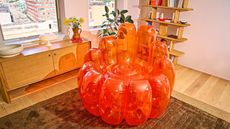 JELL-O furniture has officially landed — here's everything you need to know
The Jelly Collection is perfect for bringing dopamine decor into your home
-
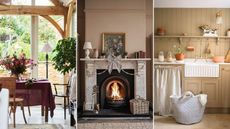
 Ed Westwick's and Amy Jackson's home renovation is “a masterclass in blending countryside charm with sustainable luxury”
Designers love the warm yet inviting color and material choices
-
 I've seen the frazzled English woman trend everywhere — designers agree that it’s the perfect style for fall
Bring European seasonal style into your home with this rom-com inspired trend
-
 Colors to decorate with in fall — 5 gorgeous shades designers love
Try bringing these chic seasonal colors into your home this season
-
 Vintage nostalgia trend — why designers say this comforting style will last in 2024 and beyond
Interior pros have seen people reaching for the past in their homes this year
-
 The 5 fall decor trends interior designers say to try this season
Go for all the cozy vibes with these sweet styles designers love
-
 Pistachio green is everywhere this summer — this color is dreamy and delicious
Bring playfulness into your space with this versatile shade
-
 10 gorgeous bathroom backsplash ideas for every style space
From metro tiles to marble, sealed wallpaper to colorful designs, our bathroom backsplash ideas will help you choose the right addition to your room
-
 The 5 coffee table trends design experts are seeing everywhere in 2024
Looking to switch up your coffee table this year? We've asked design pros for the best trends to try this year, from fun styles to chic materials
-
 What kitchen floor colors make a small space look bigger? Interior pros spill their secrets
Want to know the kitchen floor colors that will make a small space look bigger? Design experts spill on the shades that will brighten your place up
-
 7 retro home decor ideas that will help you bring in this nostalgic trend
Bringing in retro home design will make your space look warm and inviting. Design pros spill on their favorite ways to bring this aesthetic in
-
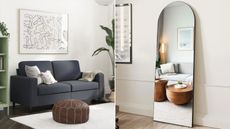
 Sculpted and statement chairs can transform rooms in an instant. I'm a homes editor and here are my top picks
Editor's picks of gorgeous statement chairs to add a touch of style to your home
-
 Amazon furniture deals — my top Editor's Picks on bedroom, bathroom, and living room finds
I'm Real Homes' editor and have spent hours looking for the retailers best offers that bring function and small-space style on budget-friendly prices
-
 I've seen butter yellow everywhere this year — and interior designers agree it's 2024's hottest color trend
We've seen butter yellow interiors spread everywhere this season, and we're in love. Designers explain how to design with them and we pick out matching buys
-
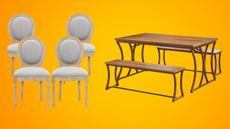
 The best Walmart furniture to shop, filtered by room
These best Walmart furniture pieces are highly rated by shoppers, thanks to their style, easy assembly, and longevity. We've picked out buys for every room.
-
 Ashley Tisdale's tips for styling a credenza are right on trend for 2024 say design experts
Check out Ashley Tisdale's tips for styling a credenza. We asked interior design experts for their input on this trendy decor style
-
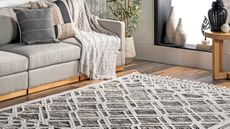 9 of the best Amazon rugs — highly rated and designer picks from $14.99
These are the best Amazon rugs that are perfect for transforming your space. Pick up a budget-friendly find to add interest and insulation to a room
-
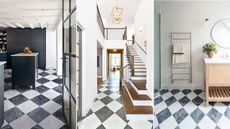 Marble checkerboard flooring — why designers say this “anti-Kardashian” style is back on trend
Marble checkerboard flooring is back on trend, with designers loving using it right now. They share why it's a great choice and how to style it on a budget
-
 Interior pros love Lily Allen’s design tip for nailing cohesive living room color
Want to know Lily Allen’s design tip for creating cohesive color in a space? We've explained why it's such a good idea, plus picked colorful rug buys
-
 The 5 lighting trends that designers say will shine brightly in 2025
Looking for lighting trends to start following ahead of 2025? We've asked interior designers for the twinkling styles they predict will be big
-
 Art Deco style is trending — here's why designers say it will dominate interiors in 2025
Love Art Deco style as much as we do? You'll be pleased to hear it's trending. Here's why designers are using it, how to style it, plus top-rated picks
-
 How to microcement over tiles — 5 simple steps for a smooth finish
Want to learn how to microcement over tiles? We've asked interior designers for the key steps they always follow, plus curated highly-rated essentials


