How to hide a TV on the wall: a DIY disguise with art
DIY a disguise for your TV on the wall with art and turn heads in your front room, for all the right reasons

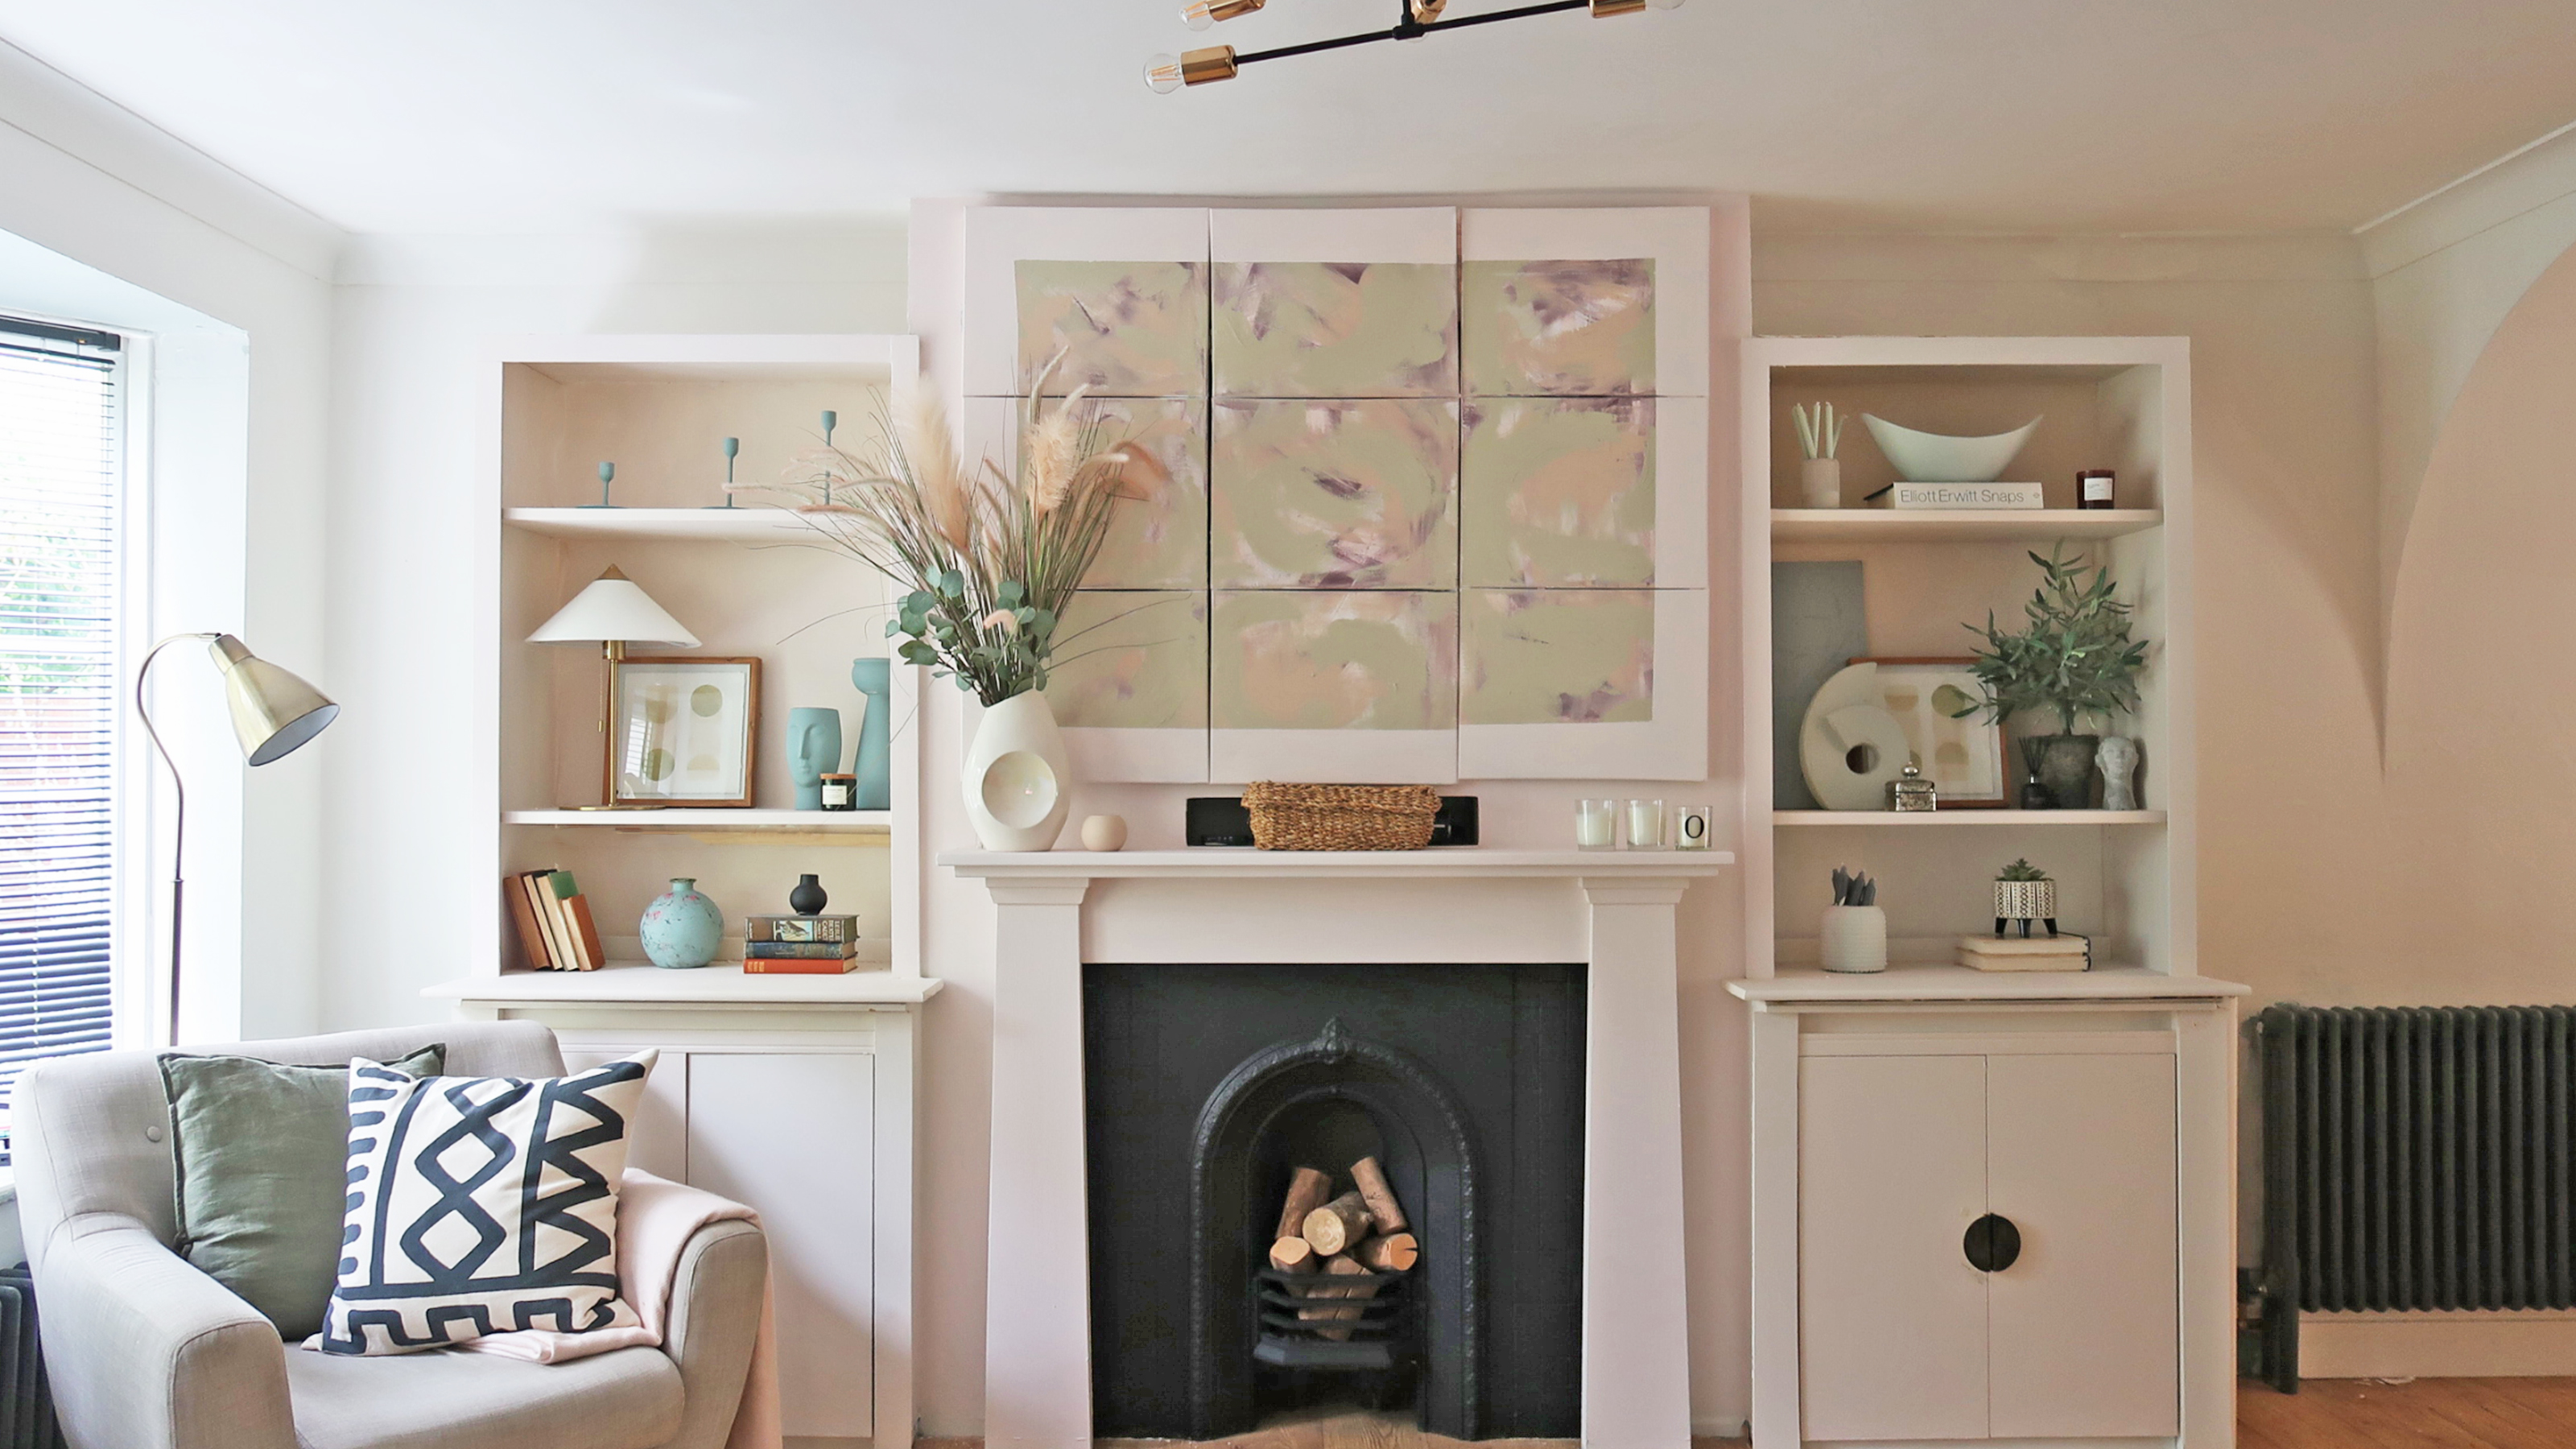
Believe it or not, TVs are controversial and either you're not too bothered by their presence in your front room, or you will do your very best to hide the TV on the wall stylishly... That's what's brought you here, right?
I'm a little on the fence about my feelings towards TVs on display, whether wall mounted or sitting on a TV stand. Because sure I love dreamy interiors, uninterrupted even by stylish living room TV ideas, however, the reality is that I have two boisterous children and a tiny front room... So that television is unashamedly part of our day!
But, that is not to say that I accept its presence entirely, oh no. And, that's what got me thinking about whether I could go down the DIY route to hide and disguise my TV on the wall with art...
The TV au naturel
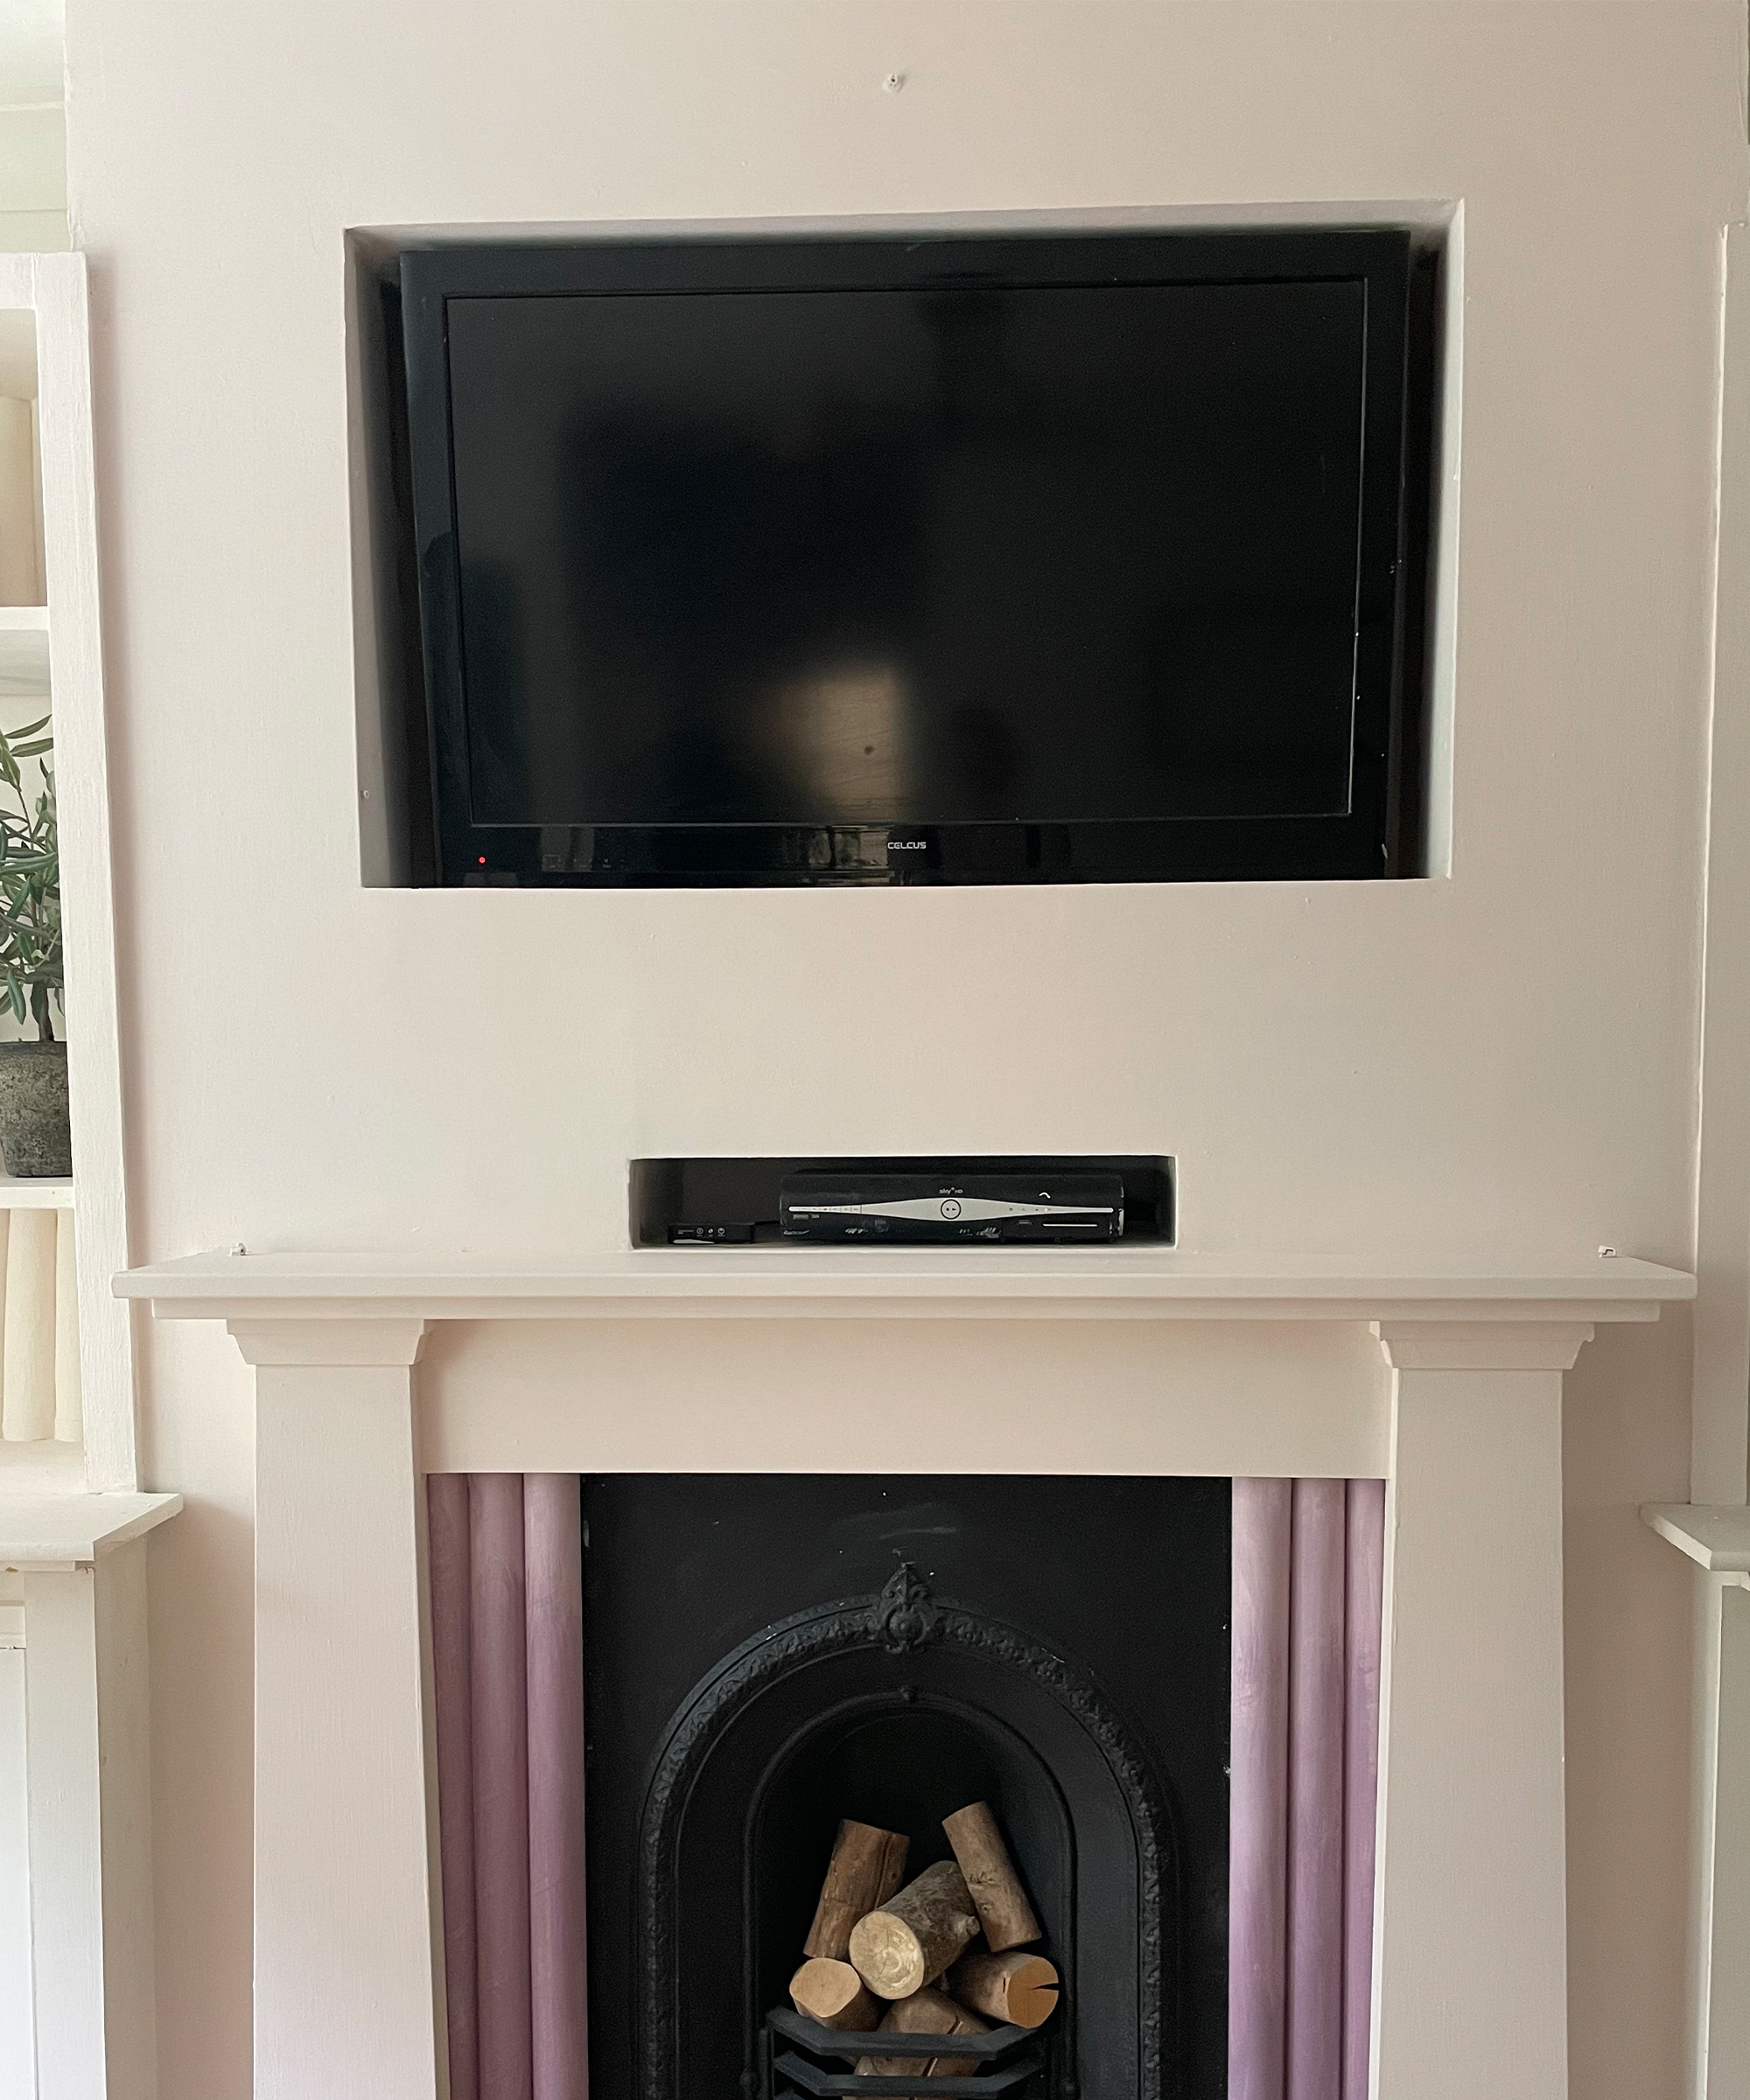
Sure, TV manufacturers have upped their game in recent years and you can now buy all manner of modern, great TVs, many of which will even pretend to be artwork when not in use. This is all well and good if you have the budget... Otherwise, if you have a smart TV, there are lots of ‘art’ or ‘fire’ videos available on Netflix and YouTube which offer an alternative to the boring black rectangle but it's not the cutest look and for those, like me, who don't have a TV that connects to the internet this doesn’t help!
So I really wanted this DIY to be a low-budget and tech-free solution for anyone that wants to stylishly disguise their TV but elevate their interiors all in the same swoop.
This DIY cost me less than £/$50 and was pretty basic to put together also. Get the prep right and you're golden.
How to hide a tv on the wall with art DIY
You will need:
1. Canvases: this 5 pack from Amazon is ideal
2. Stripwood from your local hardware store or use old leftover bits as I did
3. Screws: l love a handy selection box personally
4. Drill: a good cordless drill is a toolkit staple, Amazon has good options
5. Screwdriver: Electric or manual is fine as this project is fairly light work
6. Hinges: like these from Amazon
7. Paint: I used tester pots to keep the price down, you can choose any you like or even use up leftover paint.
1. Measure up
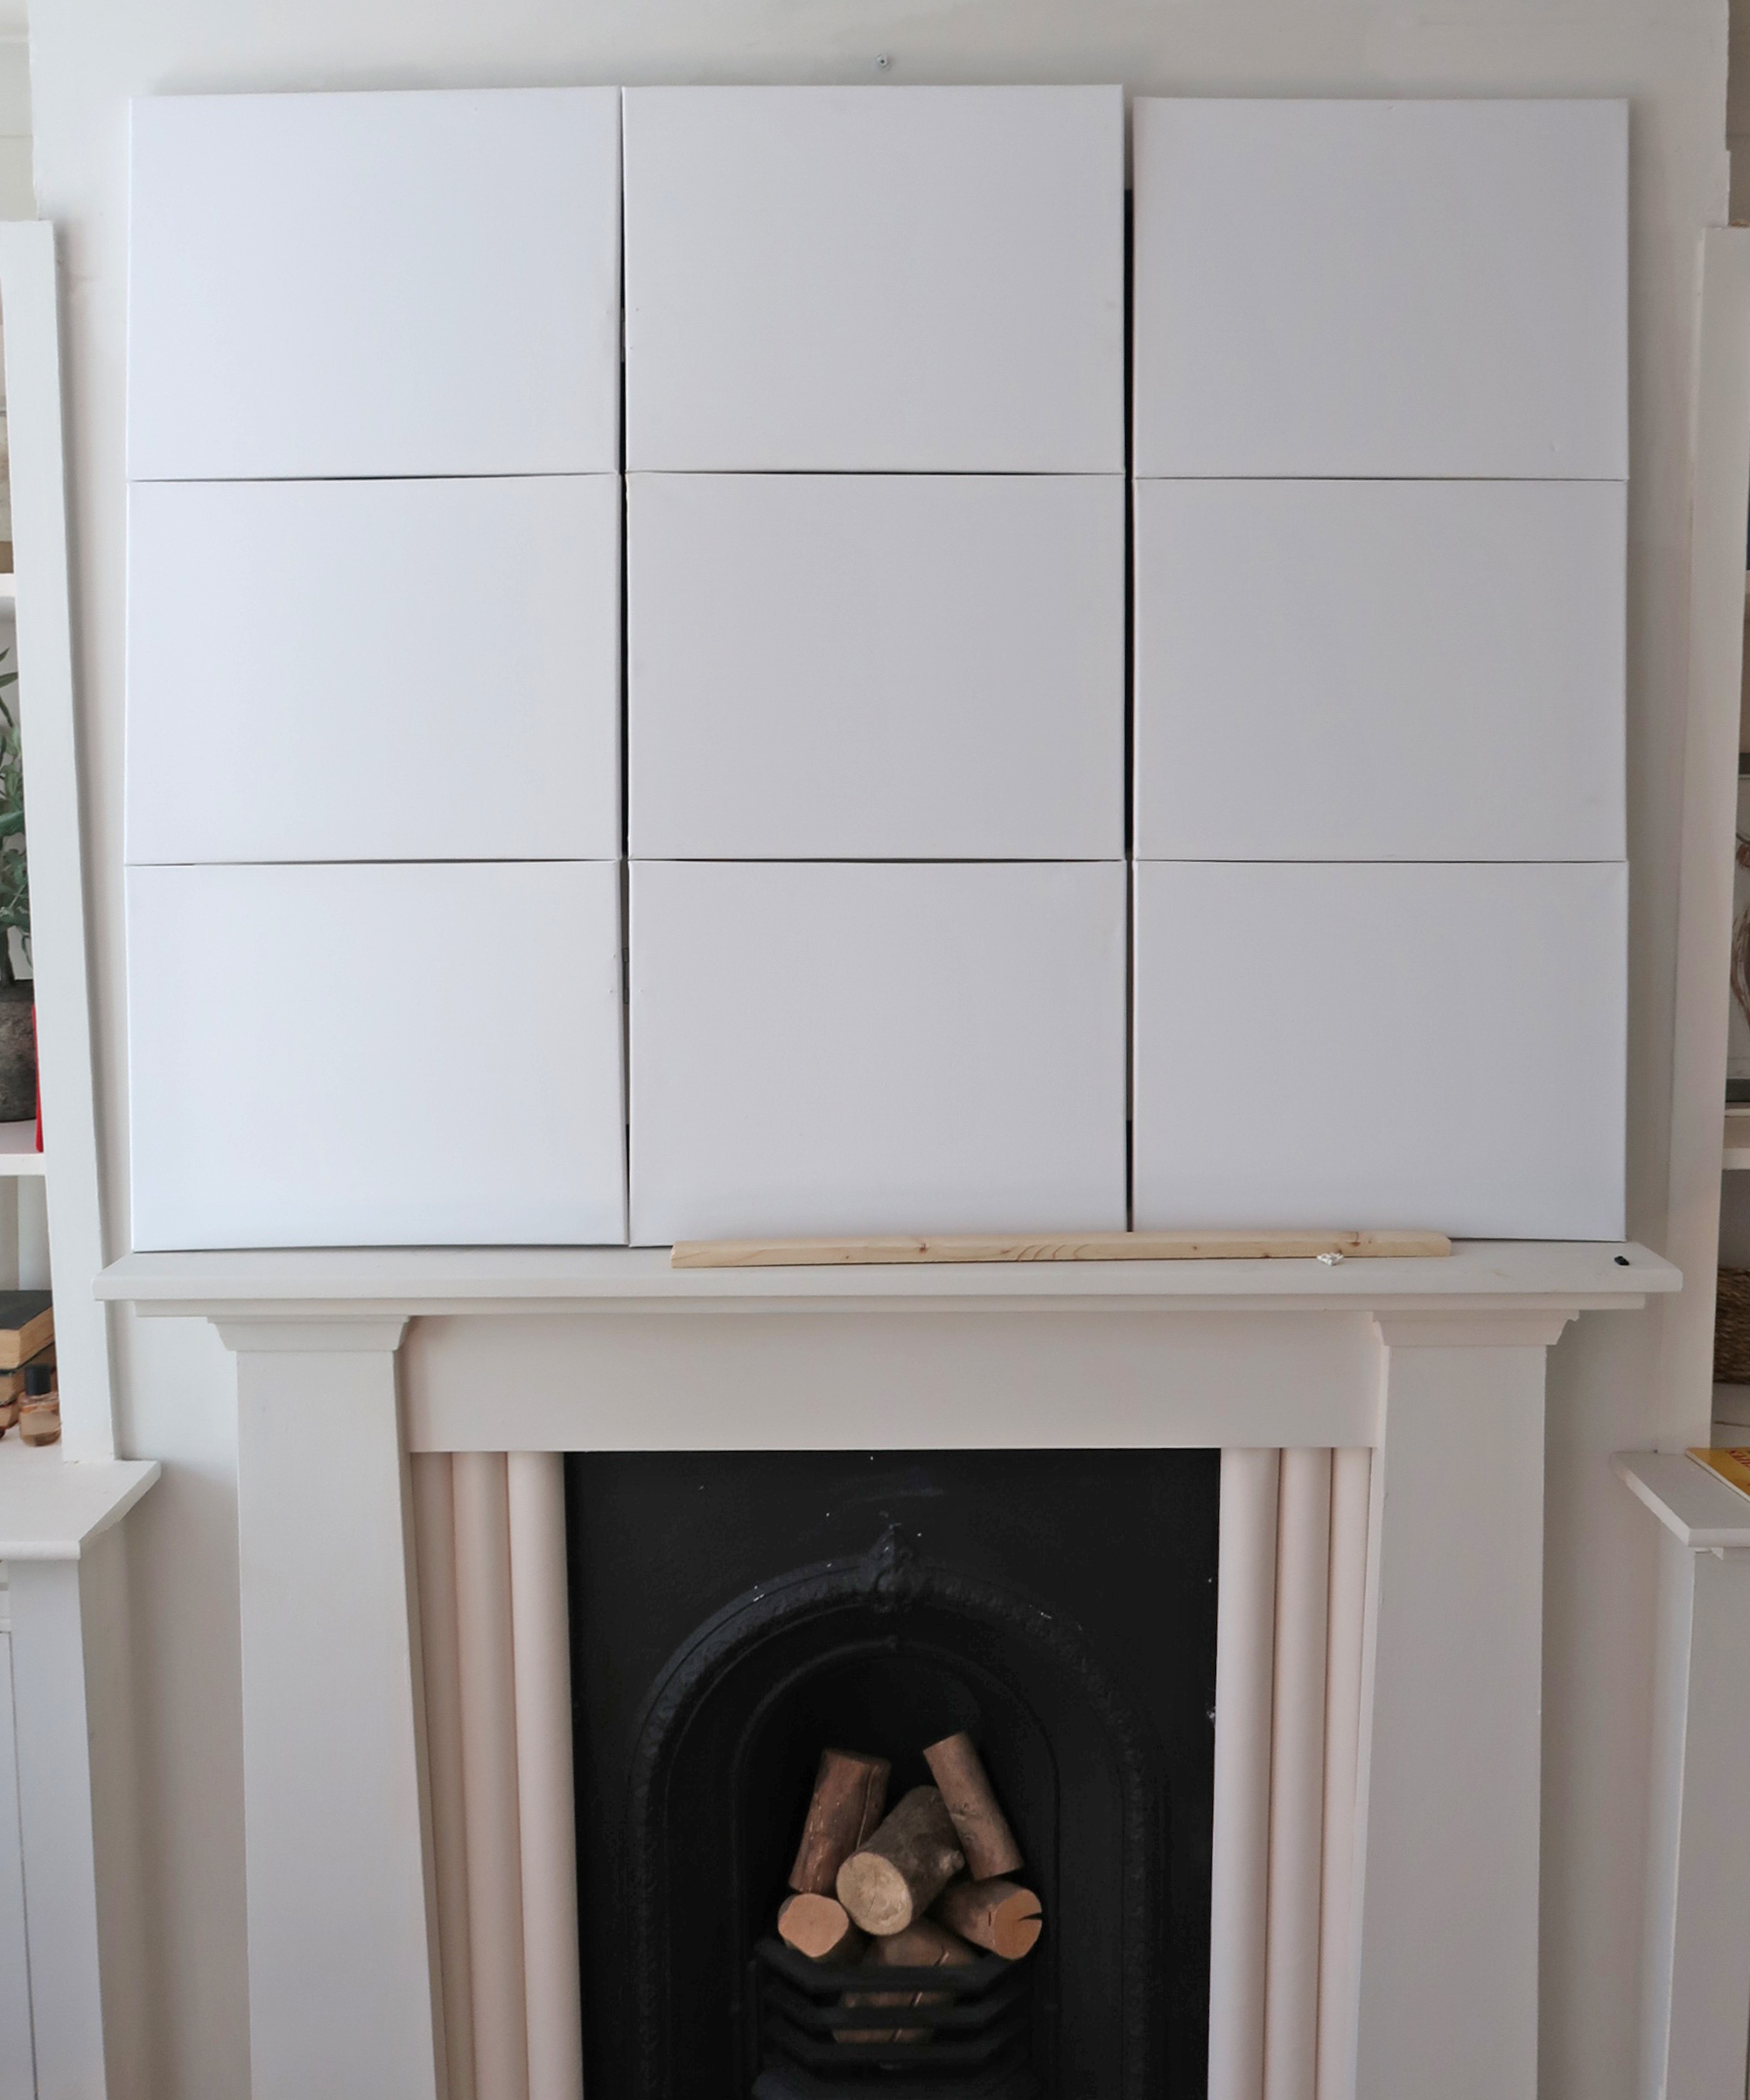
Measure your space using a tape measure and choose your desired canvases formation. Allow extra room on each side for a piece of wood (of your chosen size, sturdy enough to hold the weight of your chosen canvases) as this is what you will attach the canvasses on to.
I wanted an uneven number of columns for aesthetics so I chose three canvases split into two ‘doors’ to spread the weight over two sides, although the weight is actually very little so you could opt to connect them all together in a bifold door style look.
Get small space home decor ideas, celeb inspiration, DIY tips and more, straight to your inbox!
2. Get arty
I decided to connect the canvases together and create the doors prior to painting because I planned to build up the texture with thick paint and filler and was worried that drilling into the frames afterward might cause some cracking. You could paint them all first and then connect them to form the doors if you prefer.
You can have lots of fun with the painting and go as maximalist as you like, or keep things super simple with a reduced color palette if that’s the look you like. Unless you are using this as the starting point for decorating your room, I’d suggest including some colors which already feature in your scheme for more cohension.
3. Connect the canvasses
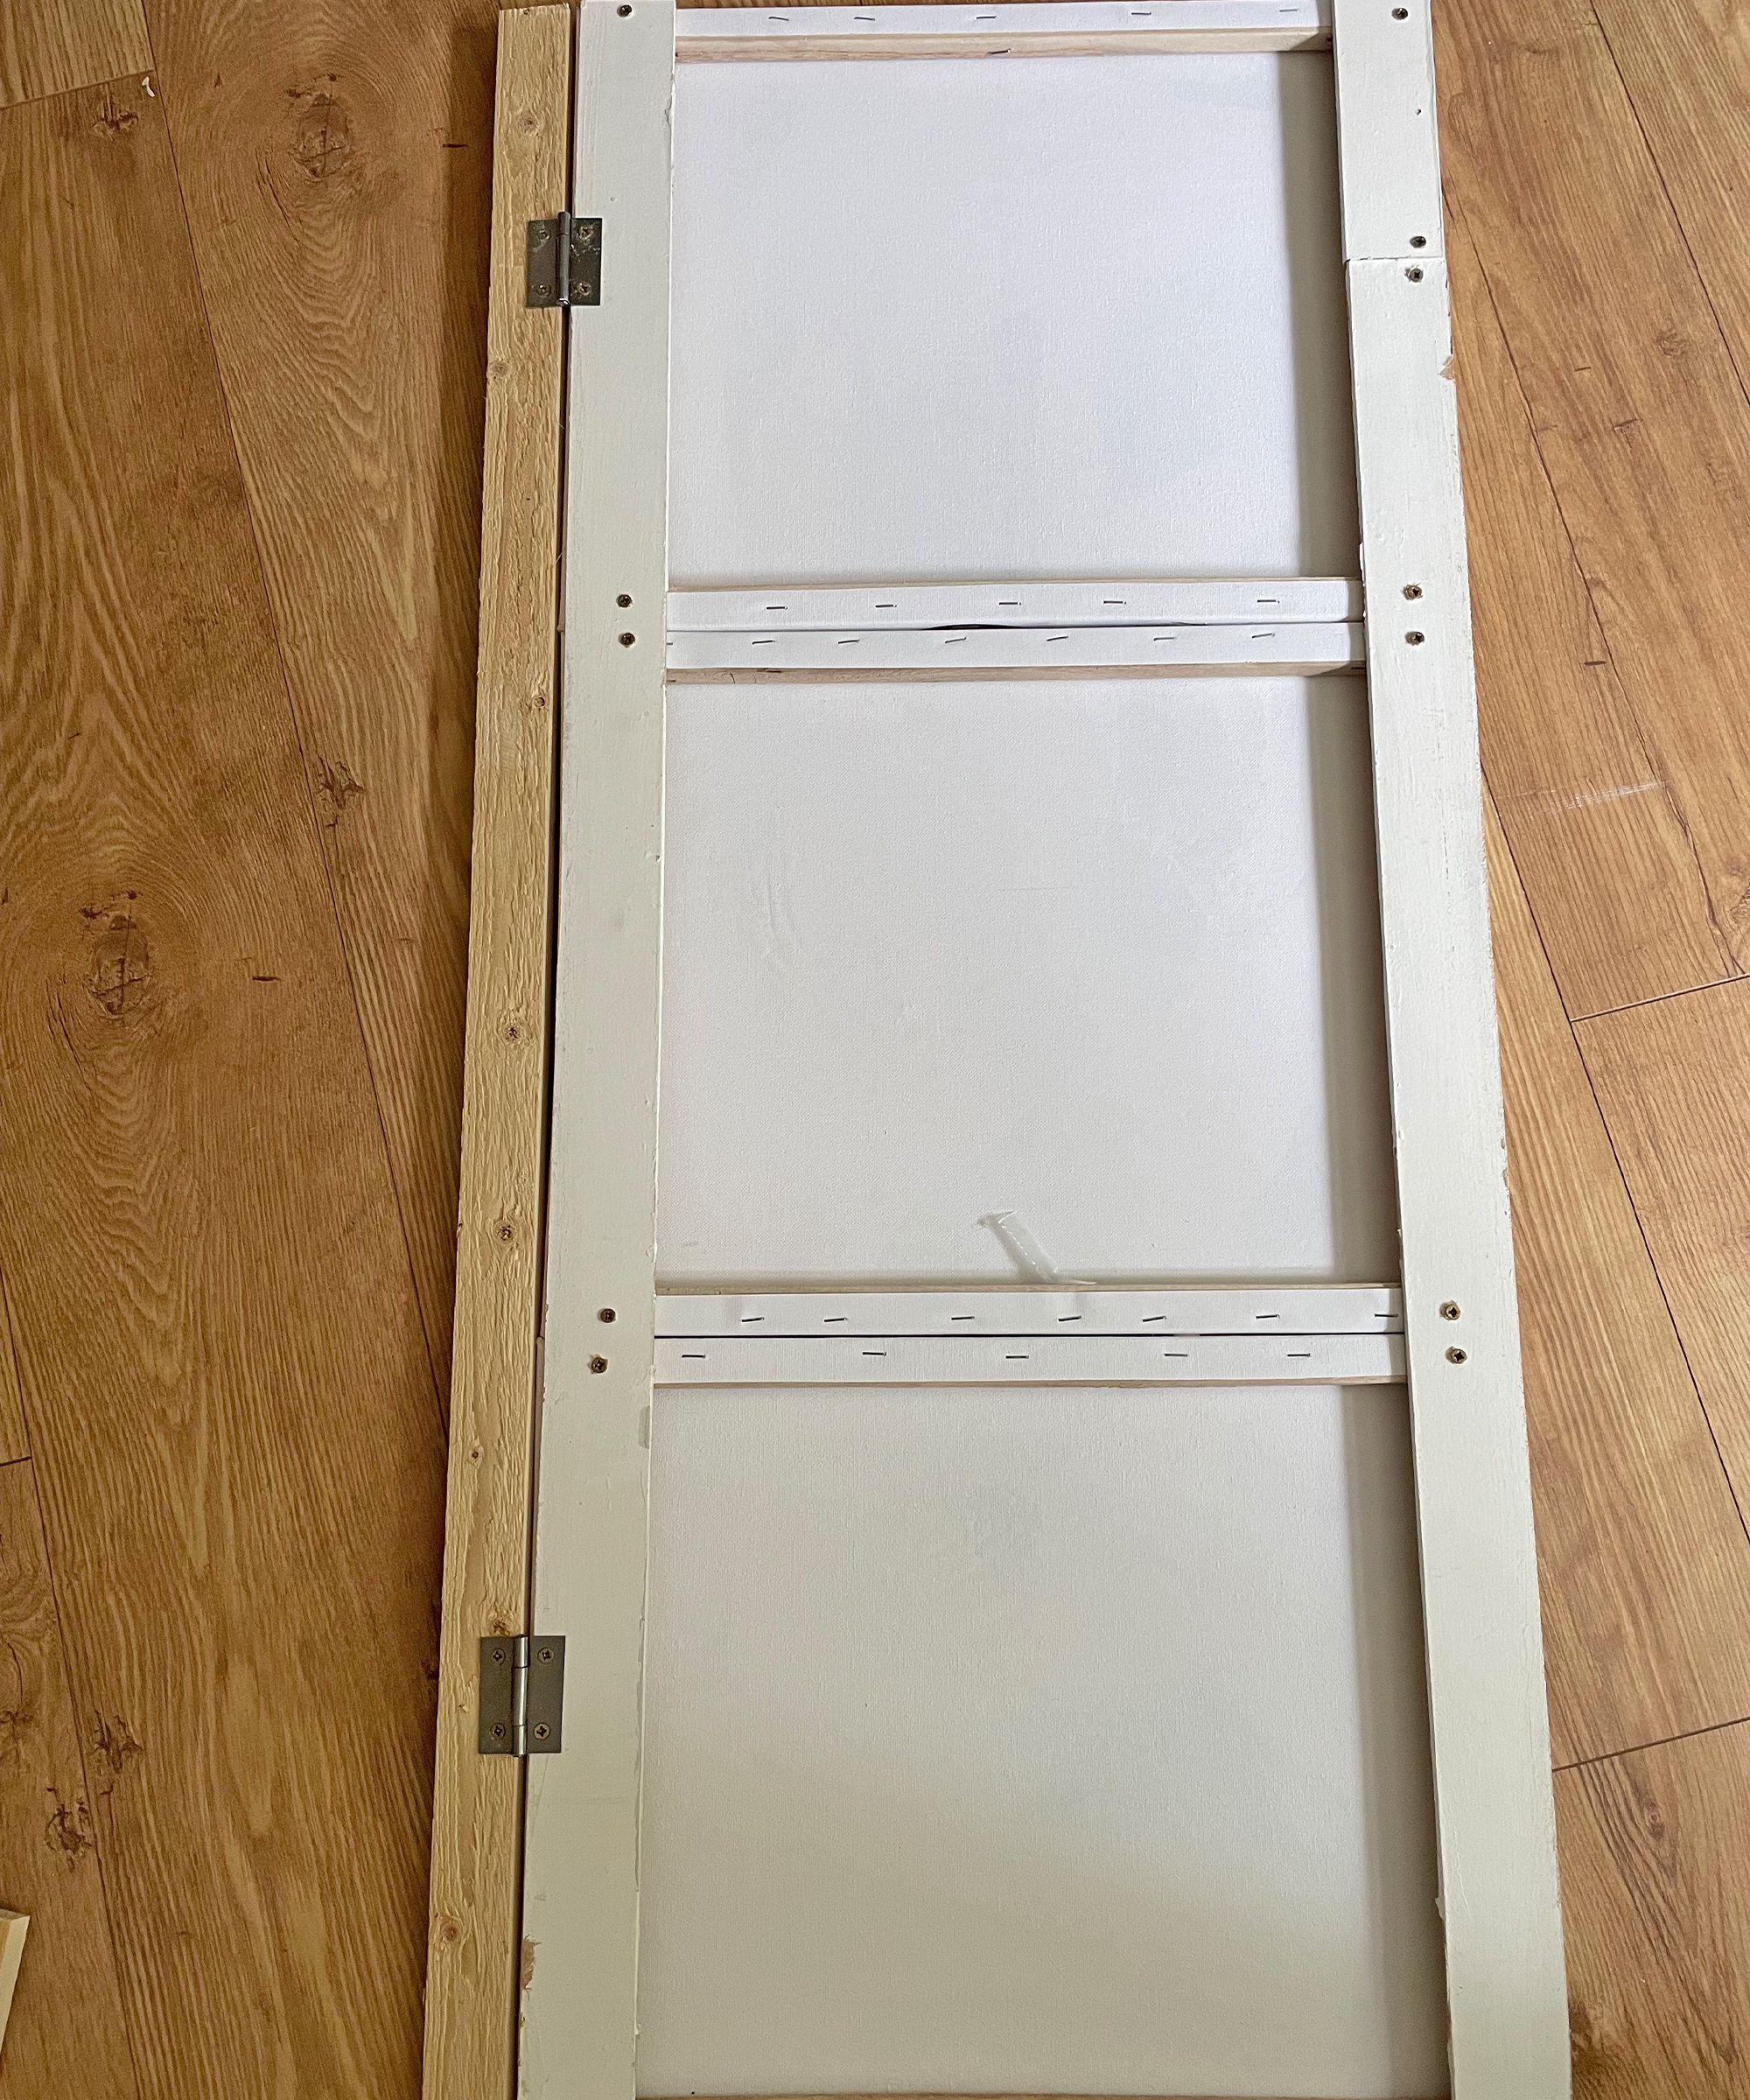
Lay out the canvases in columns and join them together at the back by screwing on thin lengths of strip wood or similar. I reused some old strips of Mdf that had been wall paneling in another life as it saved money and waste. My other half was happy that I made a dent in my (ever-increasing) collection of ‘wood I’m keeping as it’ll come in handy for something in the future’!
Once you’ve created your columns, position them next to each other on the floor and check they line up as canvases (especially cheap ones like I bought) can vary a bit.
4. Add hinges and fix to the wall
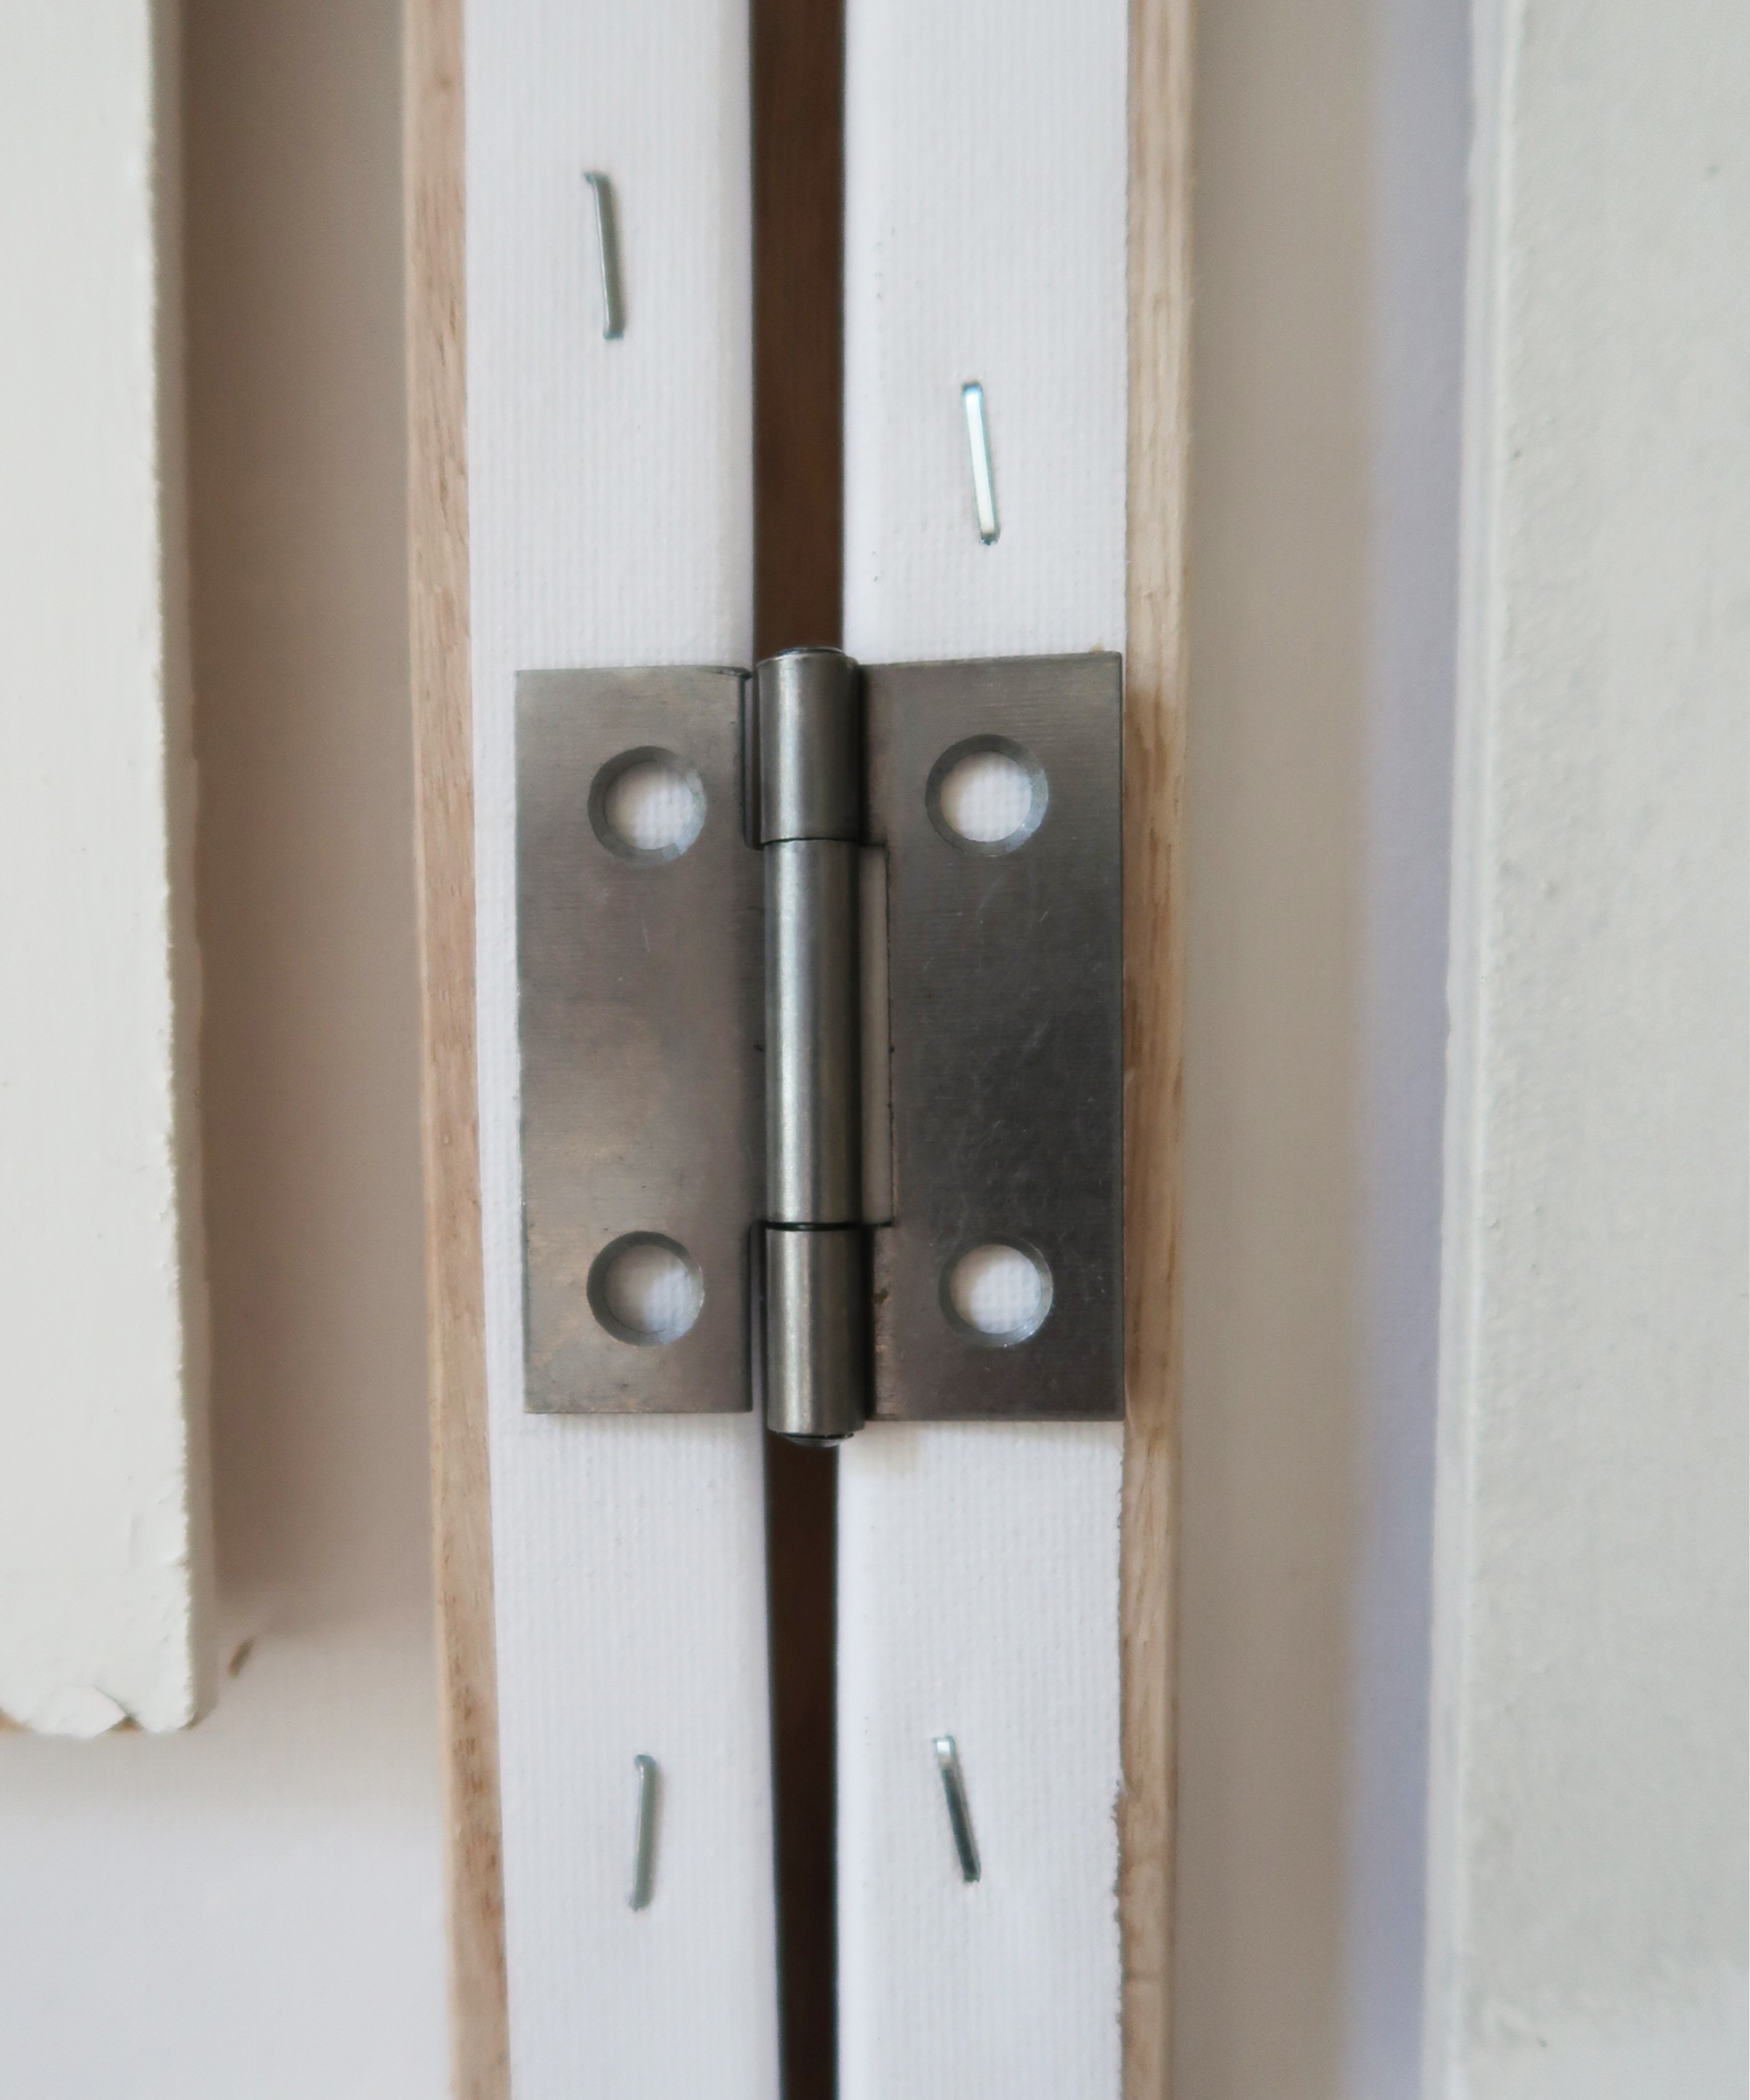
When you are happy, connect the columns that will form a door (two in my case, but more if you are making one concertina-style door, or have lots of columns) together using butt hinges and small screws. Take care not to use screws that are longer than the depth of the canvas frame or they will poke through the front of your canvas.
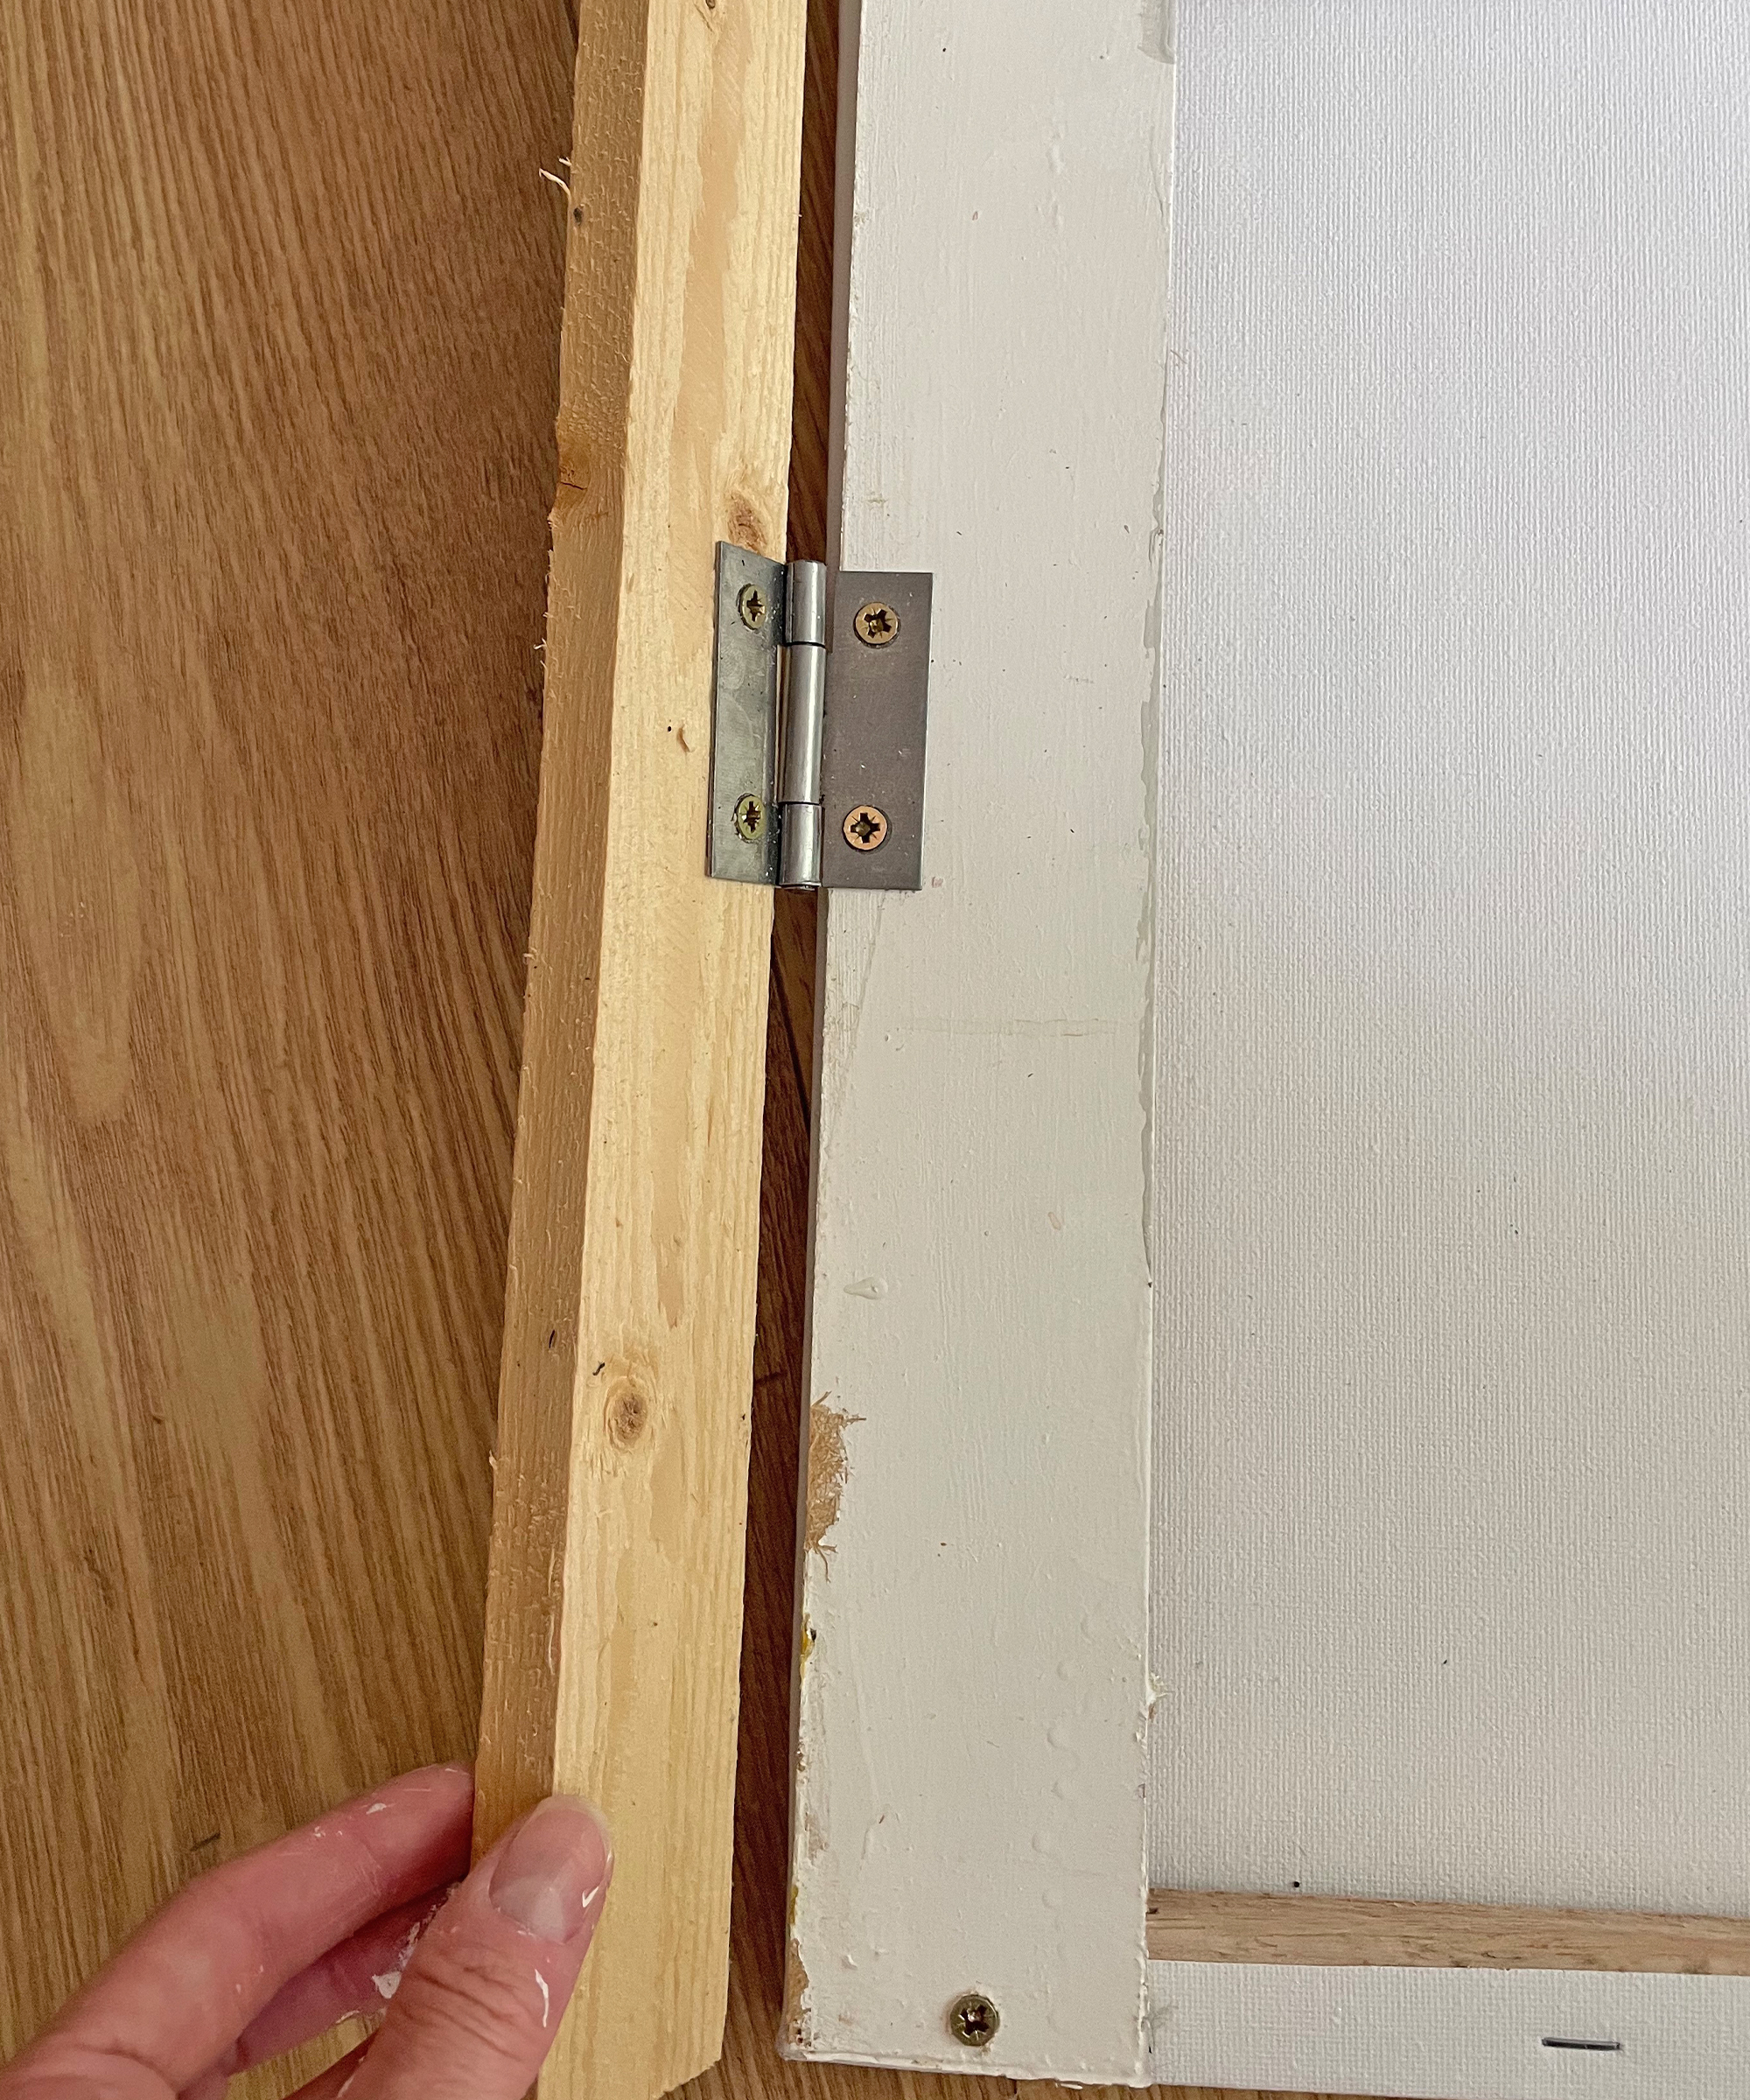
Add a piece of wood to the side of your outer column for each door (two in my case, but one if you are making a single concertina-style door). Attach two butt hinges to each piece of wood.
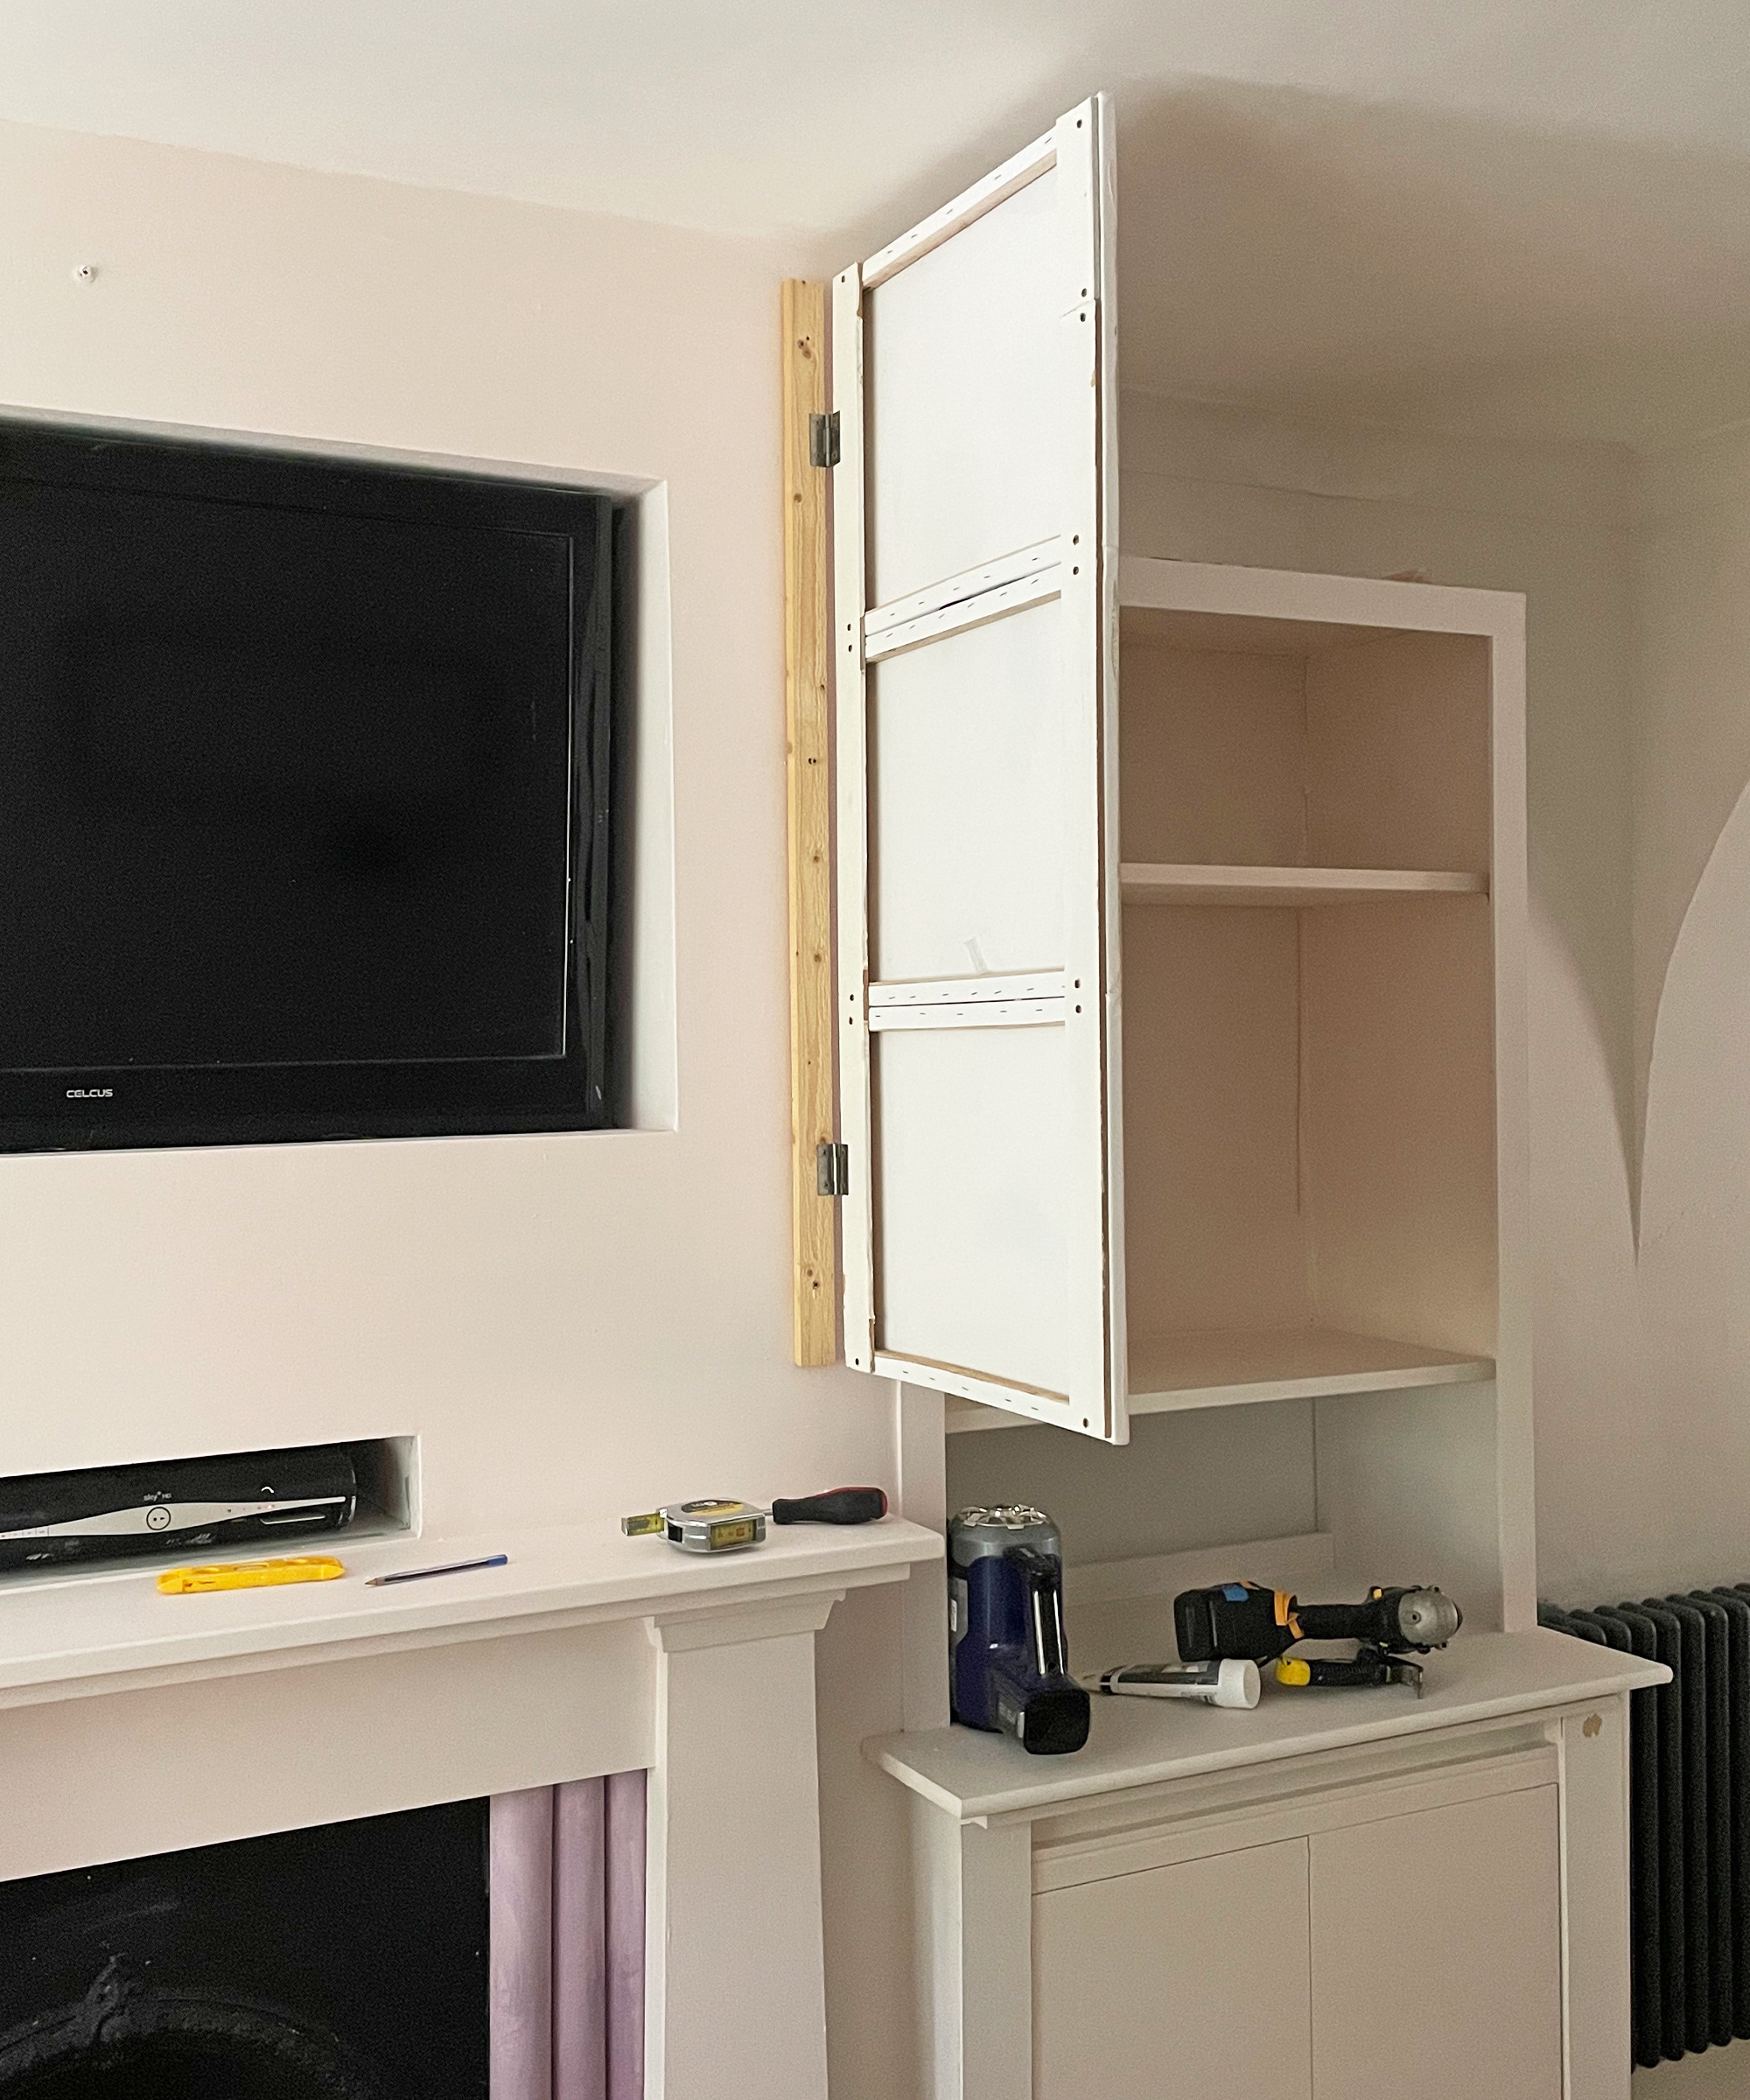
Drill pilot holes into the piece of wood and position them on the wall. Mark the position of the holes with a pencil. Drill holes for your wall fixings then insert them into the pre-drilled holes. (Choose the appropriate fixings for your wall type). Line the wood up again and screw it into the wall. Check your door opens and closes smoothly.
Complete the same process for the second door and check it lines up with the first one. It is a good idea to paint the wooden frame that you attached the canvases in the same shade as the wall behind it to help it blend in. If you have a single leaf door on one side, you might choose to decorate the back for optimal aesthetics when the door is open.
Once you've finished the installation you can add the finishing touches to the space.
The results:
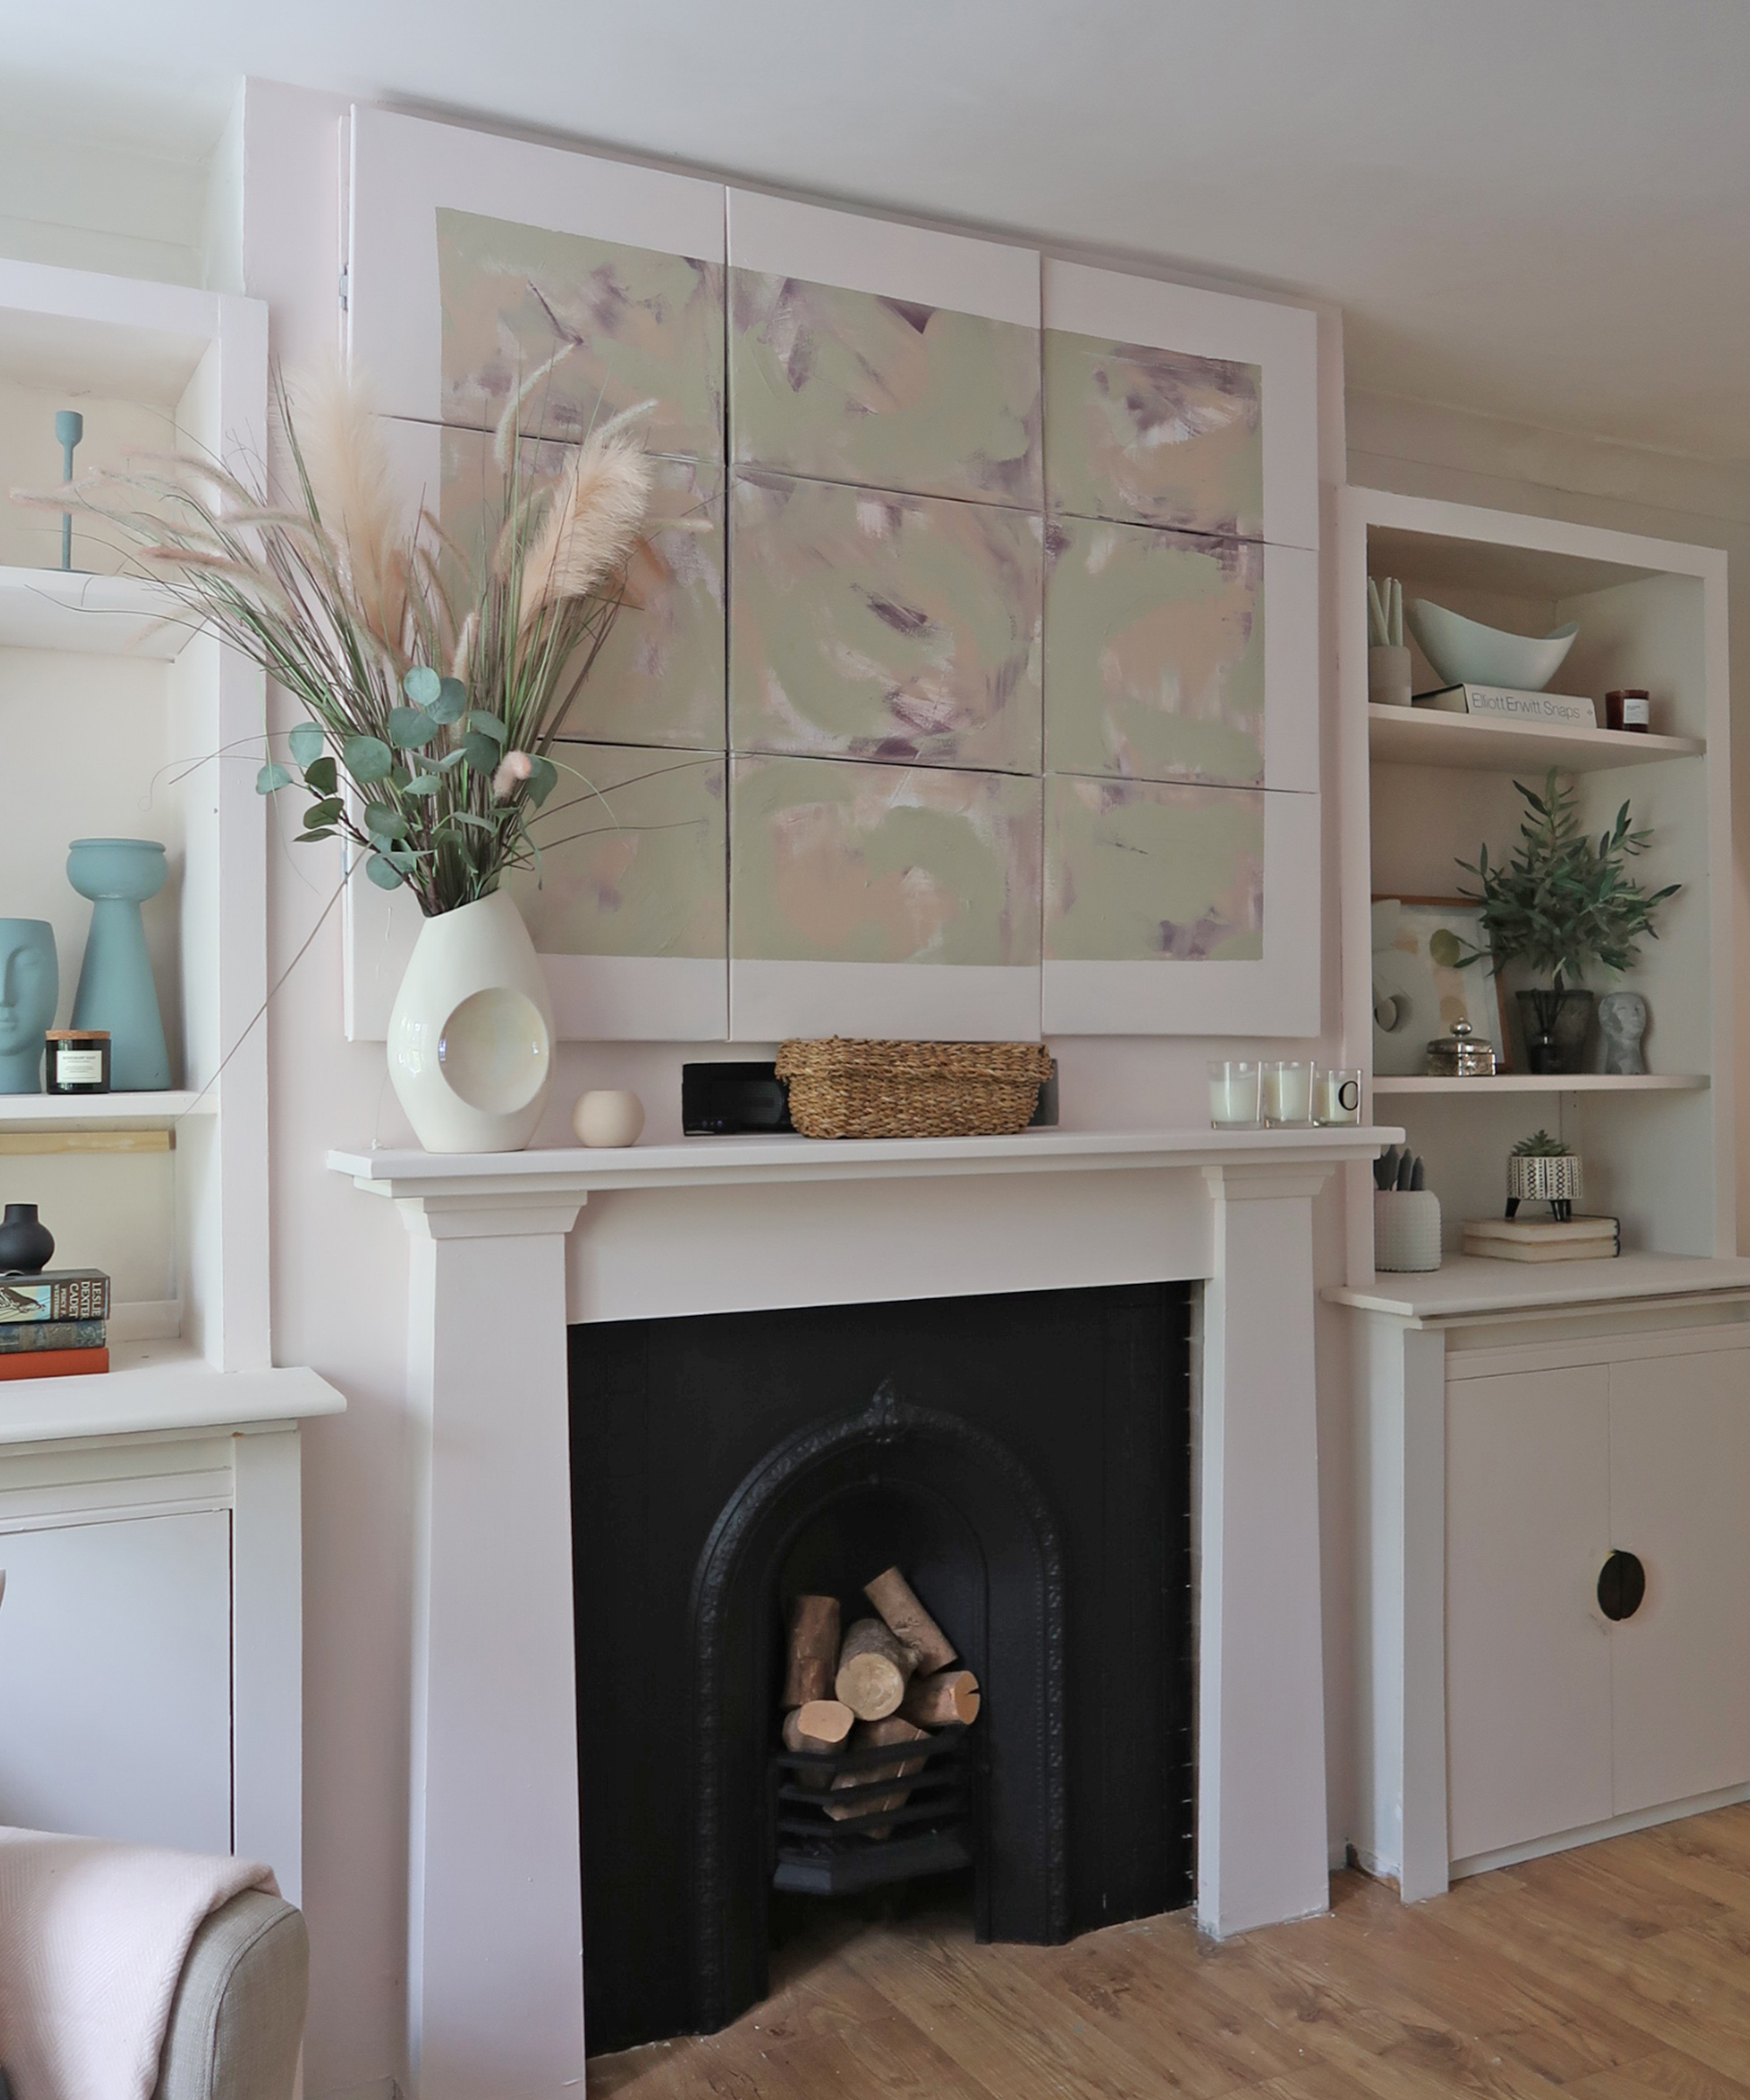
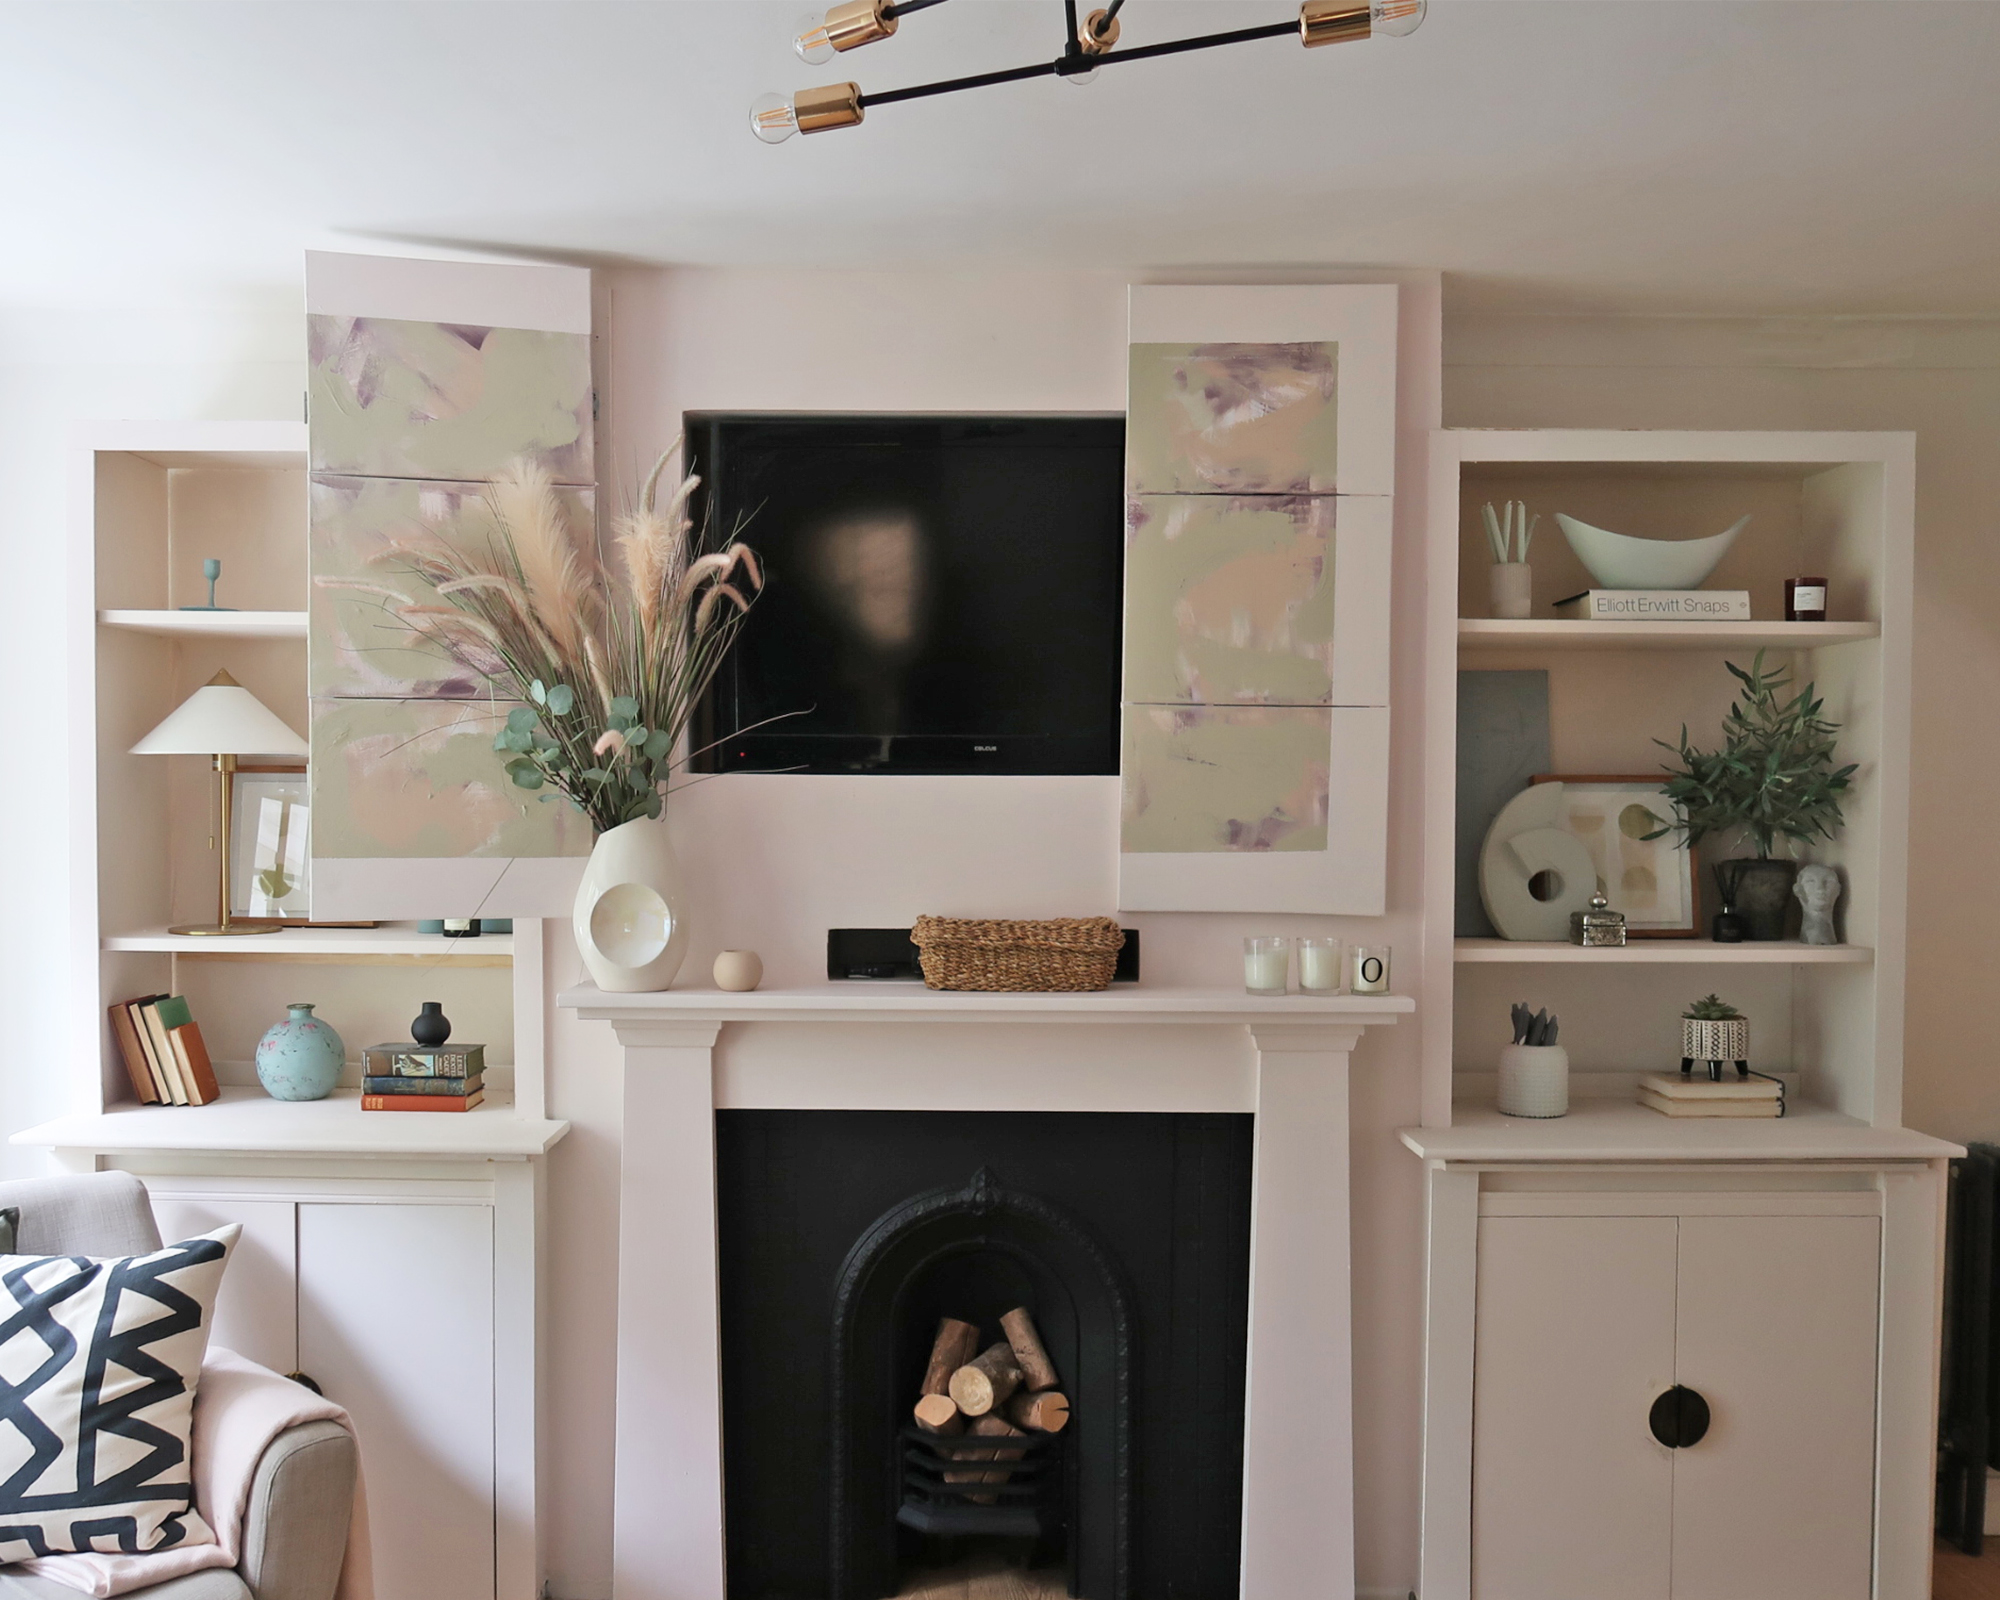
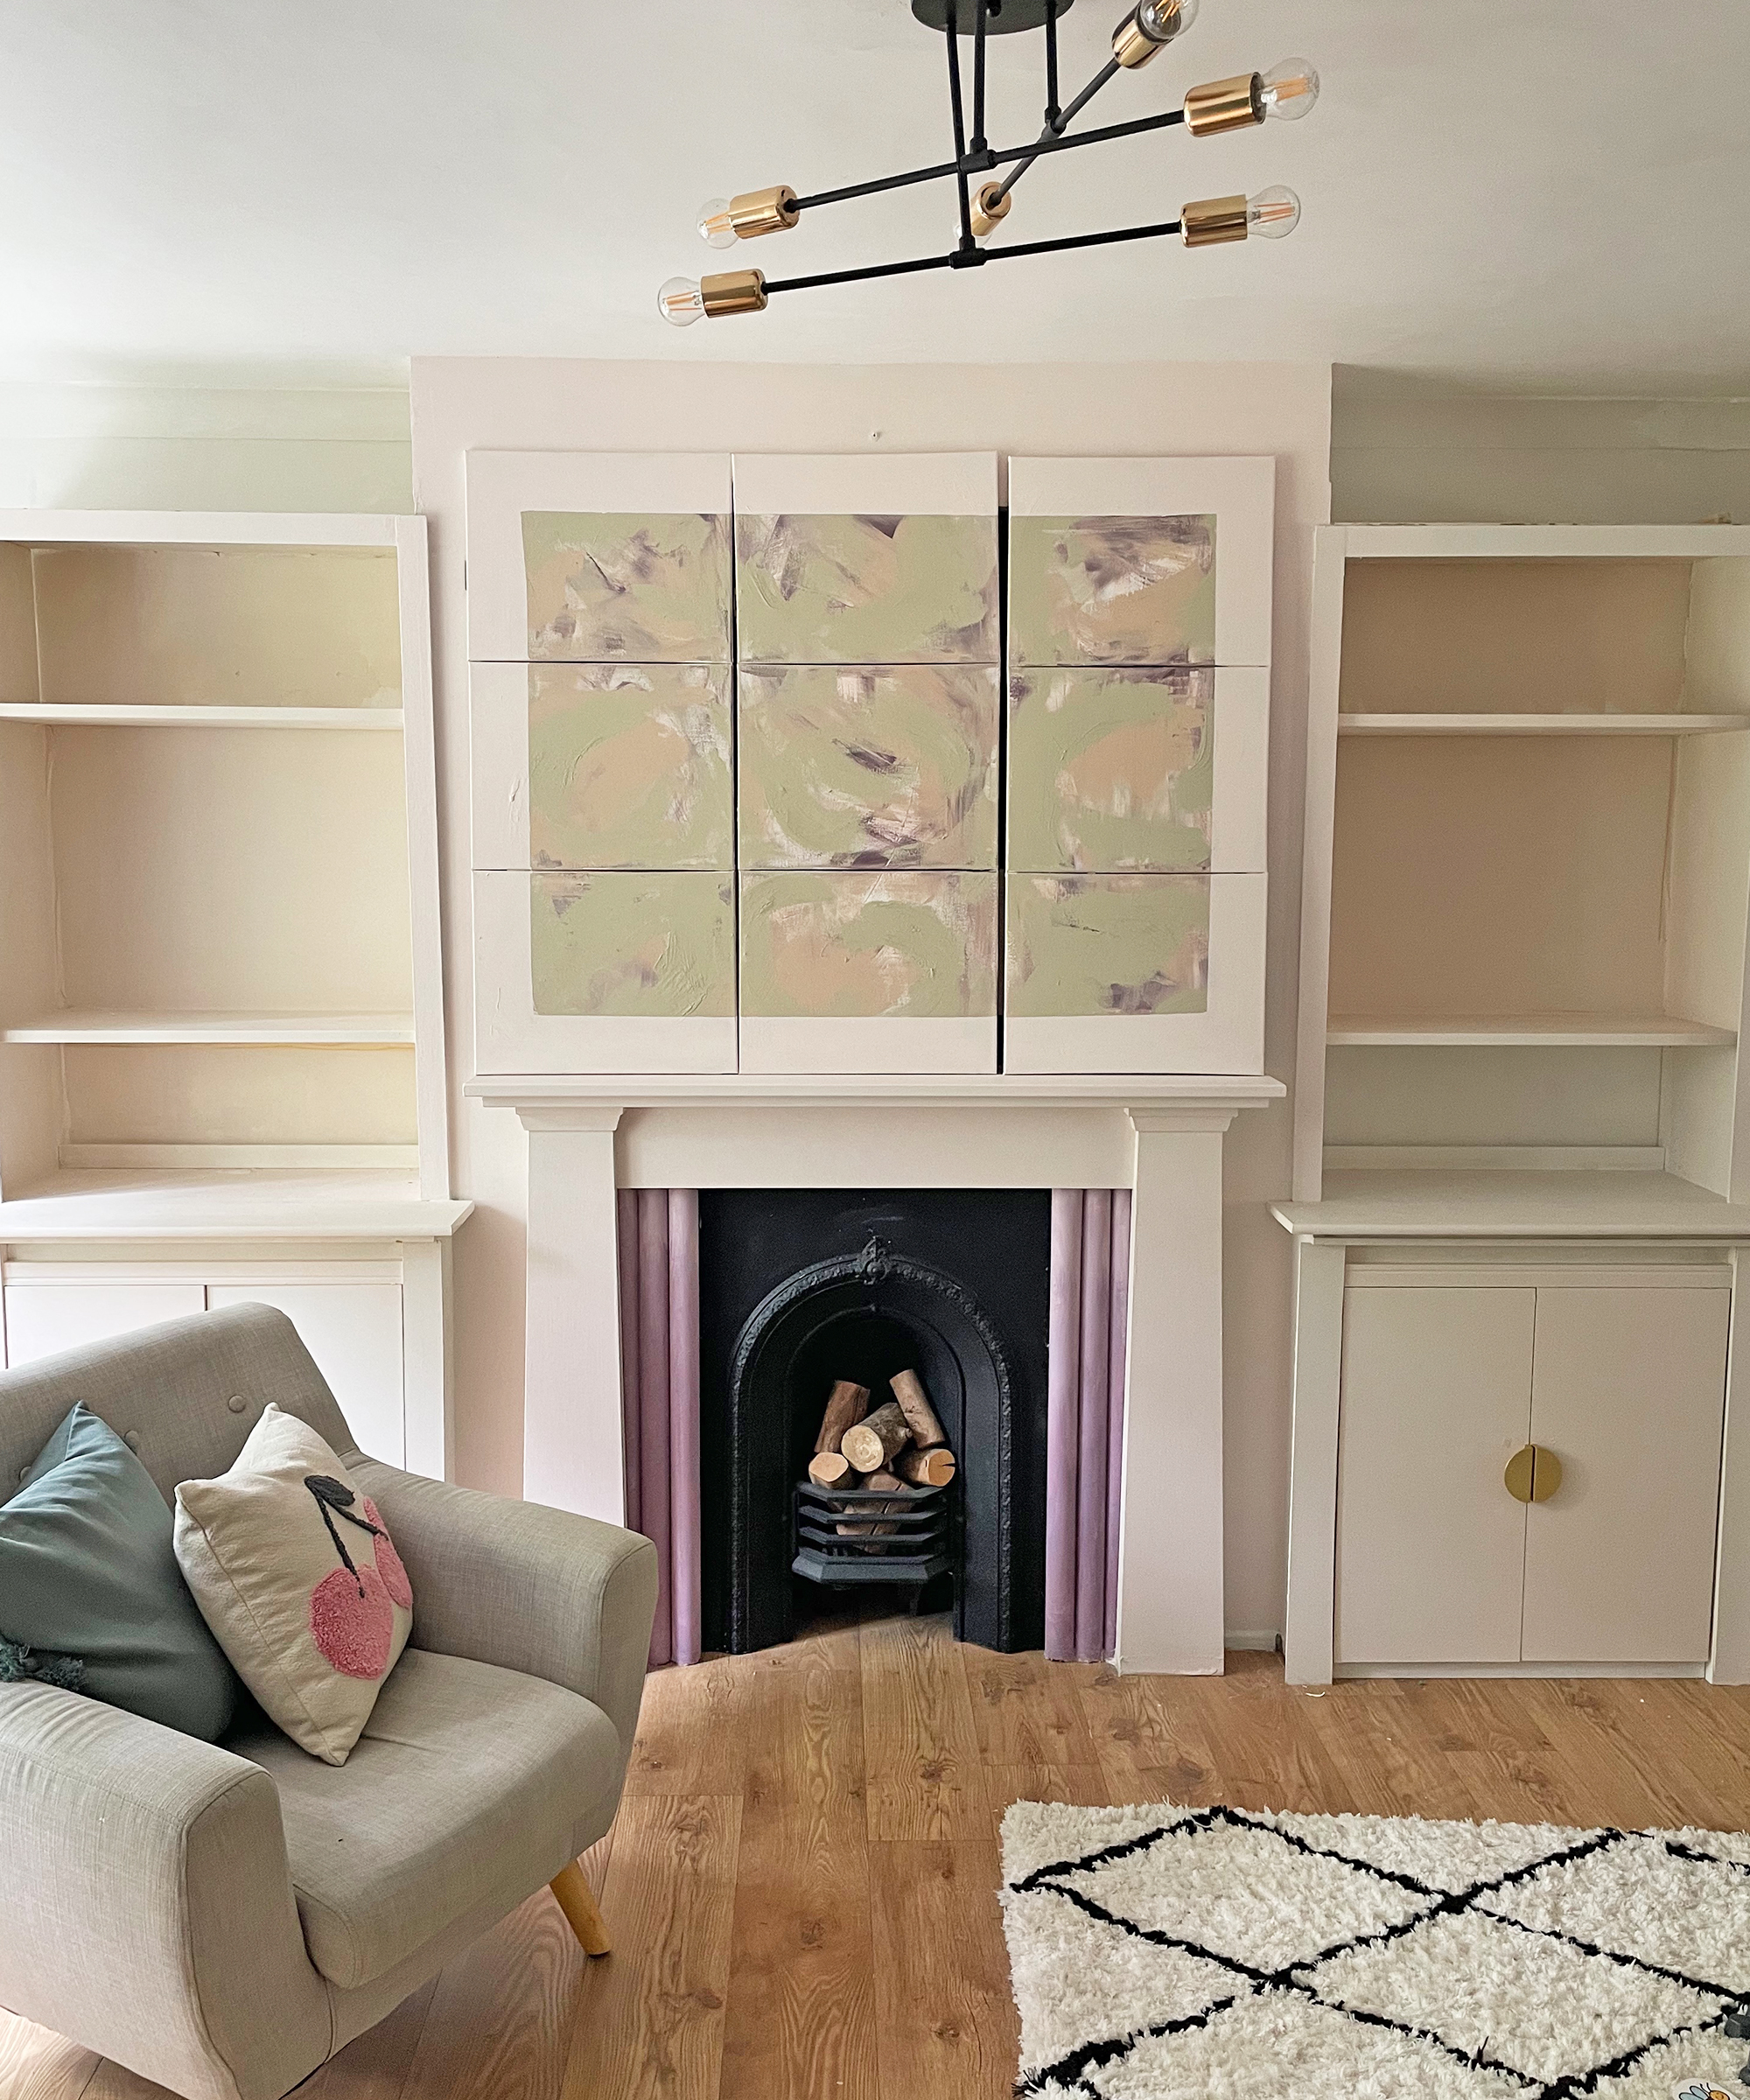
And there you have it... A hidden TV that remains easily accessible and a gorgeous new art installation for your room, all on a super low budget. Of course, hiding TV wires in the wall if they aren't already concealed will polish this off even more.
I'm happiest when I have either a drill or paintbrush in my hand! I specialise in room transformations on a budget and love experimenting with different styles and techniques which I share on my Instagram. I believe that your imagination, not your budget, should be the limiting factor when transforming a room and I love thinking of creative ways to build custom and bespoke-looking furniture using flatpacks or upcycle finds.
I also love writing and my home improvement blog (ClaireDouglasStyling.co.uk) is my passion project where I share creative ideas for interior styling and DIY tips and tutorials.