How to clean and polish plastic – remove scratches and stains from cloudy looking items
This quick guide to cleaning and polishing plastic will help you remove scratches and stains from grubby deck chairs, food containers and more with ease


Get small space home decor ideas, celeb inspiration, DIY tips and more, straight to your inbox!
You are now subscribed
Your newsletter sign-up was successful
Whether it's the plastic on your kids' playhouse, your best food storage containers, patio furniture or even on your lawn mower, this material is prone to scratching and dulling overtime. Thankfully, you can clean and polish plastic up pretty well with basic household products – many of which you'll find in your medicine cabinet...
We're taking toothpaste people, as well as baking soda and vinegar. We've also included a couple more vigorous methods like heat guns and sandpaper too for seriously effective results on larger items. So whether it's a cloudy pair of lenses or your favorite colored garden chair that you want to bring up nicely, keep reading to buff all your plastic items up to perfection once again.
How to clean plastic
To get an idea of the attention your plastic item(s) deserves, you'll want to start by cleaning it. Simply use warm water with a mild dish detergent. The, let it air dry. Next we'll go through how to remove and polish out pesky scratches, but if it's staining you're dealing with, jump to our section on how to remove stains from plastic.
How to remove scratches from plastic
To know which method to go for, you'll first need to determine how big the scratch is that you're dealing with. Once the area is clean, run your finger gently along the plastic surface. If your fingernail runs across the scratch with ease then a gentler method like toothpaste and baking soda should suffice.
If however, your fingernail catches, then you're dealing with a bigger scratch that will need a more heavy duty method like sanding paper or the heat gun. For the latter two methods, we'd advise wearing protective glasses and a mask for safety throughout.
- Cleaning up plastic is surprising similar to removing scratches from glass – get the lowdown.

Polishing plastic with toothpaste
Using toothpaste is really effective to remove small surface scratches from soft plastics on small household items like frames or storage boxes. You'll want to use a non-gel paste and if you can find one with baking soda in it, that's an added bonus. Simply apply a pea-sized amount to a microfibre cloth or cotton cloth and rub it into the clean scratched area using circular movements. Do this for a couple of minutes or until the scratch is no longer visible. Rinse, dry and this should be enough. If not, you can repeat.
Note: If you're cleaning glasses lenses, use the same method but with a gel toothpaste which is less abrasive.
Get small space home decor ideas, celeb inspiration, DIY tips and more, straight to your inbox!
Polishing plastic with baking soda
Similar to the above method, but you'll make the paste, of a similar consistency, using equal parts water and baking soda. Apply this to the scratched area using circular motions and a microfibre cloth as above. Rinse, and repeat if necessary.

- Find more baking soda cleaning tips in our guide.
Polishing plastic with sandpaper
Using wet sandpaper can help level out the uneven surface gradually. This is ideal for bigger scratches on larger surface areas like headlights or patio furniture. First, ensure the sandpaper is suitable for use when wet as you'll want to soak the sheet for about 10 minutes ahead of treating the area. Then, the trick is to start with a 220/320-grit, progressing to a finer grit which will give you the final finish
Sand lightly in circular motions, ensuring not to sand any of the surrounding area (mark this off with masking tape if needed) and remove residue with a cotton cloth as you go until the finish is smooth and the scratch no longer visible. You may need to build the grit up to as much as 800/1000, buffing continuously until you achieve your desired results.
- Cleaning up your best garden furniture? Find the latest picks.
Polishing plastic with a heat gun
If you've a dull or cloudy looking piece of plastic on a lawnmower or on part of your patio set, you can use a heat gun to smooth and bring shine to the surface once again. The trick with this is that you want to heat up the plastic, but not to the point where it melts and smokes (toxic). So, use your heat gun on its lowest setting, and move across the entire surface evenly. You don’t want to stay on one spot for too long. You'll quickly begin to see a smoother more polished looking surface.

How to remove stains from plastic
If it's yellow, a grass or another type of stain that is causing your plastic pieces of furniture, food containers and other items to look dull and well-used, try one of the following stain removal tips:
- Vinegar: Ideal to use on plastic food containers and the likes as it's natural. Simply mix one tablespoon of white vinegar per cup of water and soak your items for a couple of hours until the stain has lifted. Bigger item? Spray the solution on the stain directly and leave it time to soak in then wipe down.
- Rubbing alcohol: Or hand sanitizer also is useful to remove coffee or tomato stains. Simply apply a small amount to the stain and rub it in, then wash the area with warm water and dish detergent to fully lift the stain.
- Lemons: Simply rub the stain with half a lemon and let it dry out in the sun if possible. The combo will no only remove discoloration but it will santitize your items also.
- Find more ways to clean with vinegar around the home.
Preventative measures
- Cover plastic patio furniture: This will keep your items in better condition for years to come as covering playhouses, chairs etc. will stop the sun discoloring them, as well as any objects scratching the surface of them in bad weather. Better still? Keep items inside if you have a shed or garage available.
- Clean plastic regularly: It's important to remove dust and debris because a build up can lead to deeper scratches which take more time and extreme measures to remove.
- Avoid stains altogether: When it comes to plastic food containers and the like, avoid using these for tomato-based sauces as this is prone to staining. Use glass Tupperware instead.
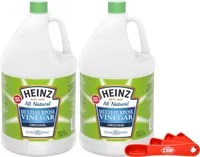
Shop Heinz All-Natural Distilled White Vinegar -1 Gallon Bottle (Pack of 2) with By The Cup Swivel Spoons
A must for natural cleaning around the kitchen and beyond.
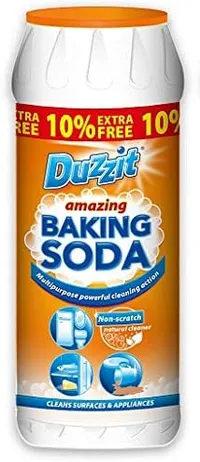
Duzzit Baking Soda 550g, Non Scratch Multipurpose Powerful Cleaning Action.
A hero product in the world of natural cleaning.
Now you have the most perfect looking plastic 👌

I'm Cam, the former deputy editor of Real Homes who worked on the site from 2020 to 2023. As a renter myself, sharing a home with two friends (and my cat) in London, I know all too well the challenges that this can pose when it comes to creating your perfect setup. As someone who has always loved everything interior design-related, I cannot rest until a home feels right and I am really passionate about helping others get there too, no matter what their living situation, style, or budget may be. It’s not always the easiest to figure out, but the journey is fun and the results are so worth it.
After interior design, travel, art, and photography are my next big passions. When I’m not writing or editing homes content, I’m usually tapping into other creative outlets, exploring galleries in London or further afield, taking photos, scribbling, or drawing!

