Sometimes, the best DIY ideas come from a bit of desperation. Example A: A pair of laminate purple IKEA wardrobes I'd had in my old home. When we moved to our new house, I briefly considered ditching them altogether. I still fancied the shape, but the laminate, purple exterior was tired. At the same time, my budget for new furniture was nill, since the repair and maintenance bills were piling up on our "new" home, a 1935, dreamhouse fixer. So, I turned my sights on a making over the mulberry wardrobes, instead of selling them on the second hand market.
But, what transformation method to use? Furniture paint? (snooze) Wallpaper? (too difficult given the lines of the wardrobe) Texture? Yes! Texture! I started with a deep, Google dive that ended with me selecting an attempt at a faux raffia technique. I didn’t find any pioneering tutorials, but gleaned ideas from faux grasscloth wall techniques.

I love all things wicker, rattan, caned and raffia anything. These materials lend fabulous texture and a relaxed resort feeling. They are fantastic additions to bedrooms, entries, and living spaces in a variety of design styles.
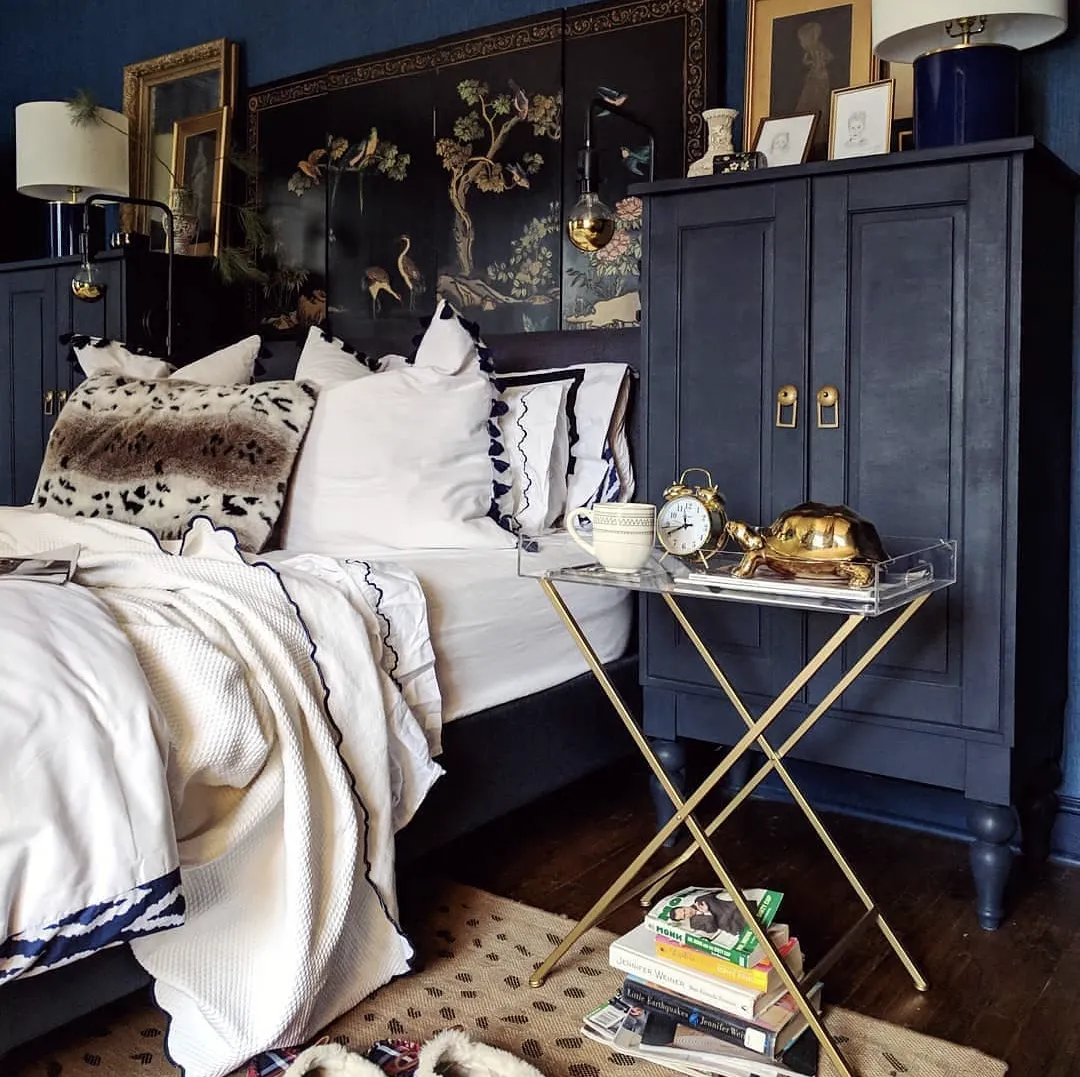
Article continues belowIn their '70s glory, raffia furniture pieces were even mixed in famed designer Billy Baldwin’s traditional interiors. And, an in-depth examination of vintage Karl Springer’s creations, supply plenty of raffia inspiration. In the last five years, there’s been a raffia furniture resurgence, with retailers like Serena & Lily, Ballard, McGee &Co. and Williams-Sonoma manufacturing freshly textured versions. I was particularly drawn to the modern, navy creations from Serena & Lily’s Blake line because I thought they would compliment our moody blue bedroom.

How to create a faux raffia effect on furniture
Creating this faux raffia texture requires little skill, but a healthy dose of patience is even more vital. Using the correct primer is also key, as is repeating the horizontal and virtual strokes that create the straight lines, bumps and nubs that mimic raffia.

Here's how I did it.
1. Lightly sand: It took me less than 30 minutes to scuff both wardrobes. Wipe dust from the surface.

2. Roll or brush on primer: This is the most important step. Use a primer specifically for slick surfaces like Ikea laminate (I used this primer from Amazon). Failing to properly prep Ikea furniture will result in a peeling mess and DIY tears.

3. Chalk paint the piece: Suppress everything you know about proper painting technique. You want to overwork the paint to create texture before it dries to the touch. Paint moving in opposite directions. I went with dark blue chalk paint, but anything in blue, creamy and even gray palettes would result in a traditional raffia look.

4. Create texture: Before the paint completely dries to the touch, use a brush to create a crosshatch or basketweave pattern. (I used a toothbrush because I wanted control in the smaller sections of my wardrobe and a nubbier texture. With straighter lined furniture, you could use a wallpaper smoothing brush or something similar.) Allow to dry. Repeat until you have the desired level of texture. This usually takes two to three coats.

5. Seal with finishing wax: Use a lint free cloth, like microfiber, to apply the wax. And follow the directions on the label. (I used this finishing wax, also available on Amazon).
6. Hardware swap: To finish the fresh look I swapped the cottage knobs for these chinoiserie-inspired brass pulls.

That's it! The end result was beautiful, and it's a piece I get complements on over and over again.
About the author
Ruthie Jackson is an Iowa-based DIY-er, blogger, and renovator who loves creating a high-end look on a budget. She's currently remodeling her family's 1930s colonial in Des Moines.