26 DIY headboards you can make in just a weekend
These quick and easy DIY headboard ideas will refresh your bedroom in just a few hours
What are you up to this weekend? How about making a DIY headboard? Why? It's likely that your bed is the focal point of your bedroom, so apart from a never-ending pile of pillows, some funky bedding, and a couple of throws, what else can you do to jazz it up? Hello, DIY headboard ideas.
The humble headboard can completely transform your room, should you choose to make it a bit of a statement. So if you are decorating your sleep space on a budget or just want to create something that's unique to your space, we've rounded up some super quick and easy do-it-yourself ideas to help you get the look you want without spending a ton of money. You can be sure these inspiring projects will complement your scheme and compete against the best beds in the world.
Some double up as feature walls and others will stop your sleepy head from getting too cold by a wall. Ultimately, they were originally used to stop you from bashing your head against the wall, acting as a barrier or shield between you and the wall.
DIY headboards
'A headboard is an easy and luxurious addition to a bedroom and if a statement design is chosen, it can achieve the same effect as art without using artwork,' says Martin Waller, founder of Andrew Martin.
‘Headboards are an inexpensive way of transforming a bedroom. They act as a focal point without the difficulty of choosing artwork.’
1. Rust-oleum's perforated metal DIY headboard
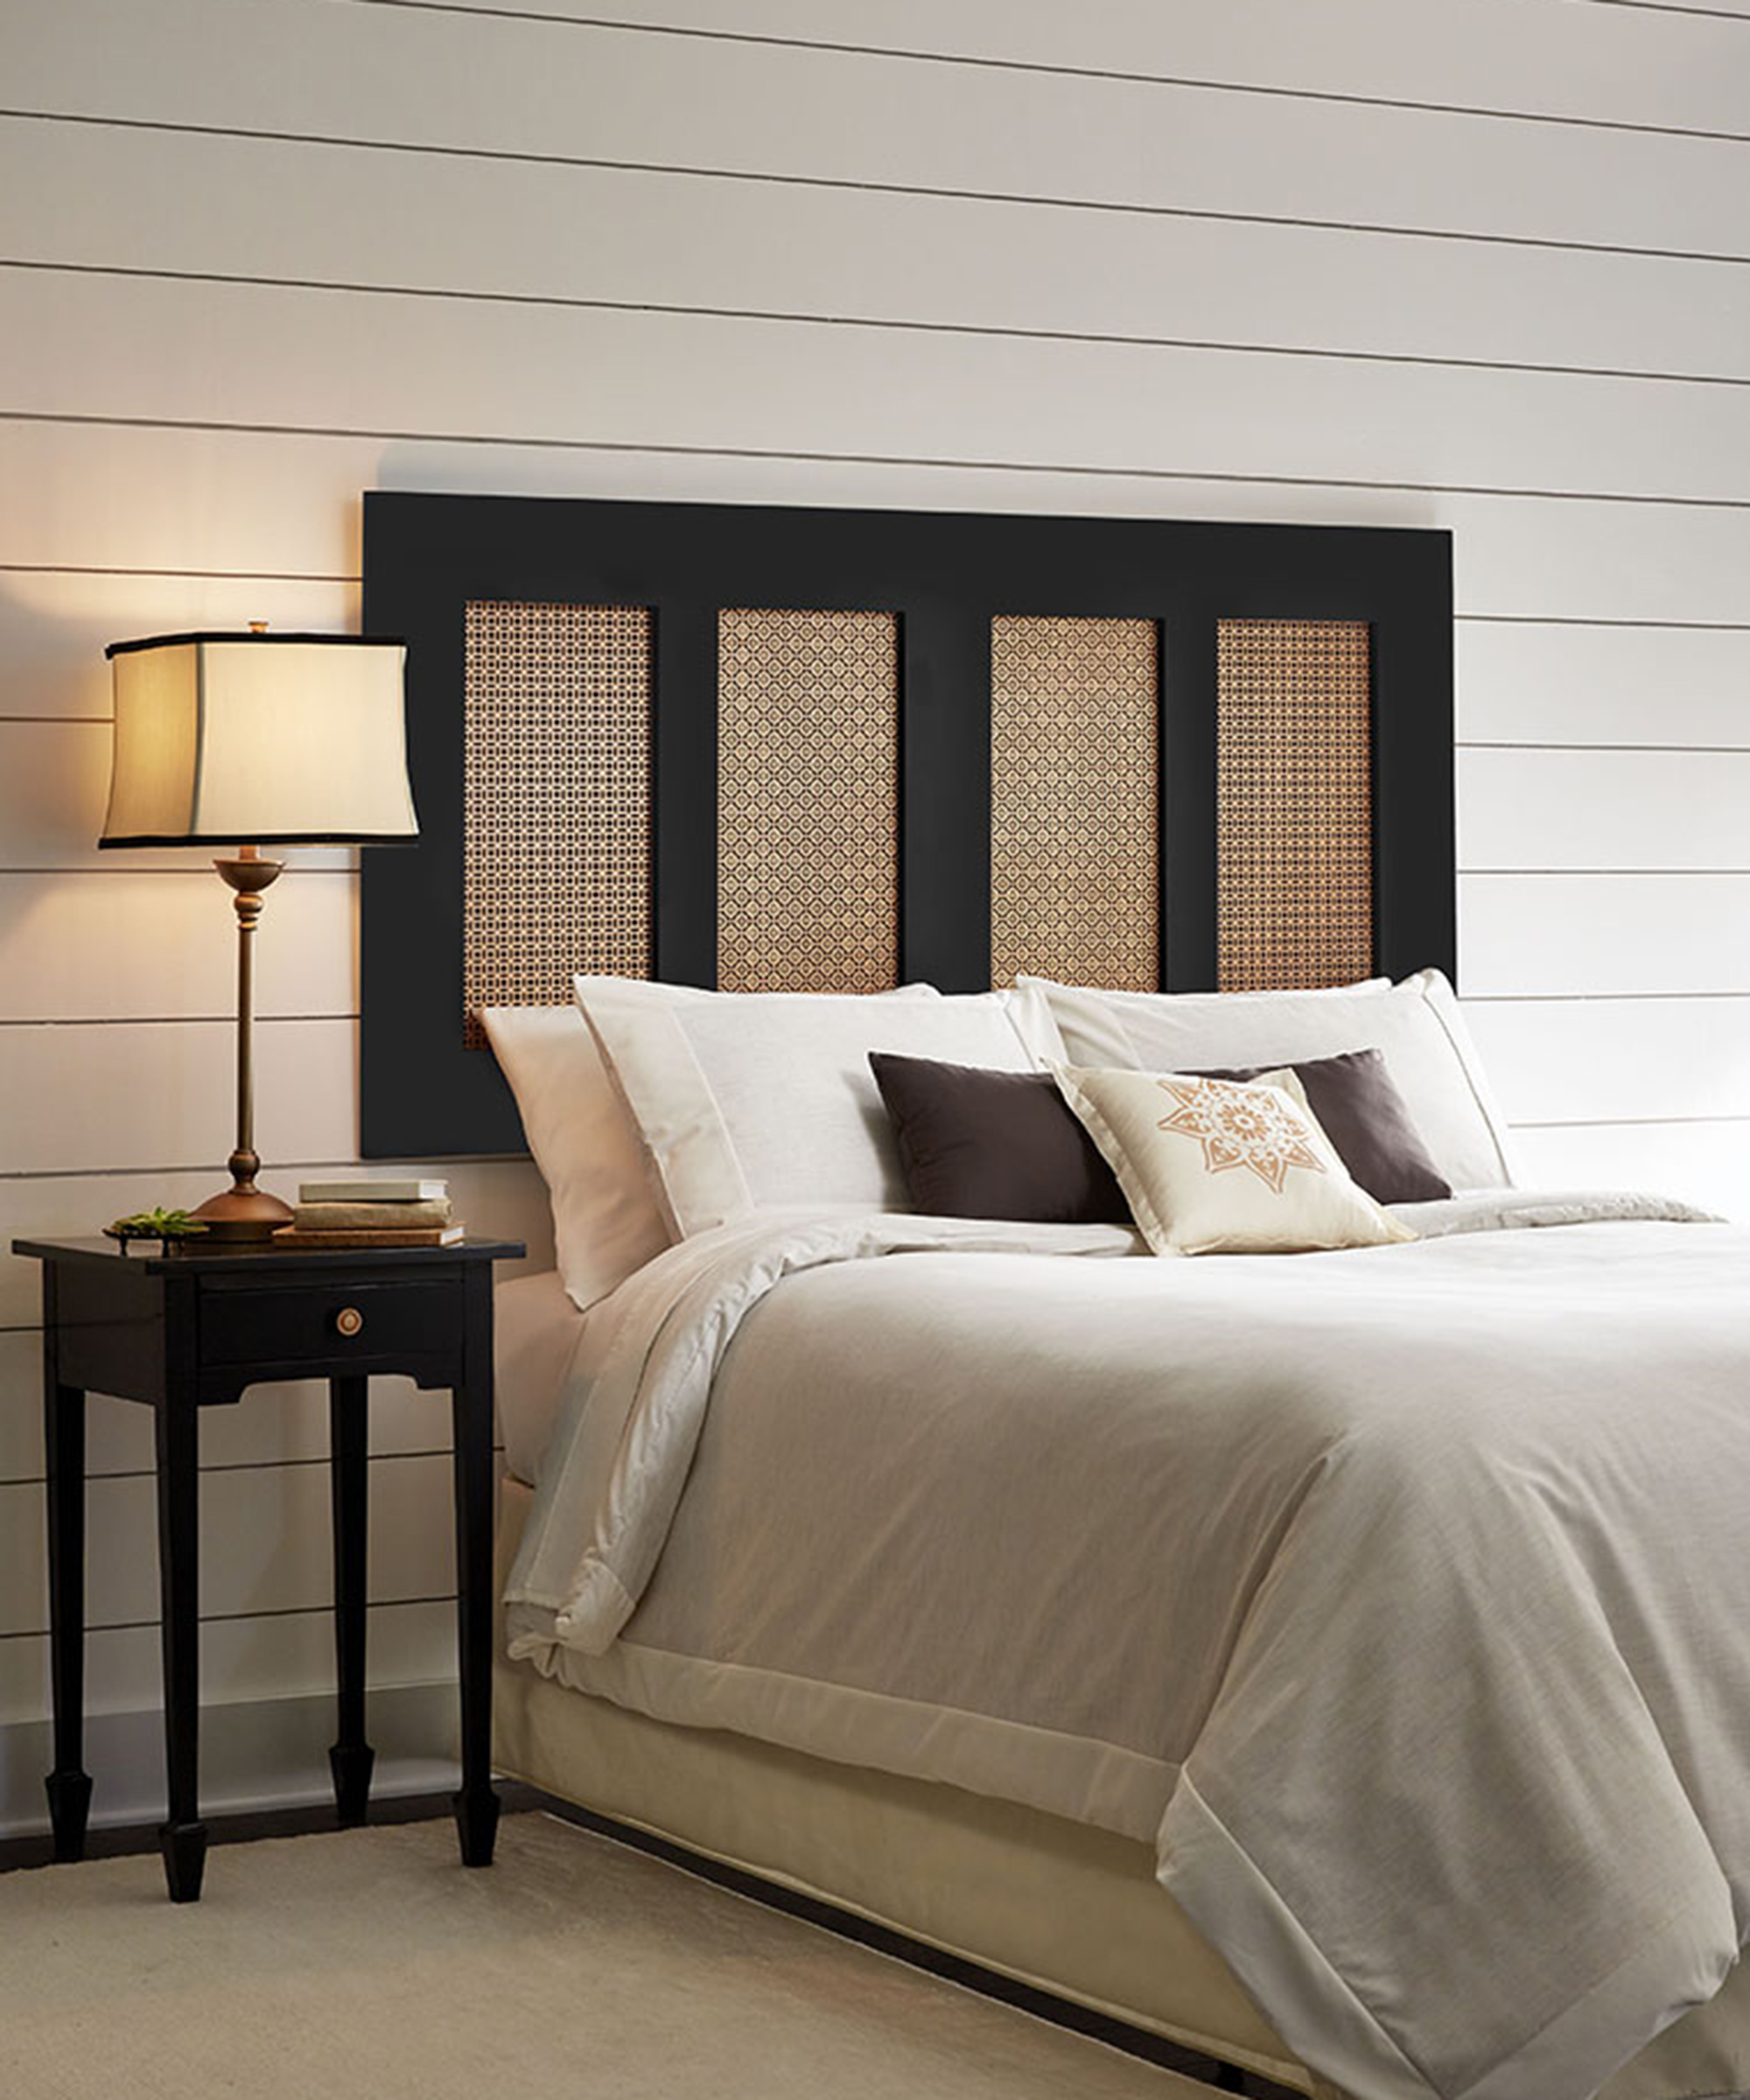
Elevate your bedroom decor in around two hours with this unique DIY headboard idea from Rust-Oleum. With perforated metal panels, add style and sophistication to your intimate space in less than half a day.
Amazingly, you'll only need a few basic pieces from the hardware store and Rust-Oleum spray paint to create a one-of-a-kind headboard that can fit on the wall behind any bed. We're sure you'll agree that it looks far more expensive than it actually costs to create.
Get small space home decor ideas, celeb inspiration, DIY tips and more, straight to your inbox!
Though completely optional, the shiplap wall decor adds extra depth and dimension too.
You will need:
- Rust-Oleum universal bonding primer: grab a can from Amazon
- Rust-Oleum metallic spray paint: go for gold, or choose another from Amazon
- Rust-Oleum protective Enamel Spray Paint
- Precut and primed wood trim
- Perforated metal pieces
- Luan backboard
- Hammer: get quick and easy delivery without marching to the shops at Amazon
- Nails: 'nail' the job with with different sizes in one handy pack
- Hook and eyes
- Hanging wire
How to:
- Shake the primer can for one minute after the mixing ball rattles. Spray the primer on one side of the luan backboard in slow, back-and-forth motions, overlapping each stroke for best coverage.
- Let primer dry for approximately 30 minutes and spray on the Gloss Deep Slate in the same fashion. Let dry for approximately 30 minutes.
- Spray the already primed wood pieces with the Gloss Deep Slate and let dry for approximately 30 minutes.
- Spray the metal pieces with the Metallic Copper Rose spray paint in steady motions to cover the entire piece. Let all pieces dry for approximately 1 hour.
- Once all pieces are dry to the touch (not tacky), layout your pieces on the luan and measure equal spacing.
- Attach wood trim pieces to the luan with a hammer and nail, making sure to connect the perforated metal in between.
- Attach hook and eye hardware to each side of the back of the luan and string hanging wire between them.
- Hang your beautiful masterpiece above your bed and enjoy!
2. Kristy and Paul's color-blocked headboard wall
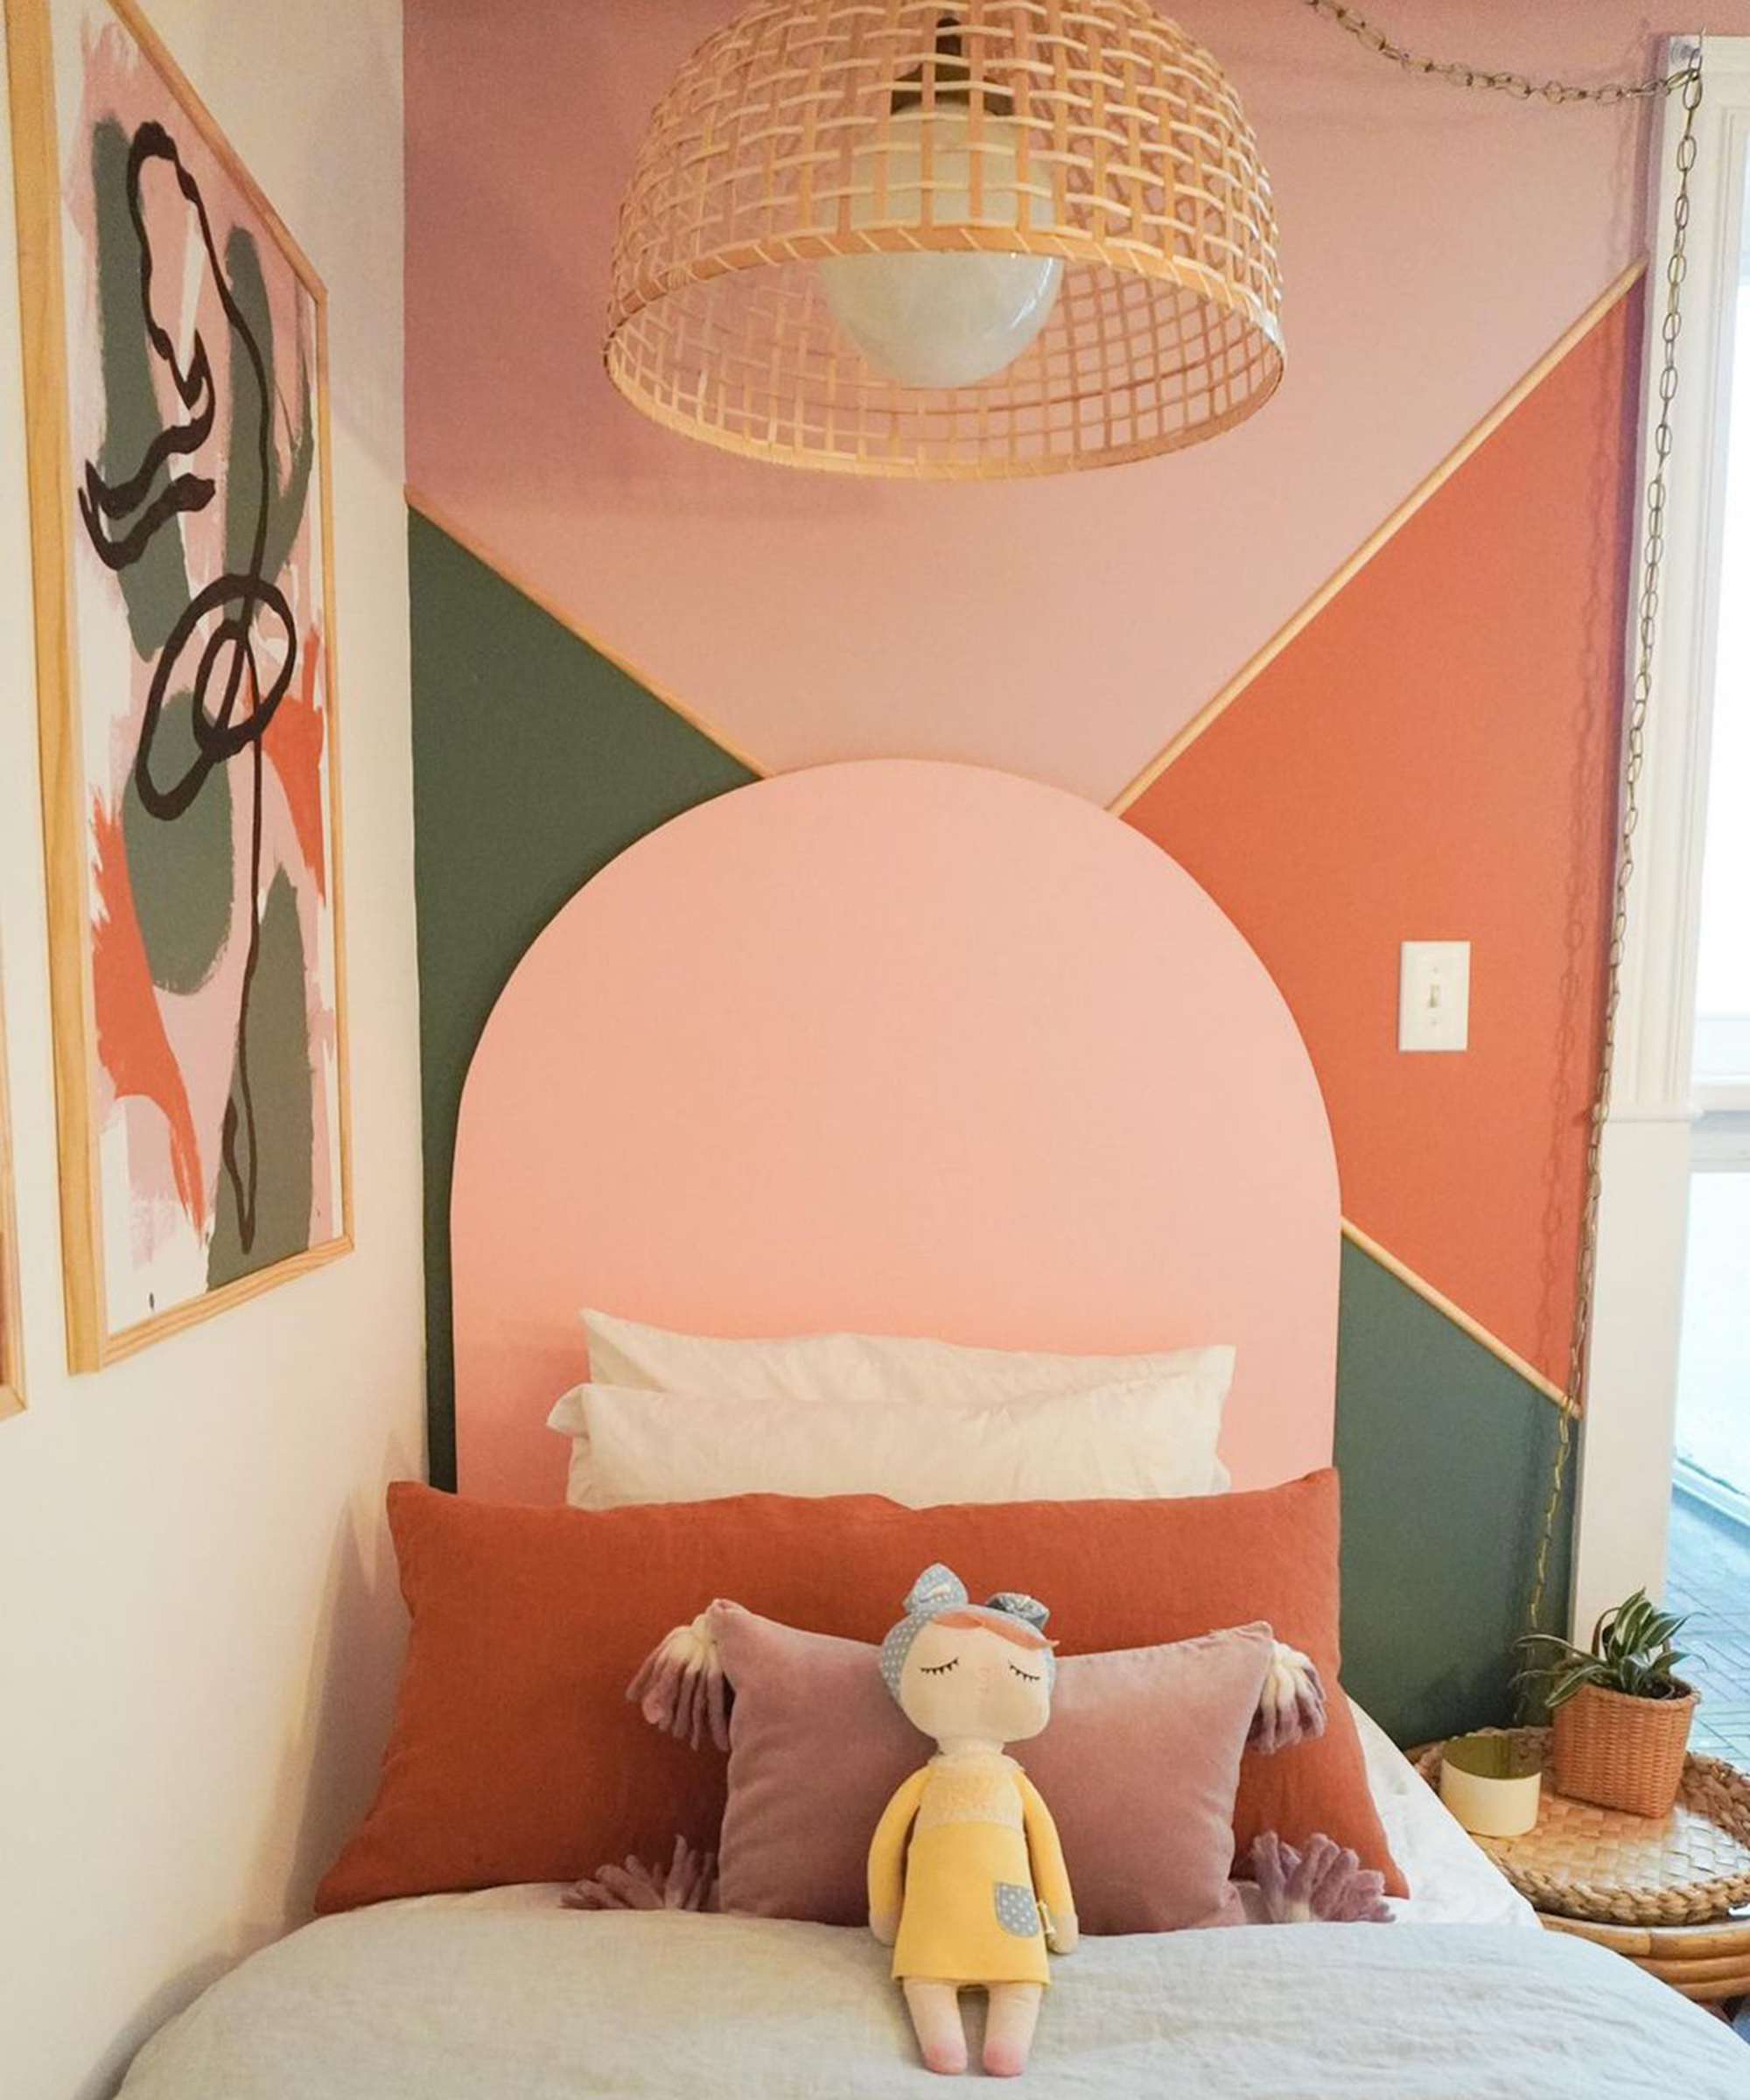
'The power of paint and free wood accents is perfect for a budget DIY,' says Kristy Benson, mom, DIYer, and half of @bensondwelling.
'We exposed the old beams and painted them pink. We found free pallet wood for the wall and did a herringbone pattern and painted it the same color as the ceiling. We used a small amount of wallpaper for an extra feature but cut down the cost. Diy’d the paintings using leftover paint and scrap drywall. And lastly, we put a piece of 1/2 round trim on the wall to separate our colors and give dimension. Big transformation on a small budget.'
Watch the superparent duo in action on Instagram.
You will need:
- 4x8’ sheet of sanded plywood
- 2x8’ sheet of caning material
- 3/4 round and 1/2 round flex trim
- Paint color of choice for flex trim
- Jigsaw or router: this Black and Decker jigsaw from Amazon is a steal under $30
- Tape measure
- Pencil
- Pin nailer
- Staple gun: another budget option on Amazon from beyond by Black and Decker
- Scissors
How to:
- Start by measuring out your headboard size, (Kristy went with queen) Draw out the arch with pencil on plywood and cut with either a jigsaw or a router for a smoother finish.
- Once the outside arch is cut, cut the inside half arches out of the middle using a jigsaw or router. Measure to have 1” of plywood down the middle and 2” of plywood around the edges.
- Soak your caning in a warm bath for at least an hour before using. Once it’s soft, pull it out, cut down the middle place the the the caning onto the back of the headboard. Cut the cane fabric so that you do one half at a time.
- Using a staple gun, staple the fabric to the back of the the wood all the way around pulling it gently taught as you go.
- Repeat the same step for the other half.
- Next, paint the flex trim your desired color with 2-3 coats.
- Once dry, use a pin-nailer to secure the flex trim all the way around the edges of your headboard so that none of the plywood edges show.
3. Lynzie Kent's vintage tapestry takeover
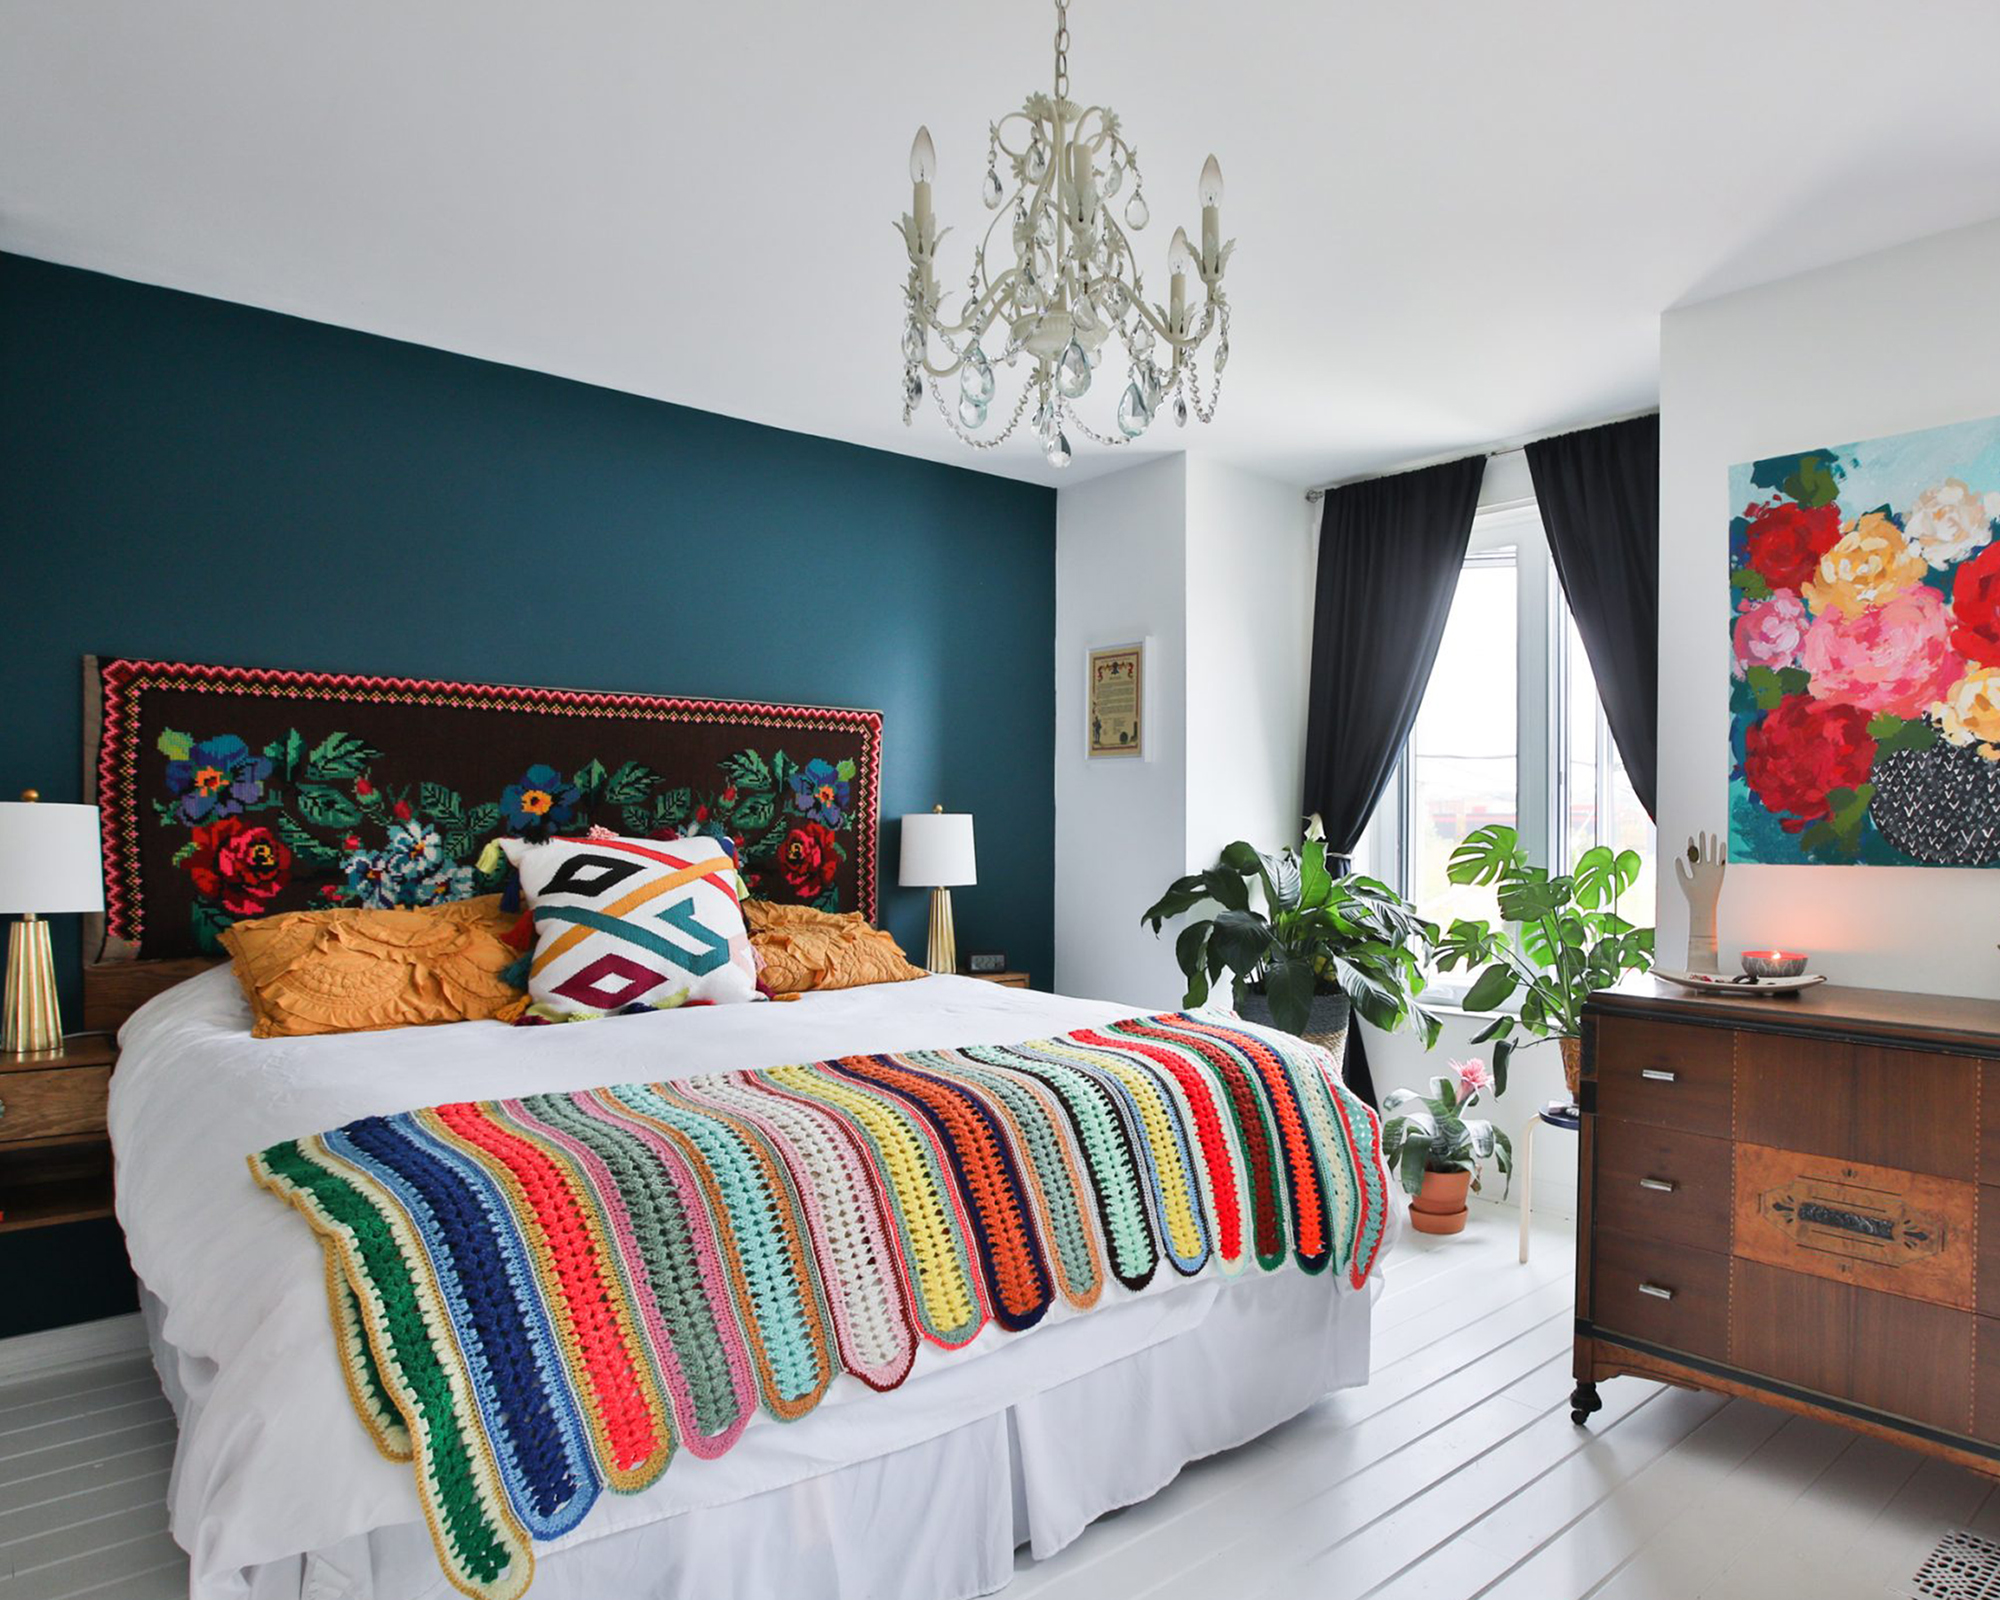
'Our DIY headboard project is complete!' says Lynzie Kent aka lovebylynzie.
'We made a new upholstered beauty using a vintage tapestry! And we gave the bedroom a fresh look with a deep teal wall!'
You will need:
- Measuring tape
- Plywood cut to your desired shape/size (Lynzie suggests Aspen plywood)
- A wood stain of your choosing
- Wood sealant: get 1.2 gallons of Thompson's Water seal delivered from Amazon
- Foam padding
- Hot glue
- Yarn or completed embroidery project: this multi-color pack from Amazon is perfect!
- Tapestry needles: this colored pack from Amazon is 'sew' cool
- Staple gun
How to:
- Measure the width of your bed to determine the size of wood base you'll need for your headboard. Purchase a piece of plywood and have it cut to your desired size/shape. We used Aspen plywood as its smooth and once stained have a lovely grain.
- Stain and seal your plywood wood. You'll need the bottom portion of the headboard to remain exposed in order to affix it to the wall, the way we did. Otherwise, you can skip this step if you plan to hang your headboard another way.
- Purchase foam to give your headboard padding. We used foam that was about 1.5 inches thick. We cut it to the shape and size of our headboard and using a generous amount of hot glue, adhered it to the plywood.
- Upholster! Our tapestry was a half-finished embroidery project that I snagged at a local vintage store. It was gorgeous and the perfect shape for a headboard. Lay your fabric or tapestry on the ground and place your plywood board with the padding attached on top of the fabric face down. Pull the edges of the fabric taut around the plywood across the top and begin affixing it to the plywood base using a staple gun. It's important to pull the fabric very taut so you get a smooth even finish across the front, however be cognizant not to pull it too tight as it can make the pattern appear skewed or not centered.
- Hang!
4. Jessica's bamboo DIY headboard
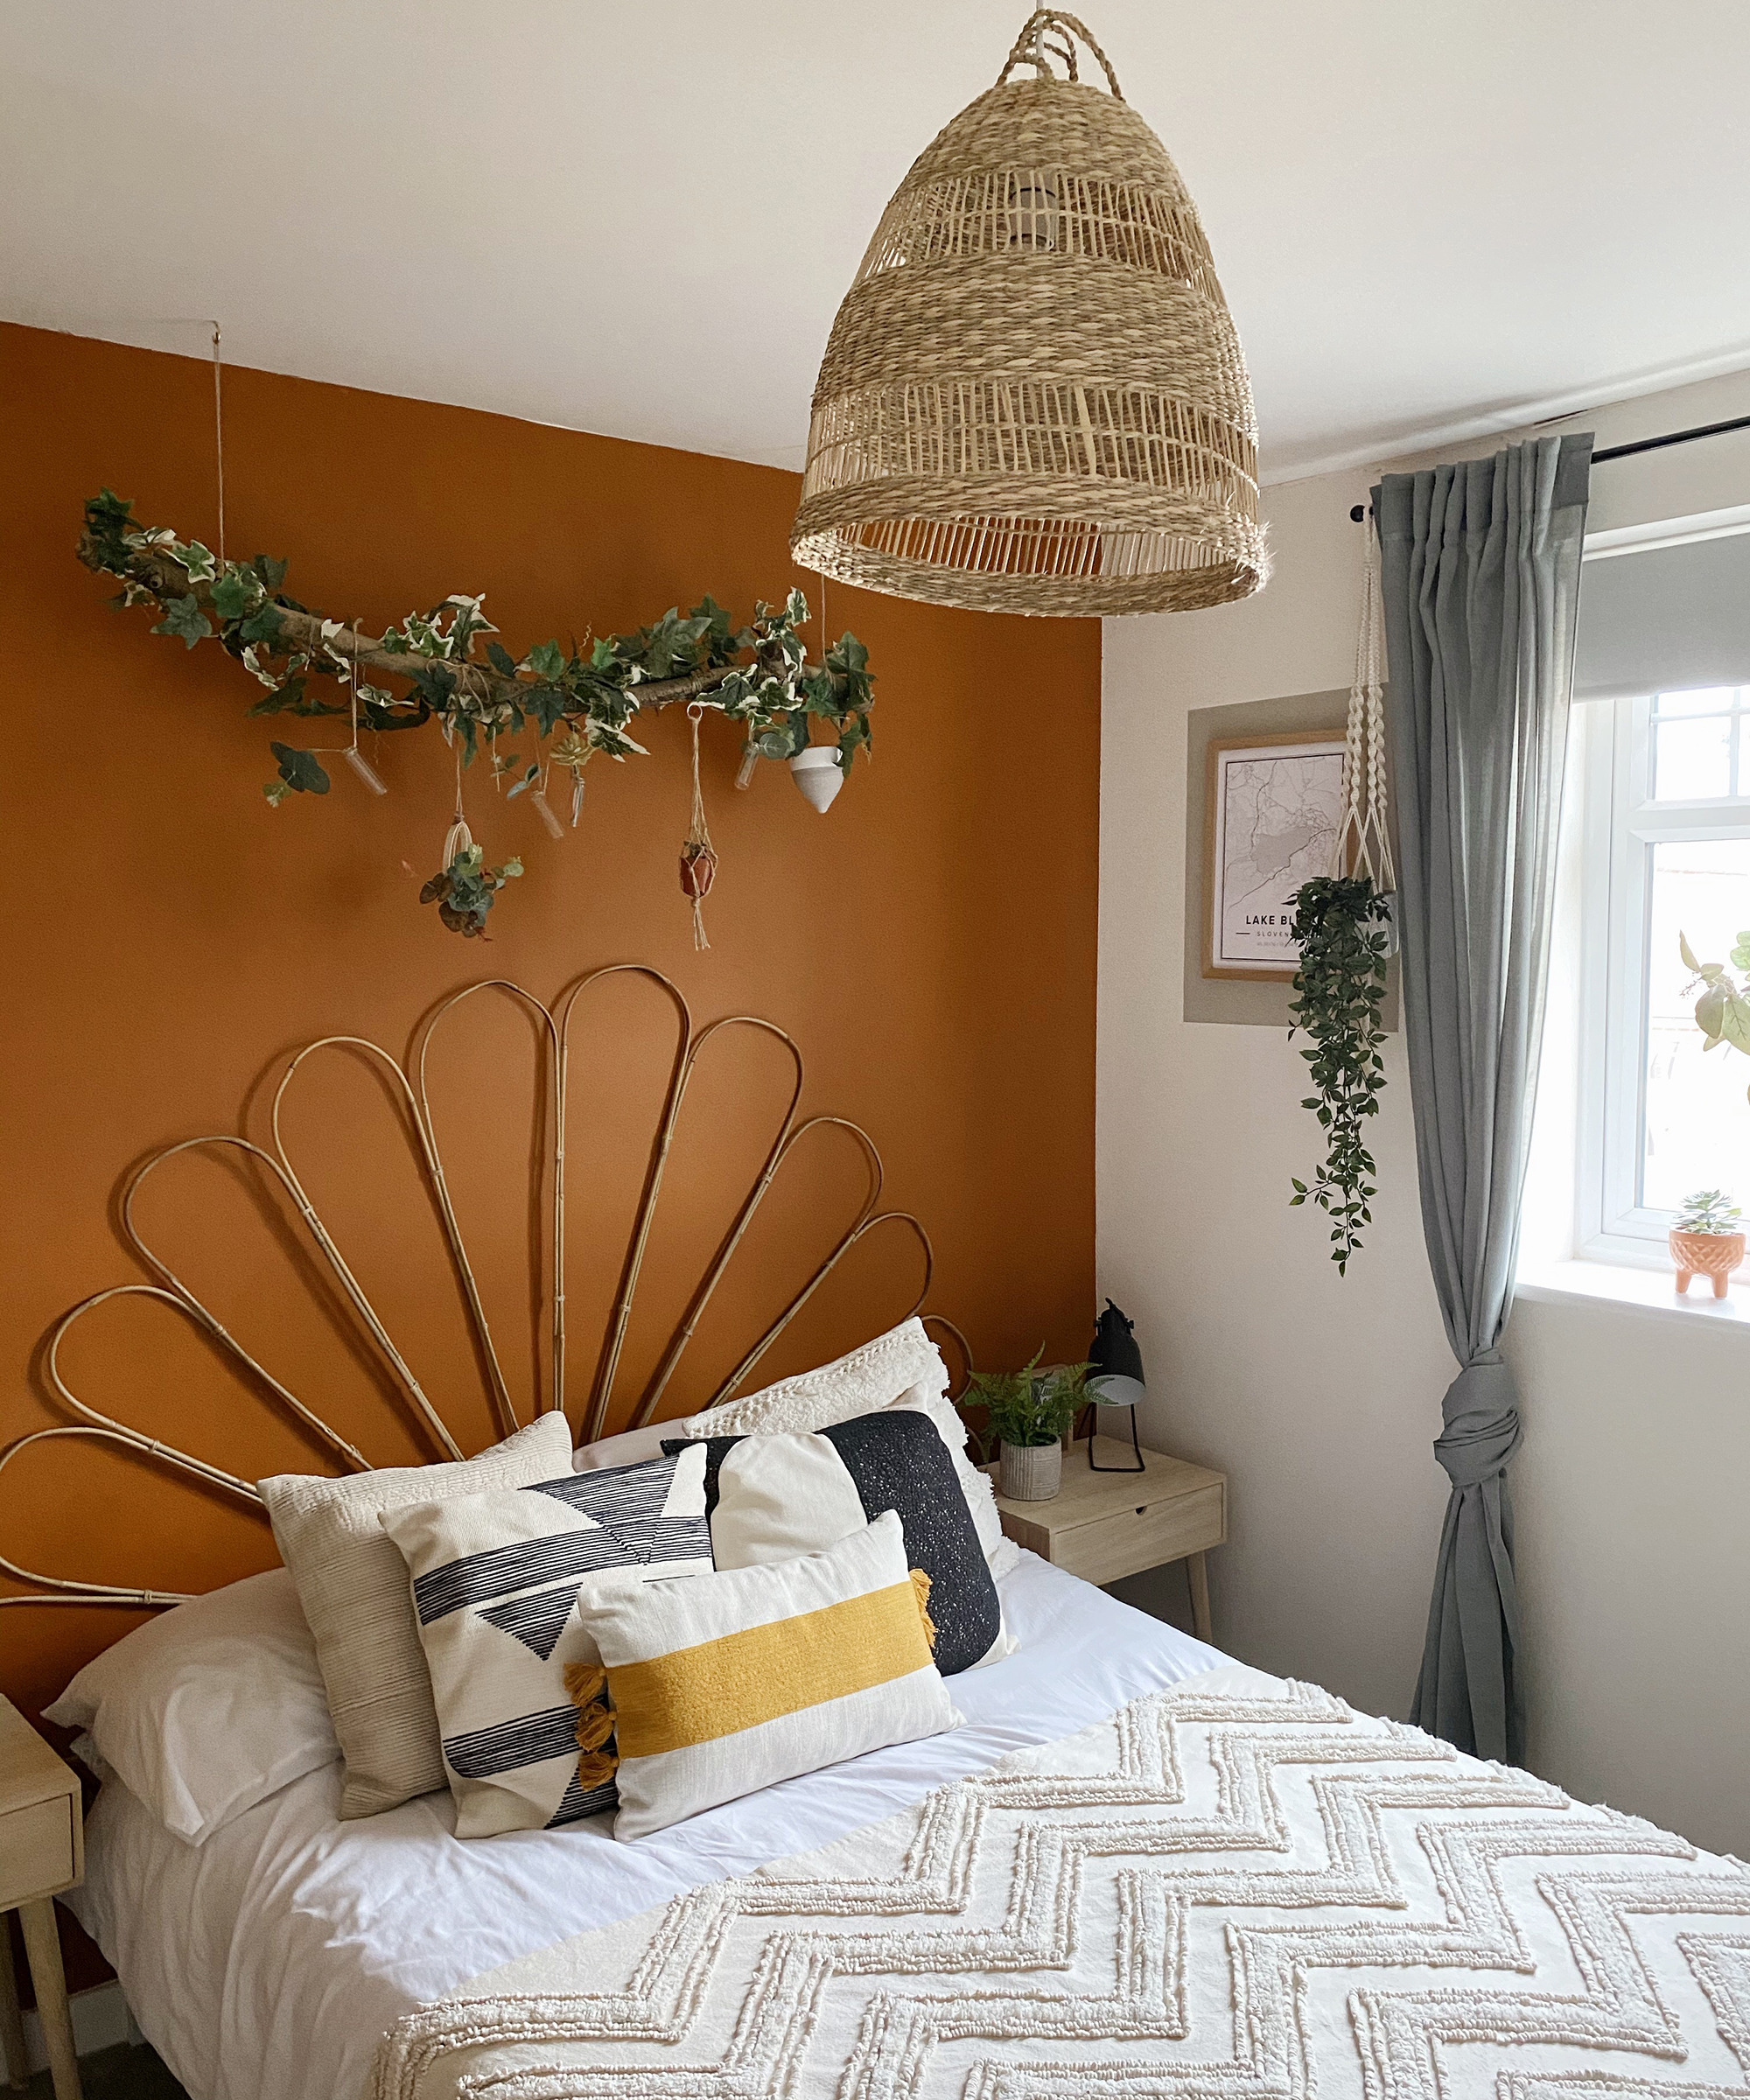
You will need:
- 11 pieces of medium-sized curved bamboo
- Cable ties: secure your projects with this 200pc pack from Amazon
- Wicker placemat: use the rest of this set to style your dining table
- Embroidery hoop: this budget option gets over 450 4.5 star reviews on Amazon
- Jute twine: With over 23,000 4.5 star reviews on Amazon, tie your search up quickly
- Strong tape / electrical tape: a savvy option from Amazon that'll keep things secure
- Gorilla Glue: no sticky decisions here – add it to your Amazon basket
- Side/diagonal cutters: cut your shopping search with these Amazon bestsellers
How to:
- Lay out all pieces of bamboo side by side into a fanned shaped and tie together using jute twine at the top and bottom.
- Cut all jute string excess off.
- Place embroidery hoop at the base of the bamboo frame and secure each piece of wood to the hoop using cable ties and strong electrical tape around the hoop to ensure it is secured.
- Place the placemat on top of the hoop where you have secured the frame, secure this in place using cable ties and Gorilla Glue if needed.
5. Holly's rainbow wall transformation
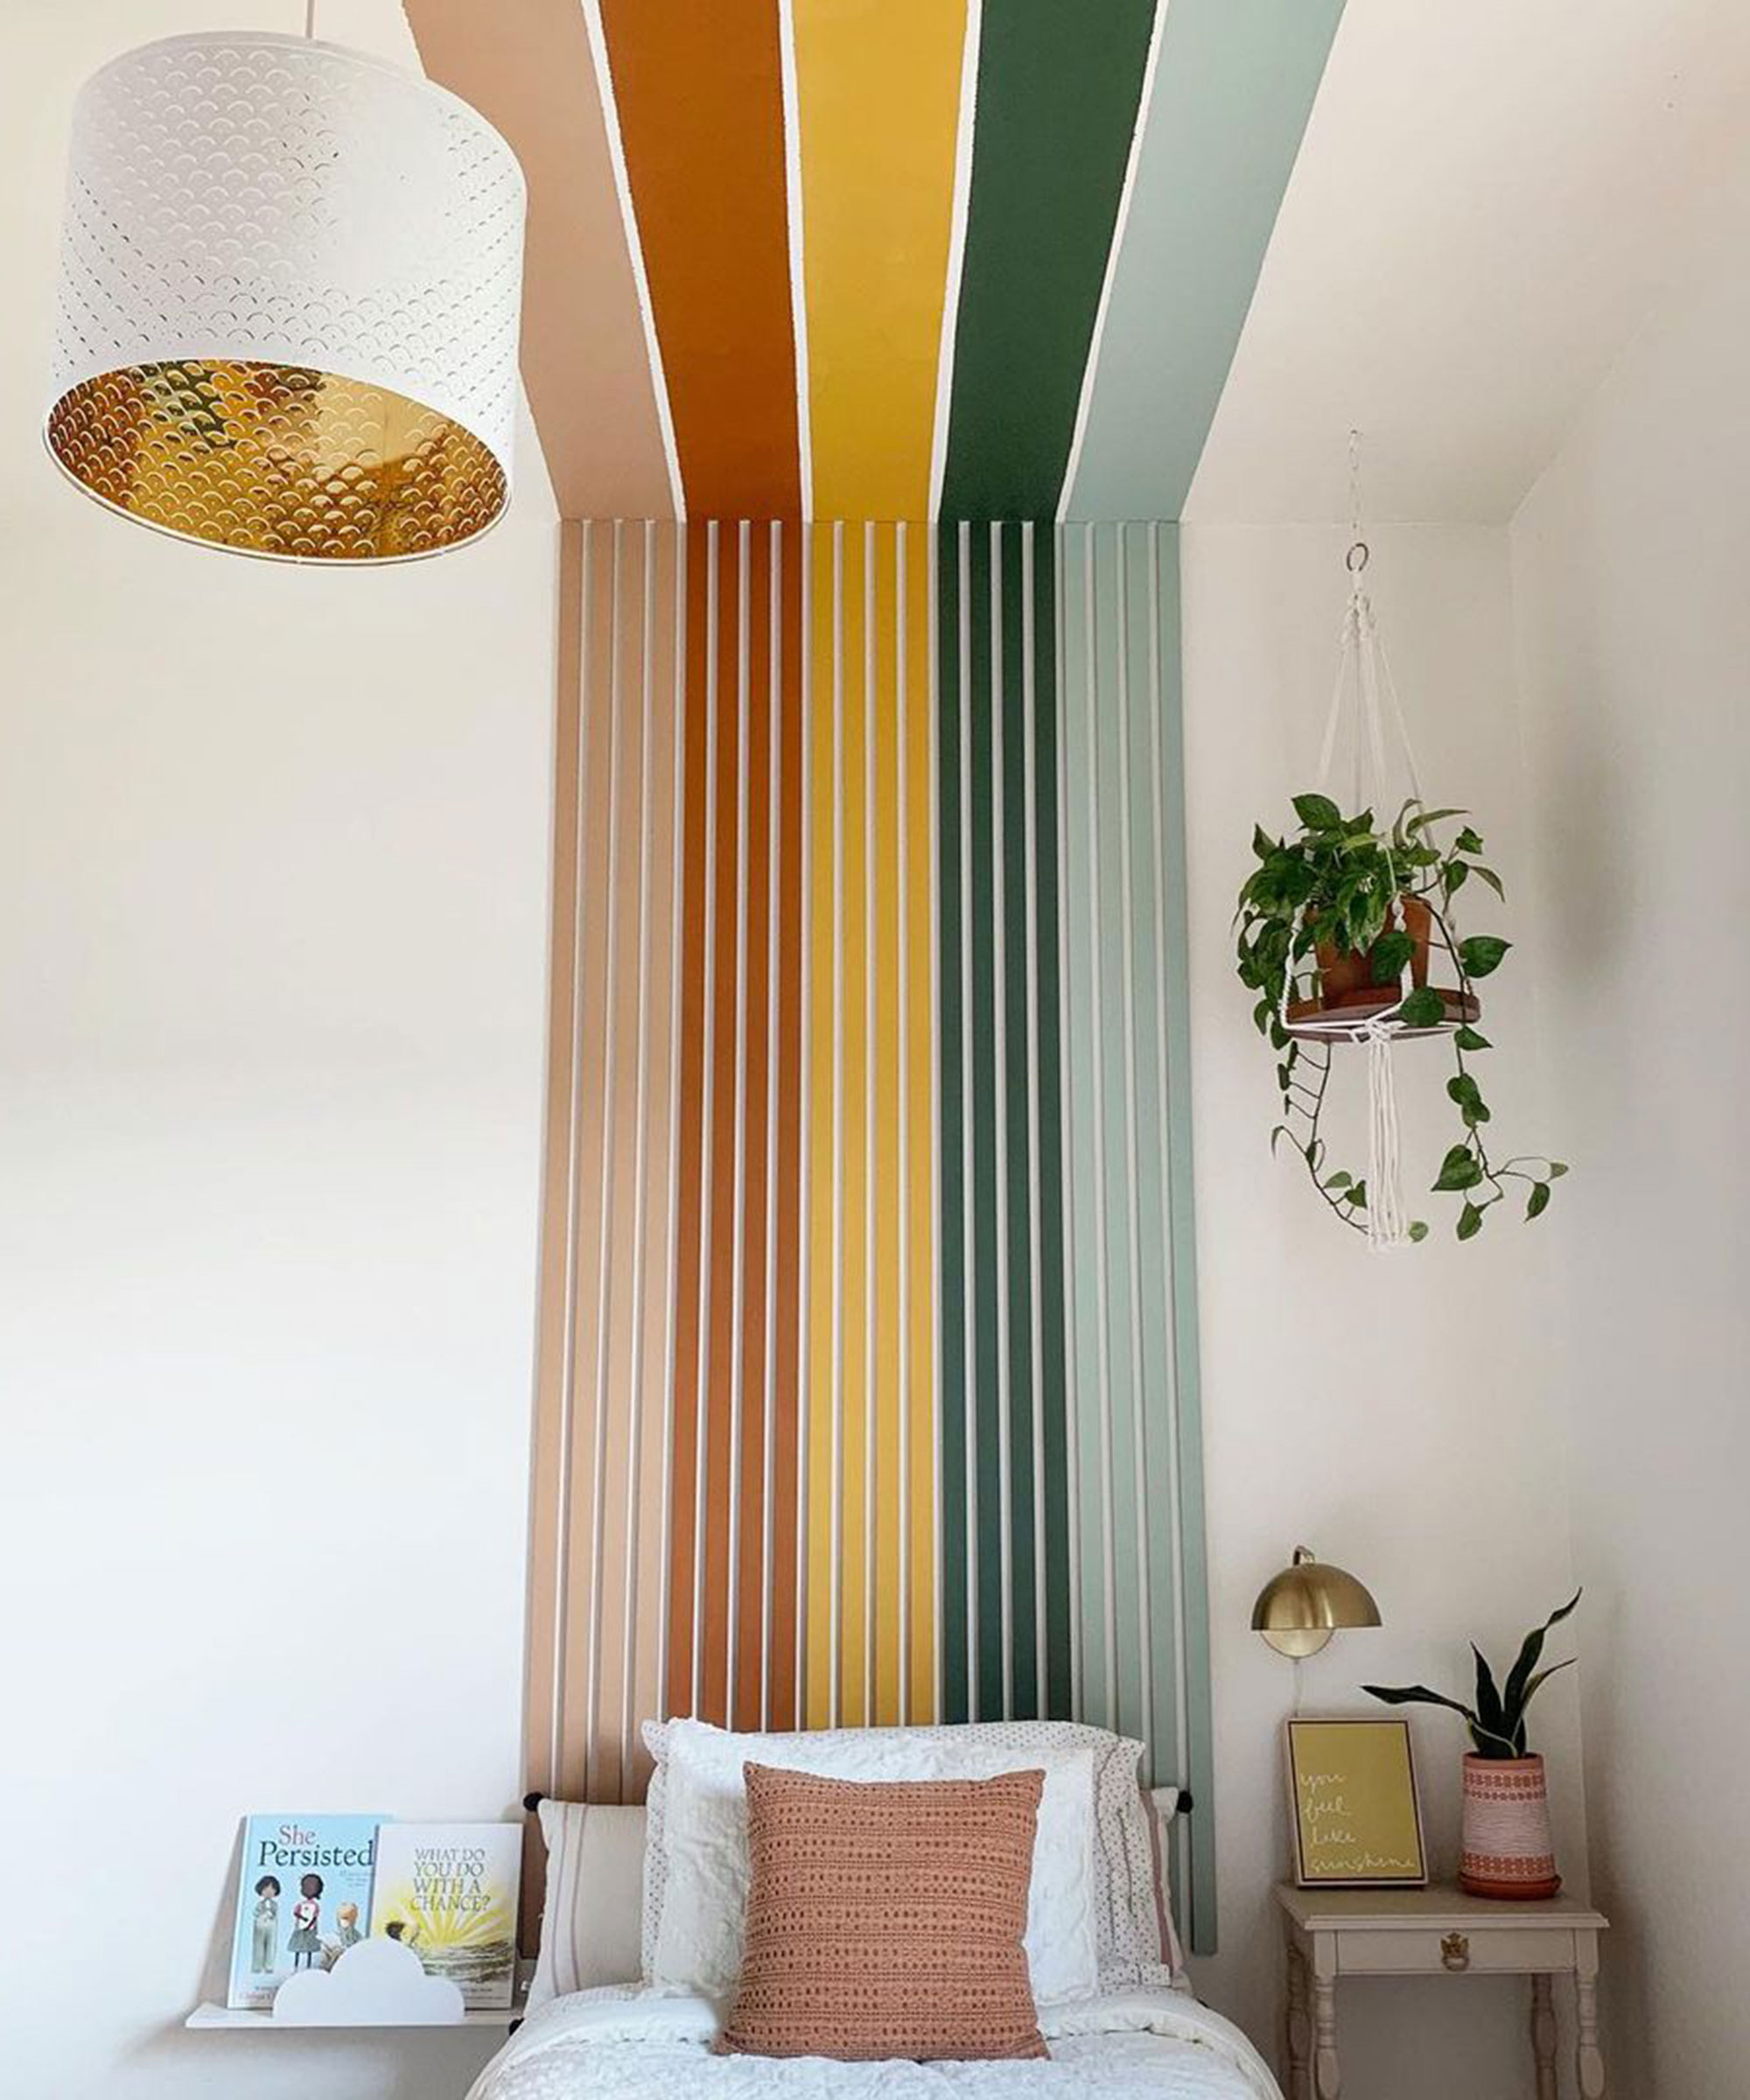
You will need:
- 20 1x2 wooden slats (Pine/MDF)
- 8oz Canyon dusk (S210-4) by Behr Paints: a cozy terracotta available at Home Depot
- 8oz Maple glaze PPU3-16 by Behr Paints: get this gorg rust hue at Home Depot
- Saffron strand PPU6-02 by Behr Paints: find this spicy yellow at Home Depot
- Royal Orchard PPU11-01 by Behr Paints: forest green vibes found at Home Depot
- Jojoba N330-90 by Behr Paints: the softest of sage greens, available at Home Depot
- Nail gun: Holly used the DEWALT Finish Nailer Kit, and we've found it on Amazon
- Level: level up with this tool from Amazon to ensure professional-looking results
How to:
- Paint slats your desired colors.
- Hold up your first slat and use a level to be sure it is vertically straight. Use a nail gun to nail the board into the wall in several places, top to bottom. Tip: since not all of the vertical slats will be on a wall stud, make your nails go in slightly diagonal, alternating ways each nail. This helps support into drywall.
- To evenly space the slats, hold some sort of spacer up against the first slat before you place your next slat. You can use a 1x2 on its side or a shim or any thin scrap piece of wood you may have. Nail in the next slat and repeat!
- Continue each rainbow color with just paint on the ceiling.
6. Luke Arthur Wells' boucle DIY headboard
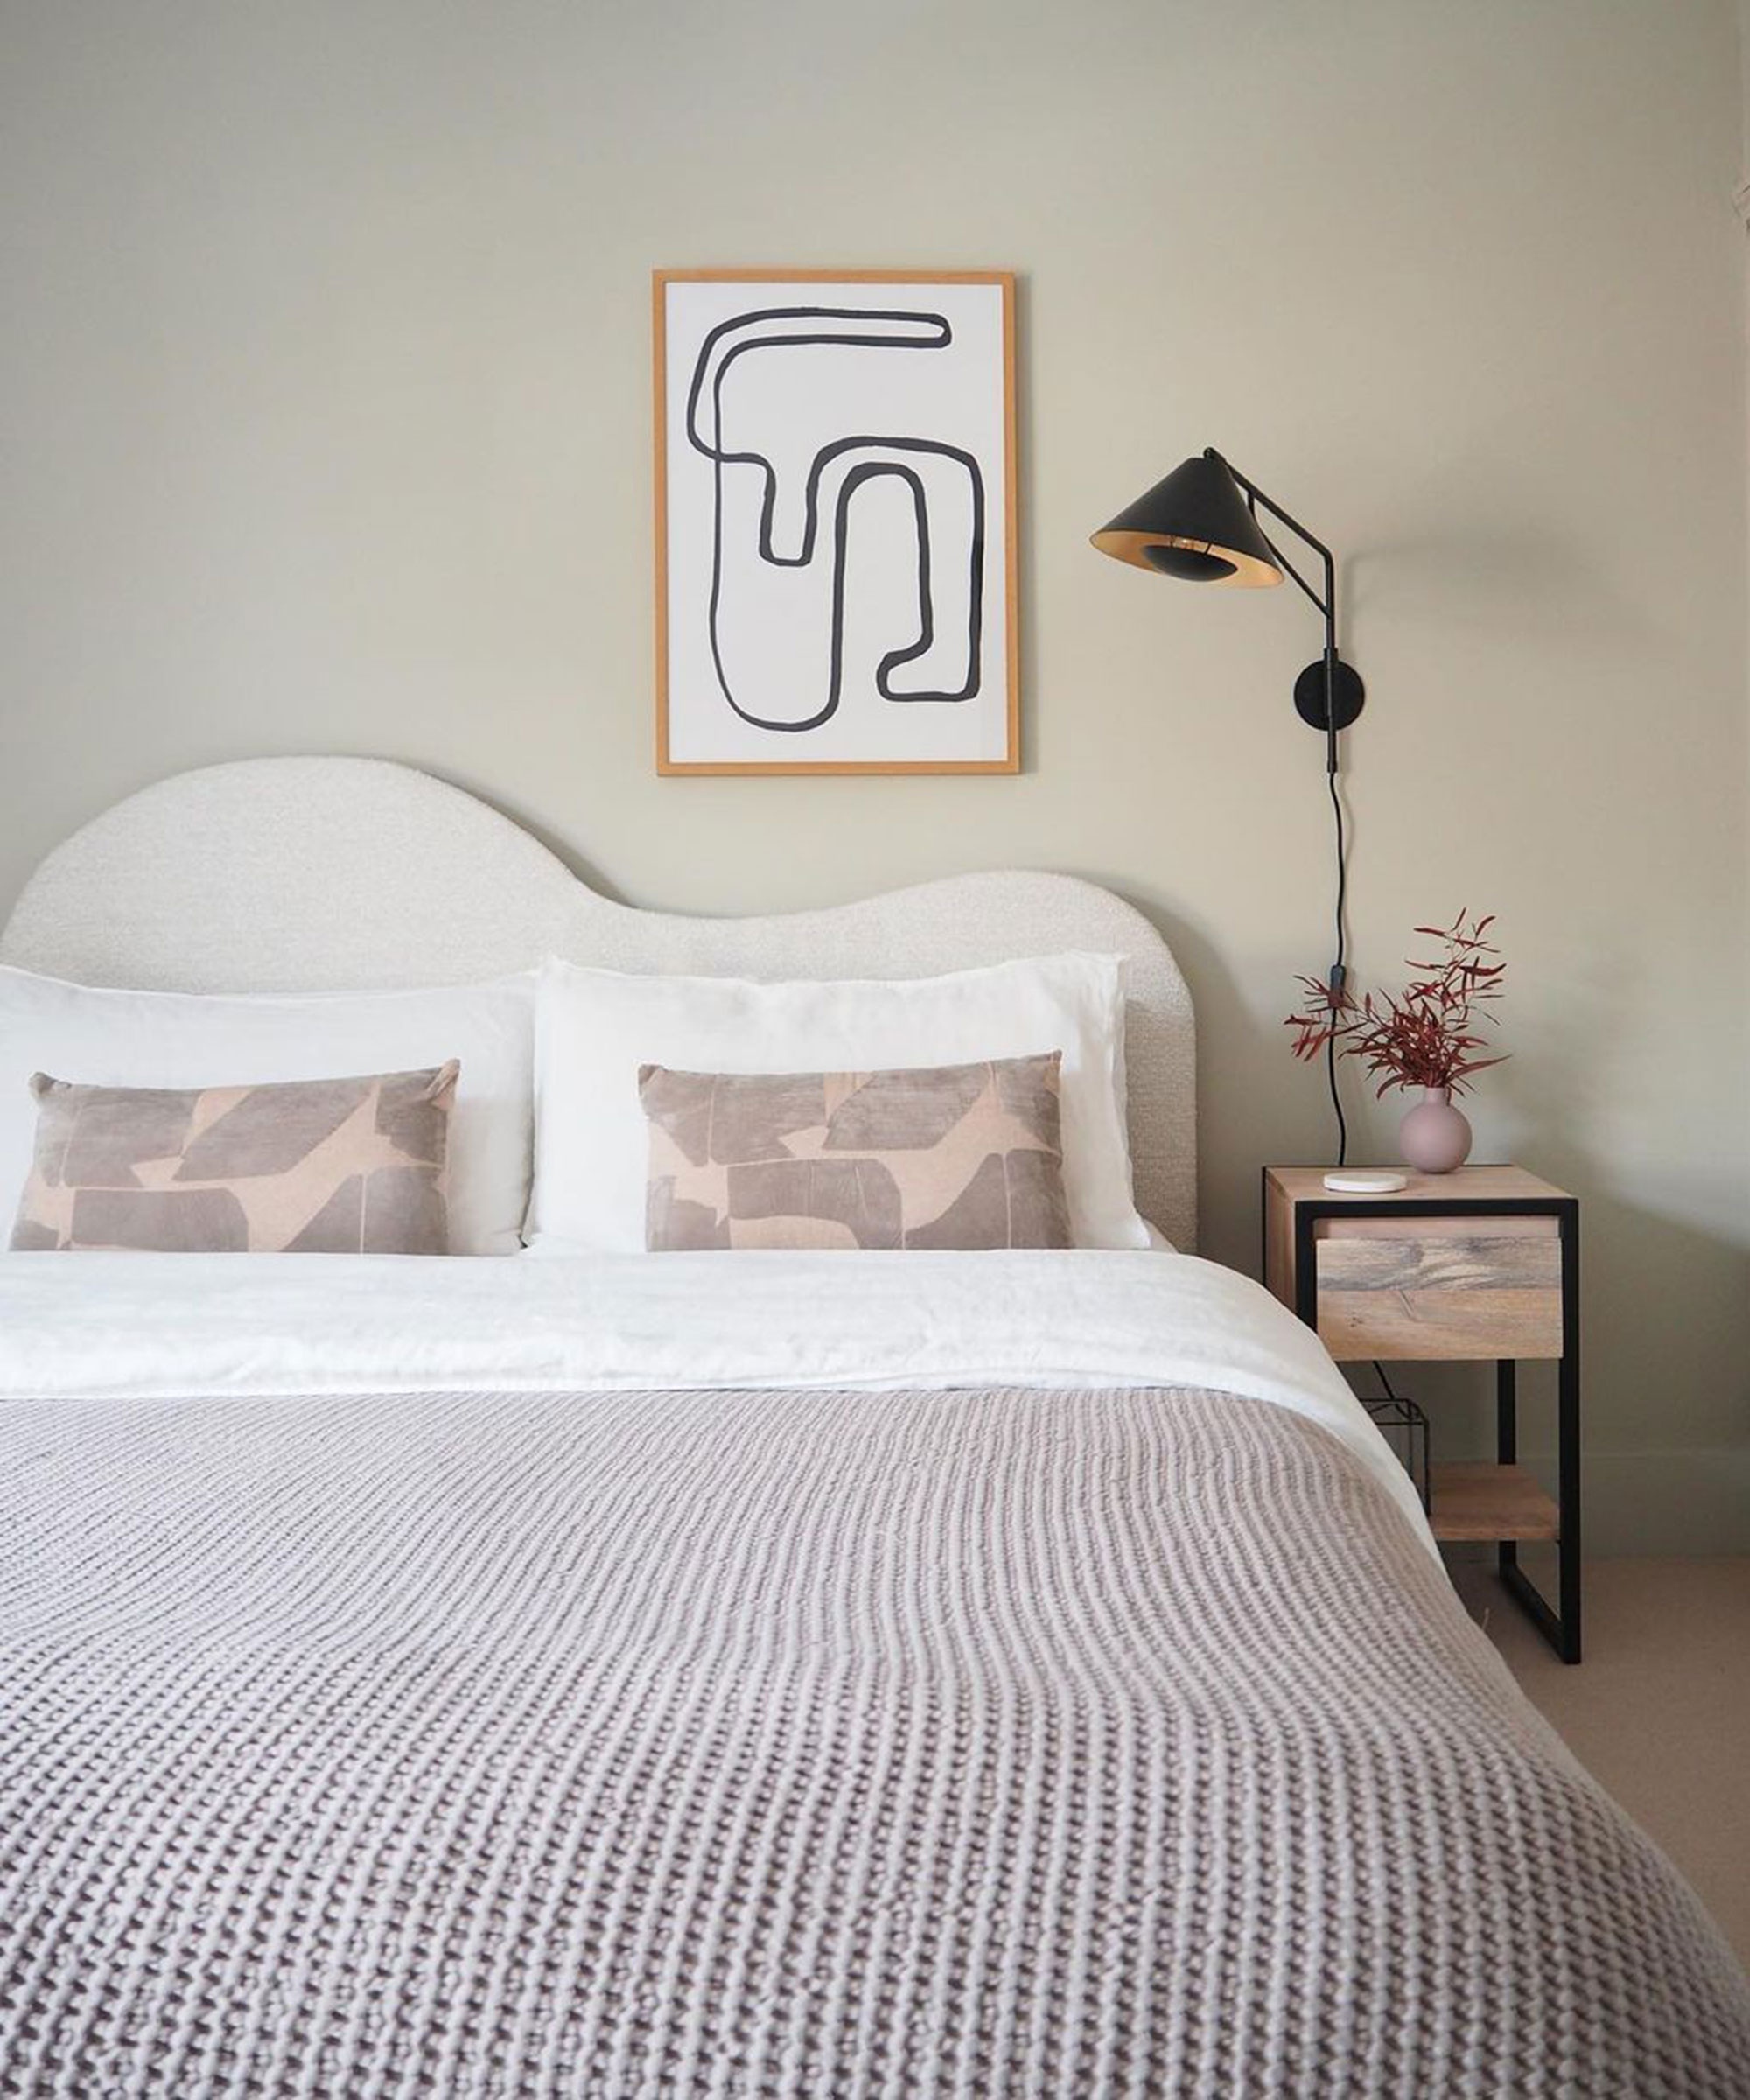
Boucle or teddy material is known for its cozy and chic qualities. So what better than to rest your head with this luxury looped yarn DIY, which looks far more costly than it actually is to create.
'I saw a boucle headboard on Pinterest and thought it would probably be easy enough for my sister and her fiancee to make, with me virtually assisting. The bed before was a wooden framed one. We kept the base but used a multi-tool to cut the headboard off.' says Luke Arthur Wells, interior stylist, designer, and home DIYer.
You will need:
- Electric screwdriver: we found best cordless tool for the job on Amazon
- Screws
- 18mm piece of MDF
- Pencil
- Jigsaw
- Wadding
- Staple gun (loaded with large staples)
- Boucle fabric: this Teddy material from Amazon is a trendy and tactile choice
- Pre-drill some holes into the upper legs of your bed – you will need these later to secure the headboard into place!
- Start with an 18mm piece of MDF, cut to pretty much the same height as your existing headboard.
- Draw out an irregular curved shape for the top of the headboard.
- Cut the shape out with a jigsaw.
- Cover the MDF in a layer of wadding, just so it doesn't look flat. To do this, lay the MDF down on the wadding, cut around the shape leaving about 5cm extra around the edge to staple.
- Using a staple gun, secure the material to the MDF.
- To cover the wadded wood in boucle, lay down your fabric and do pretty much the same as with the wadding. The curves can make this tricky so cutting into it can make this step easier.
- Screw your headboard into the legs of the bed.
7. Annie Sloan's artistic painted headboard
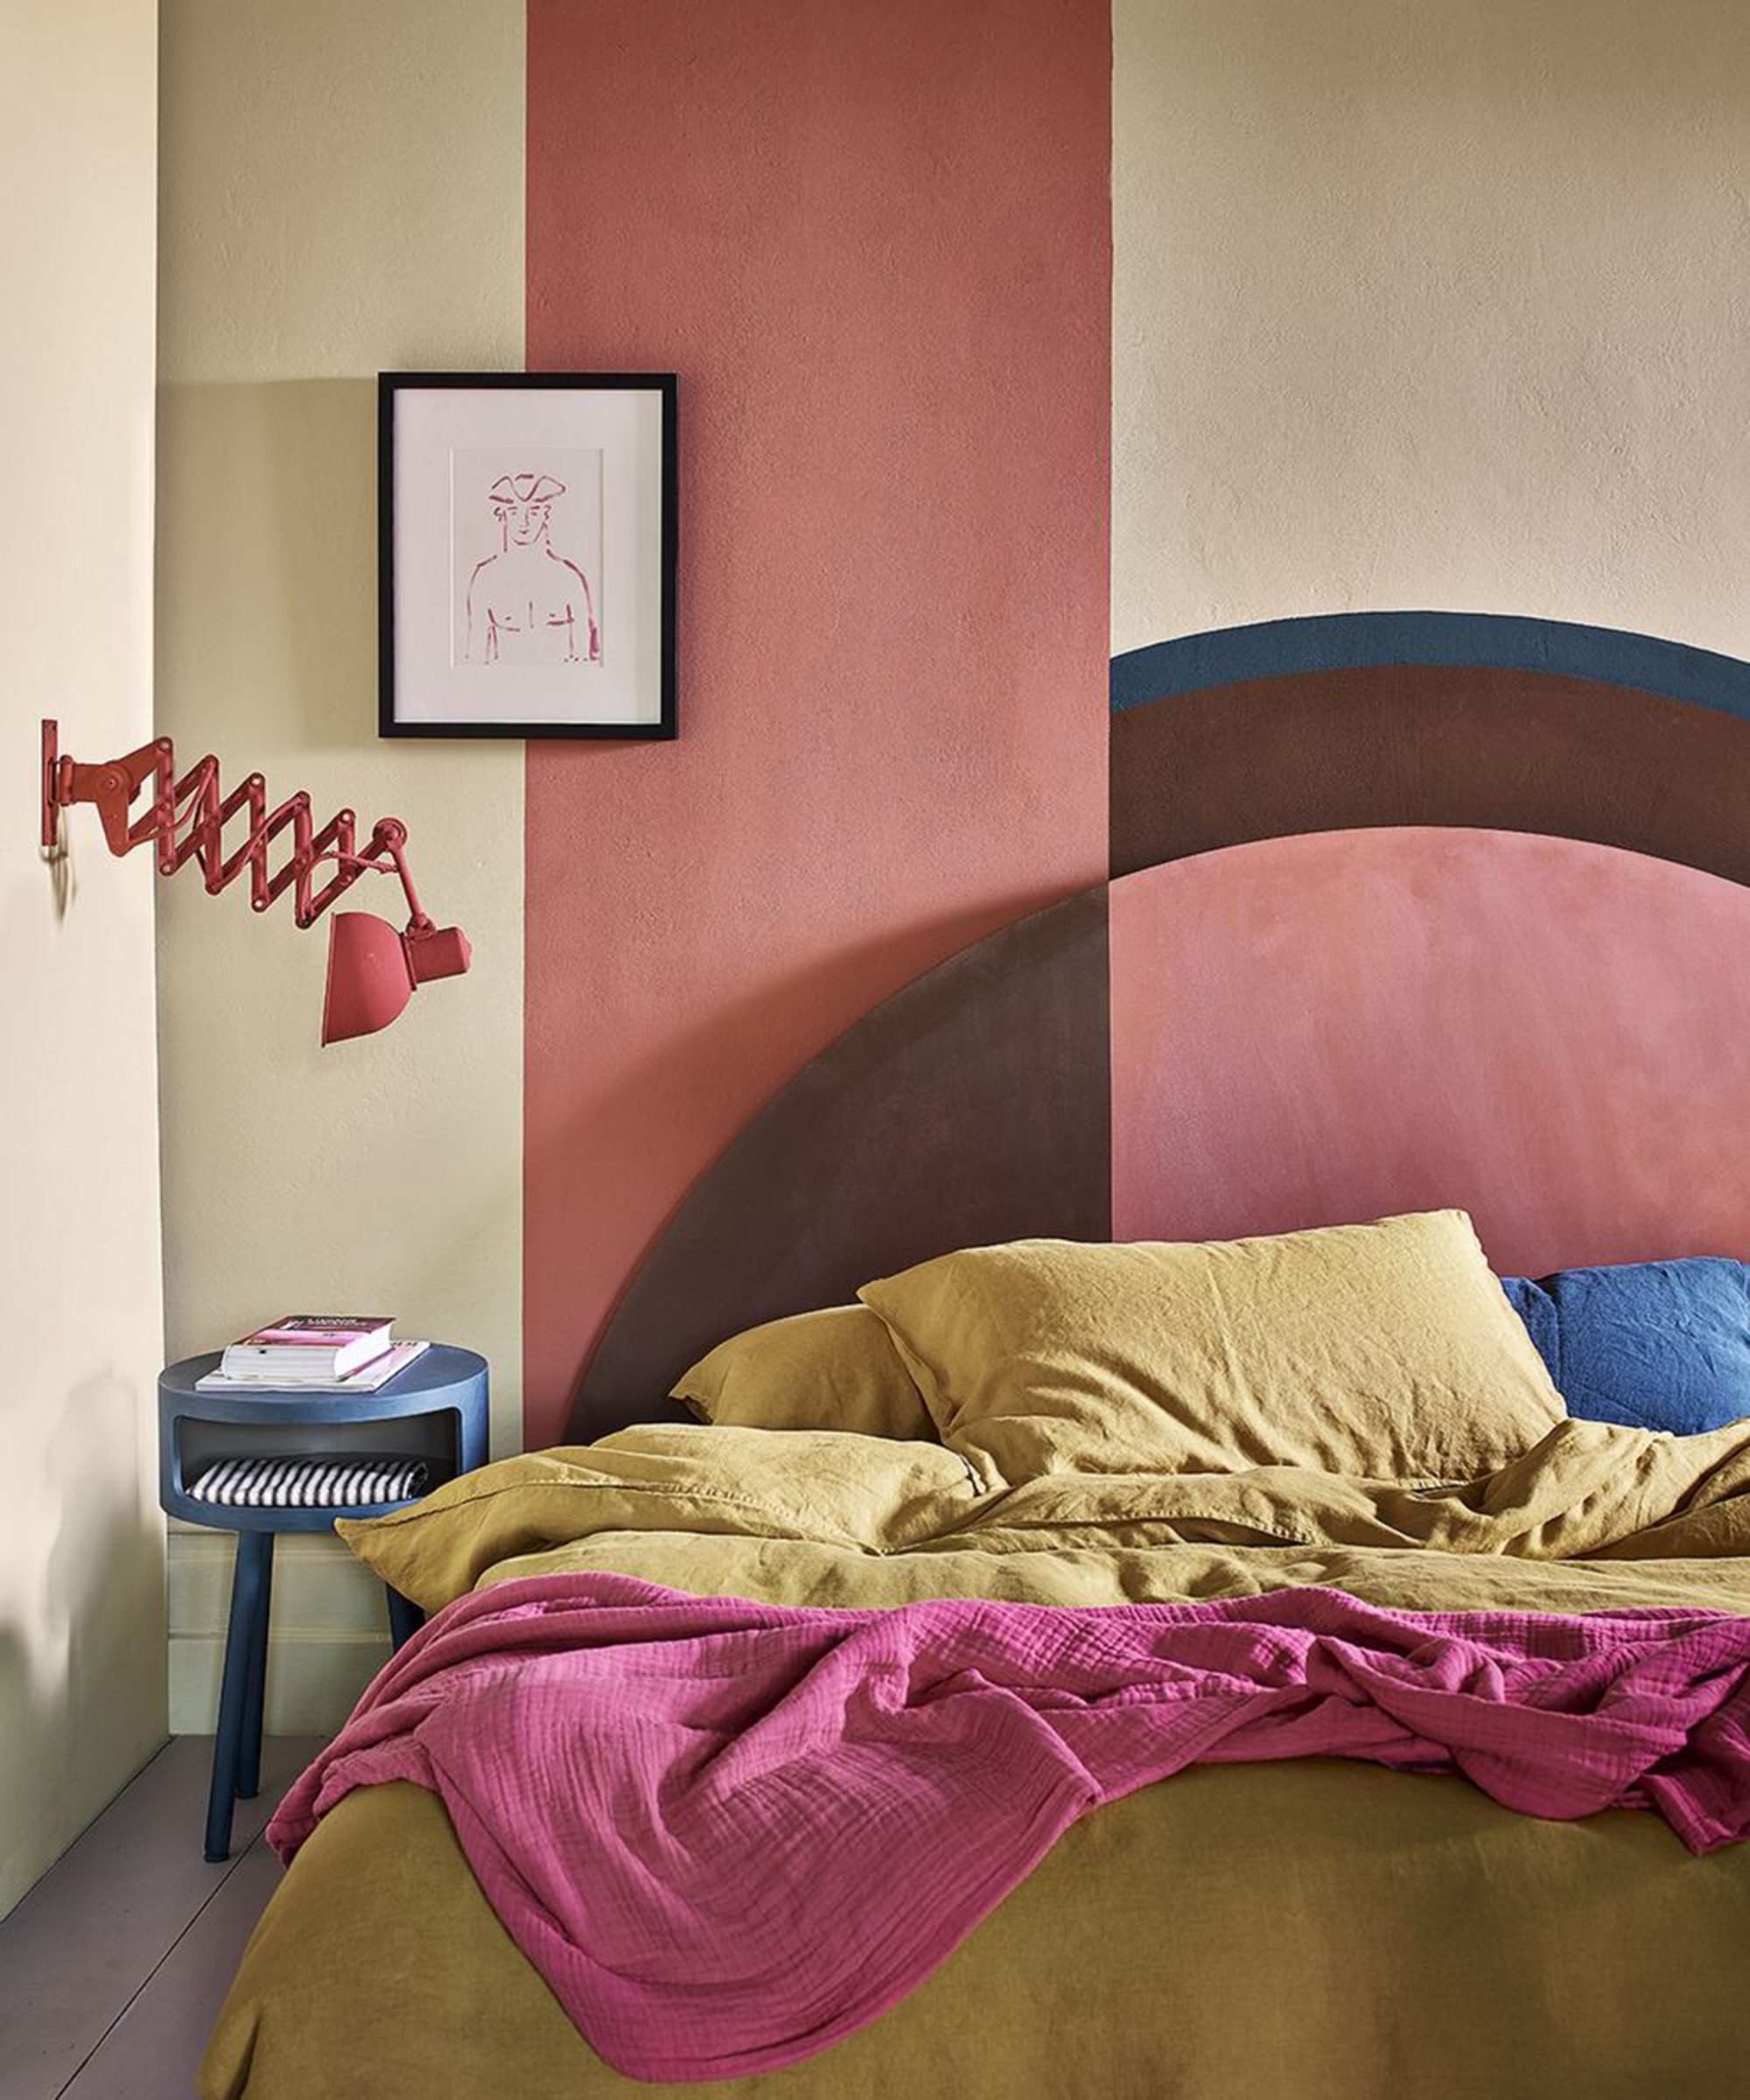
If you've got a landlord who isn't that lenient when it comes to drilling into the walls, then using paint is a cheap and affordable option that won't damage walls and makes a statement. Creating a painted headboard means that you can have a 2-in-1 feature wall and DIY headboard. We love the texture of chalky paint, but you can always mix and match with different emulsion types for tonal variation.
'Using paint to emulate furniture shapes into 2D on your wall is a fantastic way to make an impactful statement,' says Annie Sloan, British artist, color expert and author.
'For best results, use the boundaries of your bed and design up from that width.'
There's no 'right way' to do this, so although we've provided the equipment needed, go wild with different shapes and motifs using masking tape.
You will need:
- Old Ochre chalk paint by Annie Sloan: a dark cream by the queen of color
- Honfleur chalk paint by Annie Sloan: a rich but rustic French countryside brown
- Scandinavian Pink chalk paint by Annie Sloan: a Swedish furniture-inspired pink
- Paintbrush
- Masking tape
8. Kelly Day's wallpaper DIY headboard
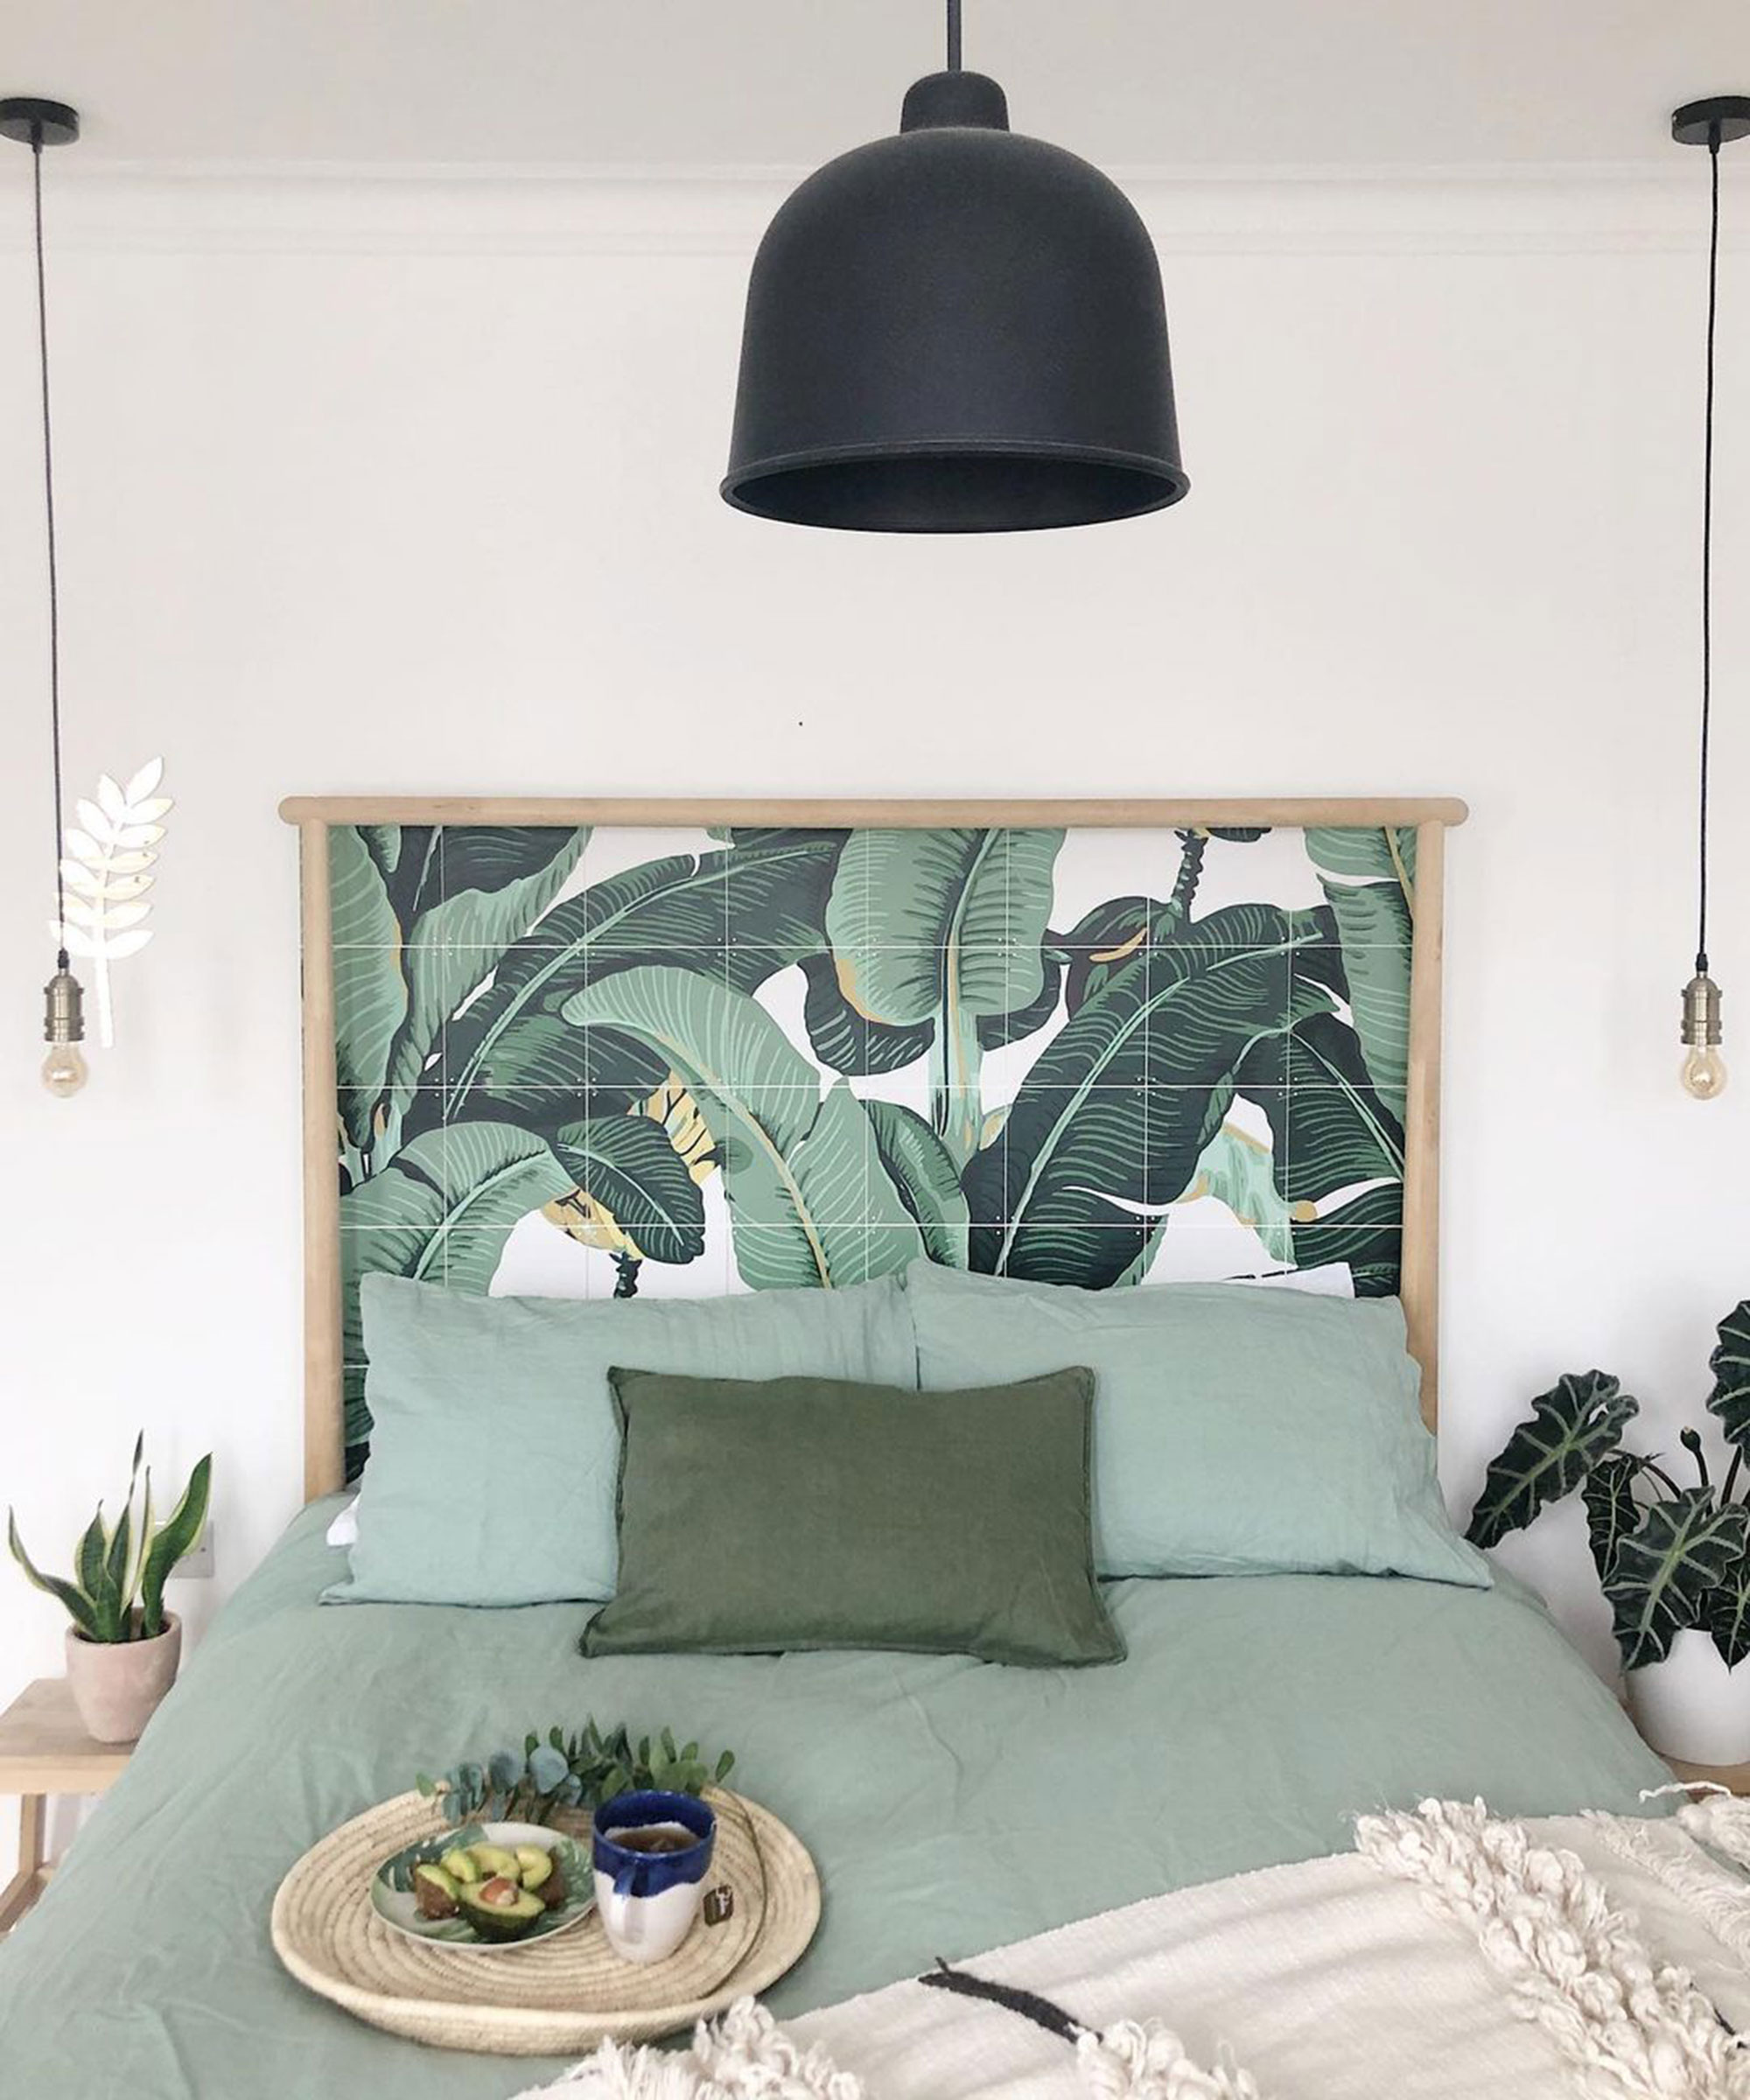
Honestly, this hack by Kelly Day aka @thisismyhomestyle. Literally just takes an hour and you can do it using stuff you already have in the house. You know that spare roll of wallpaper you didn't need for the bathroom? Put it to good use as a headboard. It'll create a real feature in your bedroom, bring in pattern and interest instantly.
You will need:
- Wallpaper
- Wallpaper paste: stick it with this Rust-Oleum favorite from Amazon
- Scissors
- Ruler
- Pencil
How to:
- Plan your headboard shape and size: Take a pencil and a ruler and plan out the size you want your wallpaper headboard to be. Obviously, you can get creative with the shapes, but we think a classic square or rectangle is the most effective. It makes it easier if you use the width of your wallpaper roll to plan the overall width of your headboard, just so you don't have to do any fiddly cutting. Draw your shape onto the wall with the pencil and then take the measurements of each side.
- Cut your wallpaper: Use the measurements from the shape you have created on the wall to cut your pieces of wallpaper to fit. We recommend laying your wallpaper flat on the floor to do this.
- Get wallpapering: Just treat it how you would any wallpapering job. If you have never wallpapered before, it's really not as tricky as you would expect, just watch our easy-to-follow video or read our how to hang wallpaper guide.
9. Laurel Harry's rainbow DIY headboard
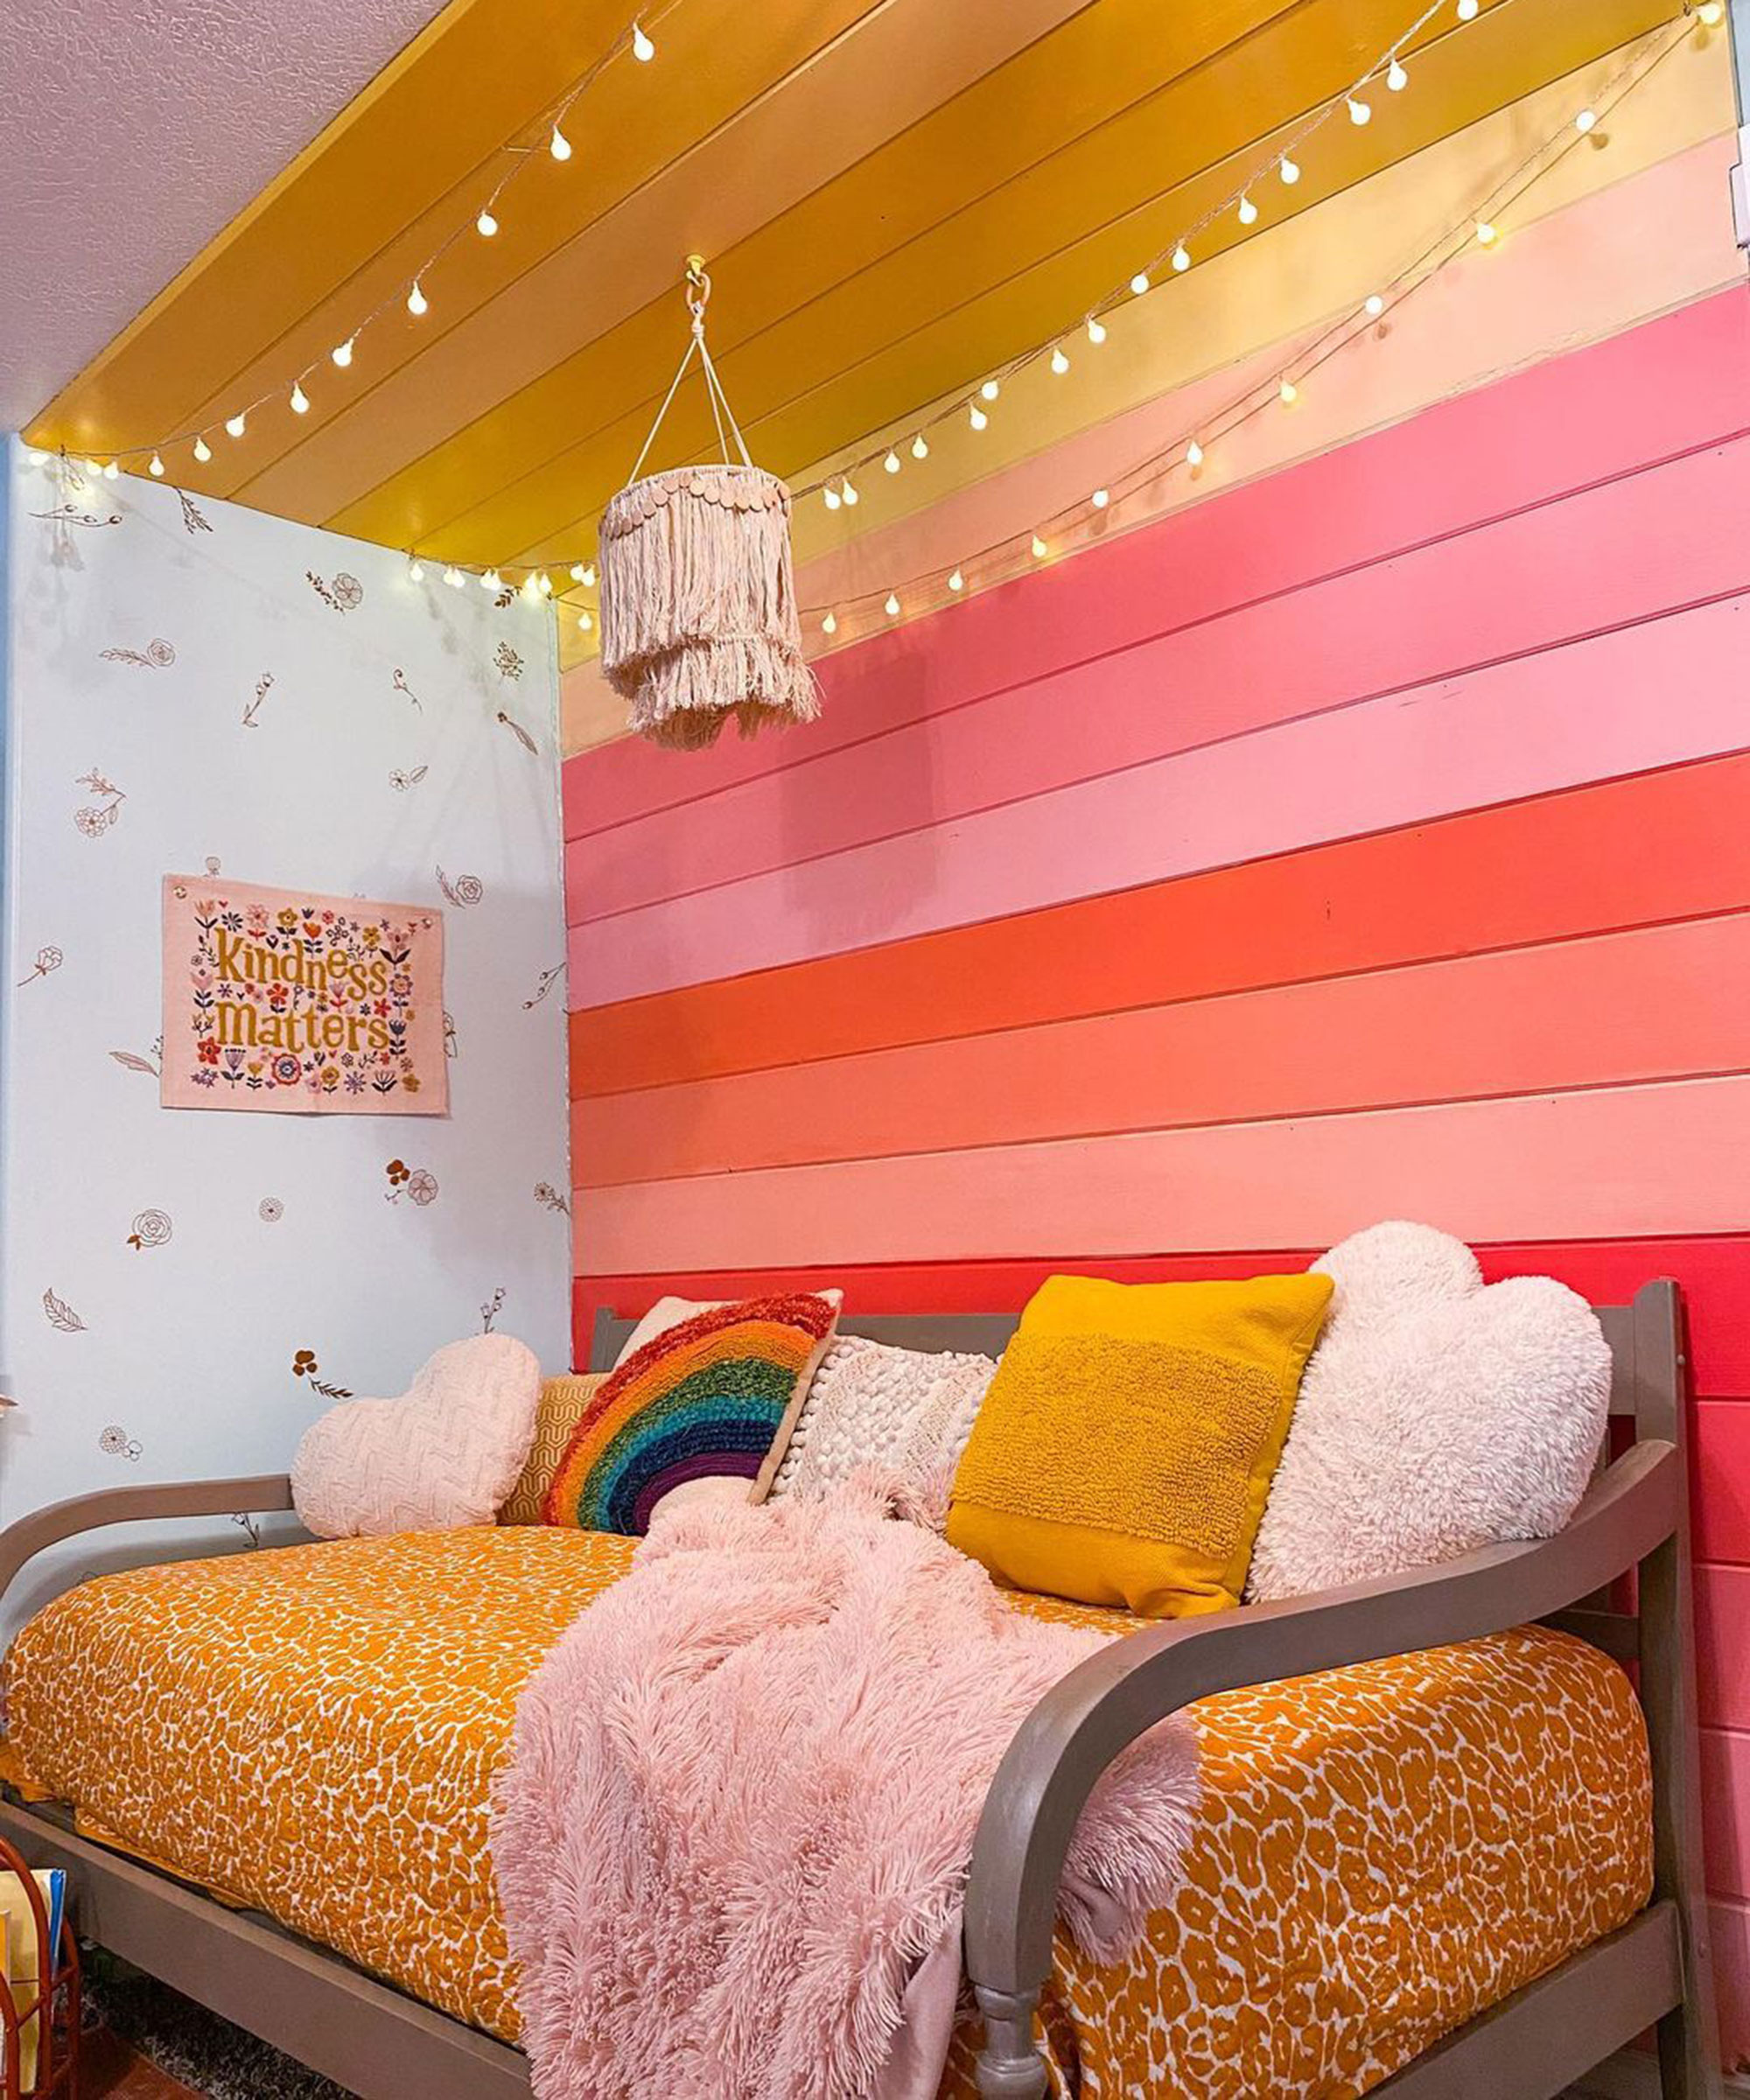
'I loved redoing this area of my daughter’s room with my daughter and hubby during the holidays!' says Laurel Harry aka @thehousethatdiybuilt, a mom from Utah.
'I love how paint transforms a space - maybe this will actually motivate her to keep her room clean...We will see. She picked out these wall colors herself - she wanted her favorite colors that make her feel happy!'
You will need:
- Long boards of tongue and groove pine:Laurel looked to Lowe's for these
- Hand or electric saw: love this foldable and flexible option from Amazon
- Nail gun
- Nails
- An assortment of sample paint pots in colors of your choosing
- White wall paint
- LED indoor string lights of your choosing (Laurel found hers on Amazon)
How to:
- Start with long boards of tongue and groove pine and cut them down to the size of your bedroom wall.
- Next, attach the boards to the wall using a nail gun, extending them up on the ceiling .
- Once the boards are up, paint them. Laurel used six sample pots of Behr paint mixed varying amounts of white paint in with the six colors to create even more shades and an ombré effect! She originally planned to paint the boards in more traditional rainbow colors, so you can try this if the pink and yellow scheme isn't to your interior taste.
- Once dry, finish everything off with string lights strung all across the top part of the headboard above the bed to create a magical effect!
9. Dulux's asymmetrical micro makeover
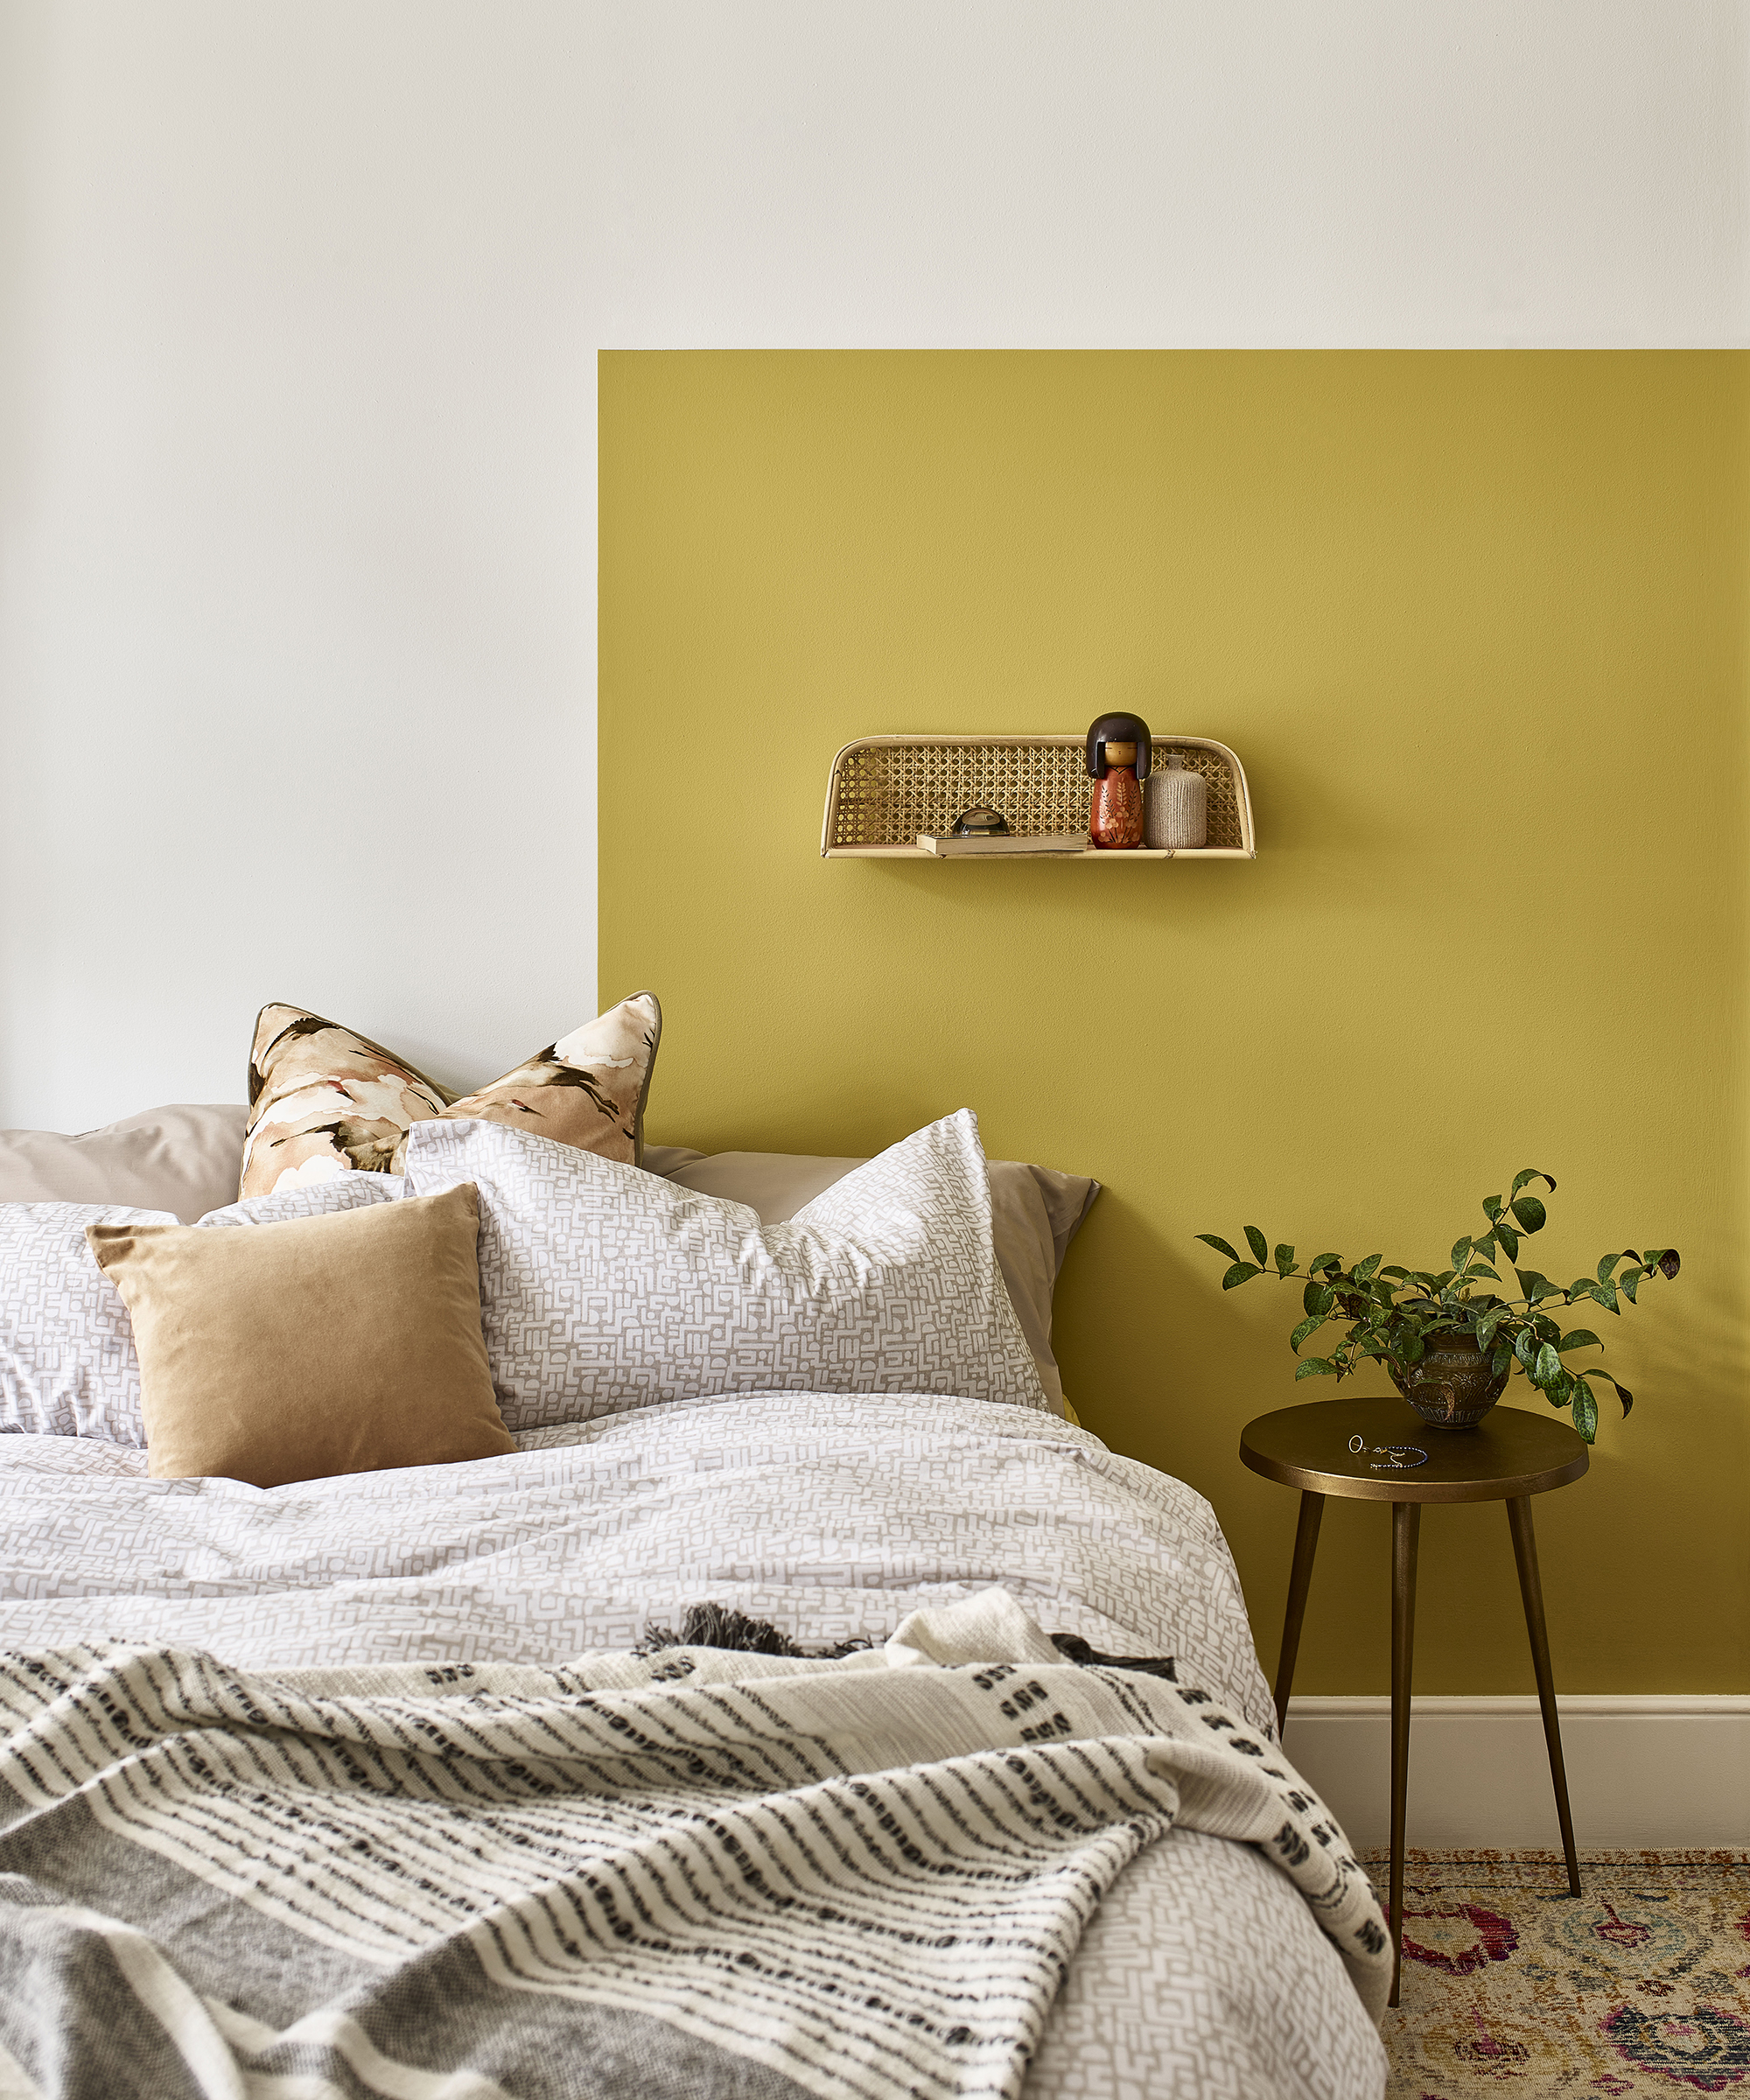
Yes, this is another painted DIY headboard, but if you're not brave enough to go full-on with your bedroom wall decor, this conservative option is just as creative and is a great way to use up leftover paint.
'A bit of color can completely transform a room, but if you’re short on time, you can still achieve a stylish new focal point for a boring bedroom with a DIY painted headboard – the perfect project for beginners,' insists Marianne Shillingford, Dulux.
You will need:
- Measuring tape: this one from Amazon self-locks for accurate measurements
- Pencil
- Chalk
- Masking tape
- Small roller: keep the good times rolling with this Amazon bestseller
- Emulsion in a shade of your choice: Dulux Simply Refresh, Golden Sands is a star buy
How to:
- Measure up: Firstly, decide where you want your headboard to be painted onto the wall. With your measuring tape and pencil, mark the edges and the top line at regular intervals across the wall.
- Chalk your lines: Cover a length of string with chalk, by running the string along the side of the chalk. Stretch the string across the wall, connecting the points you’ve marked up in pencil. Secure the ends of the string with masking tape. Check the string is straight, then ping the string to leave a chalk line across the wall. Repeat for the sides of your headboard.
- Mask it: Apply strips of masking tape just outside your lines of chalk to create your headboard shape.
- Apply your paint: Using a small roller and tray, roll paint to fill the shape of your headboard, being careful not to roll over the outer edges of the masking tape.
- Peel and reveal: While the paint is still wet, peel off the masking tape to reveal your headboard design.
11. Make a stylish headboard with cushions
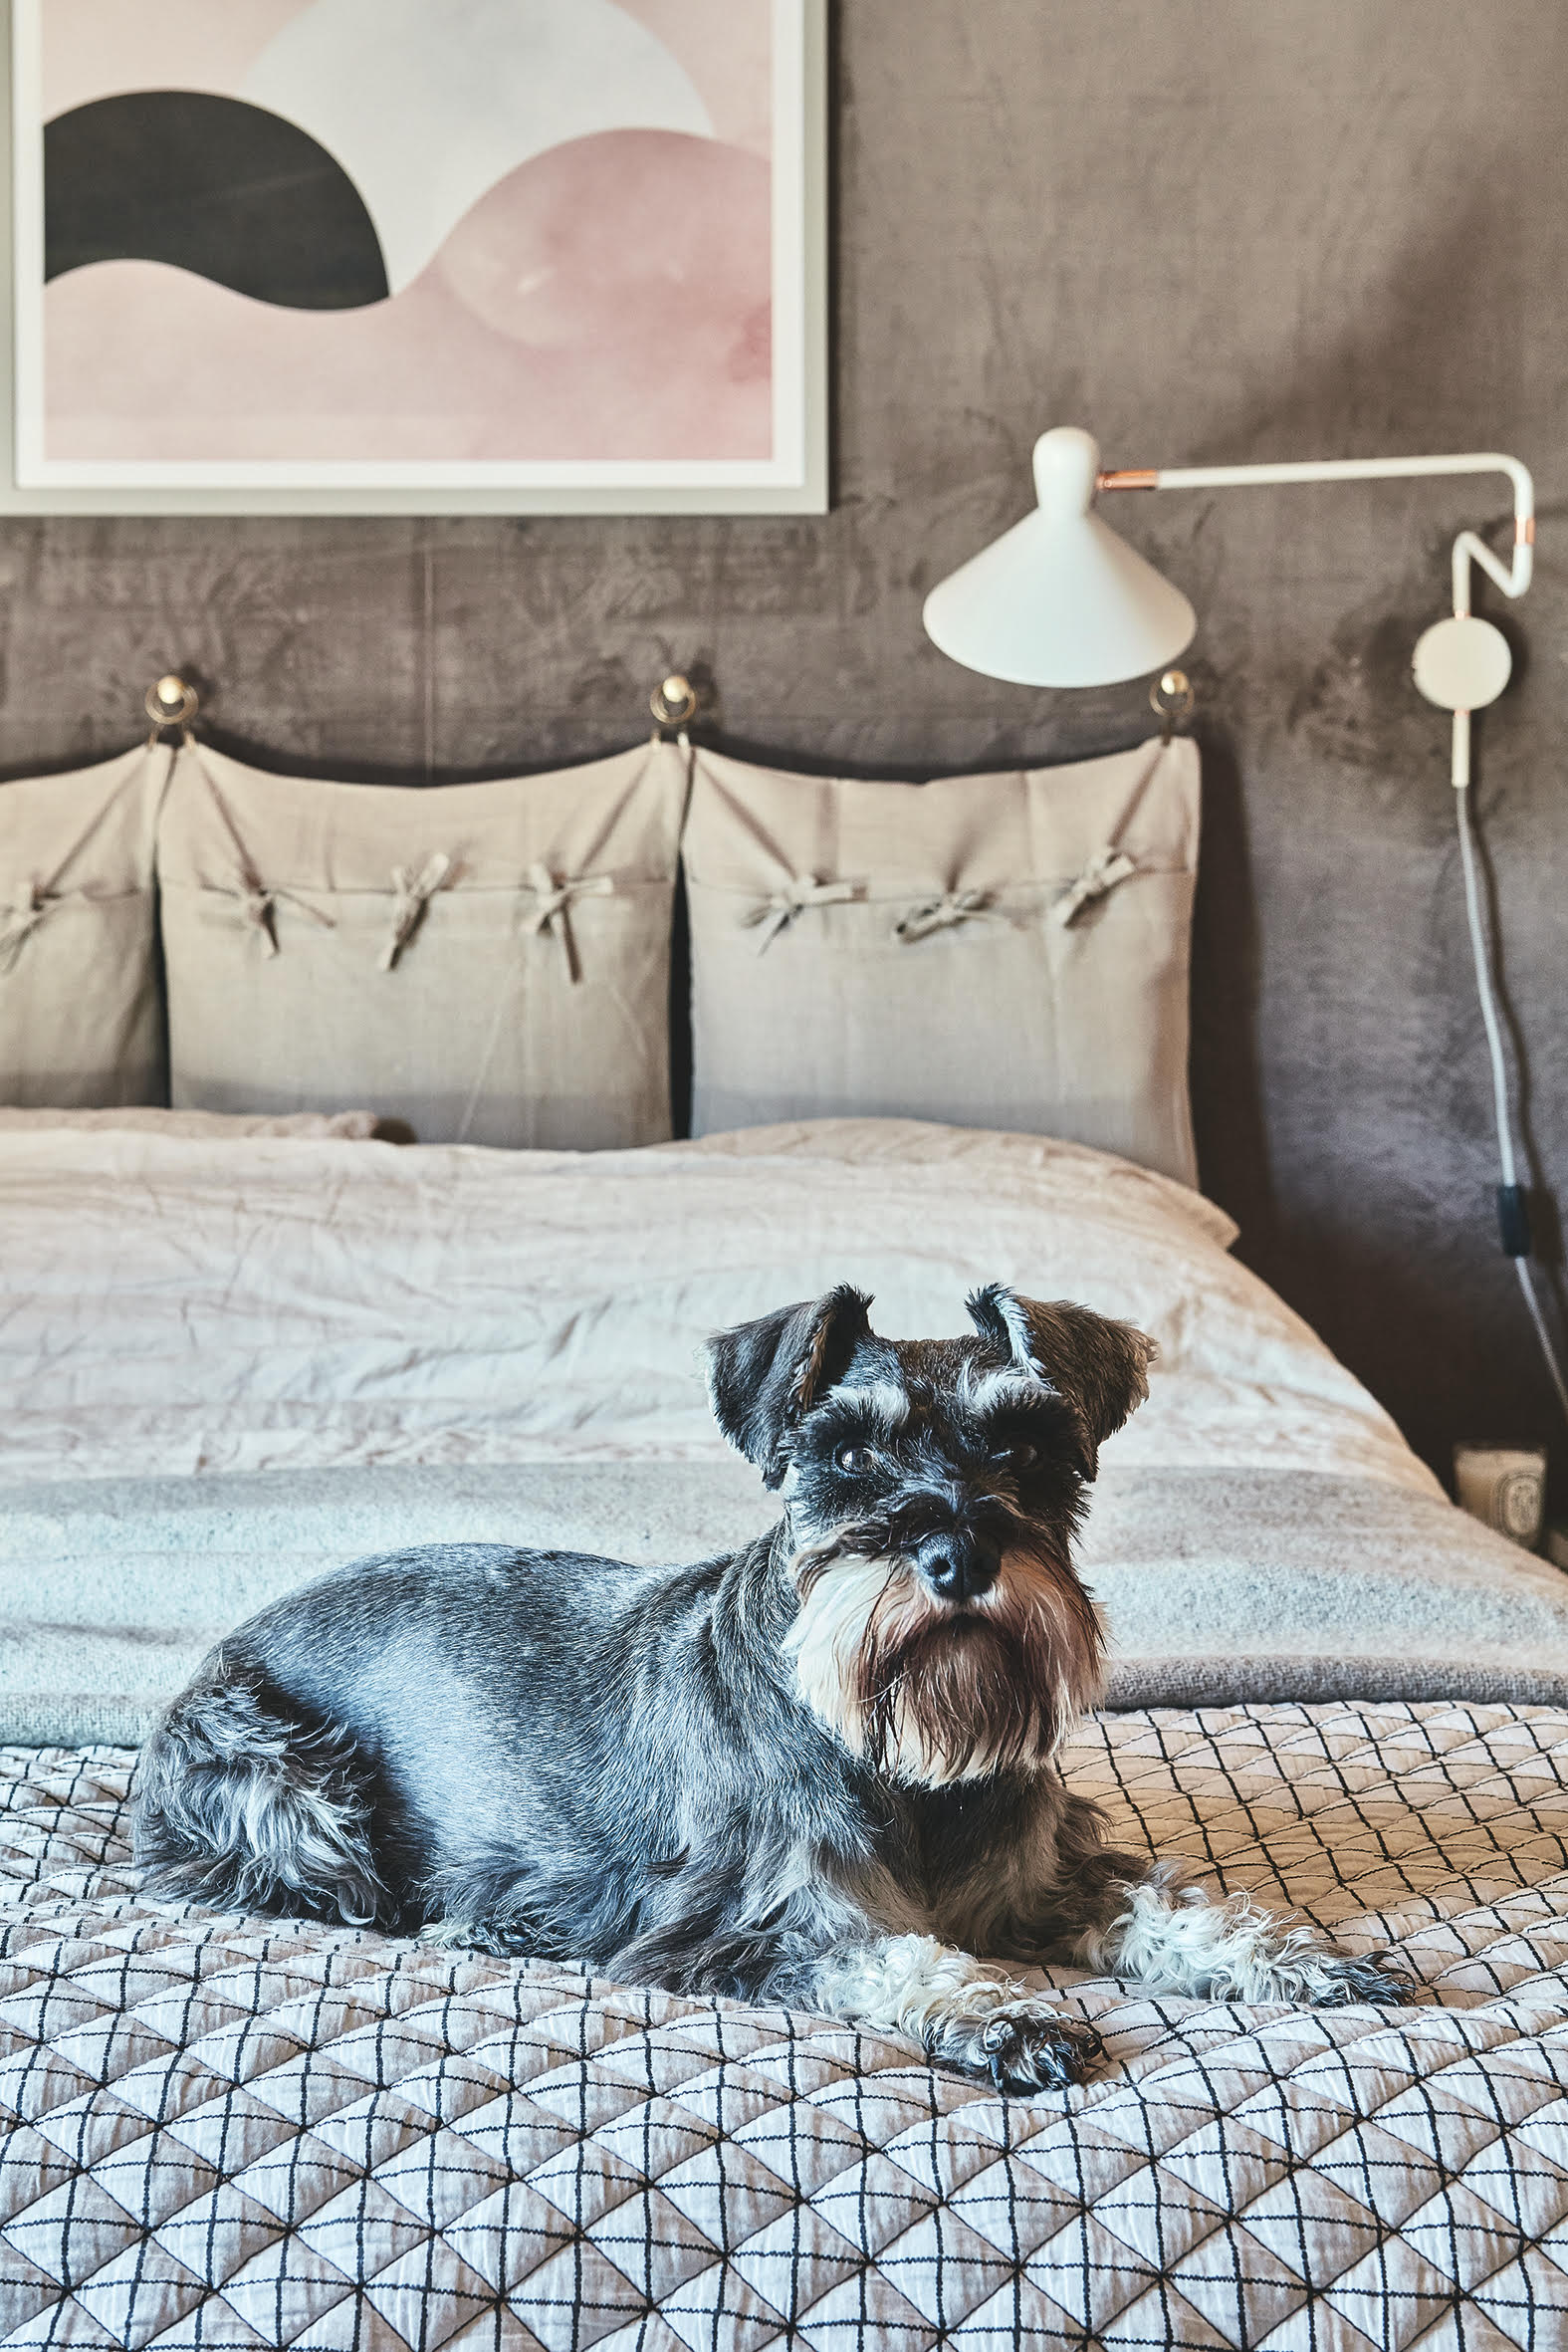
Try and ignore the cute dog for sec, and take a look at that DIY headboard. For this super easy DIY project, just pick two or three large square cushions and attach some small brass rings (curtains rings work well) to the top two corners. Then, using the size of your chosen cushions as a guide, mark out where you need to place the nails or screws that will hold up the cushions. Hammer some large brass nails (or use screws if you prefer), hang the cushions and you're done.
Take a tour of the rest of this gorgeous log cabin (there are more dog pics over there, too).
12. How to make a fabric headboard
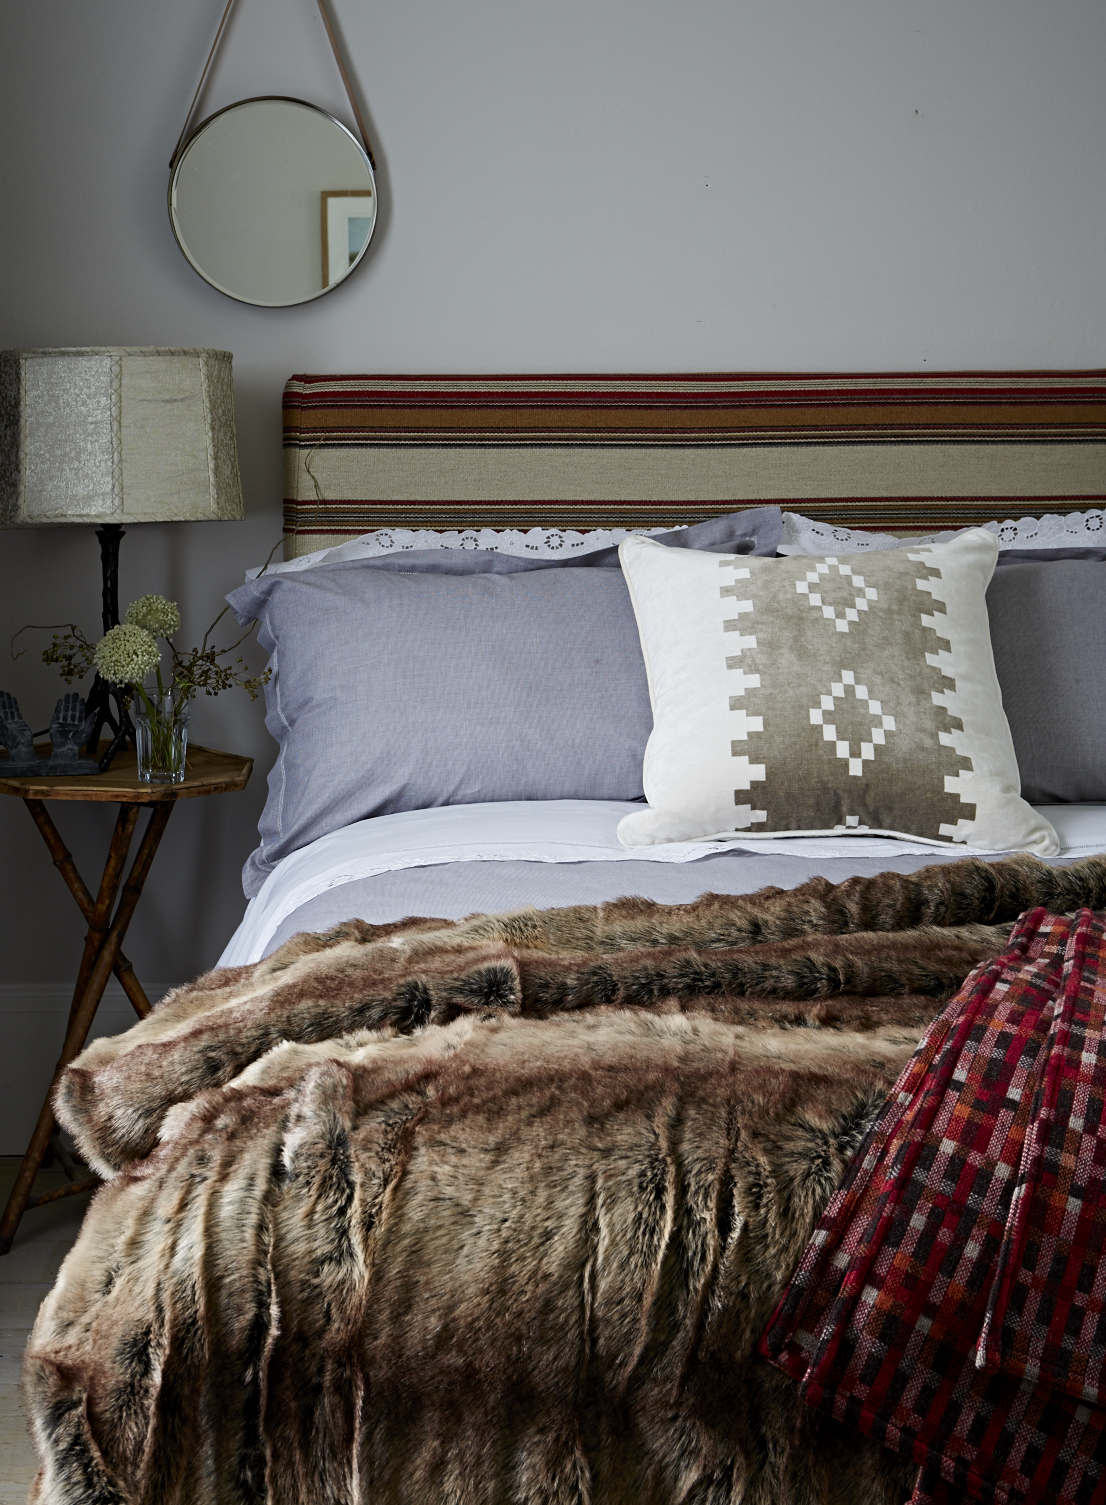
Maybe you have been left with a cumbersome leather headboard that, no matter what lovely things you do to your room, the gross brown leather block behind your bed always seems to be the focus?
A really easy DIY headboard idea is to cover up your existing one with a fabric of your choice. All you will need is a length of fabric that will cover your headboard and a staple gun. Lay the fabric flat on the floor, then remove the headboard and lay it over the fabric. Get someone to help you stretch the fabric over the front of your headboard and then secure it with a staple gun to the back. It doesn't matter if it looks a bit messy at the back of the headboard because no one will ever see it.
13. Use a rug to create a DIY headboard
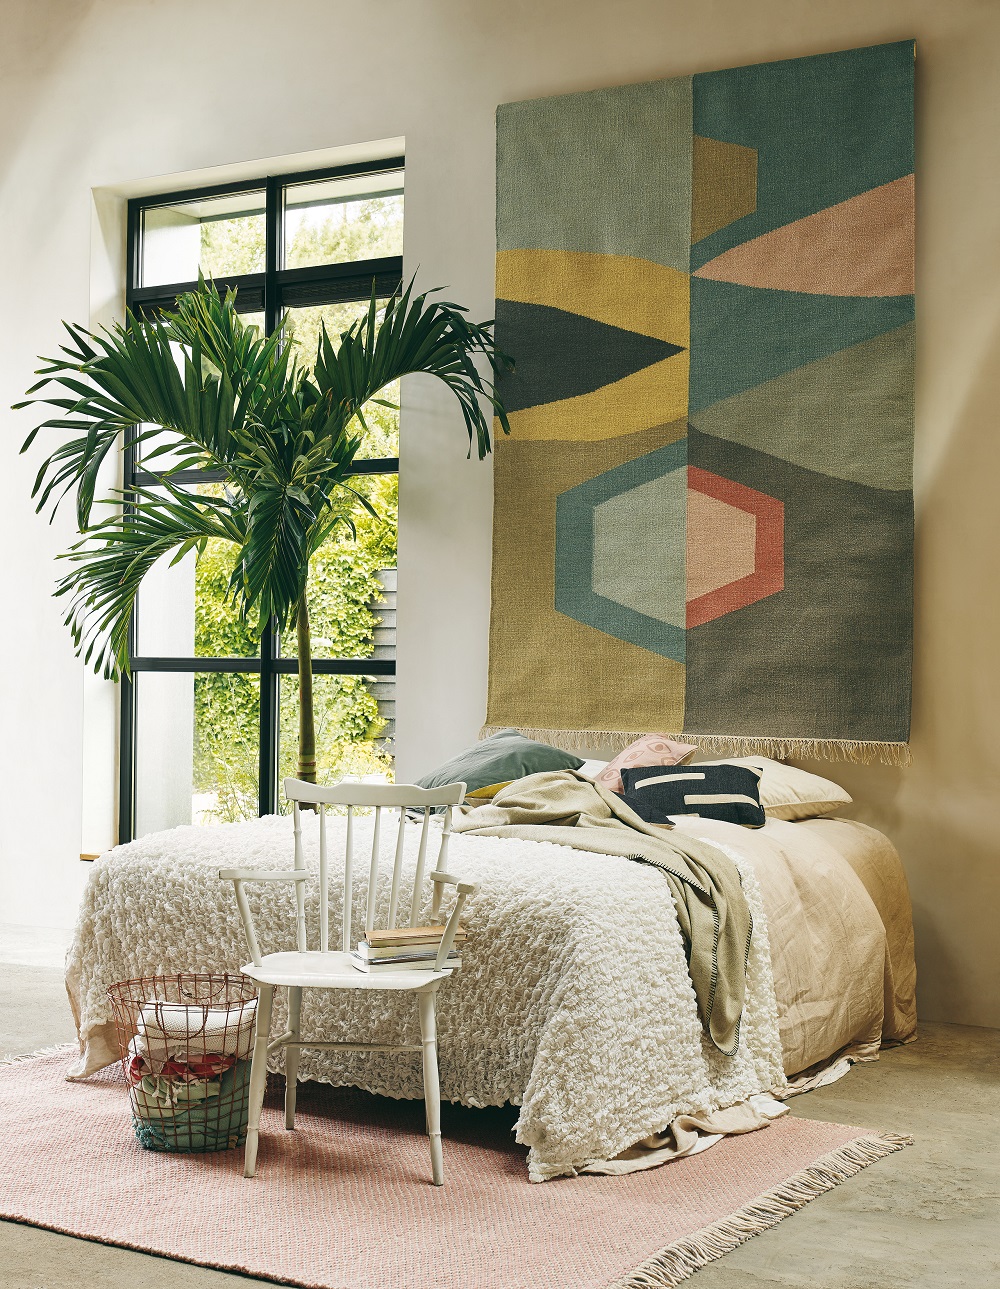
This is literally the easiest DIY headboard idea ever, simply hang a rug or a piece of wall art above your bed. This works best if the rug is the same size or slightly bigger than the bed. This is also a great tip if you are renting as you can use command strips to secure a wall-hanging above your bed.
Check our feature of decorating ideas for renters for more inspiration.
14. Paint a DIY headboard on the wall
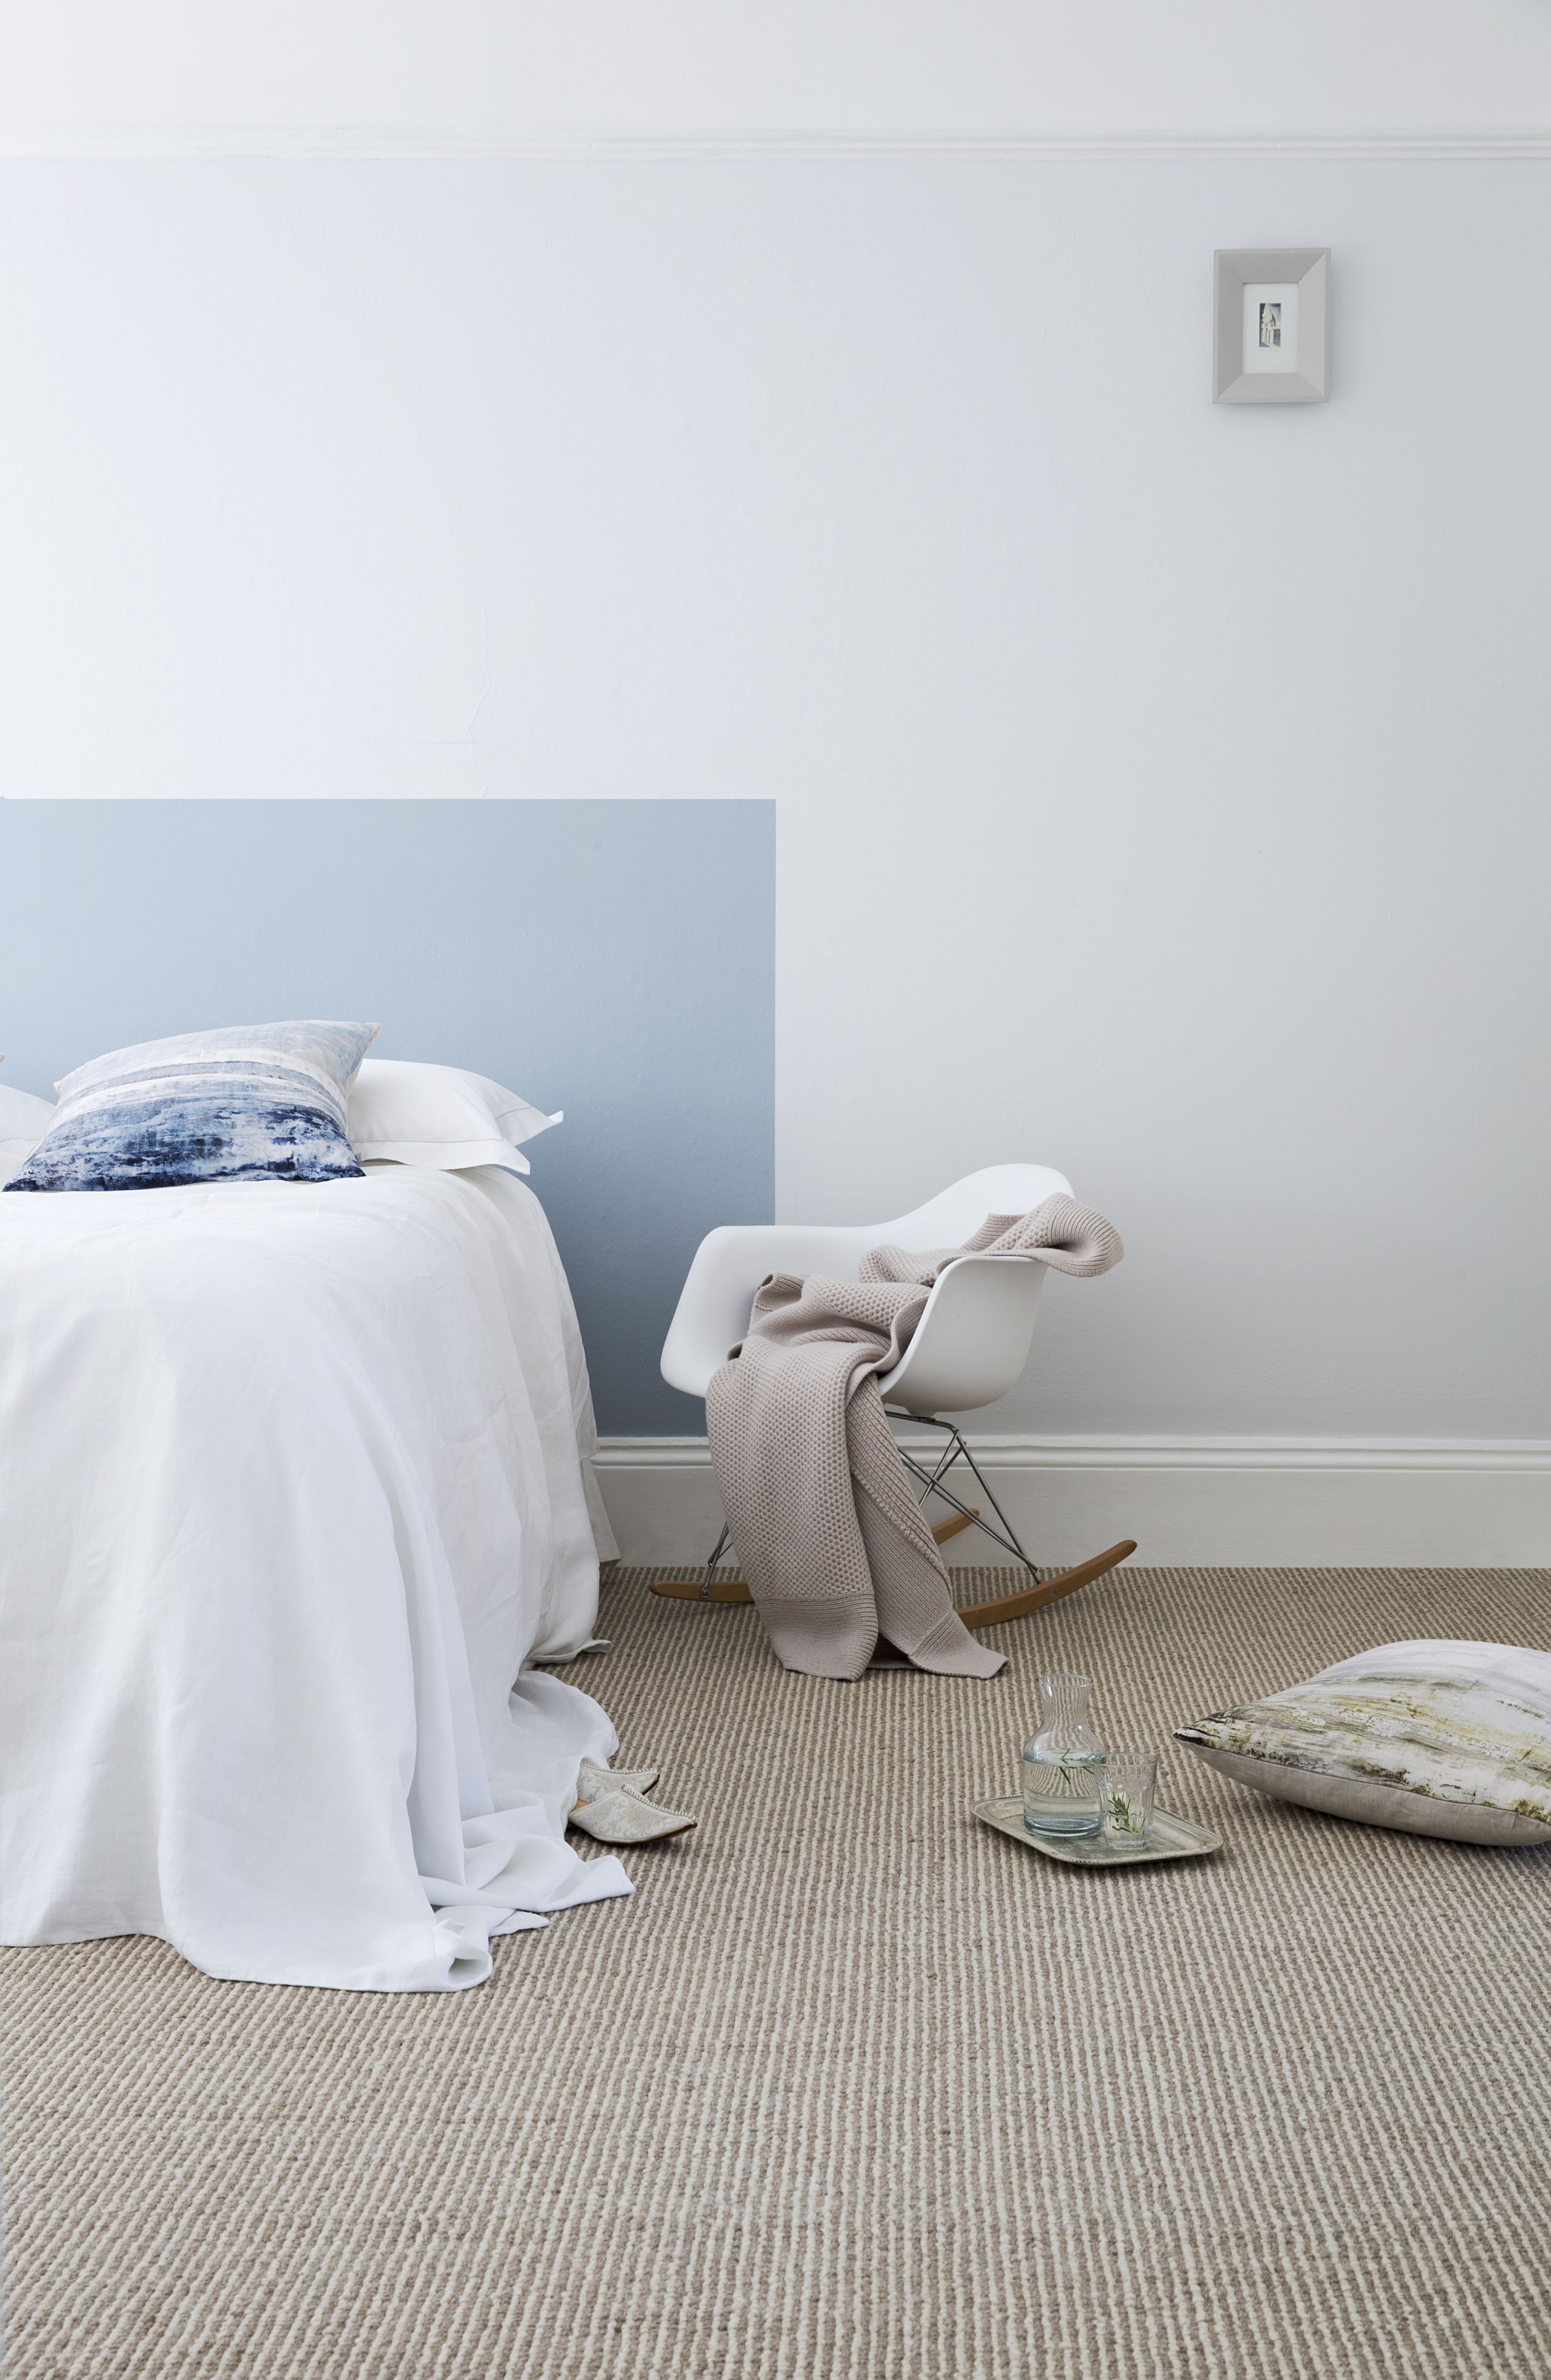
The cheapest alternative to a real headboard; all you need for this quick DIY headboard project is some paint, a brush (or roller) and some masking tape.
Start by using tape to mark out a rectangle around the top of your bed. Then, take your color of choice and start painting, being careful to keep within the lines of the masking tape. Let the paint dry, giving it another coat if it needs one, and then peel away the masking tape.
15. Or create a DIY headboard with wallpaper
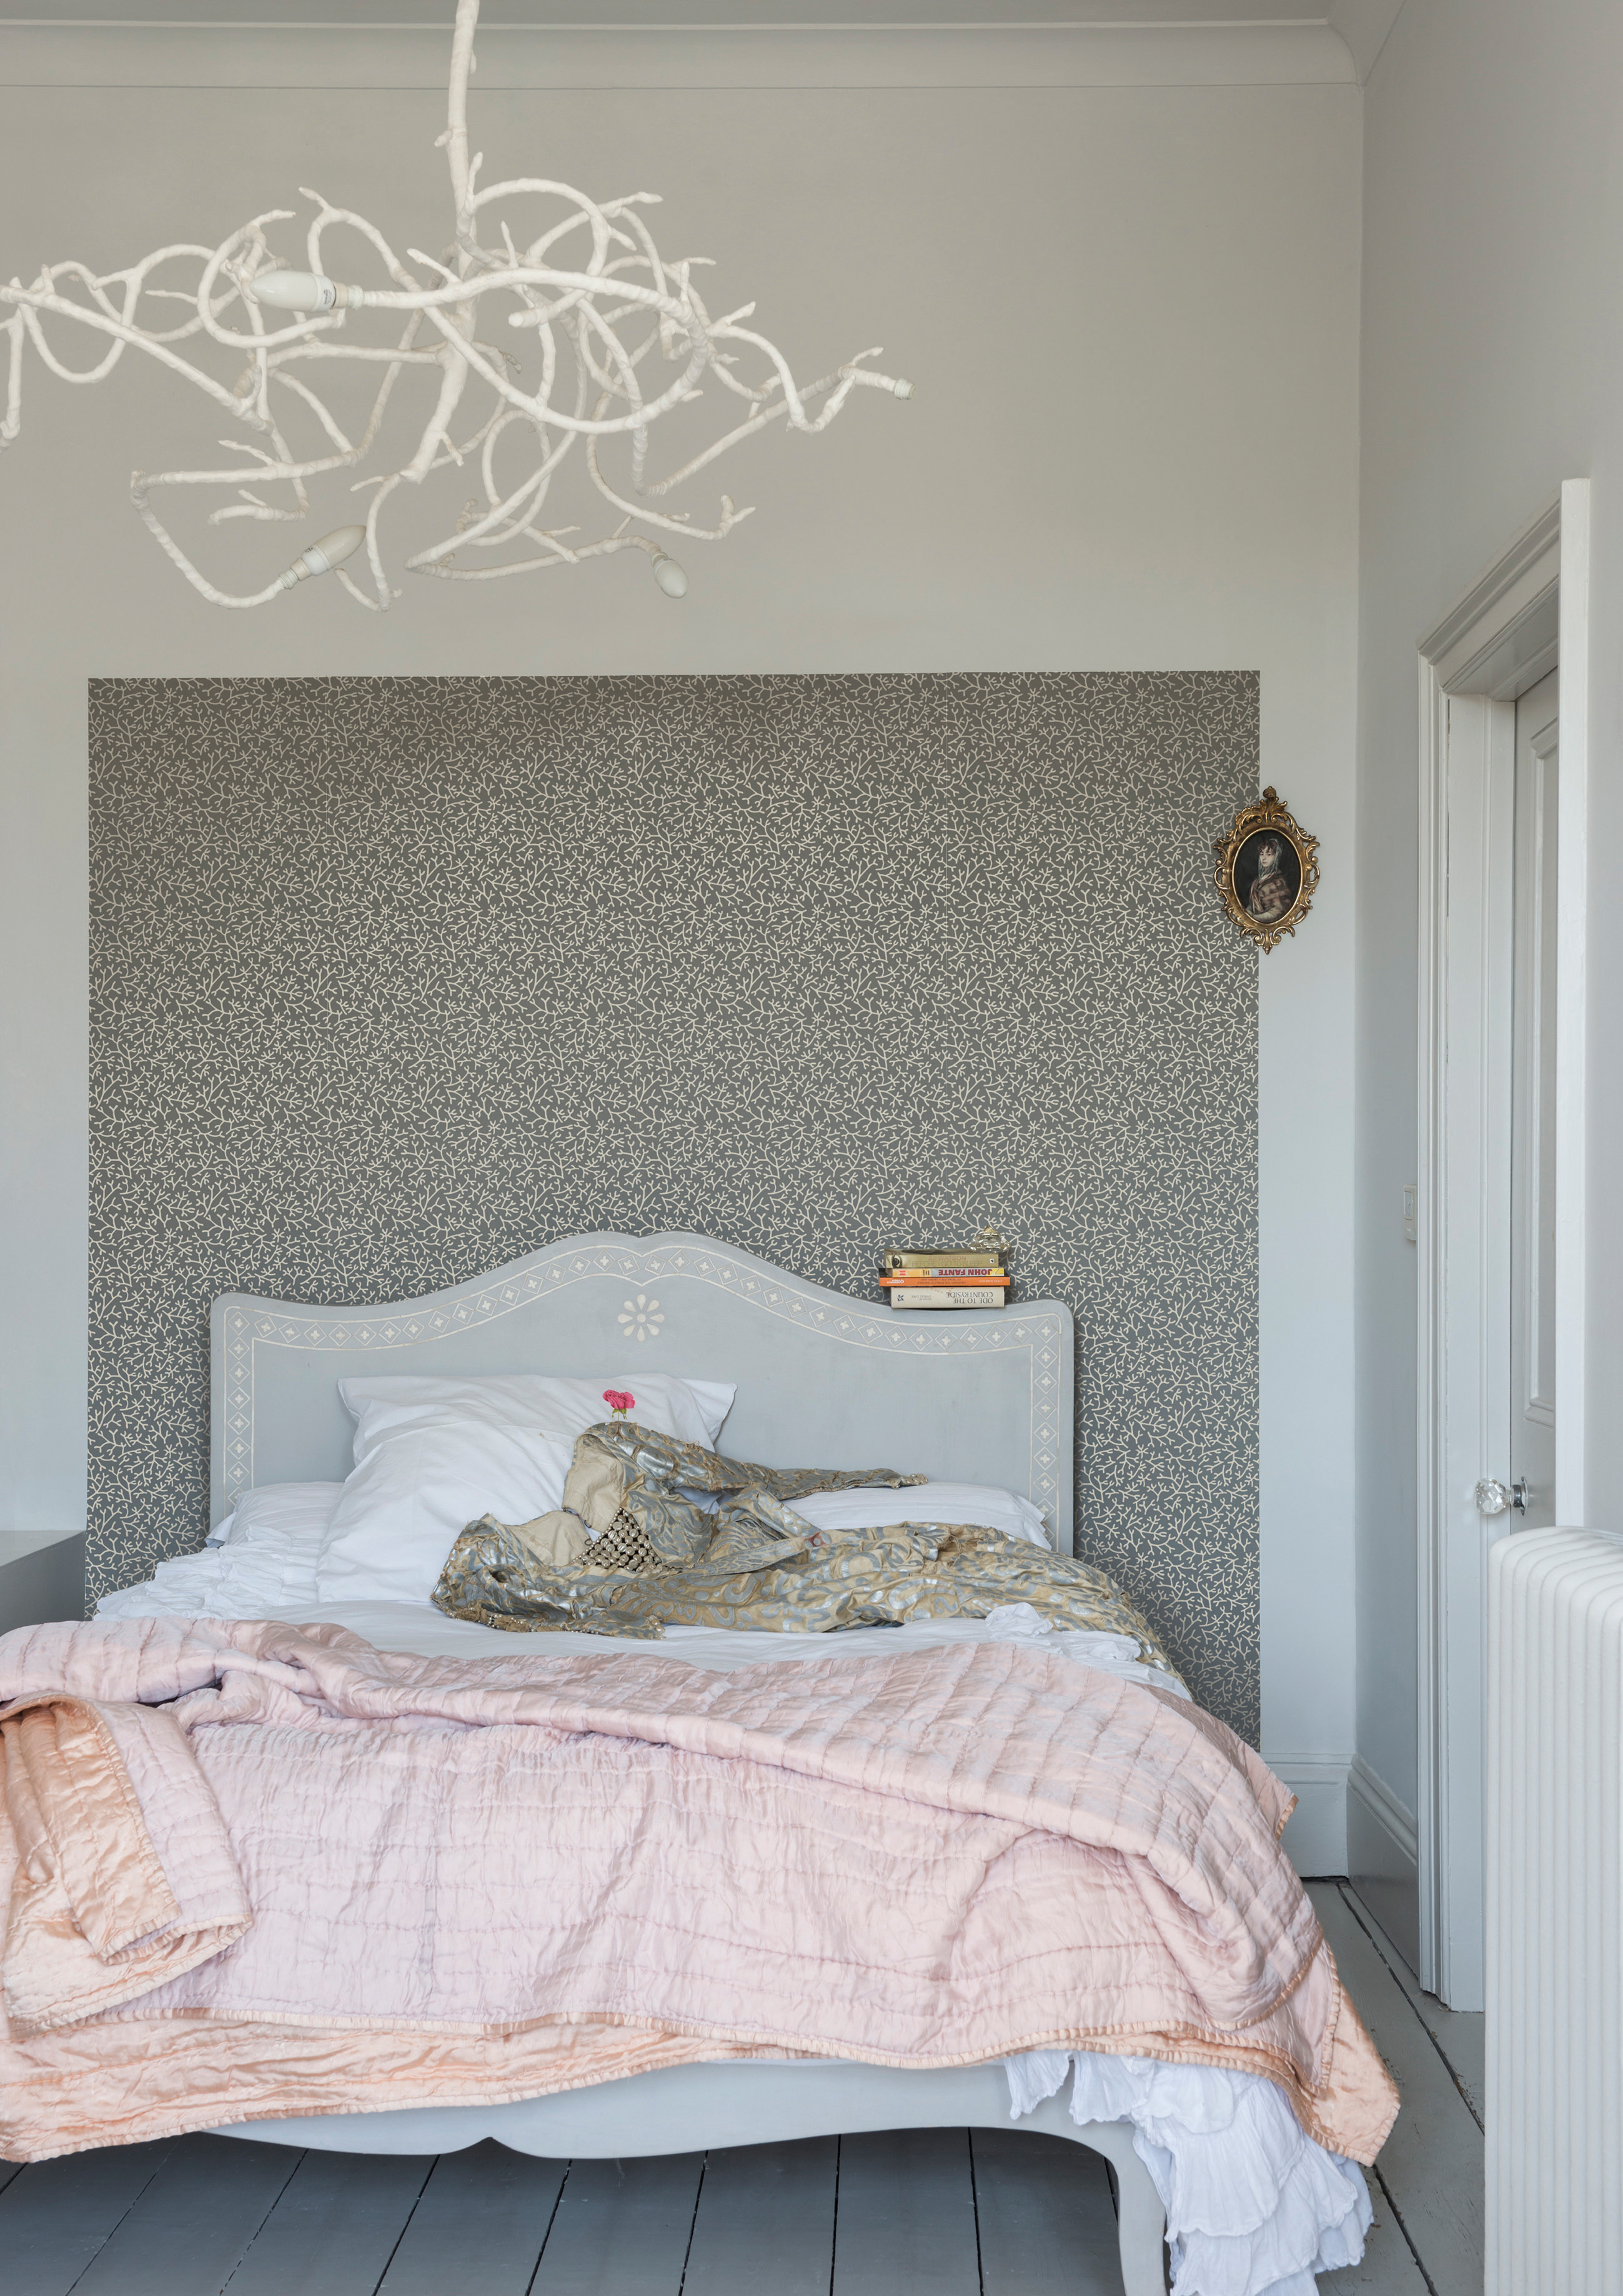
If you want to add more pattern to your room, creating a headboard from wallpaper is a really easy tip, and since you will only need one roll, it's also really inexpensive (or you can go for that stand-out designer wallpaper you can only justify one roll of). Just measure out the size you want your headboard to be by drawing an outline around your bed with a ruler and a pencil. Then just hang your wallpaper as you usually would.
Not sure where to start with how to wallpaper? Head over to our step-by-step guide.
16. Make a DIY headboard in wood
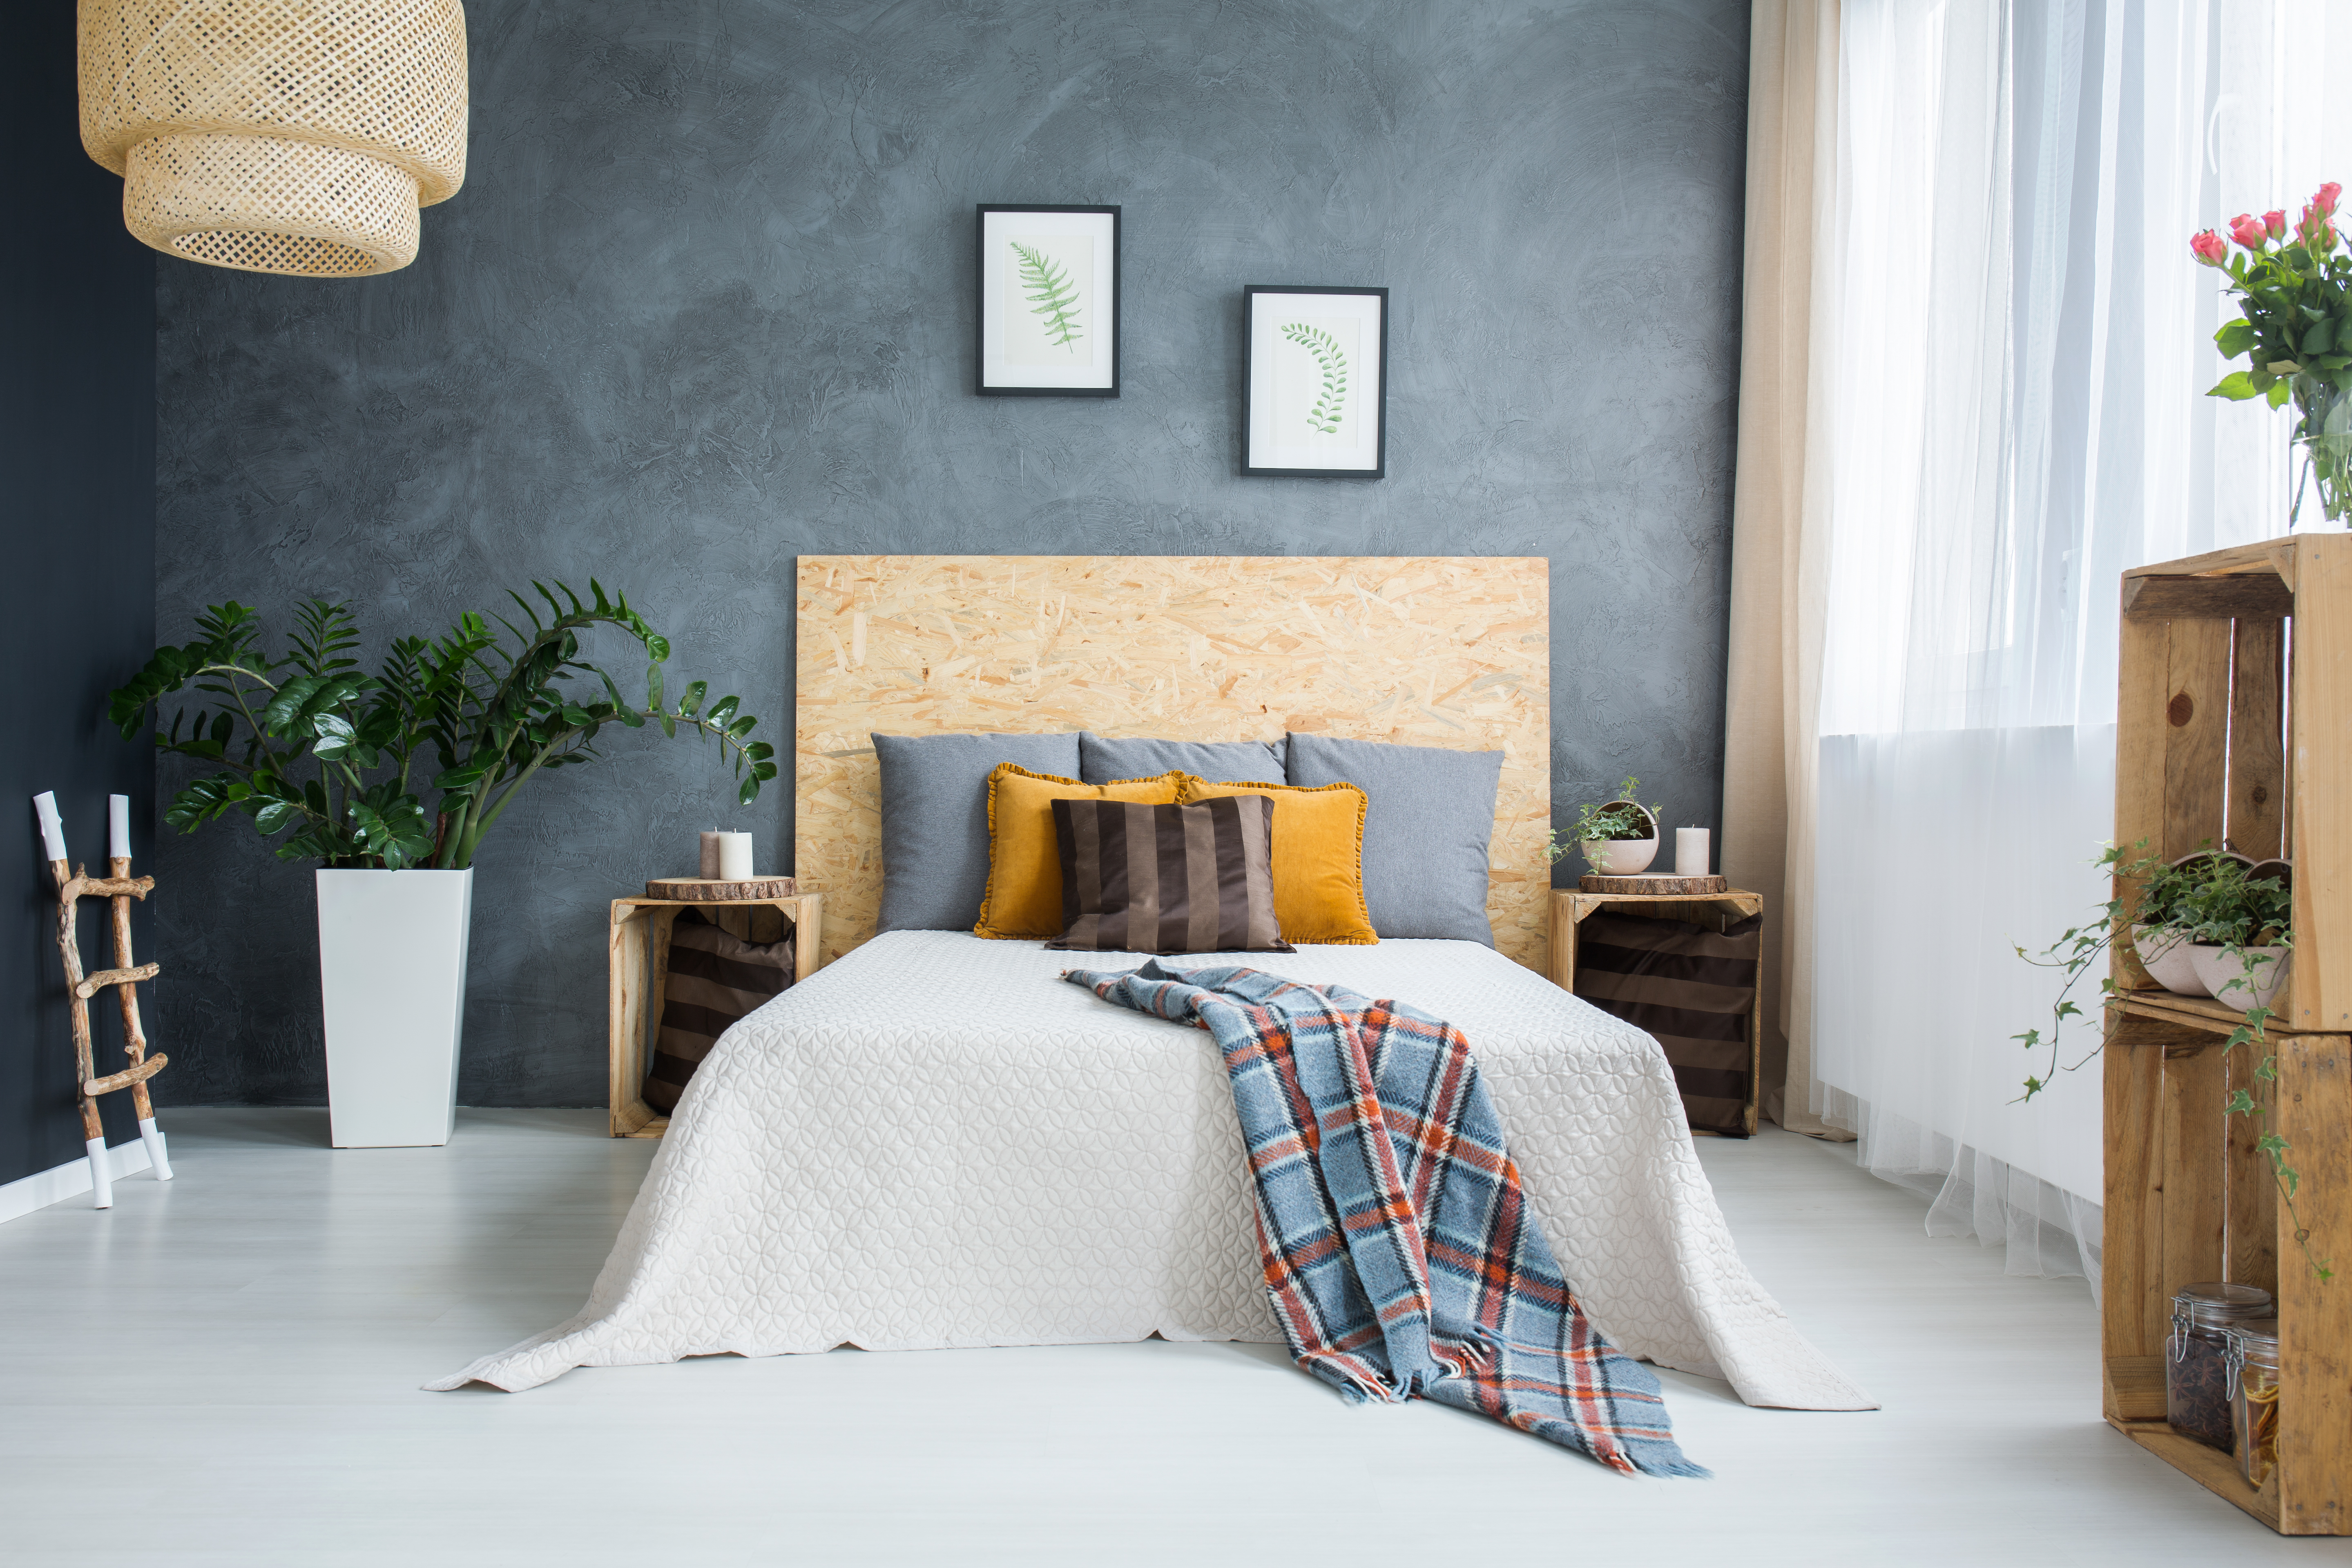
If you are a fan of the industrial, unfinished look, this is a really great headboard DIY idea. Just head down to your local DIY store and look out for a nice piece of chip board that is slightly larger than the size of your bed. You can then either drill it to your wall, or, if you are renting, slide it down the back of your bed. We also love the idea of adding some bedside tables using upright wooden crates, for a great storage headboard.
17. Paint a DIY headboard on MDF
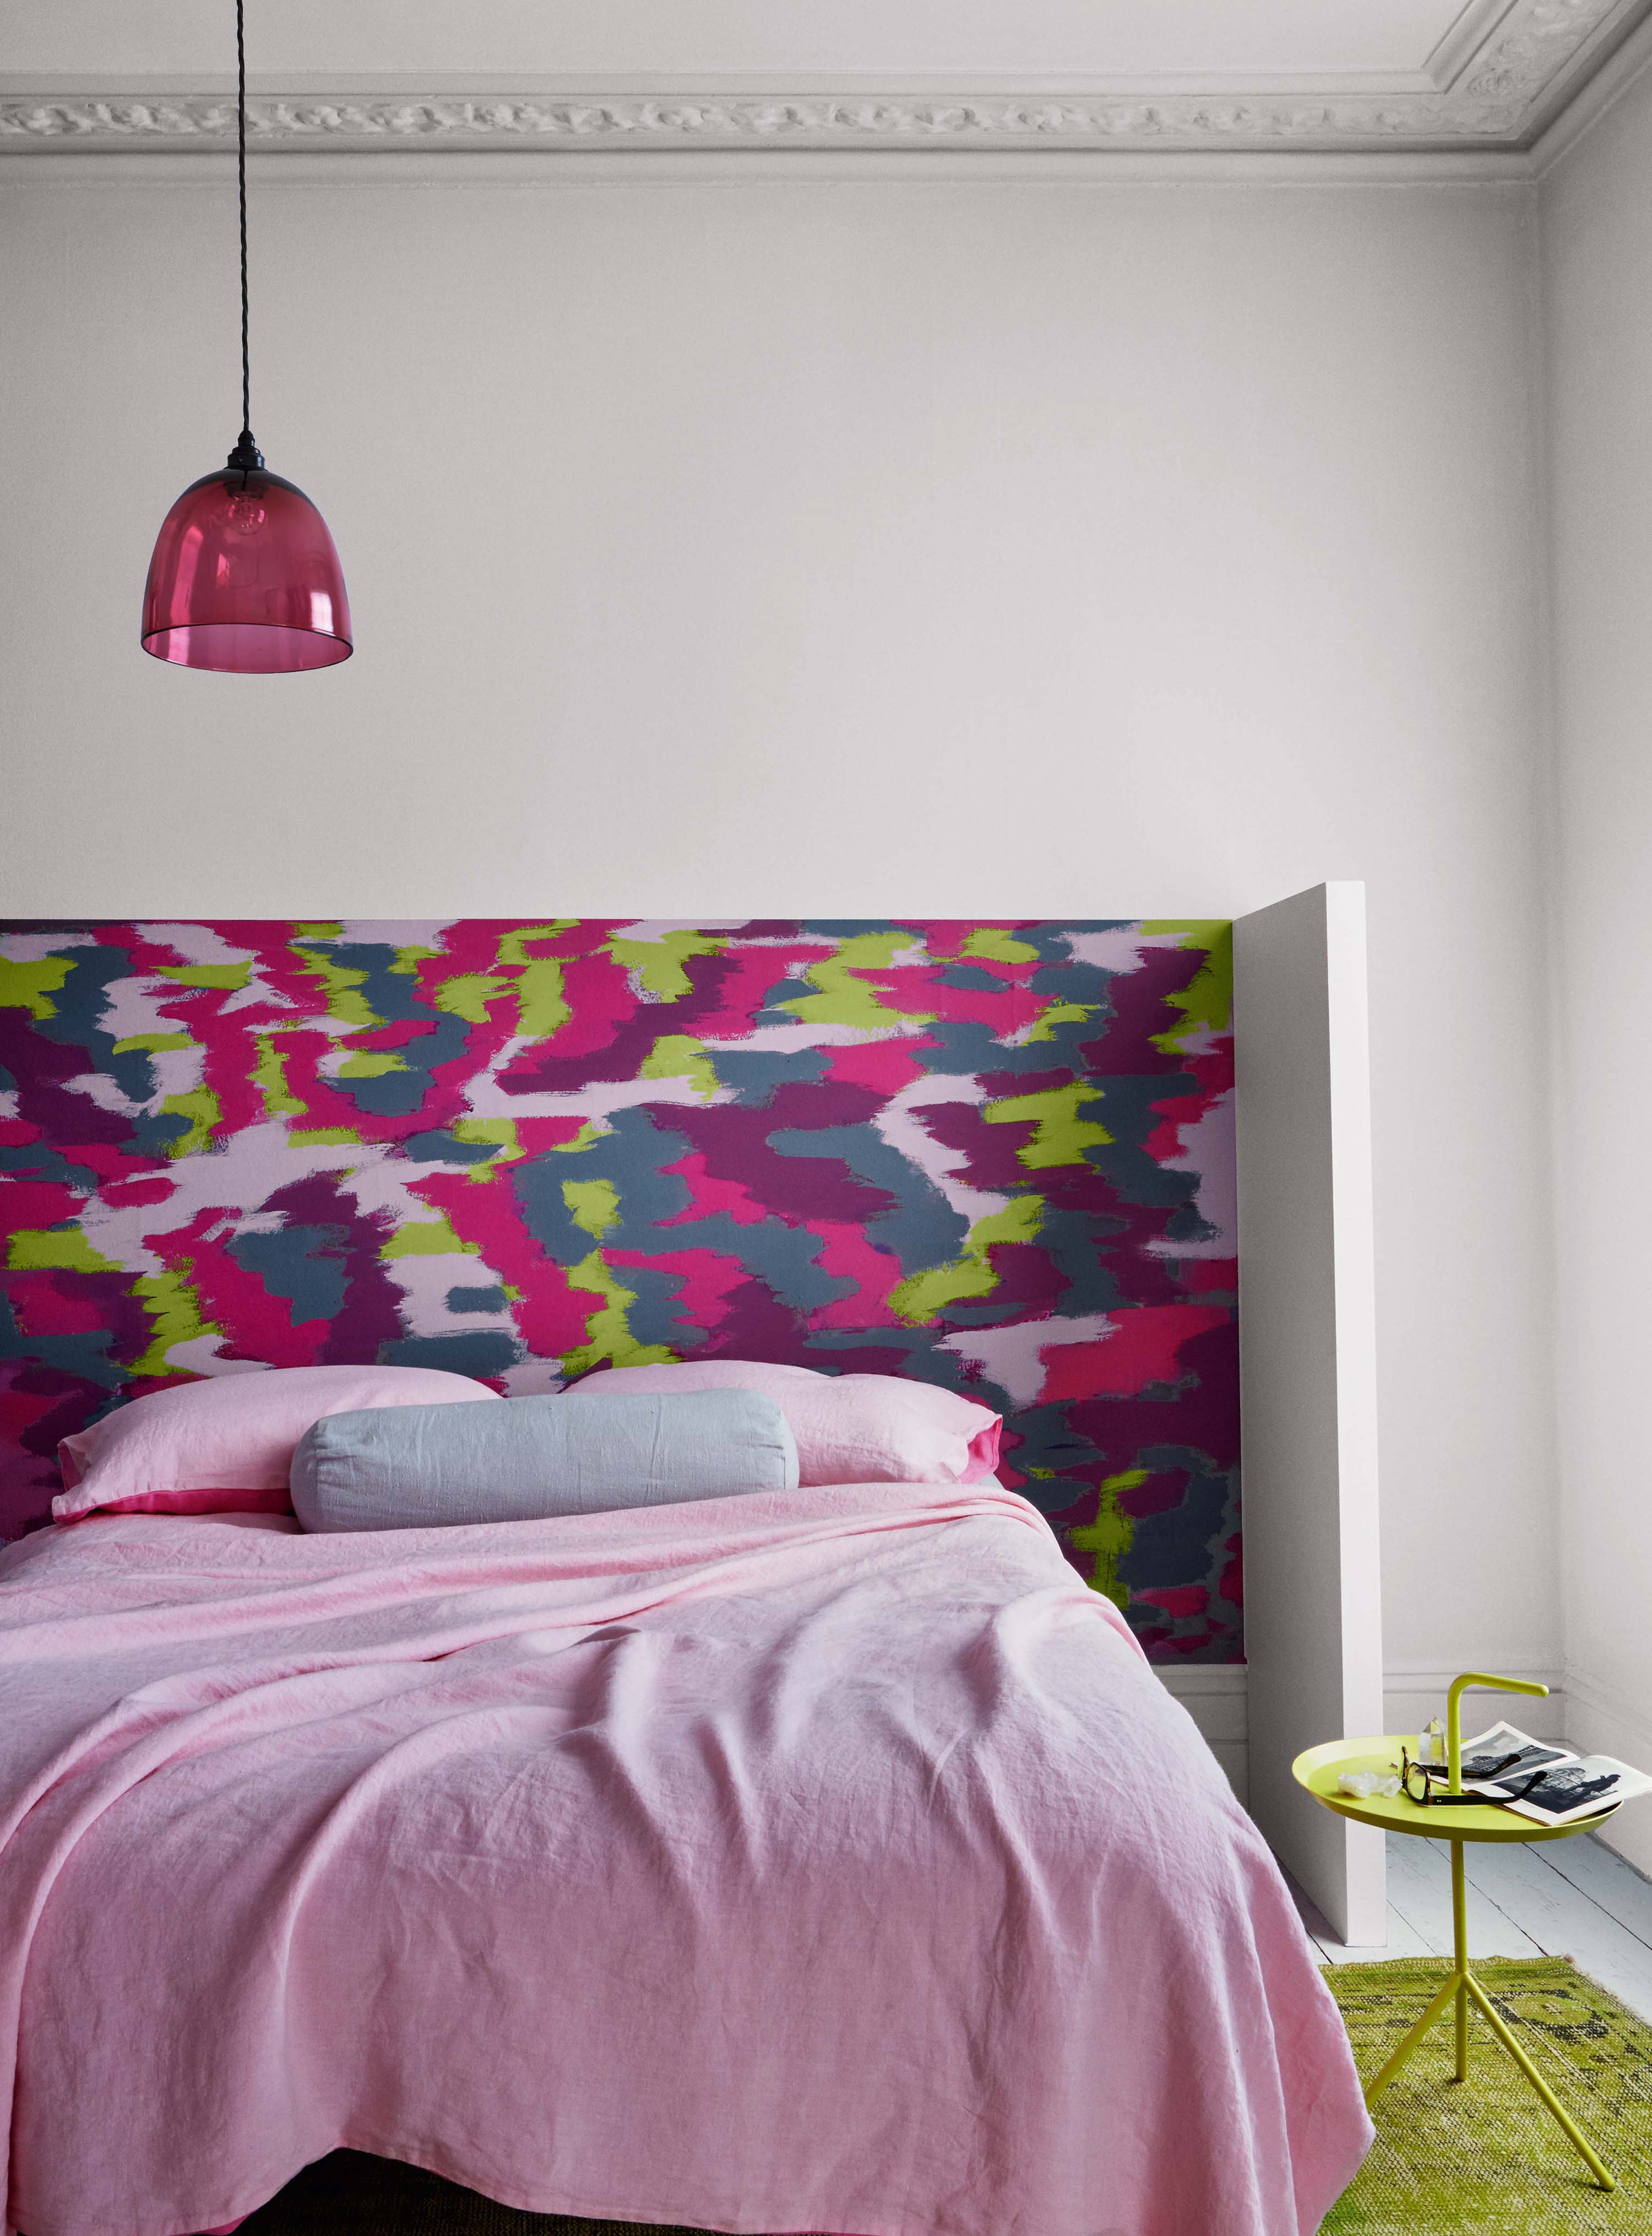
You could, of course, paint that chipboard (or, better still MDF) DIY headboard to suit your room. You could go with an all over wash of color or use some masking tape to create some geometric shapes, or you could paint your headboard in chalk paint and get creative, drawing on your own designs (just make sure to varnish it to prevent smudging).
18. Make a DIY headboard with storage

See, we said we'd come up with a practical headboard for you. So, why not adapt some open shelves to create a DIY headboard with storage? Simply place the shelving behind your bed, choosing a simple unit's that's the same width – or slightly wider than – your bed.
Of course, this one is an Ikea buy, rather than one of our many favorite Ikea hacks. Or, you could just check out the rest of our storage headboards and paint one to suit your scheme. Easy.
19. Or make a headboard out of shoe storage
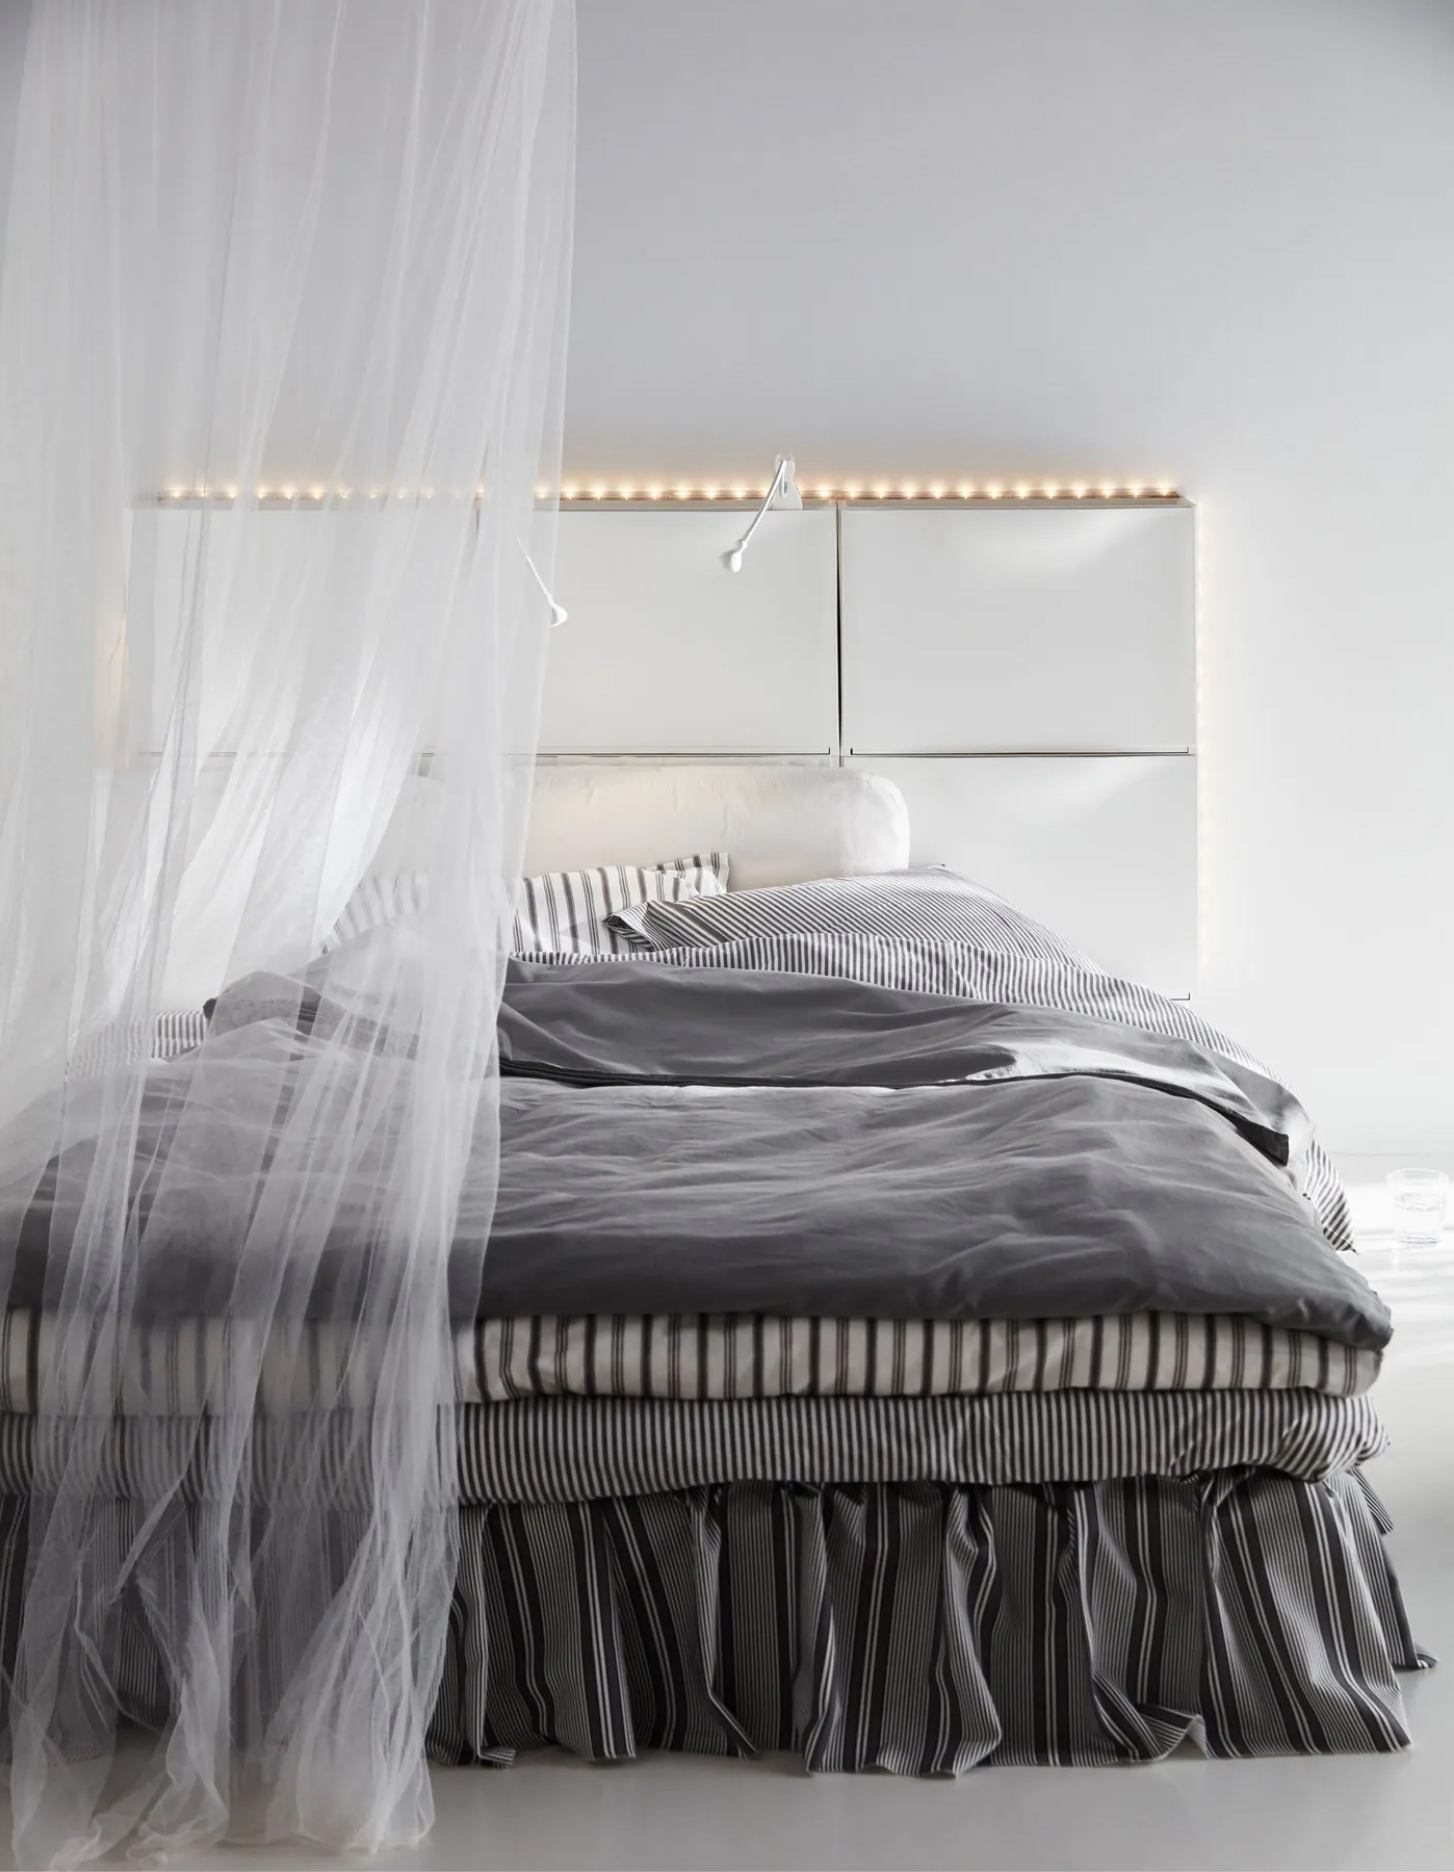
Of course, this wonderful headboard idea also came from the geniuses over at Ikea. It's created using the much-loved Trones shoe cabinet and then lined with LED strip lights to give the bedroom a lovely glow. Use the units to store your books, spare bedding, your PJ collection or even clothes if you are really tight on closet storage.
20. Create a DIY headboard using floorboards
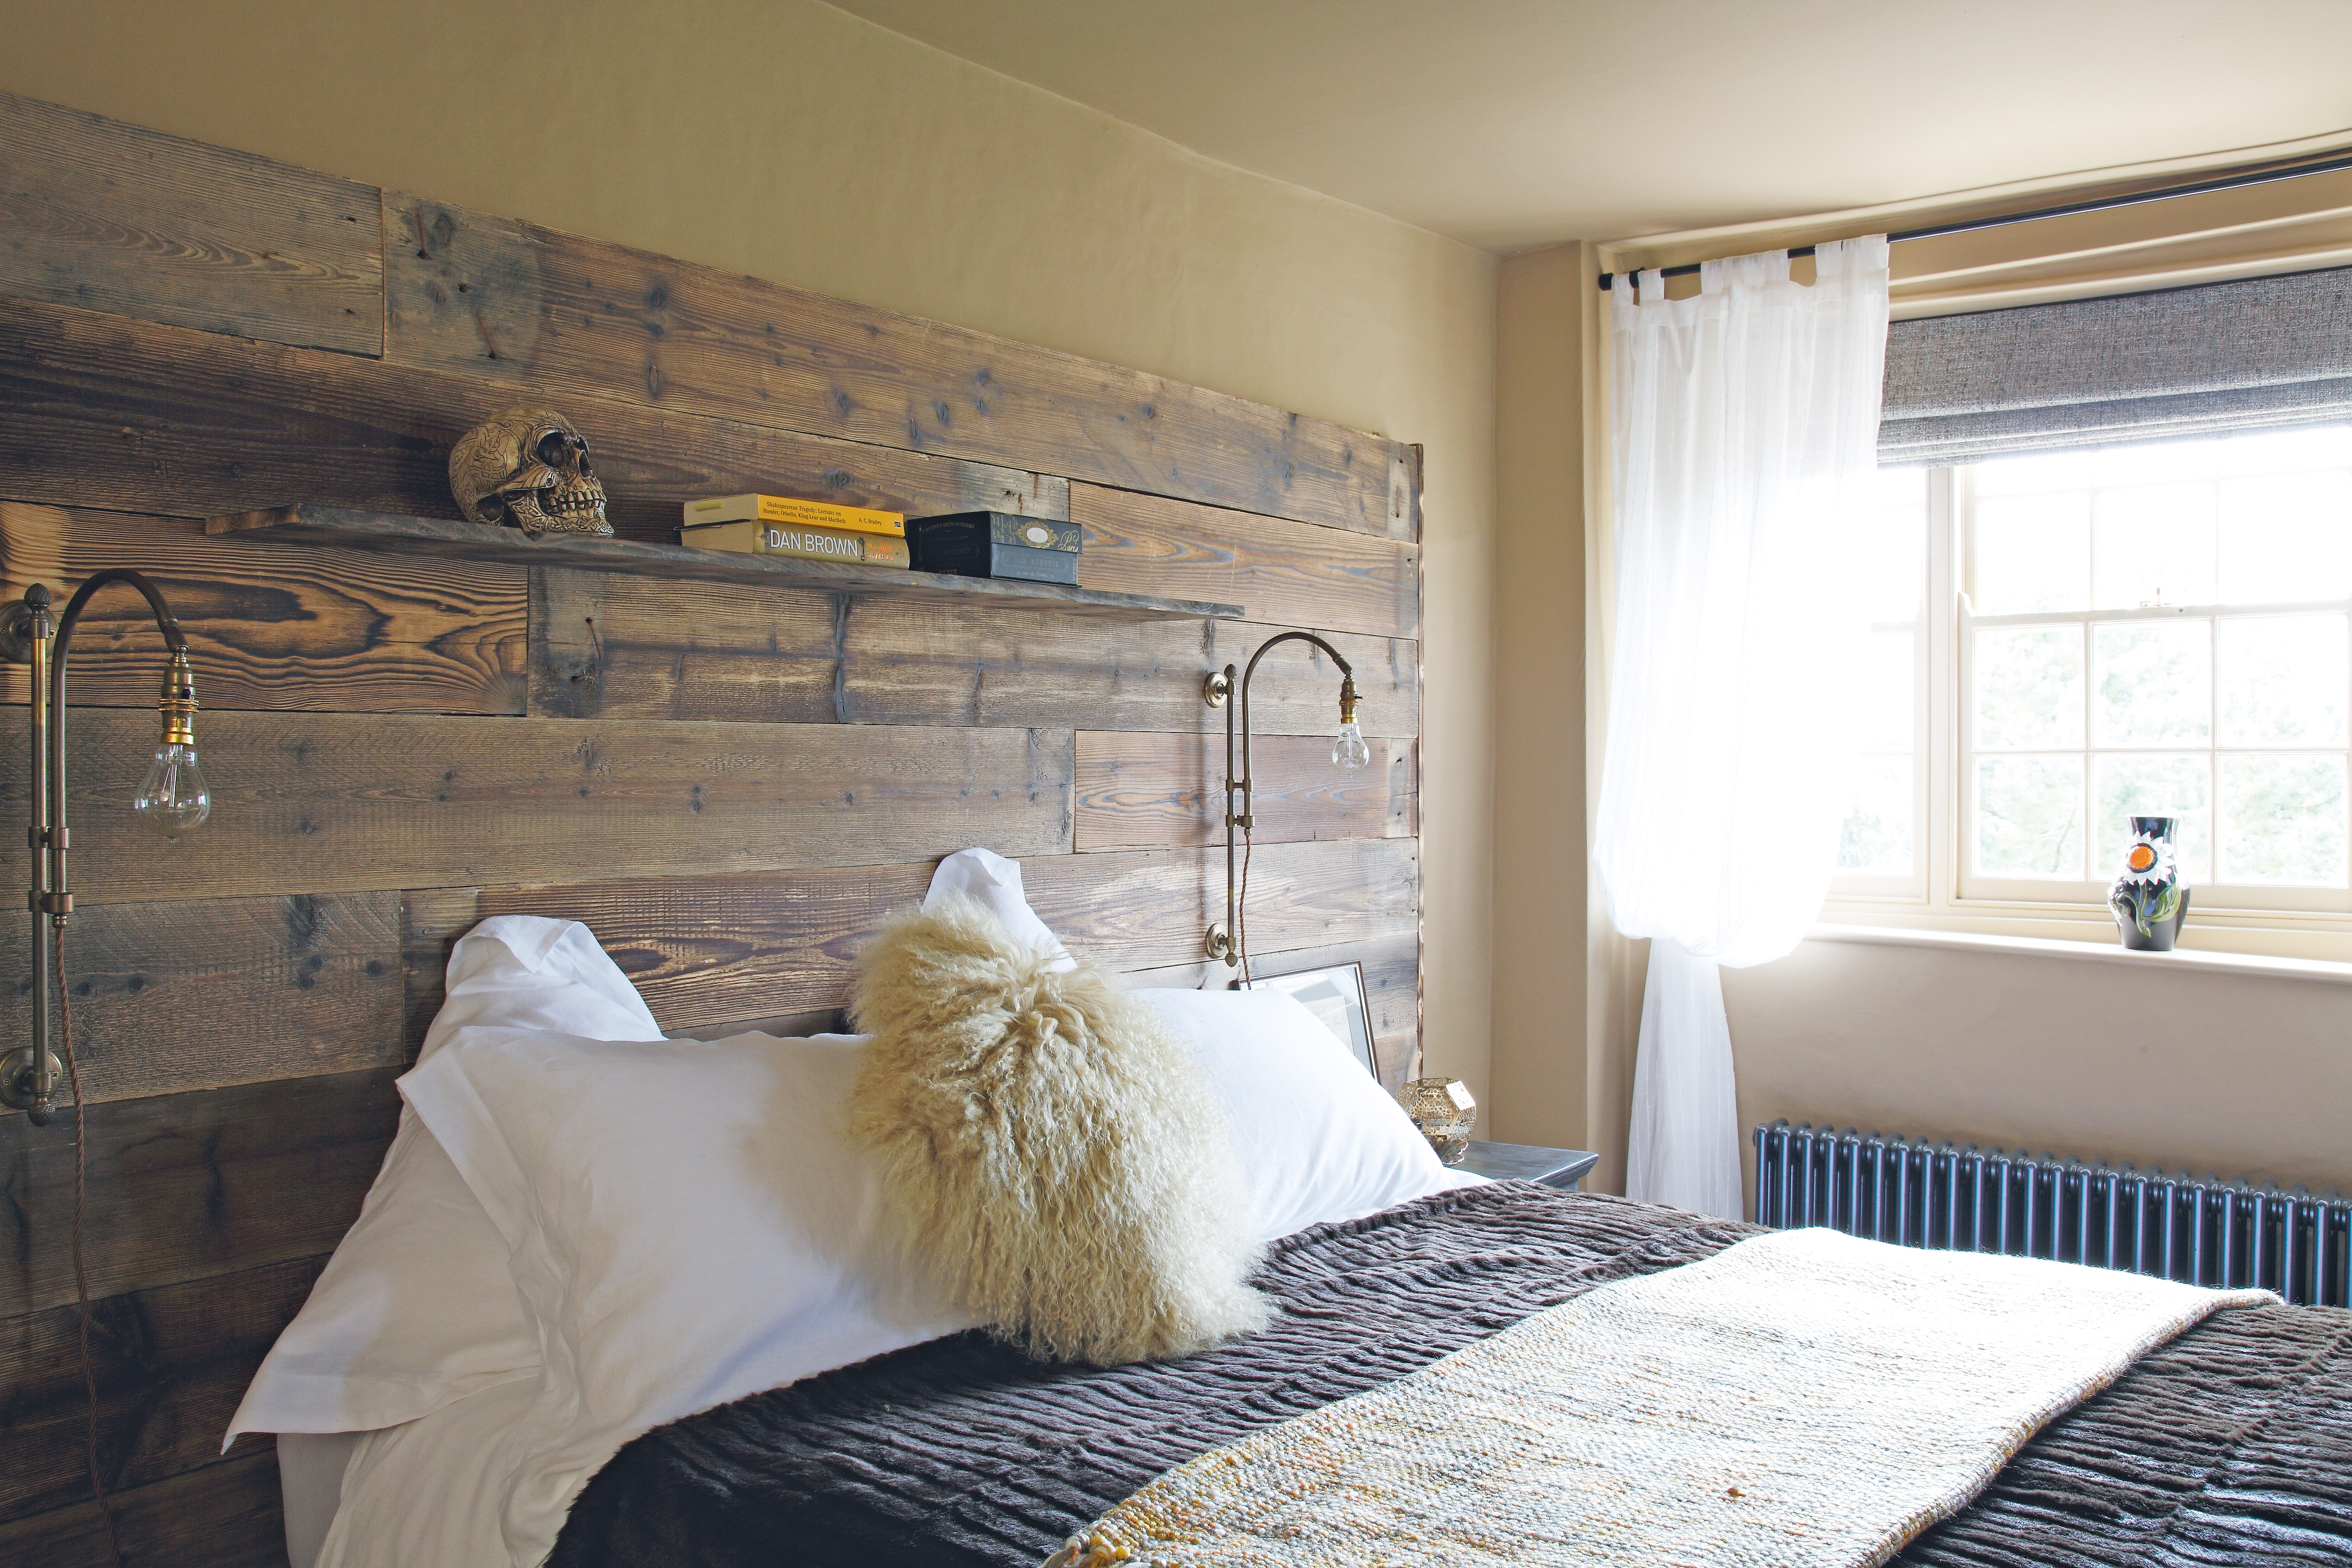
This DIY headboard idea is a bit more hands on, and it takes a but more time and patience than just slapping up a square of paint around your bed. But any DIY novice could still get some great results.
Start by sourcing your floorboards – we love the rustic look of reclaimed floorboards – so have a look on eBay or dig around reclamation yards. You could also buy new floorboards or planks of timber. You will then need three or four pieces of batten, sizes dependent on how large your headboard will be. Then, simply cut everything to size, fix the battens to the wall to create a frame, and either screw or hammer the floorboards to the battens. For a double bed, we'd put a central vertical batten into the framing, too, to create a solid base.
21. Take your headboard onto the ceiling
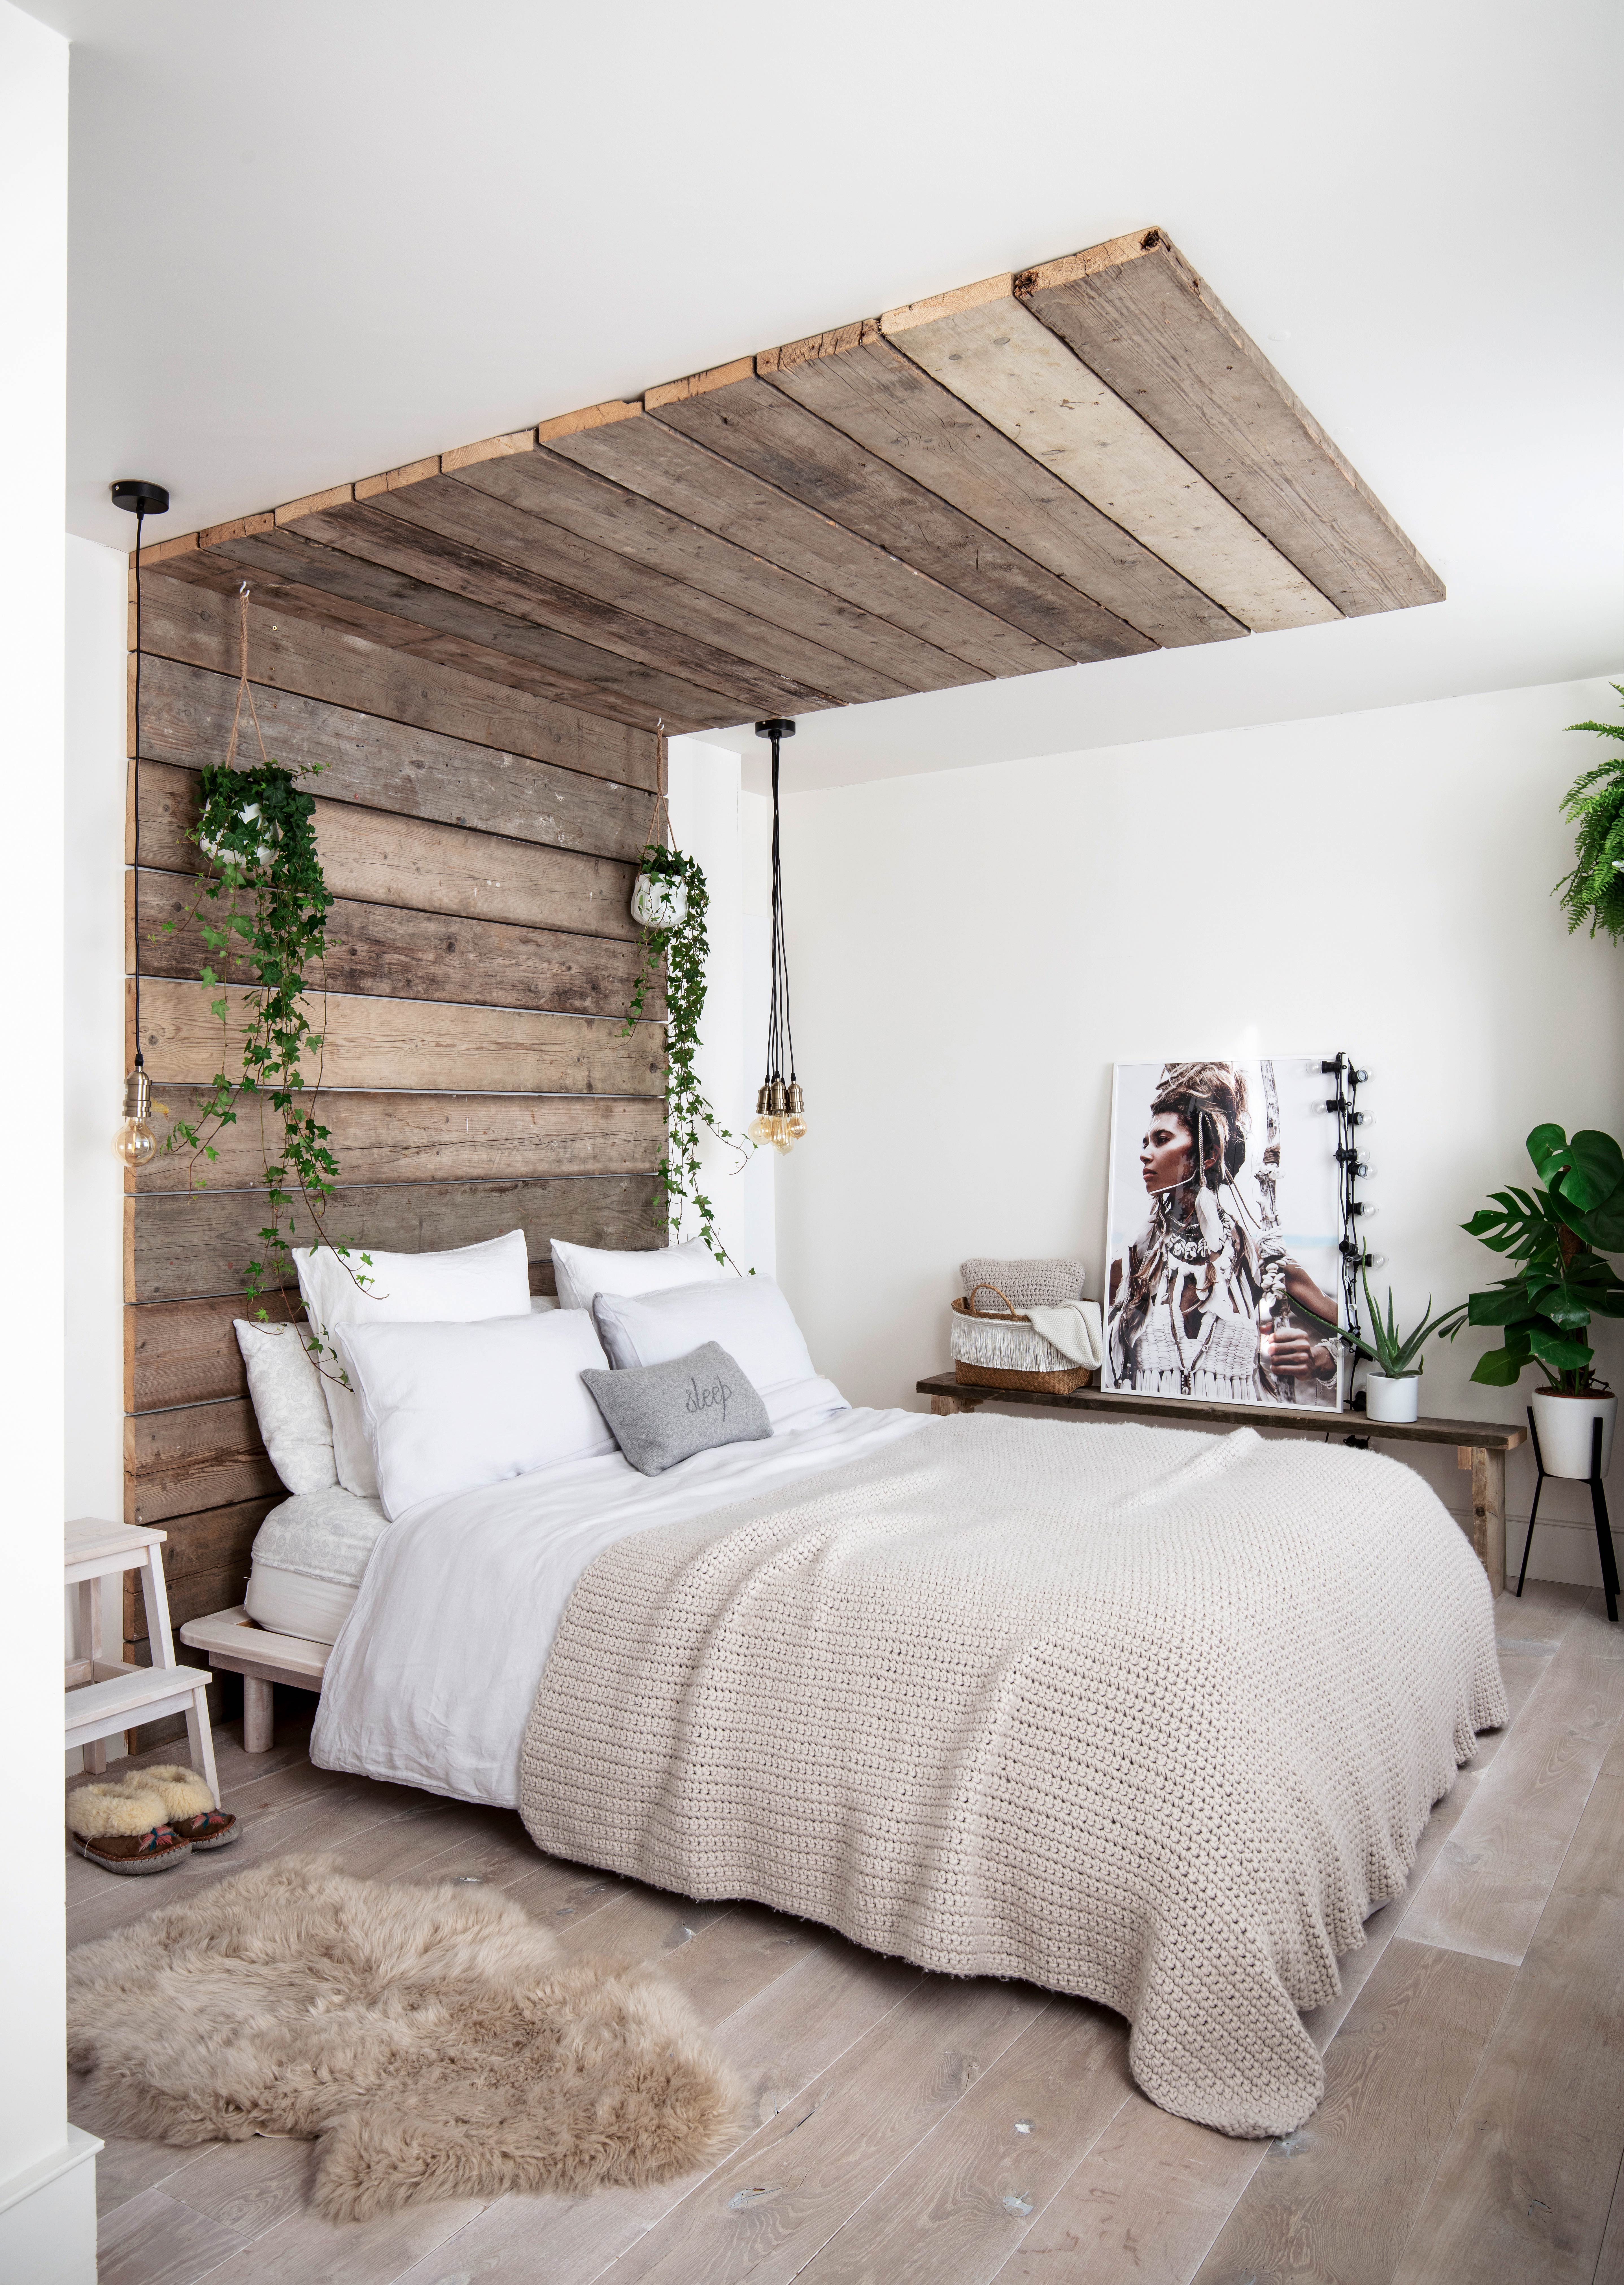
Take the rustic look even further by bringing those boards up onto the ceiling. It creates almost like a canopy or a treehouse feel to the bedroom and works so well with all the lovely wooden textures going on in the rest of the room. Pick a low platform bed to sit underneath so you really get the full effect and hang plants from above to really add to that natural, rustic vibe.
22. Upcycle a secondhand find
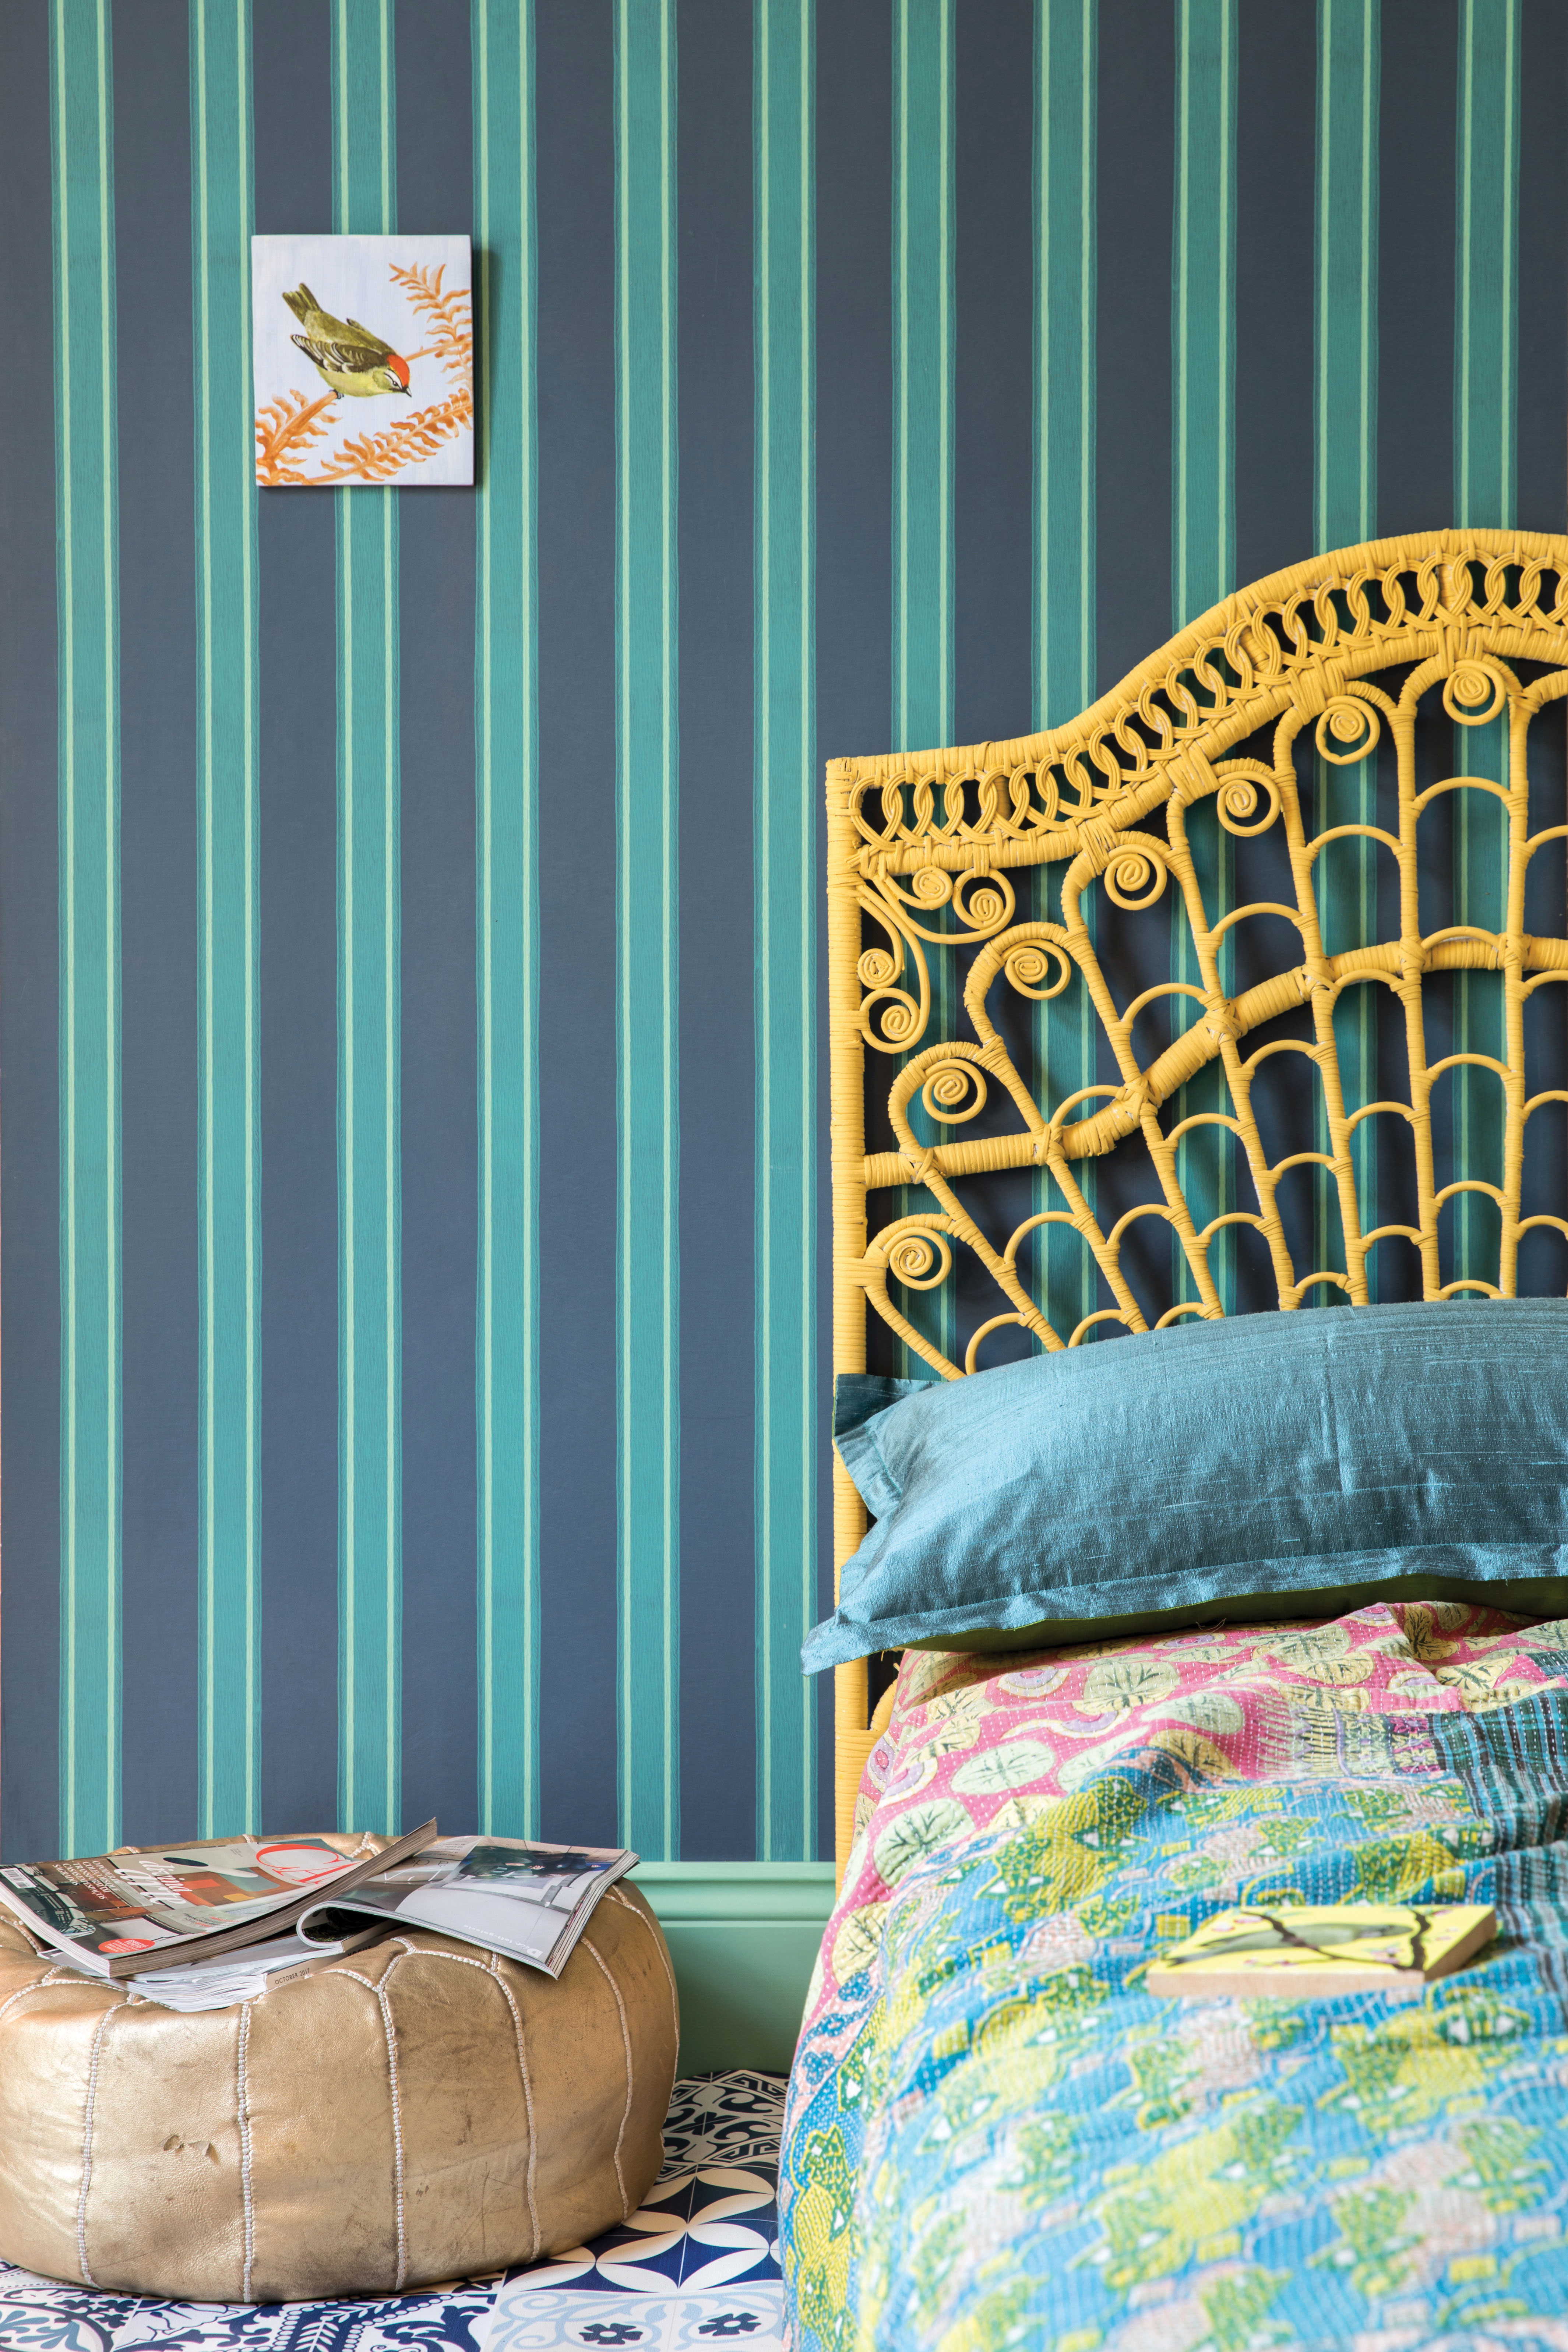
Been lusting after one of those 1960s/70s style rattan headboards and happened upon one at a boot fair for half the price of the shops? If it's seen better days, the smart money is on spray painting it to suit your bedroom's scheme. Black looks gorgeous against contemporary or boho room schemes; white is pretty in country-style or French-style bedrooms; but for a colorful bedroom, choosing a bold, primary shade is a win-win. We love how this one looks.
23. Use doors to makeshift a headboard
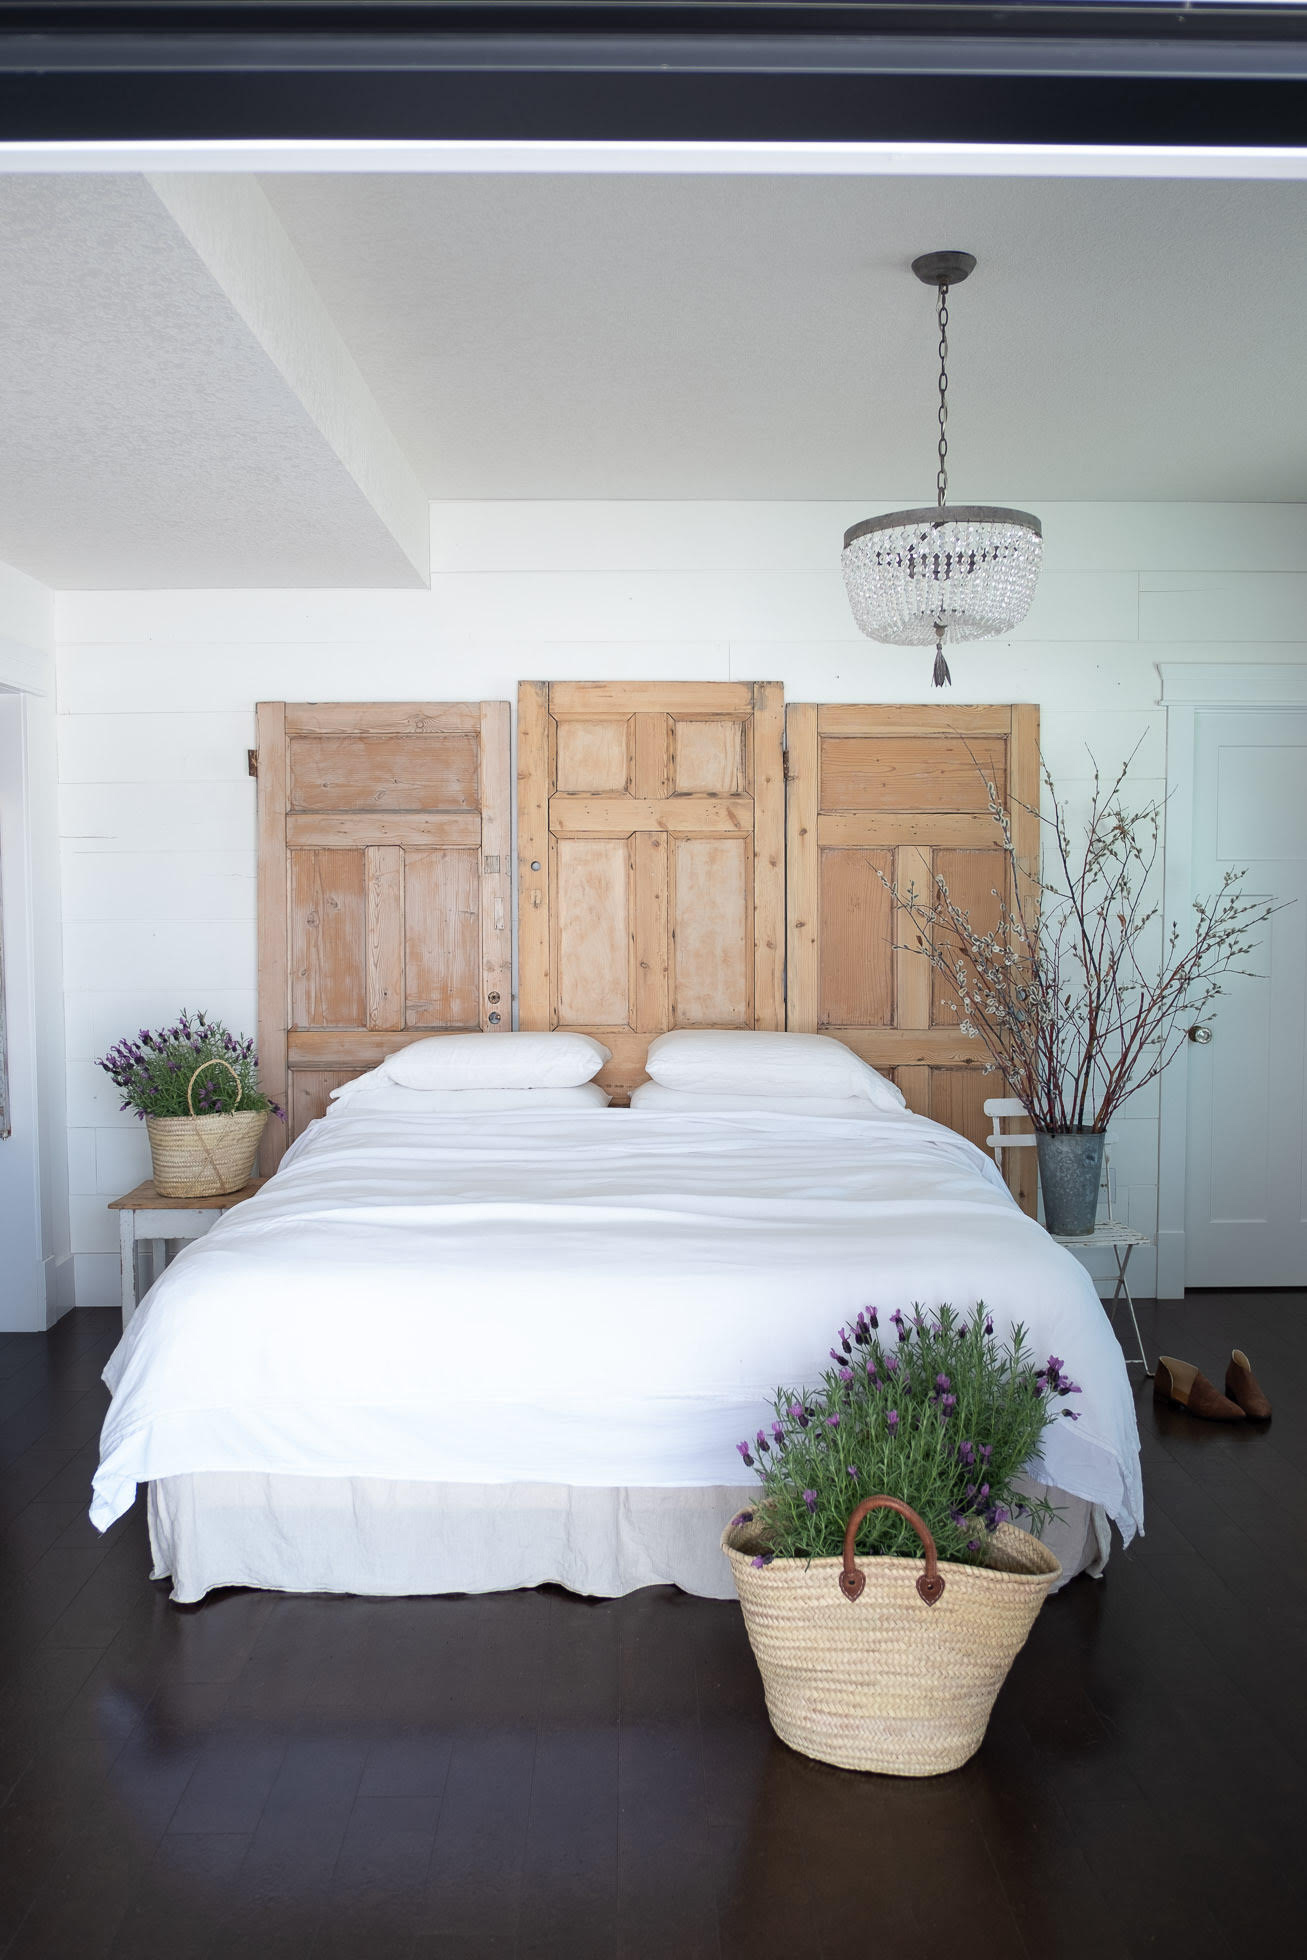
We love love love this idea from the bloggers over on Vintage Society Co. .Look out for some old wooden doors on eBay or reclamation yards, they don't need to match, or even be the same size. You can secure them in place behind your bed using a drill.
If you find a gorgeous-looking door but it's painted in a not so gorgeous color, don't worry you can just follow our guide to how to strip paint from wood. Or alternatively, you could always copy this headboard DIY idea, but paint your doors to make it more of a statement. For that you are going to need our guide to painting wooden doors.
24. DIY a headboard with paint and tape
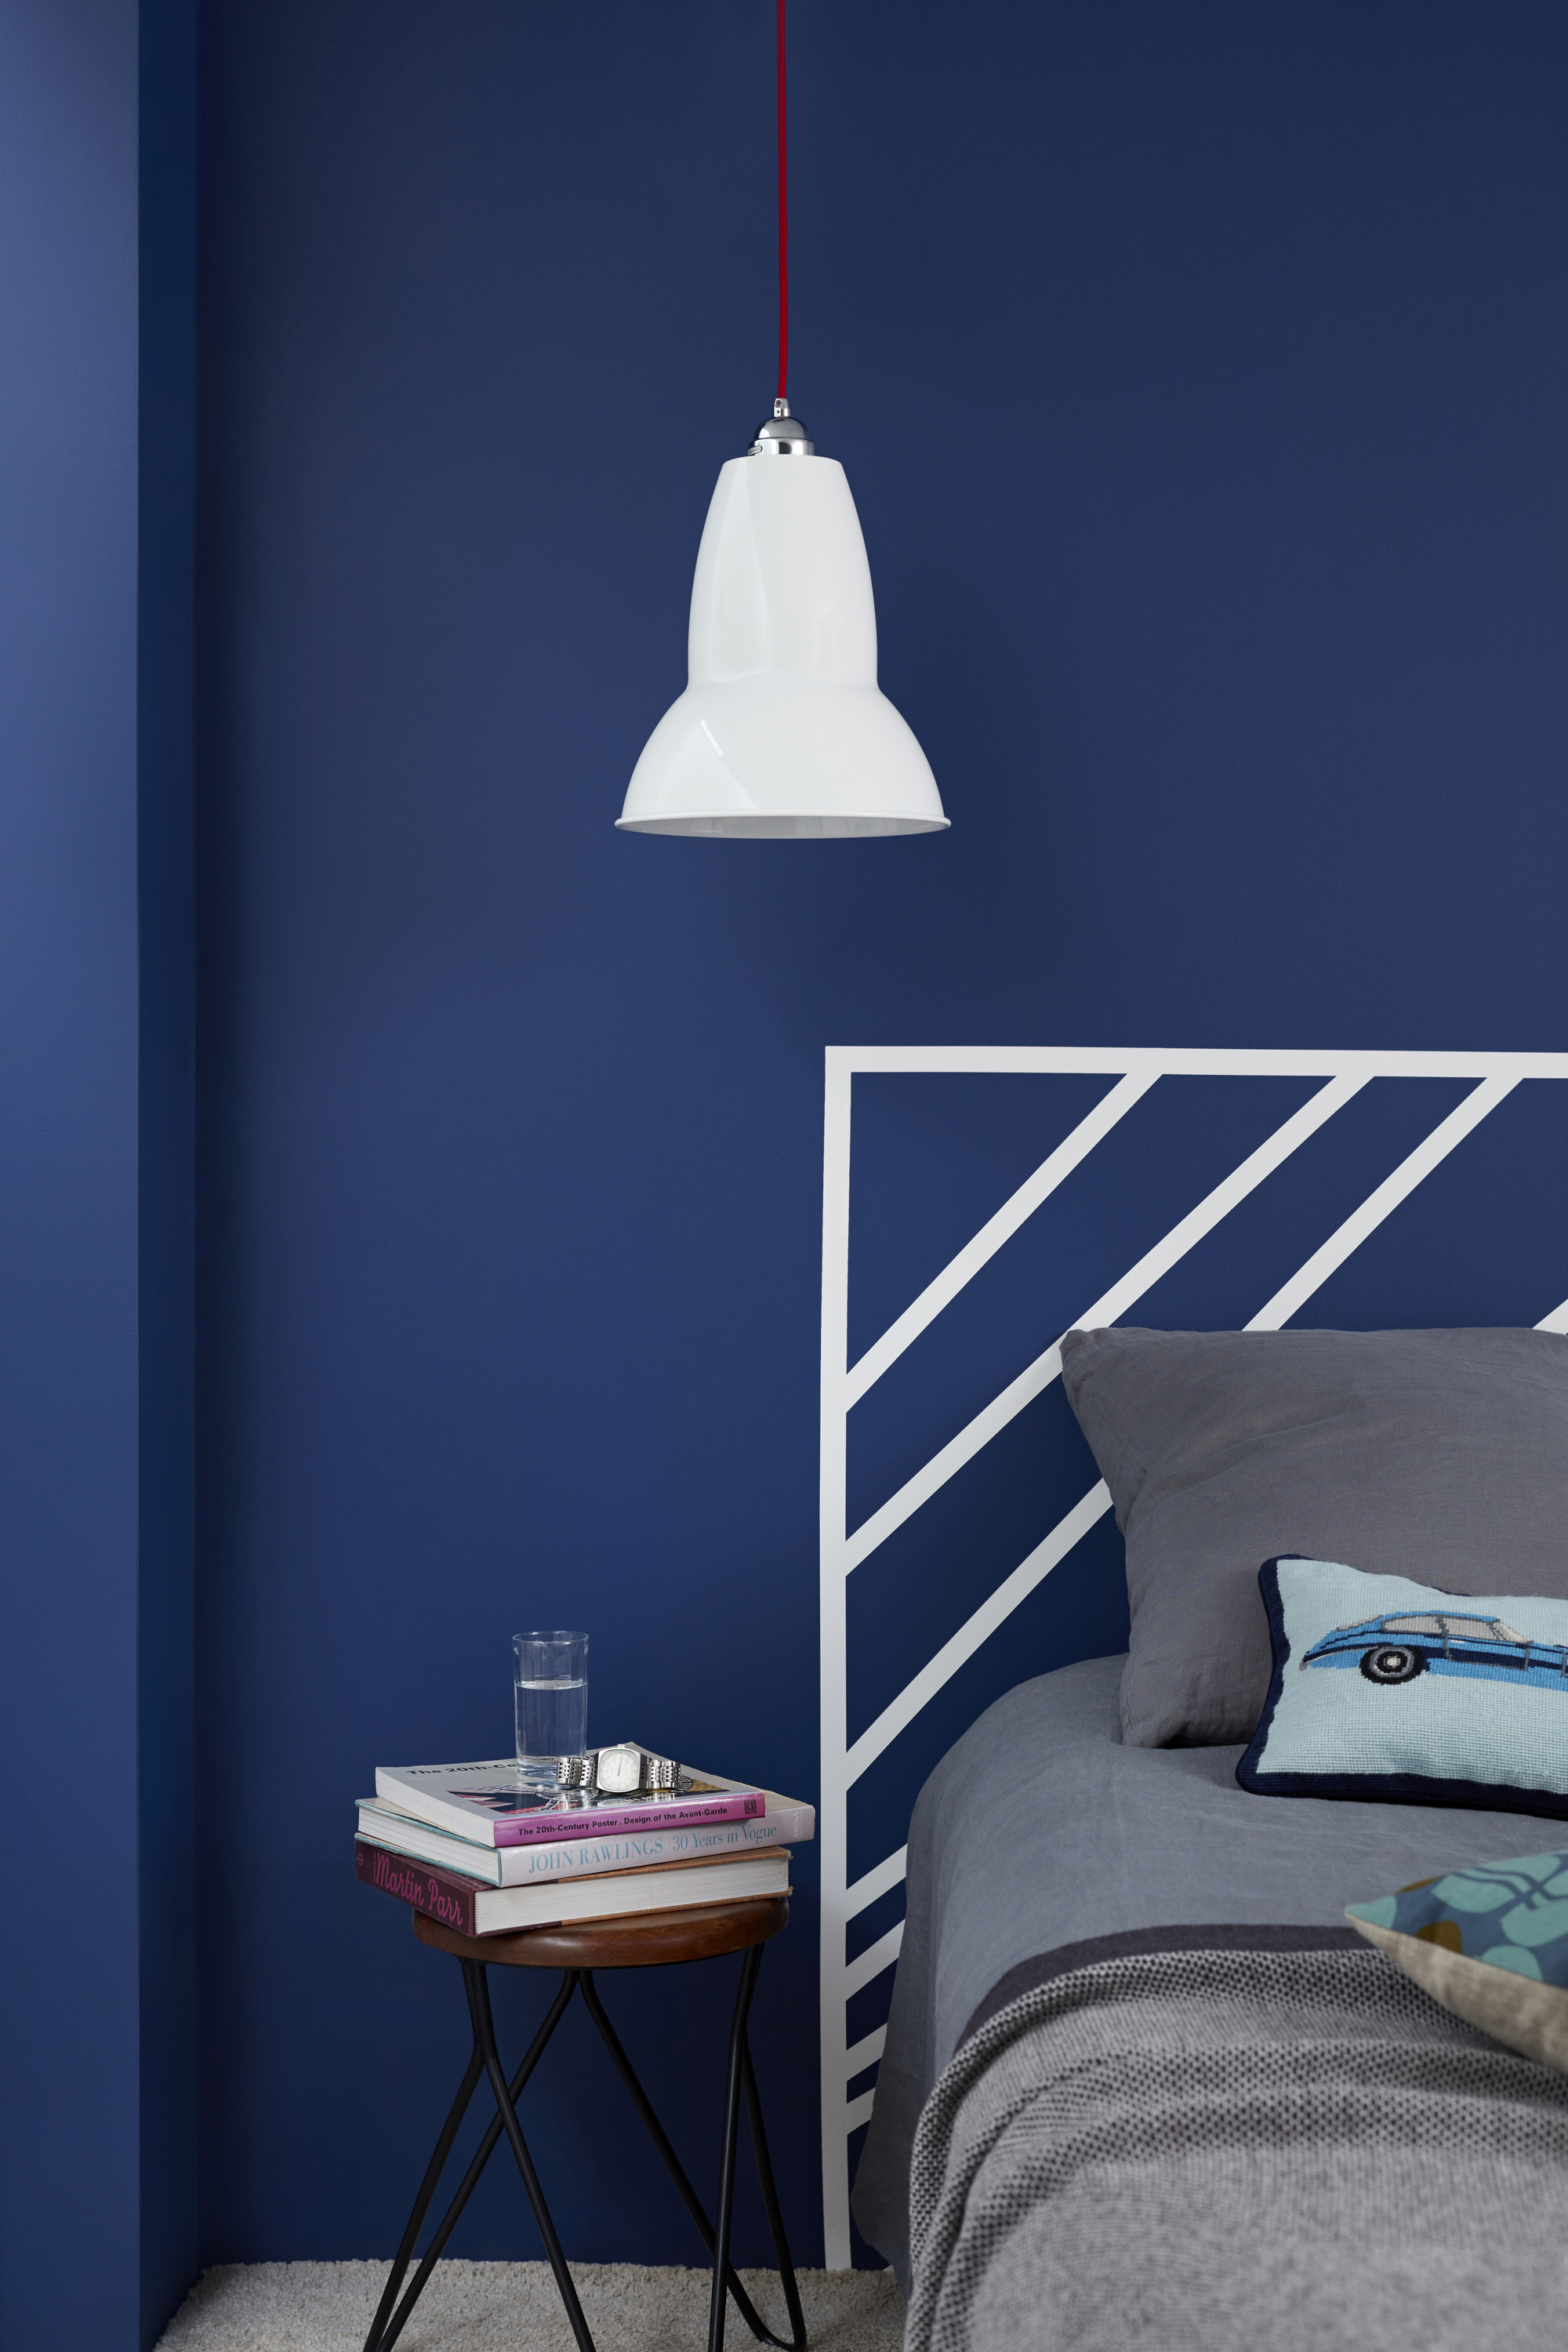
You will need:
- Tape measure
- Weighted string
- Spirit level
- Paper
- Low tack masking tape
- Wall paint of your choosing
How to:
- Measure and draw out the headboard border. Use the tape measure, weighted string and spirit level to ensure you create straight lines. Our top tip? It's a good idea to play around with ideas on a piece of paper first to perfect your design before you start drawing on the wall.
- Mark the border of your design with masking tape. Low-tack tape is the best option here to ensure it doesn't damage the paint when you remove it from the wall. Seal the tape by painting it with the background color and then allow it to dry.
- Mark the design you want to create for your headboard with masking tape. Simple diagonal stripes have been used here, but you can create any design you want. Seal it by painting over the area in your background color. Allow it to dry.
- Paint your wall and headboard area with your chosen color (blue here) and allow it to dry. Peel off the masking tape and hey presto, a unique headboard that takes up no extra space in your room.
25. Create a patterned headboard with boards
You will need:
- Plywood
- Hand or electric saw
- Wood glue
- Spirit level
- Measuring tape
How to:
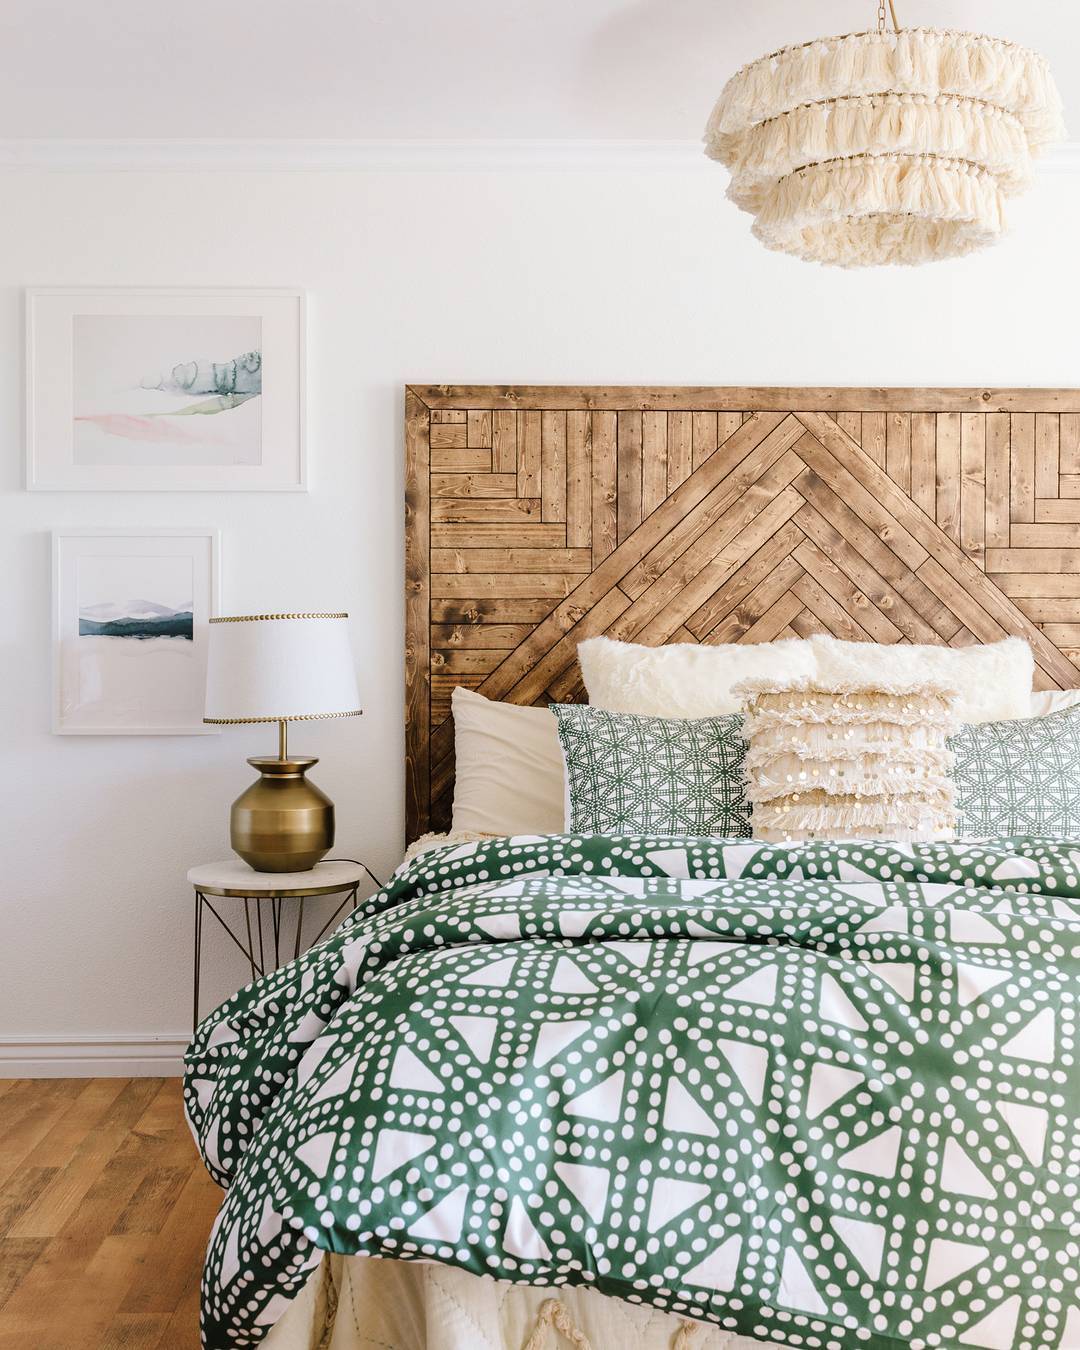
This might look complicated, but this DIY headboard would be super easy to recreate using plywood as the base and cut boards to create your pattern. Plan your design (we love the chevron look if you after something simple) cut your boards to size and you can secure them in place just with wood glue.
26. Paint a DIY headboard using a bold hue
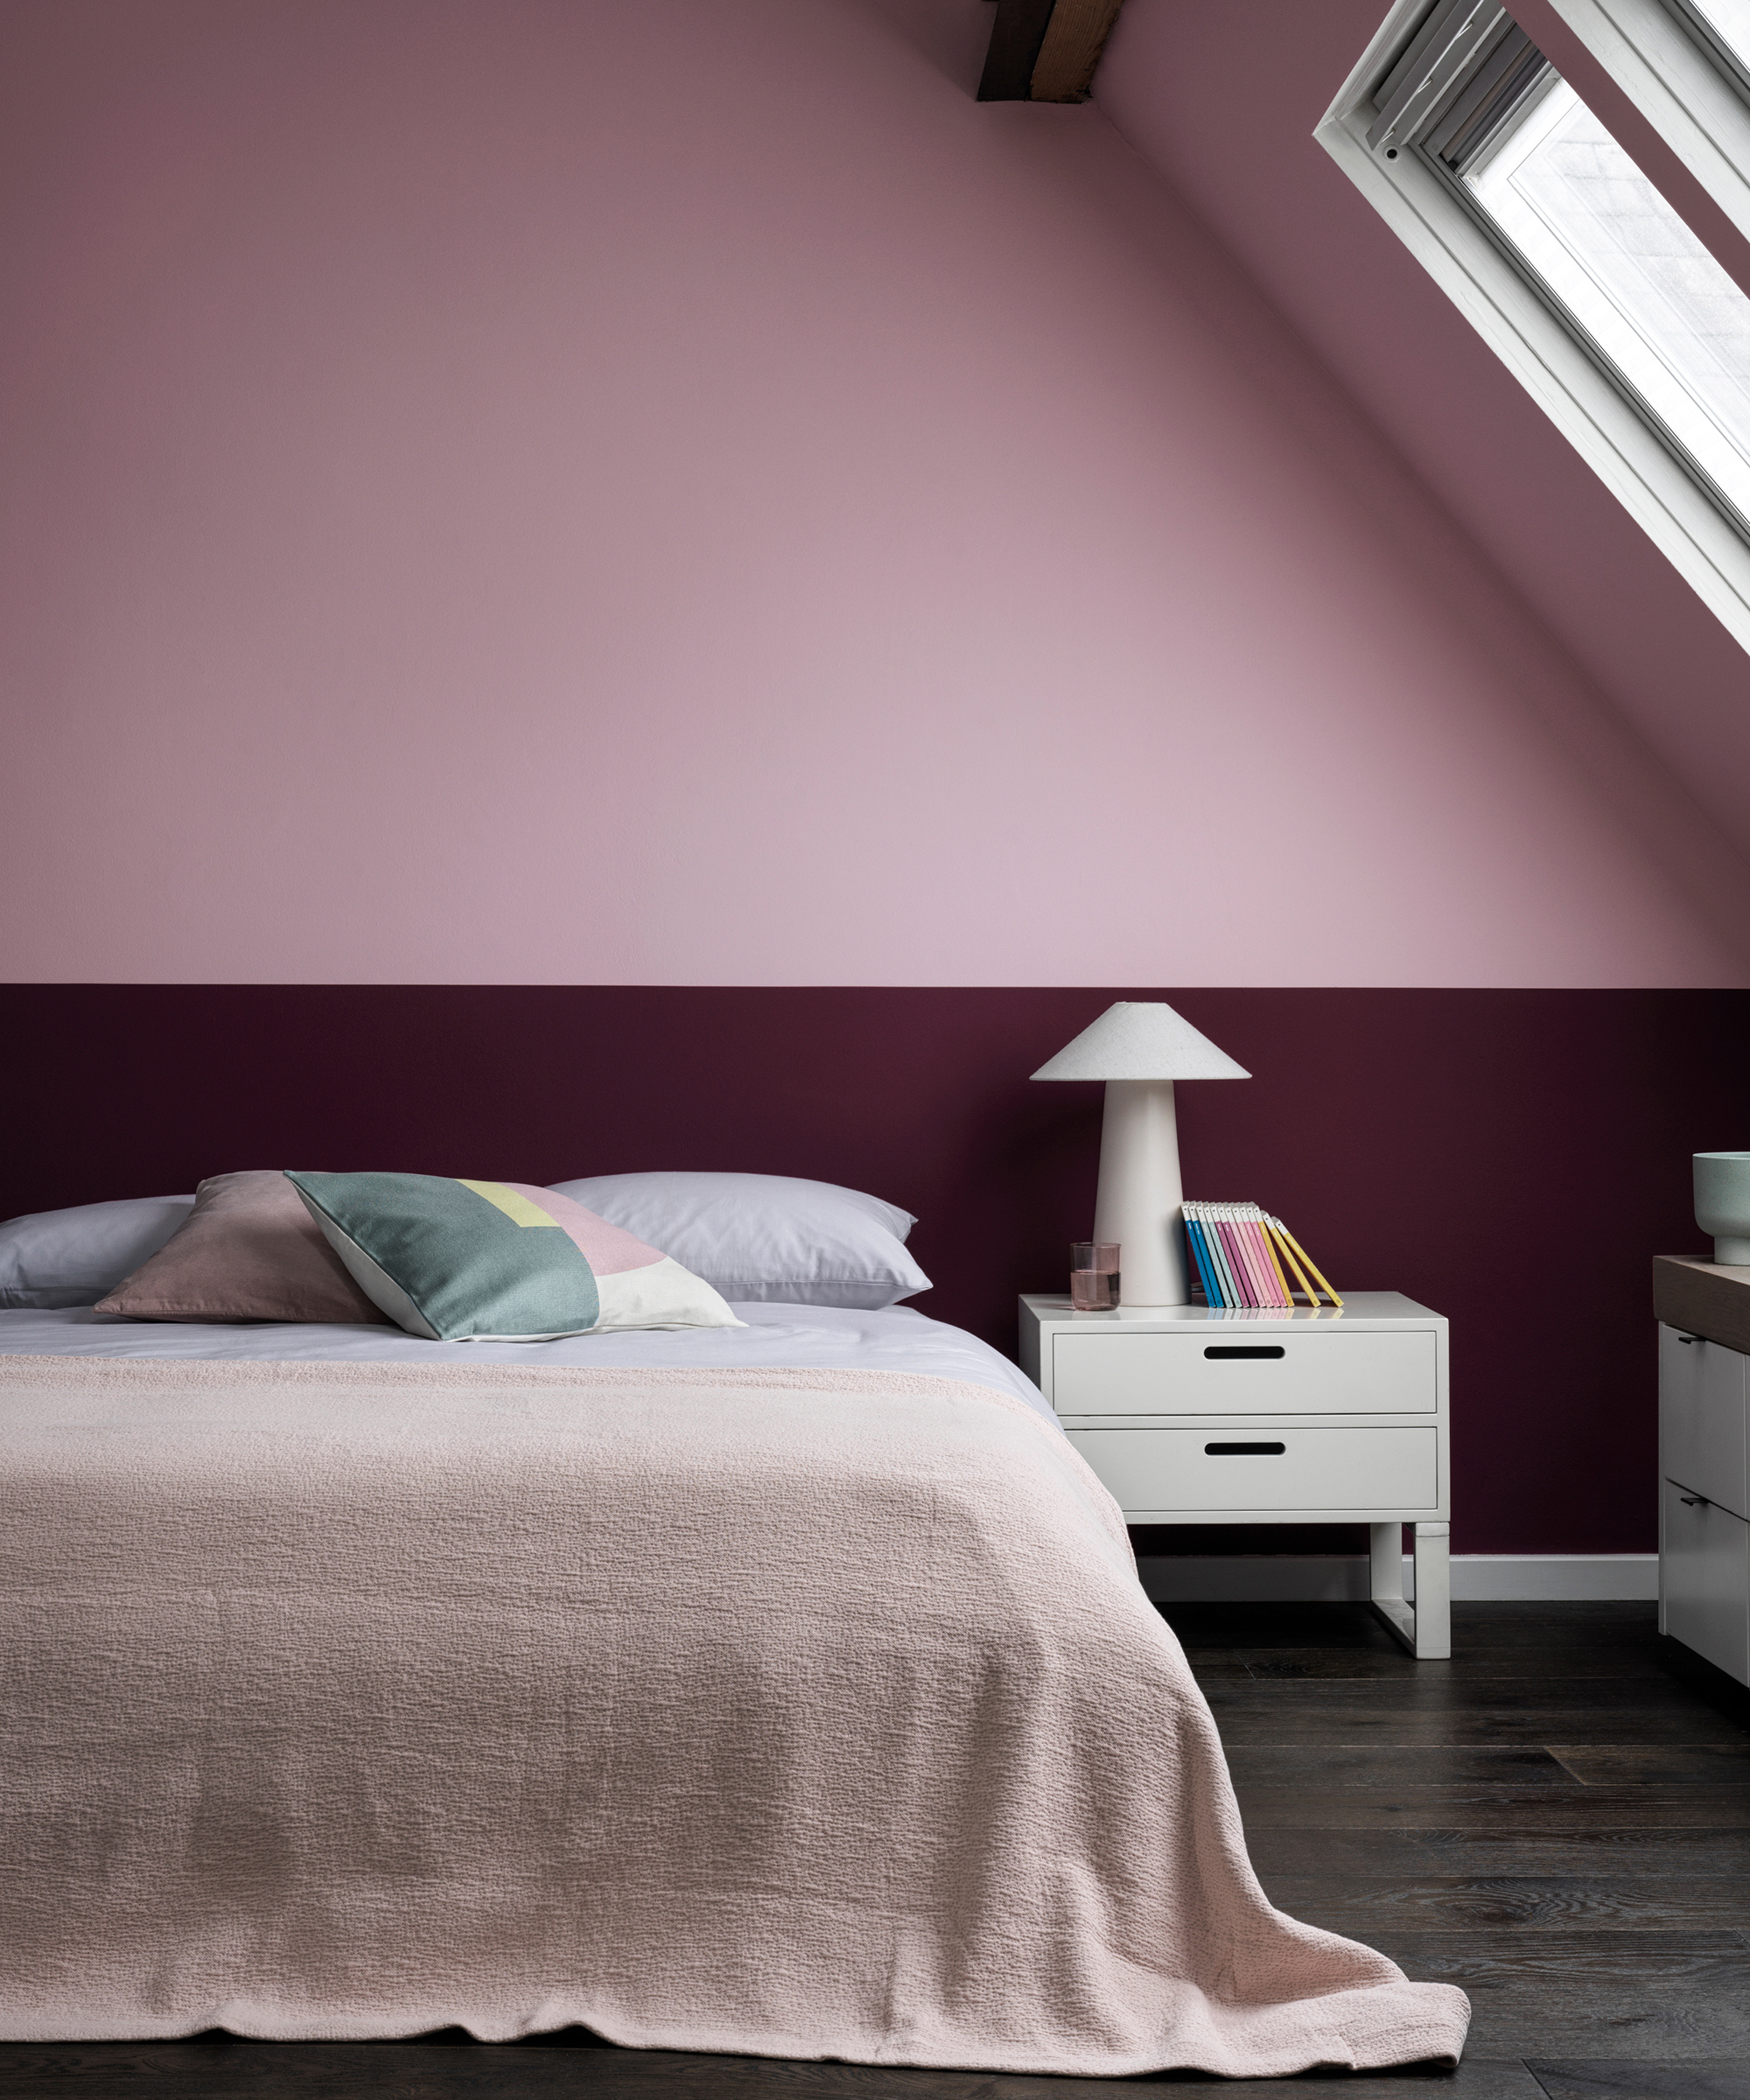
'For an instant and easy update, why not do something dramatic on the wall behind the bed. Something as simple as a bold, color like charcoal, deep berry, or yellow is an easy way to achieve this effect,' says Justyna Korczynska, senior designer at Crown.
'Alternatively, why not create a patchwork of overlapping stencils to add an unusual feature. As a visual link, introduce one piece of furniture or accessory, like a single chair or oversized bowl, in the same color as the feature wall. You don’t need to use a huge amount of paint to create this striking effect.'
What can you use instead of a headboard?
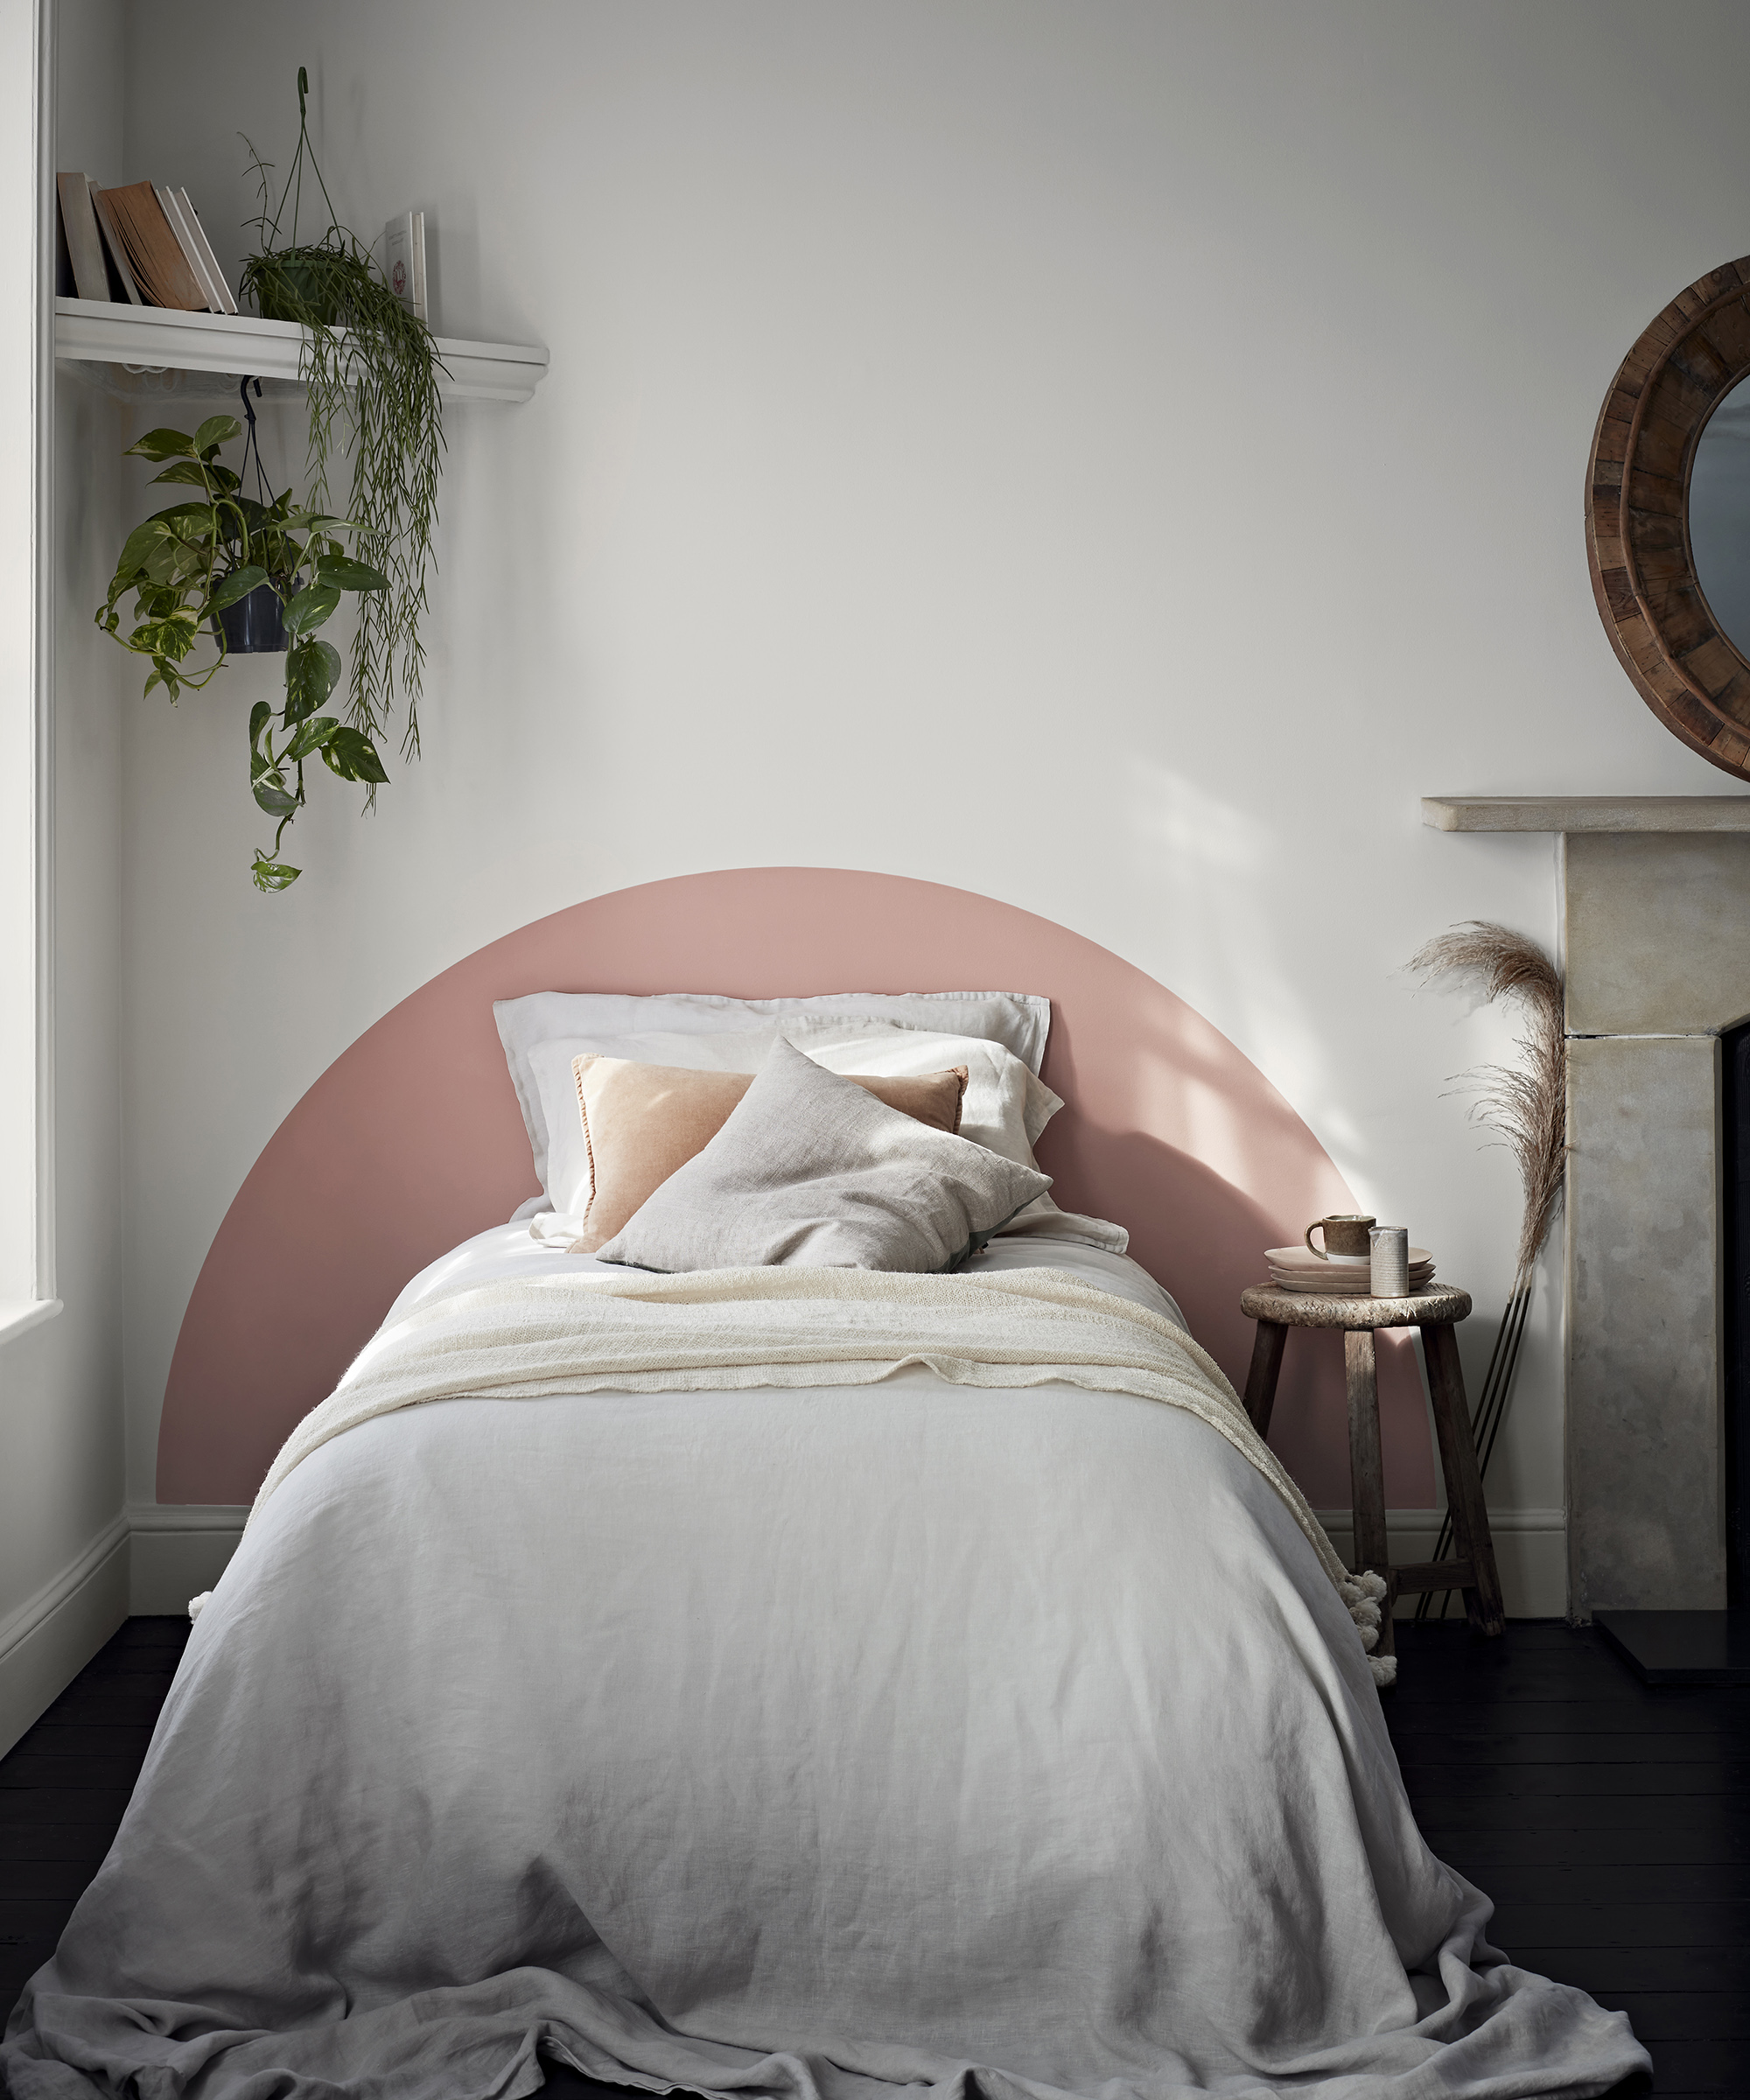
There are plenty of things you can use instead of a store-bought headboard. Use paint to create the shape of a headboard, hang wallpaper where a headboard would normally go, or secure a rug behind your bed instead. You could replace your headboard with floating shelves to display books and houseplants or create a gallery wall to give your space some texture and interest.
What wood is best for making a headboard?
If you are making a wooden headboard from scratch, plywood is a good option if you are on a budget and plan to paint it or cover it. If you don't intend to cover your headboard and want to leave the wood bare, pine or any hardwood in fact, would be a better choice.
How much does it cost to make a headboard?
The cost to make a headboard will vary on depending what type of headboard you are making. For example, if you want to create a 'headboard' using just paint that could cost you under $20 but if you want to DIY a wooden headboard you'd be looking at around $100 for the materials (that wouldn't include the cost of power tools of you need those for your project). To reupholster a headboard, or DIY an upholstered headboard, this would be between $100-$150 depending on the size of your bed and your choice of fabric.

Hebe joined the Real Homes team in early 2018 as Staff Writer before moving to the Livingetc team in 2021 where she took on a role as Digital Editor. She loves boho and 70's style and is a big fan of Instagram as a source of interiors inspiration. When she isn't writing about interiors, she is renovating her own spaces – be it wallpapering a hallway, painting kitchen cupboards or converting a van.
