Before & After: 2 basic bookcases get a modern makeover
Talented furniture flipper shares how to refinish a cheap basic bookcase and turn it into a modern piece, sure to turn heads.

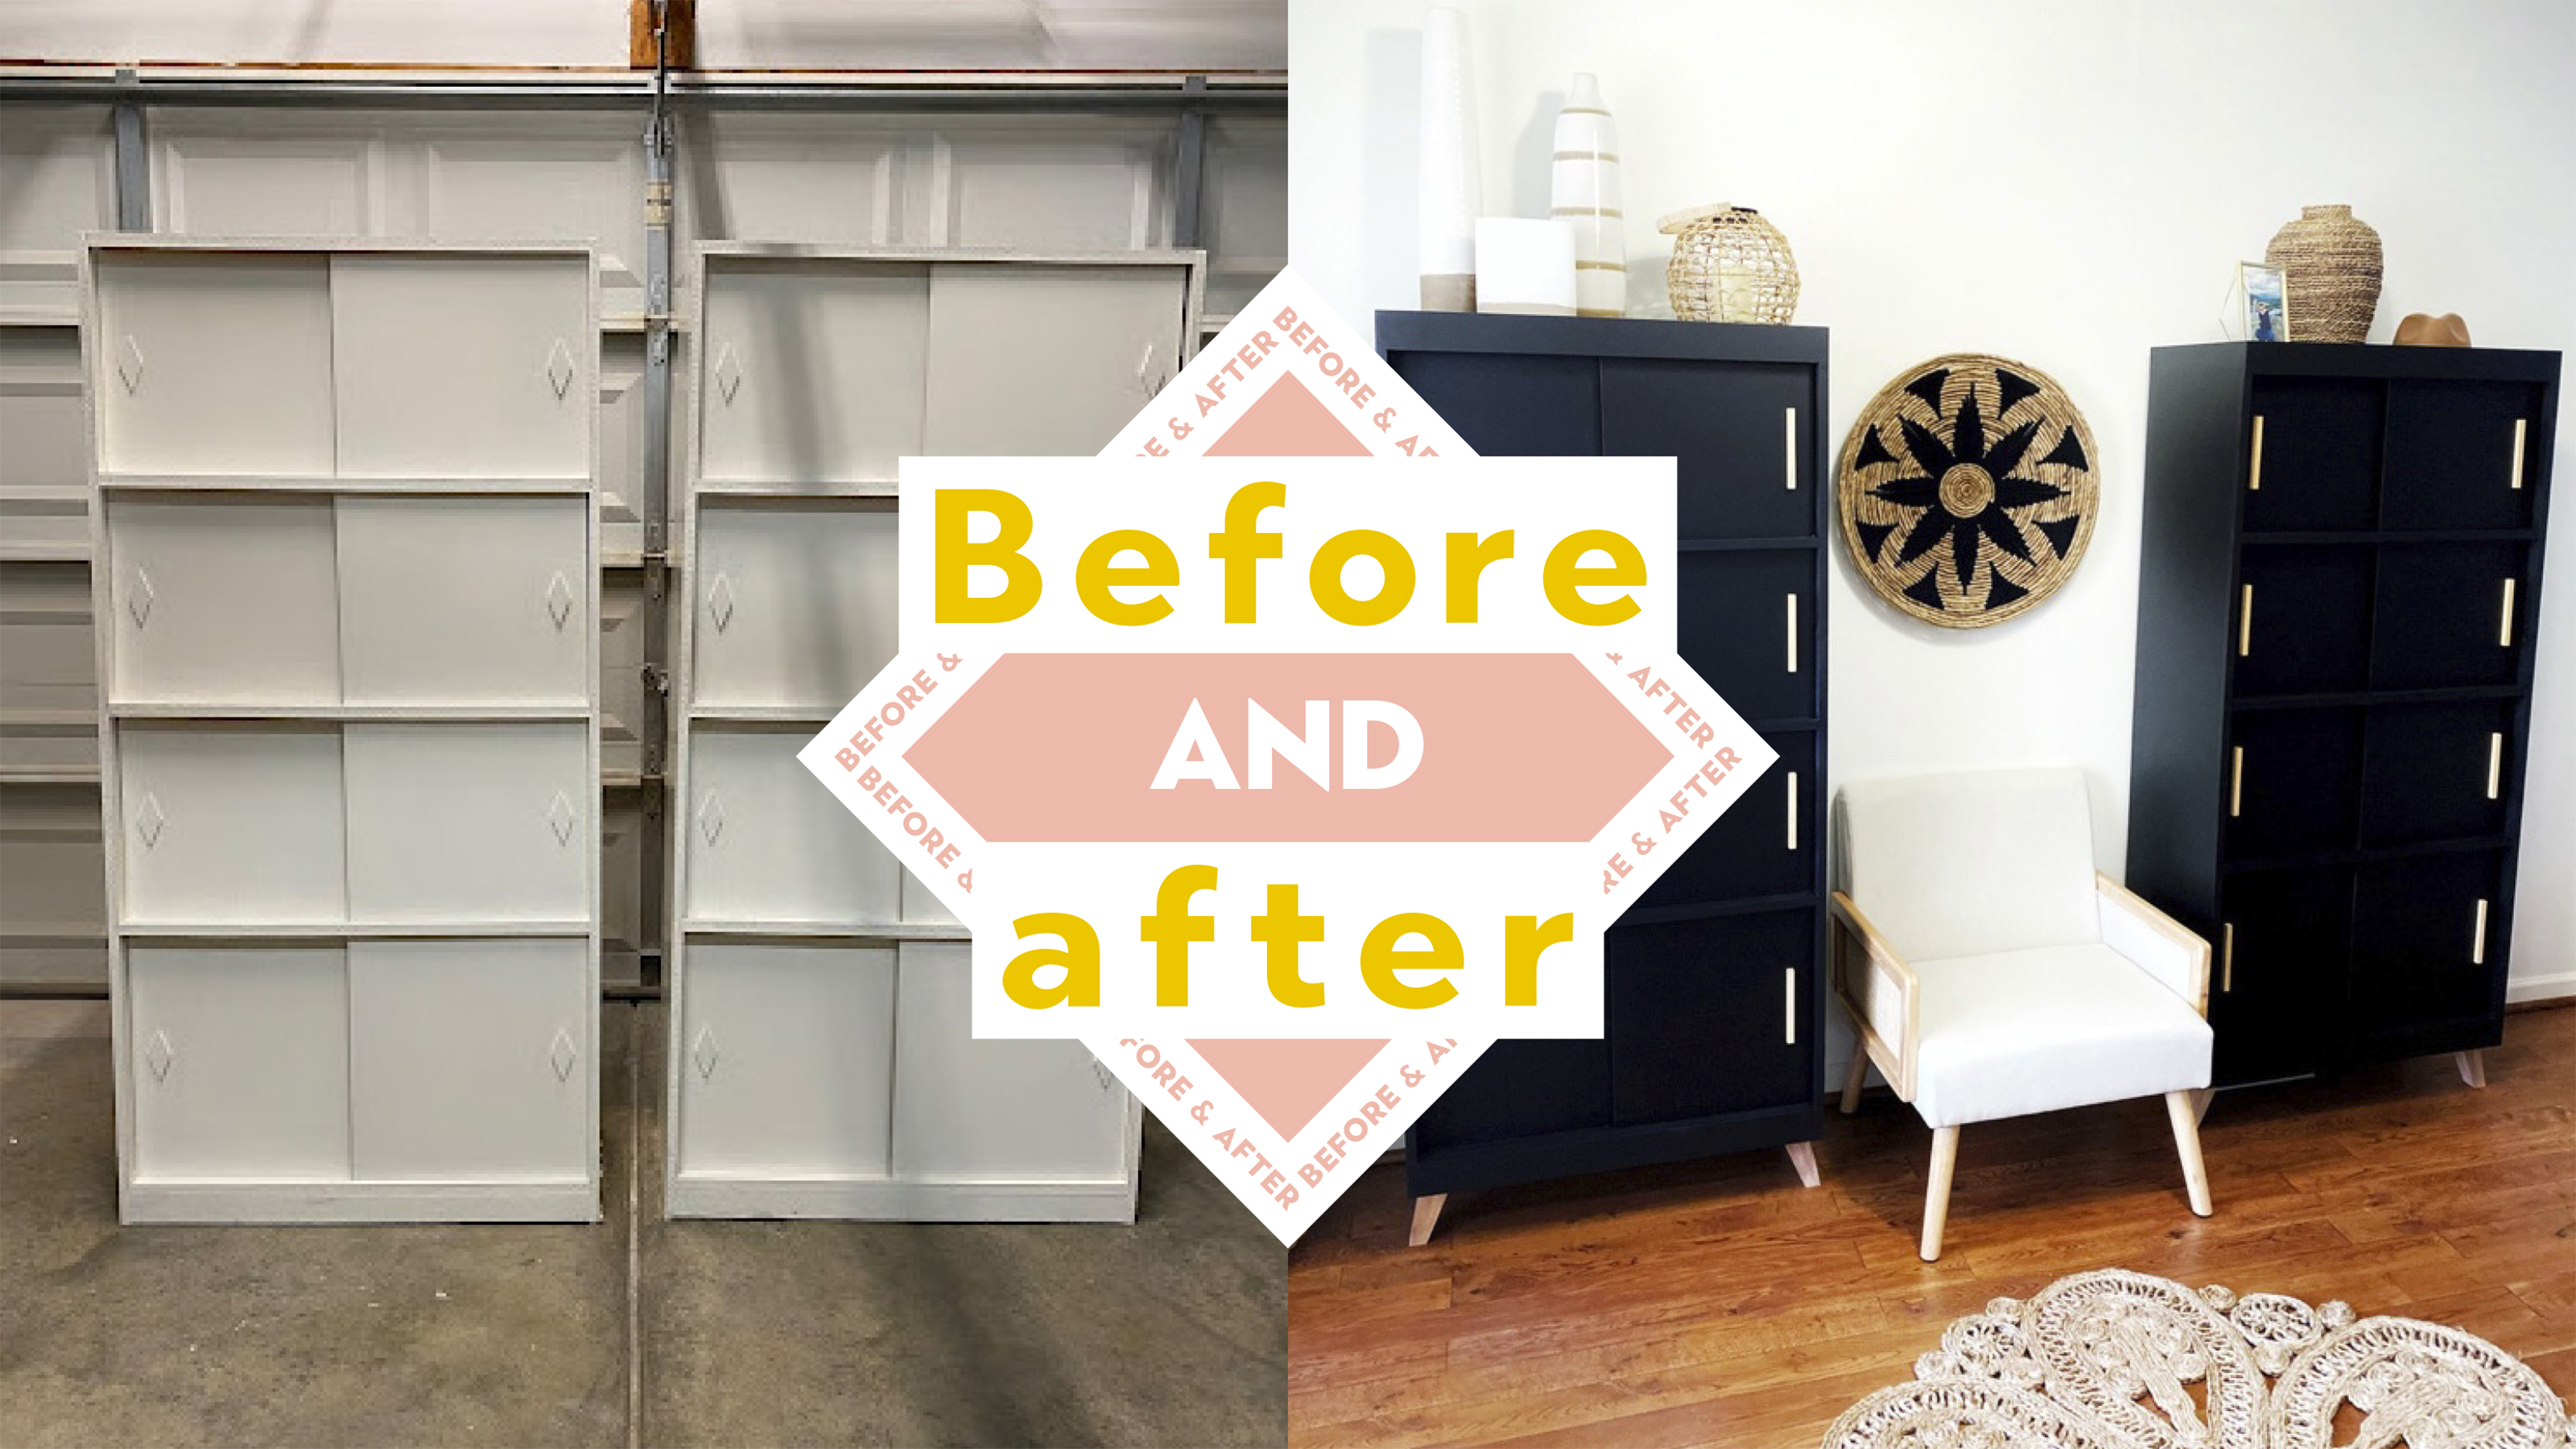
Granted we all need bookcases in our lives, but do we need unsightly ones? Negative. If you're not in a position to buy brand new furniture right now, refinishing a bookcase that you've thrifted – or that's already in your home looking worse for wear – is a very wise idea. Whether you want to restore an old piece or give a 'modern' piece of furniture that feels a little tacky, a new stylish lease of life, there are some hard, fast and simple steps to follow that will help you achieve your bookcase of dreams.
You could, of course, build a bookshelf from scratch, but if you like to go thrift shopping – who does not? – follow in furniture flipper Christina Lipstone's footsteps to create a fresh new look for your bookshelf.
How to refinish a bookcase
In most homes, storage is pretty much always at a premium. Even if you have a big space, there is always something to stow away, or display. In Lipstone's case, her bookcases were very much needed for storage. So they are a key storage item and totally worth investing some DIY time into.
A post shared by Christina | DIY | Furniture Flipper | Aspiring Woodworker (@around.the.lemontree)
A photo posted by on
Keep scrolling for the step-by-step!
You may need:
1. A new paint color: Lipstone used Fusion Mineral Paint in Coal Black
2. New 'chair' legs: Lipstone purchased these furniture legs from WEICHUAN in Unfinished Beech Wood from Amazon (5.5" Set of 4)
3. Square Dowels for hardware: Lipstone used 1/2 ×12 inch Wooden Square Dowel Rod Sticks from Amazon.
4. Furniture salve: Wise Owl is used here.
5. A sander: Lipstone uses Surfprep
7. A paint sprayer: The Homeright Sprayer is a great pick on Amazon.
8. Wood filler
1. Source your bookcase
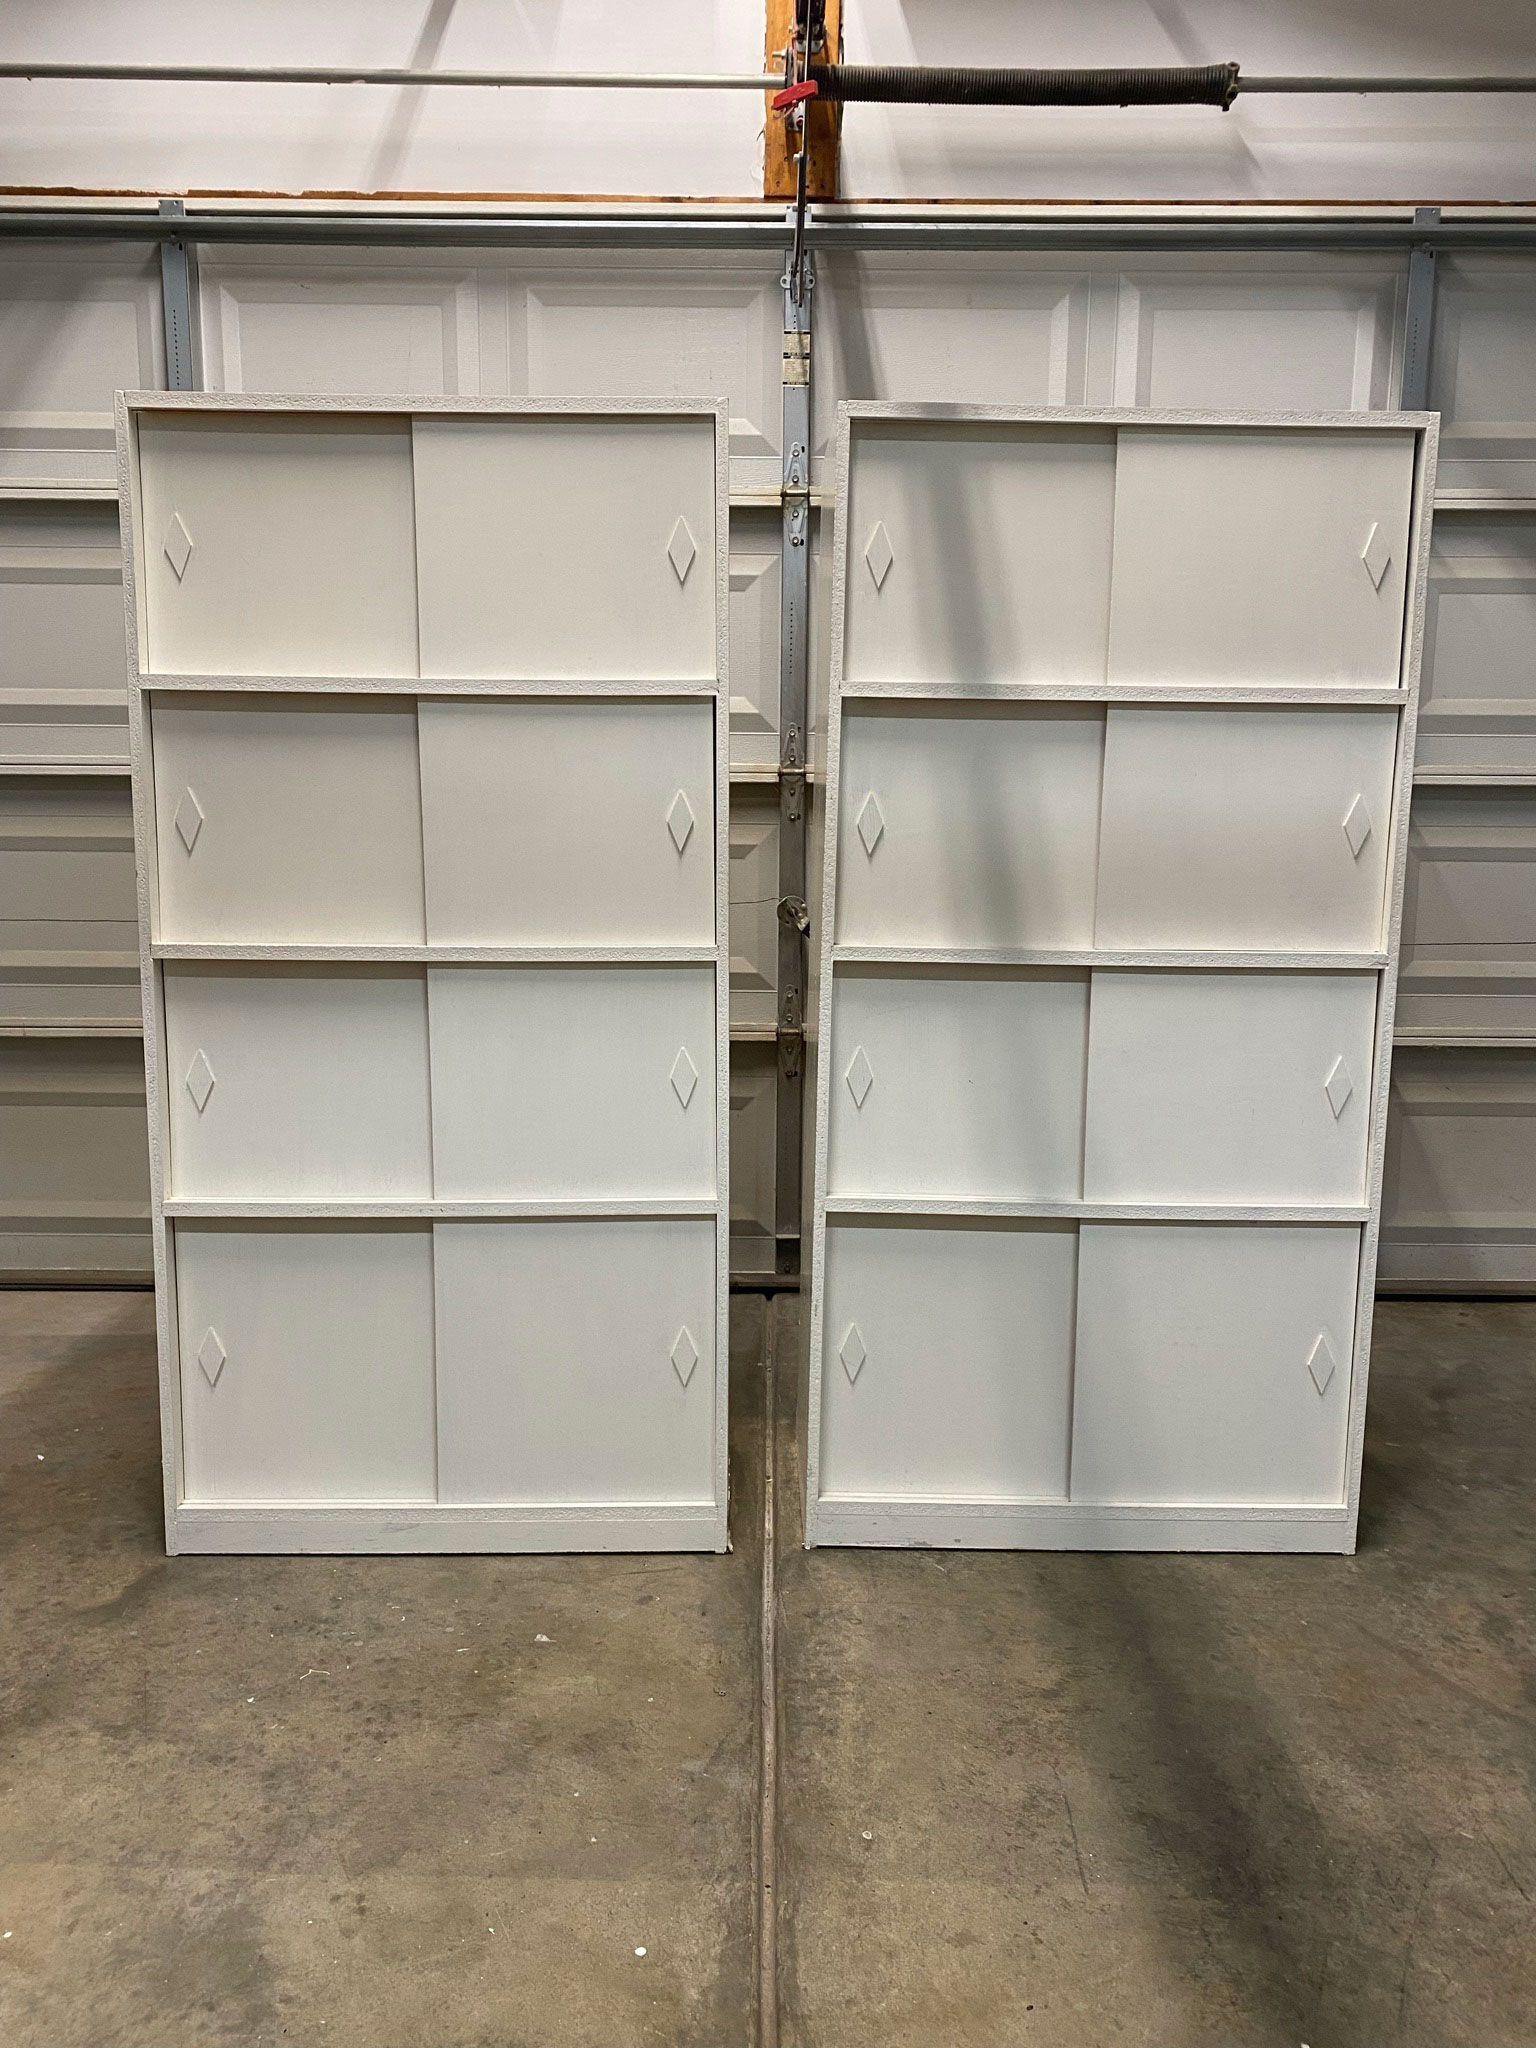
First off, you want to find a bookcase, ripe for refinishing. 'I found these bookcases on Facebook Marketplace.' Shares Lipstone.
Consider what you want from it, whether you want open or hidden storage, how big your space will allow for and so on.
'I was looking for storage options for all of my staging items I use to stage my finished furniture pieces that I’m selling. Buying bookcases brand new was way out of my budget, so when I saw these on Facebook Marketplace I knew they would be perfect!'
Get small space home decor ideas, celeb inspiration, DIY tips and more, straight to your inbox!
2. Sand and remove the existing finish
Not all finishes are good ones, and these bookcases were giving off very dated vibes.
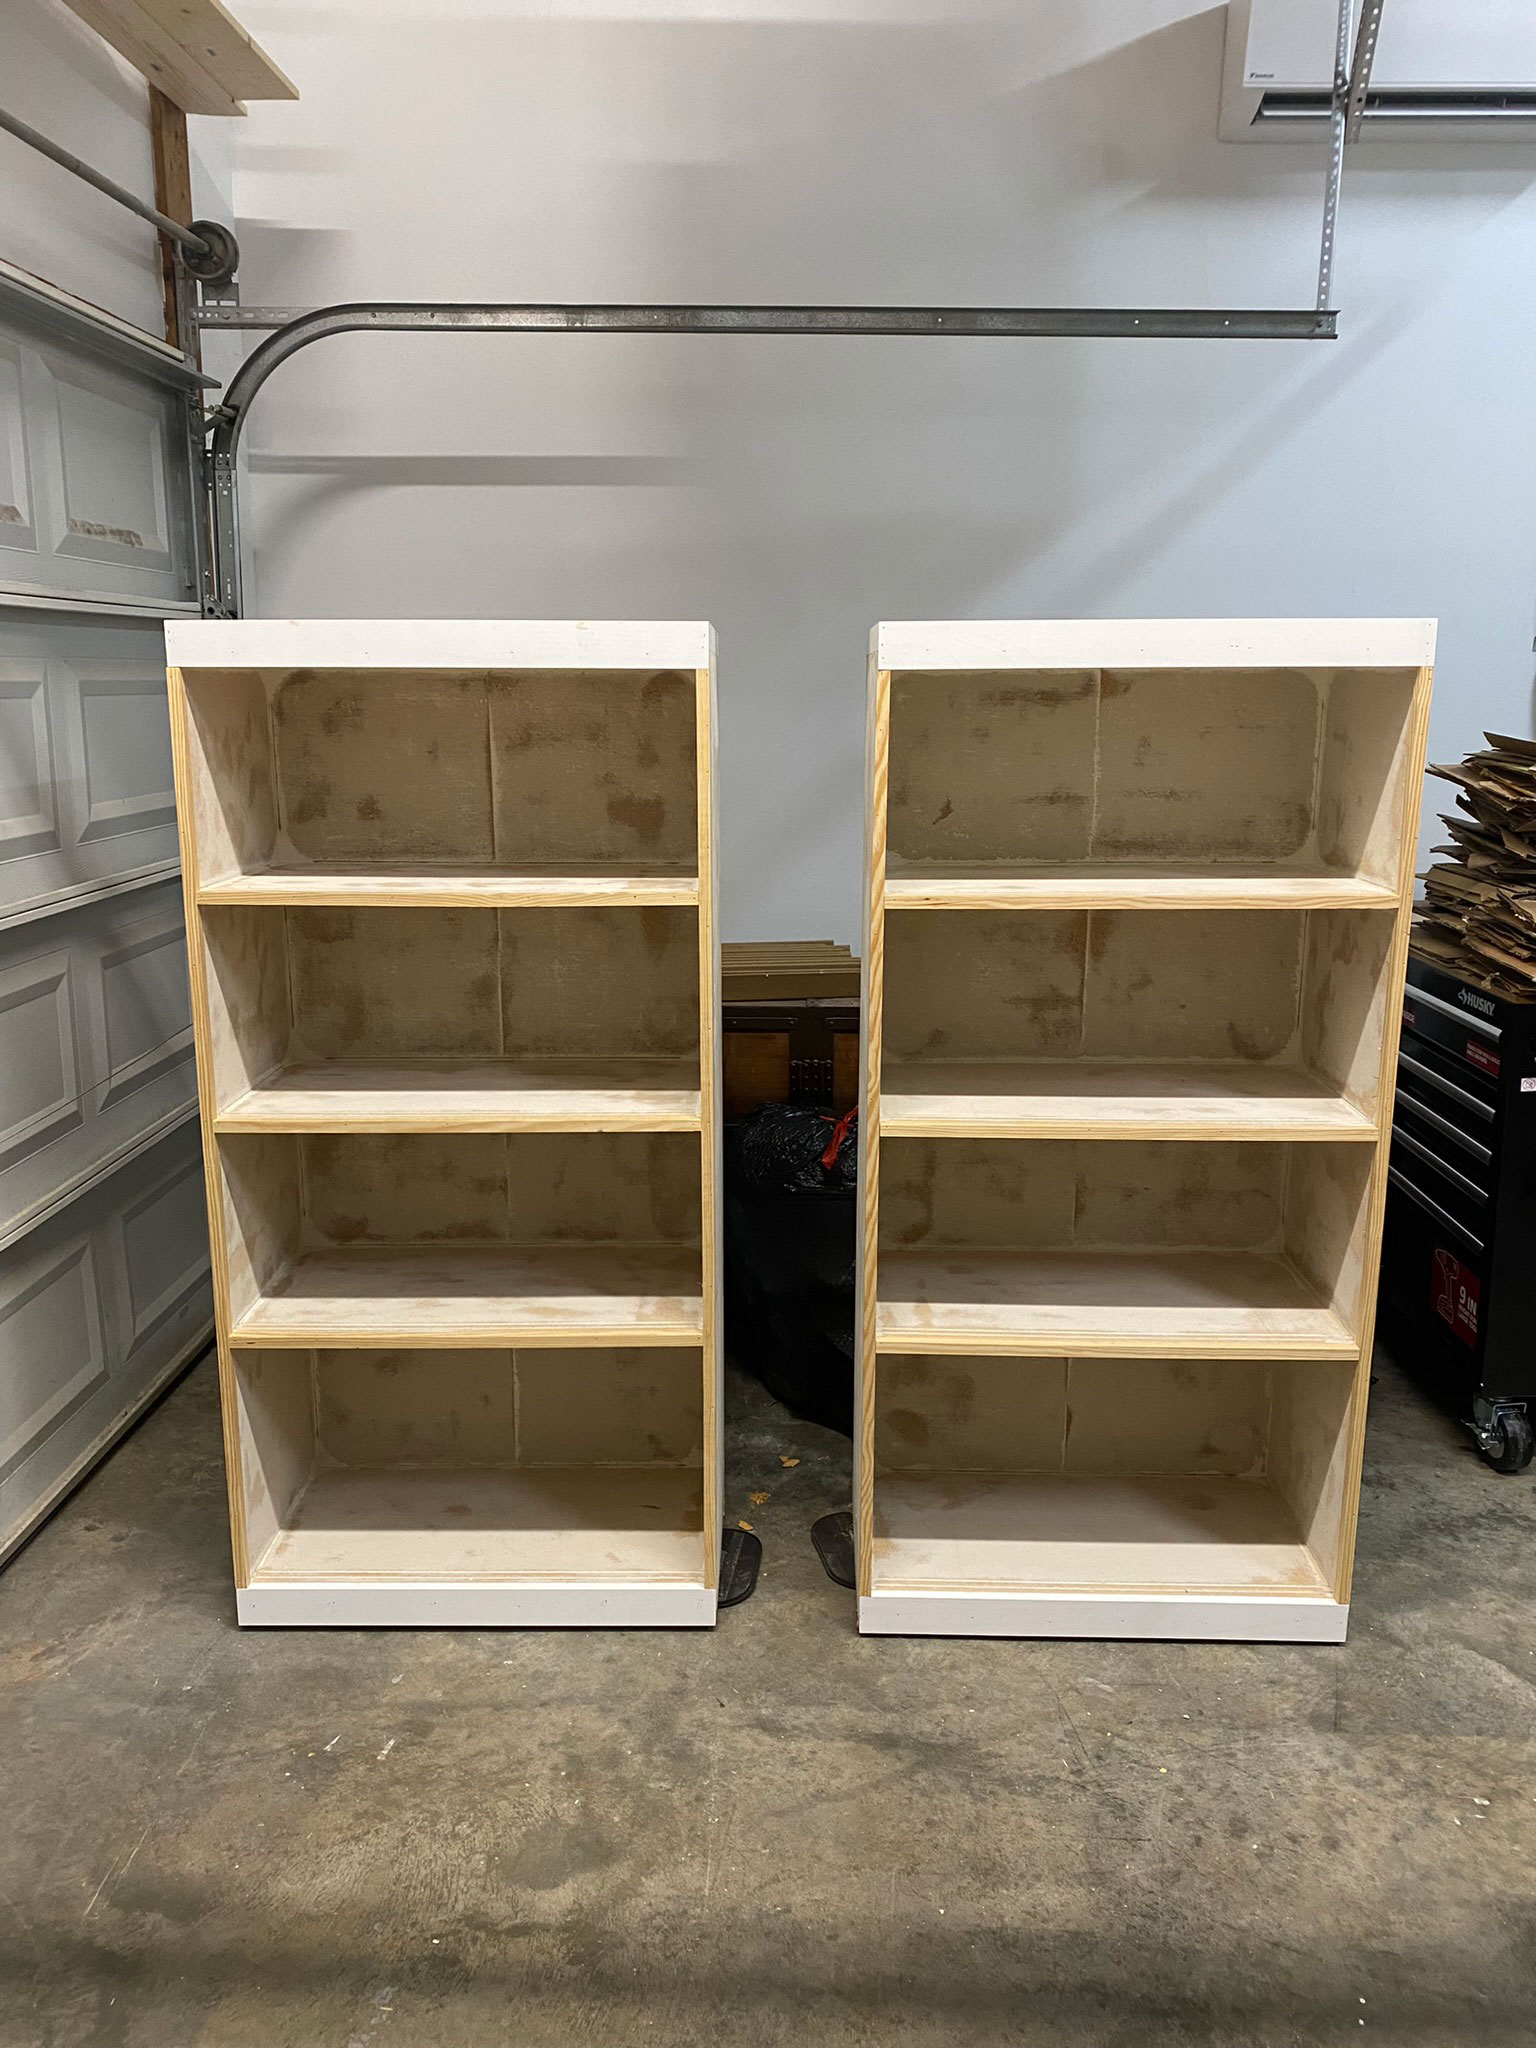
'The bookcases had previously been painted in acrylic paint. I spent weeks sanding all the acrylic paint off and removed the diamond-shaped hardware on each door.'
If you don't want to use a sander, there are other ways to remove paint from wood furniture including heat guns and oven cleaners...
3. Replace trim and hardware
After taking her time to sand off the paint, Lipstone went on to change up the hardware. 'I added new trim, legs, and handles.'
'The edges of the bookcases were exposed MDF and made the bookcases look unfinished. I went to Home Depot and purchased some primed pine and trim wood. I cut them to size then glued and nailed them in place to give the bookcases a finished look.'
You want a seamless finish, ready for painting. In Lipstone's case, she had to fill some gaps and smooth seams of the new hardware additions.
'I wood-filled all the nail holes and caulked the seams of the new trim pieces.'
4. Repaint and reassemble
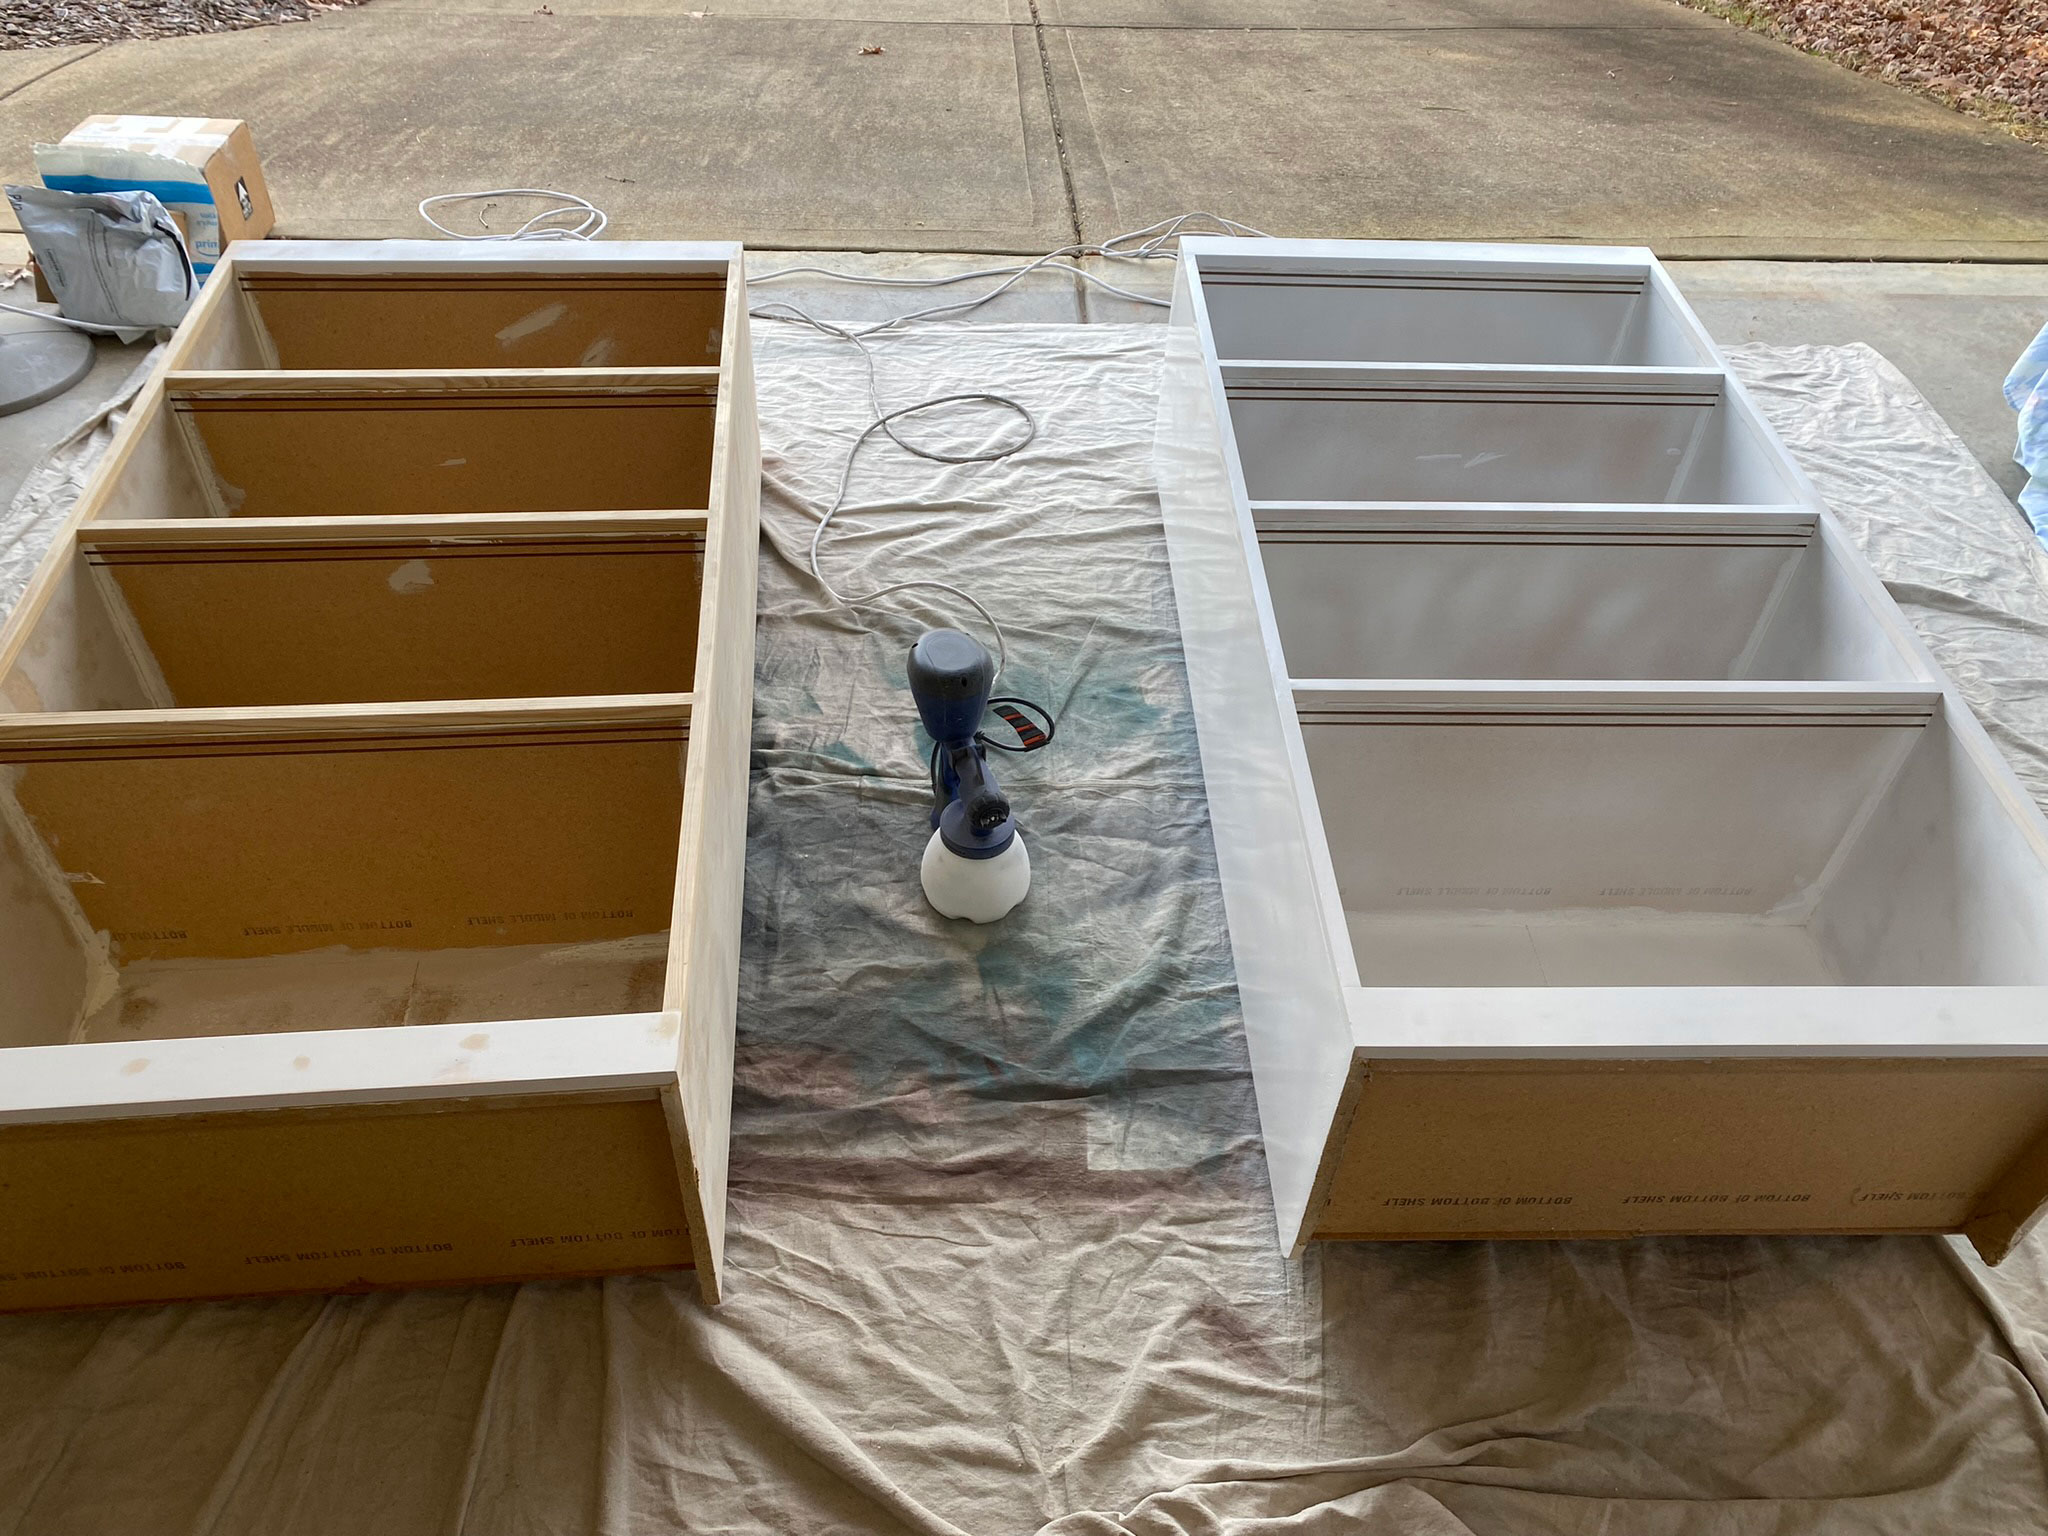
She then repainted the entire bookcase with a color that was far more aligned with her interior design style – modern boho.
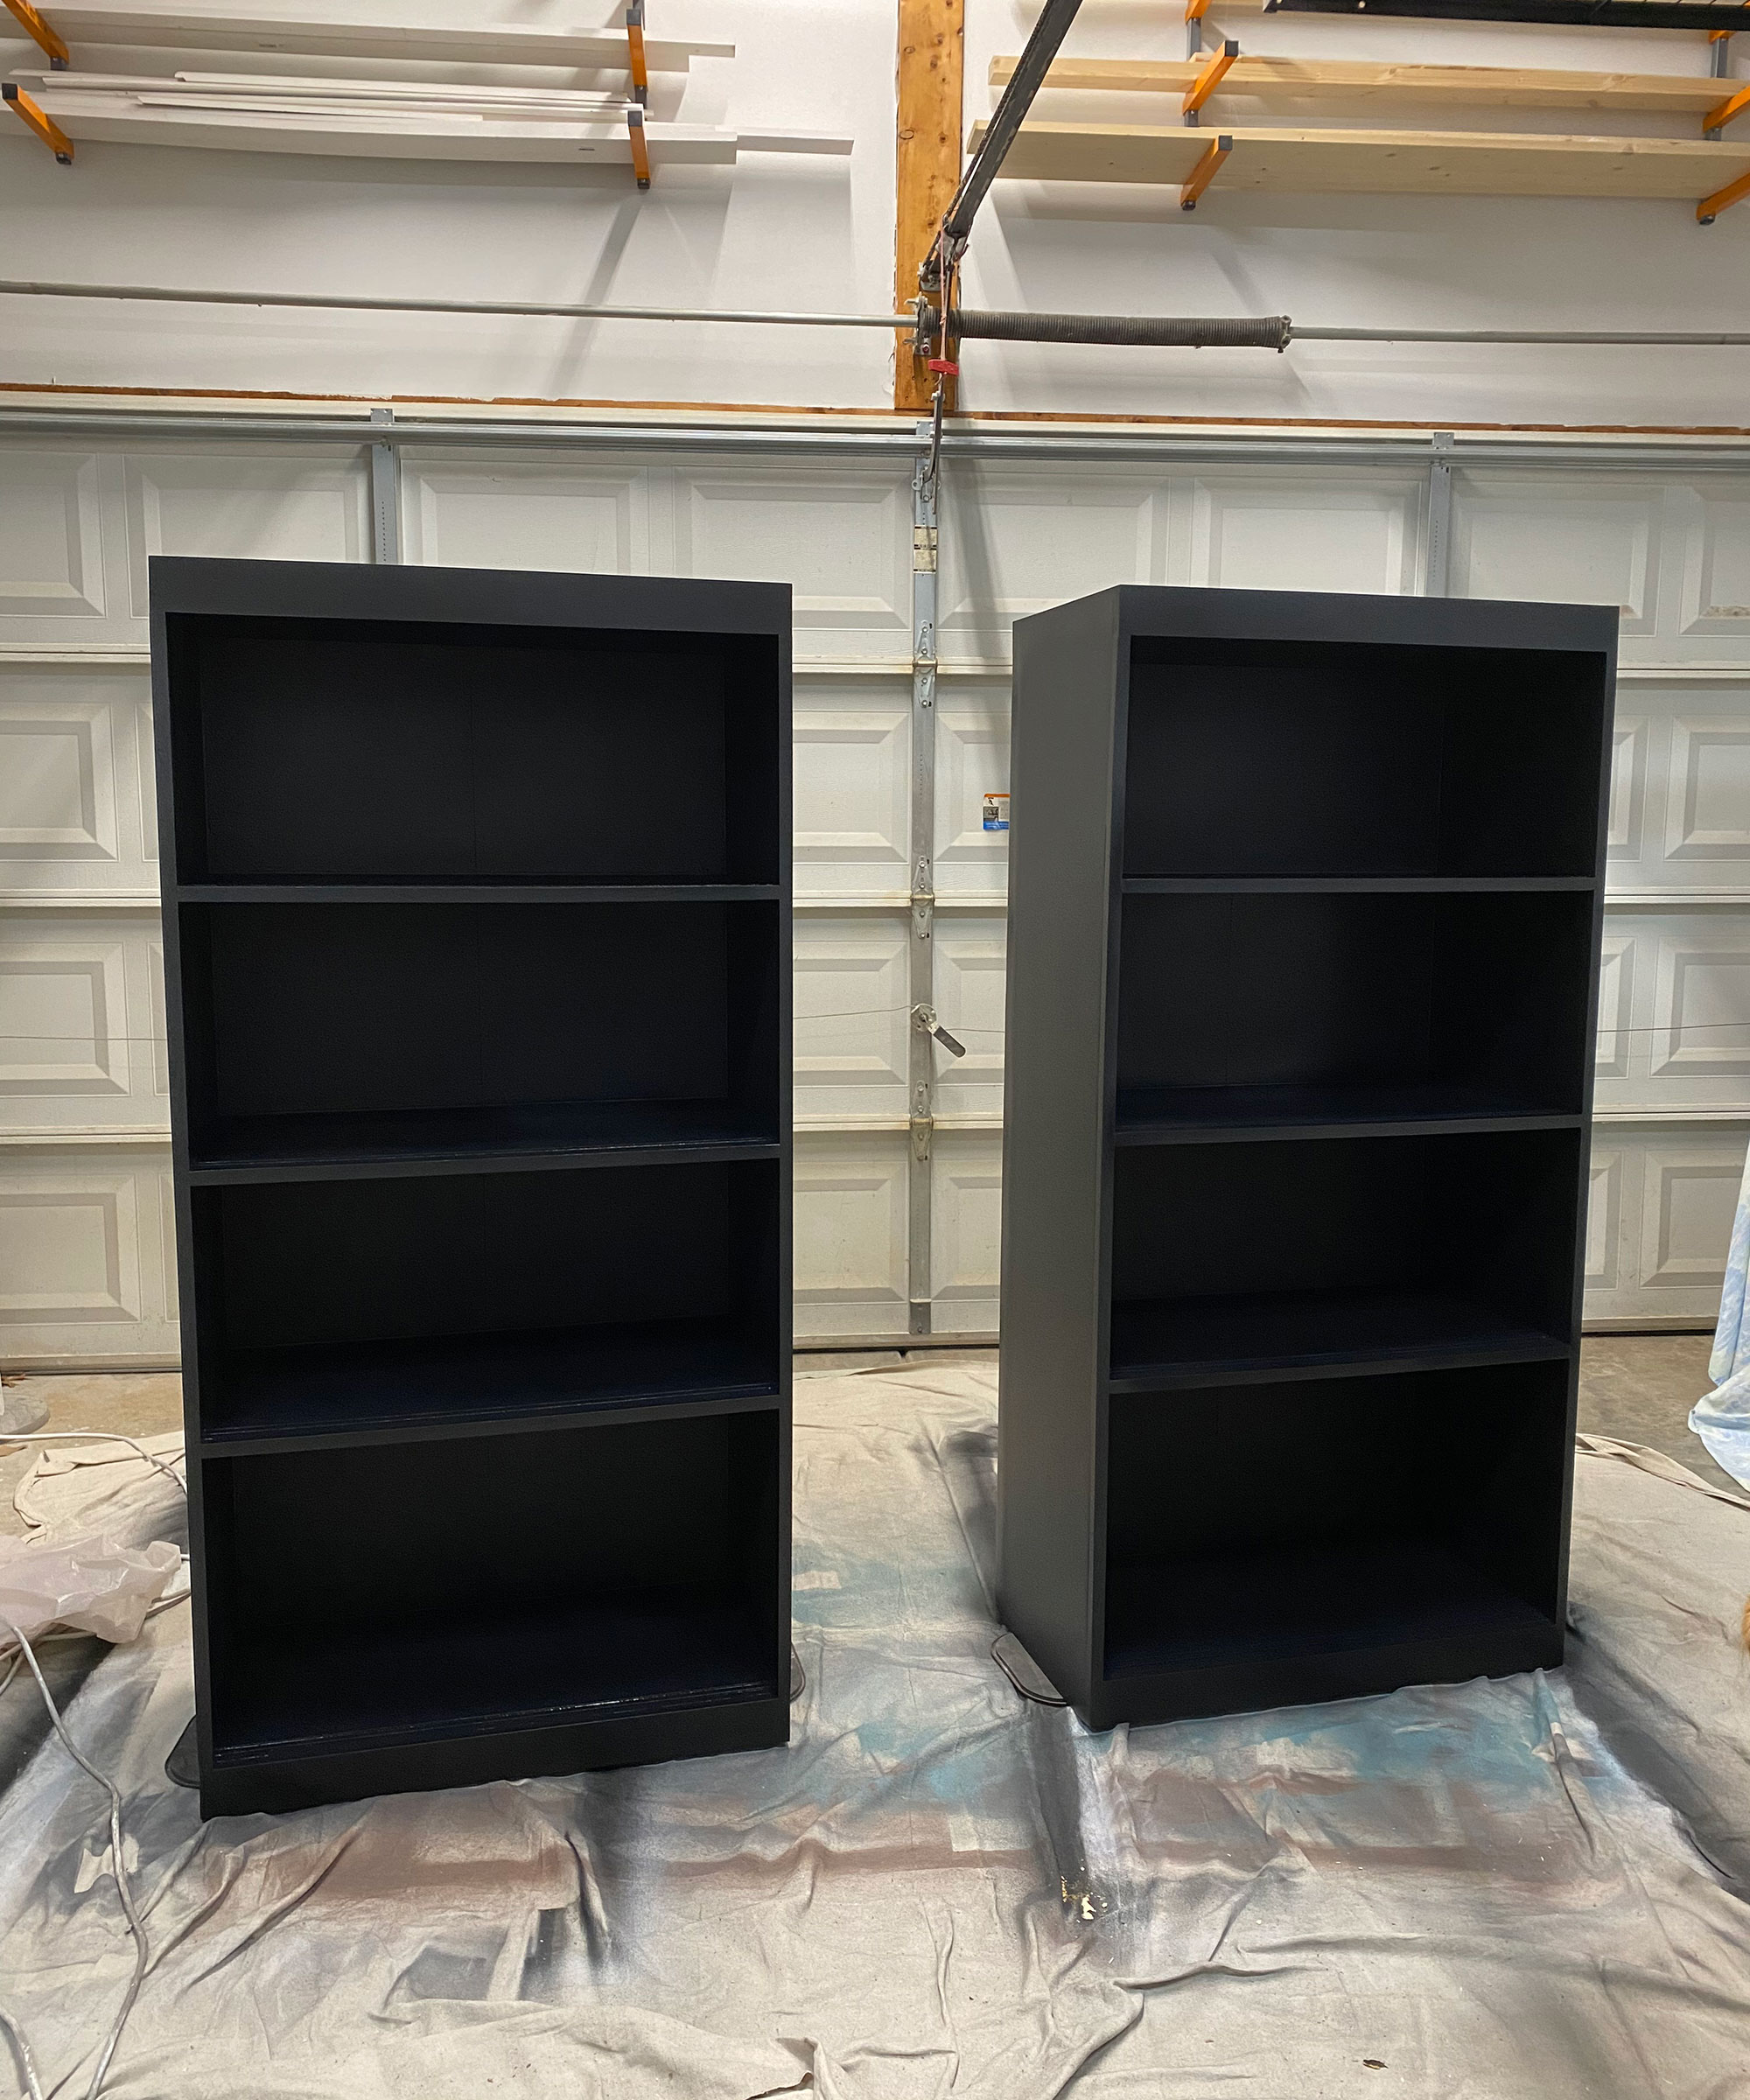
'My personal style is a modern boho look. Since I was keeping these for myself I went with my favorite color Coal Black from Fusion Mineral paint. I primed and then painted using my paint sprayer. Next I added some support blocks on the bottom in order to add the new legs.

5. Add finishing decorative touches
'Once I got the bookcases in the house I realized the doors weren’t sliding smoothly, so I added Wise Owl furniture salve to each door runner and this fixed the issue.'
Lipstone noted how choosing the wooden accents in hardware was done to better contrast the black and it's those finer details that can make a major difference:
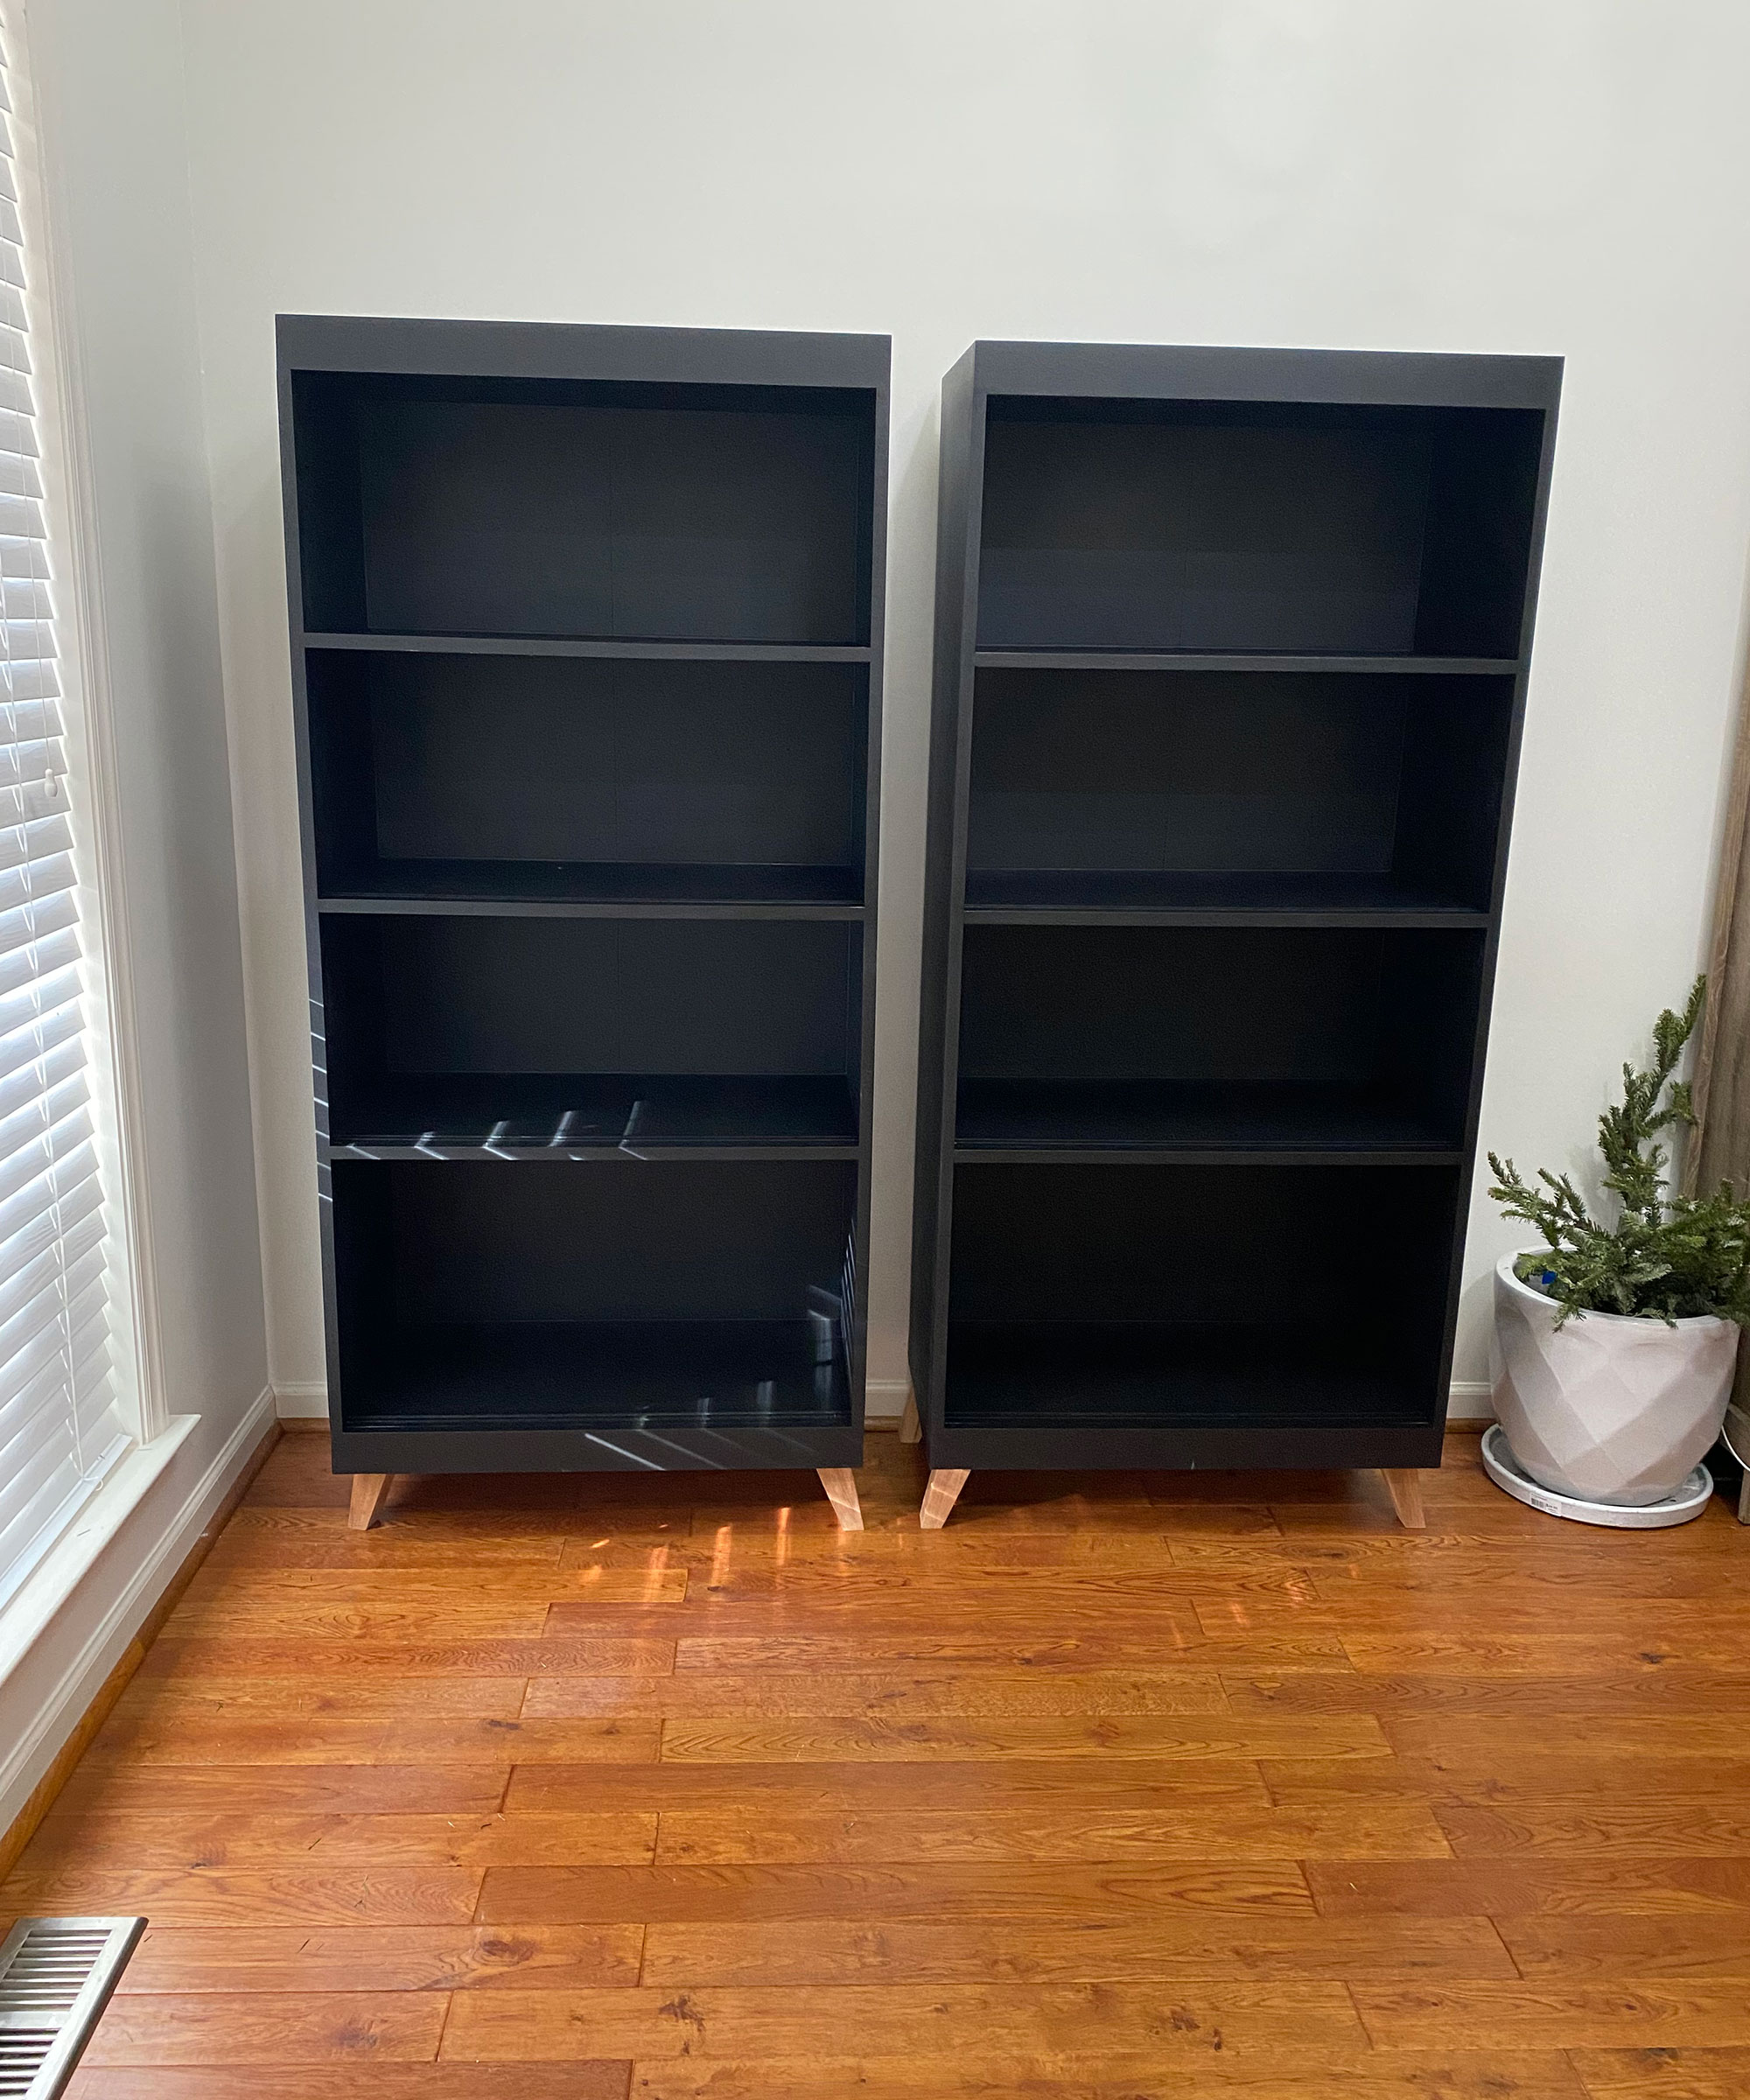
'I purchased square-shaped wooden dowels on Amazon and cut them to size to use as hardware. I carefully glued them to each door.'
The results:
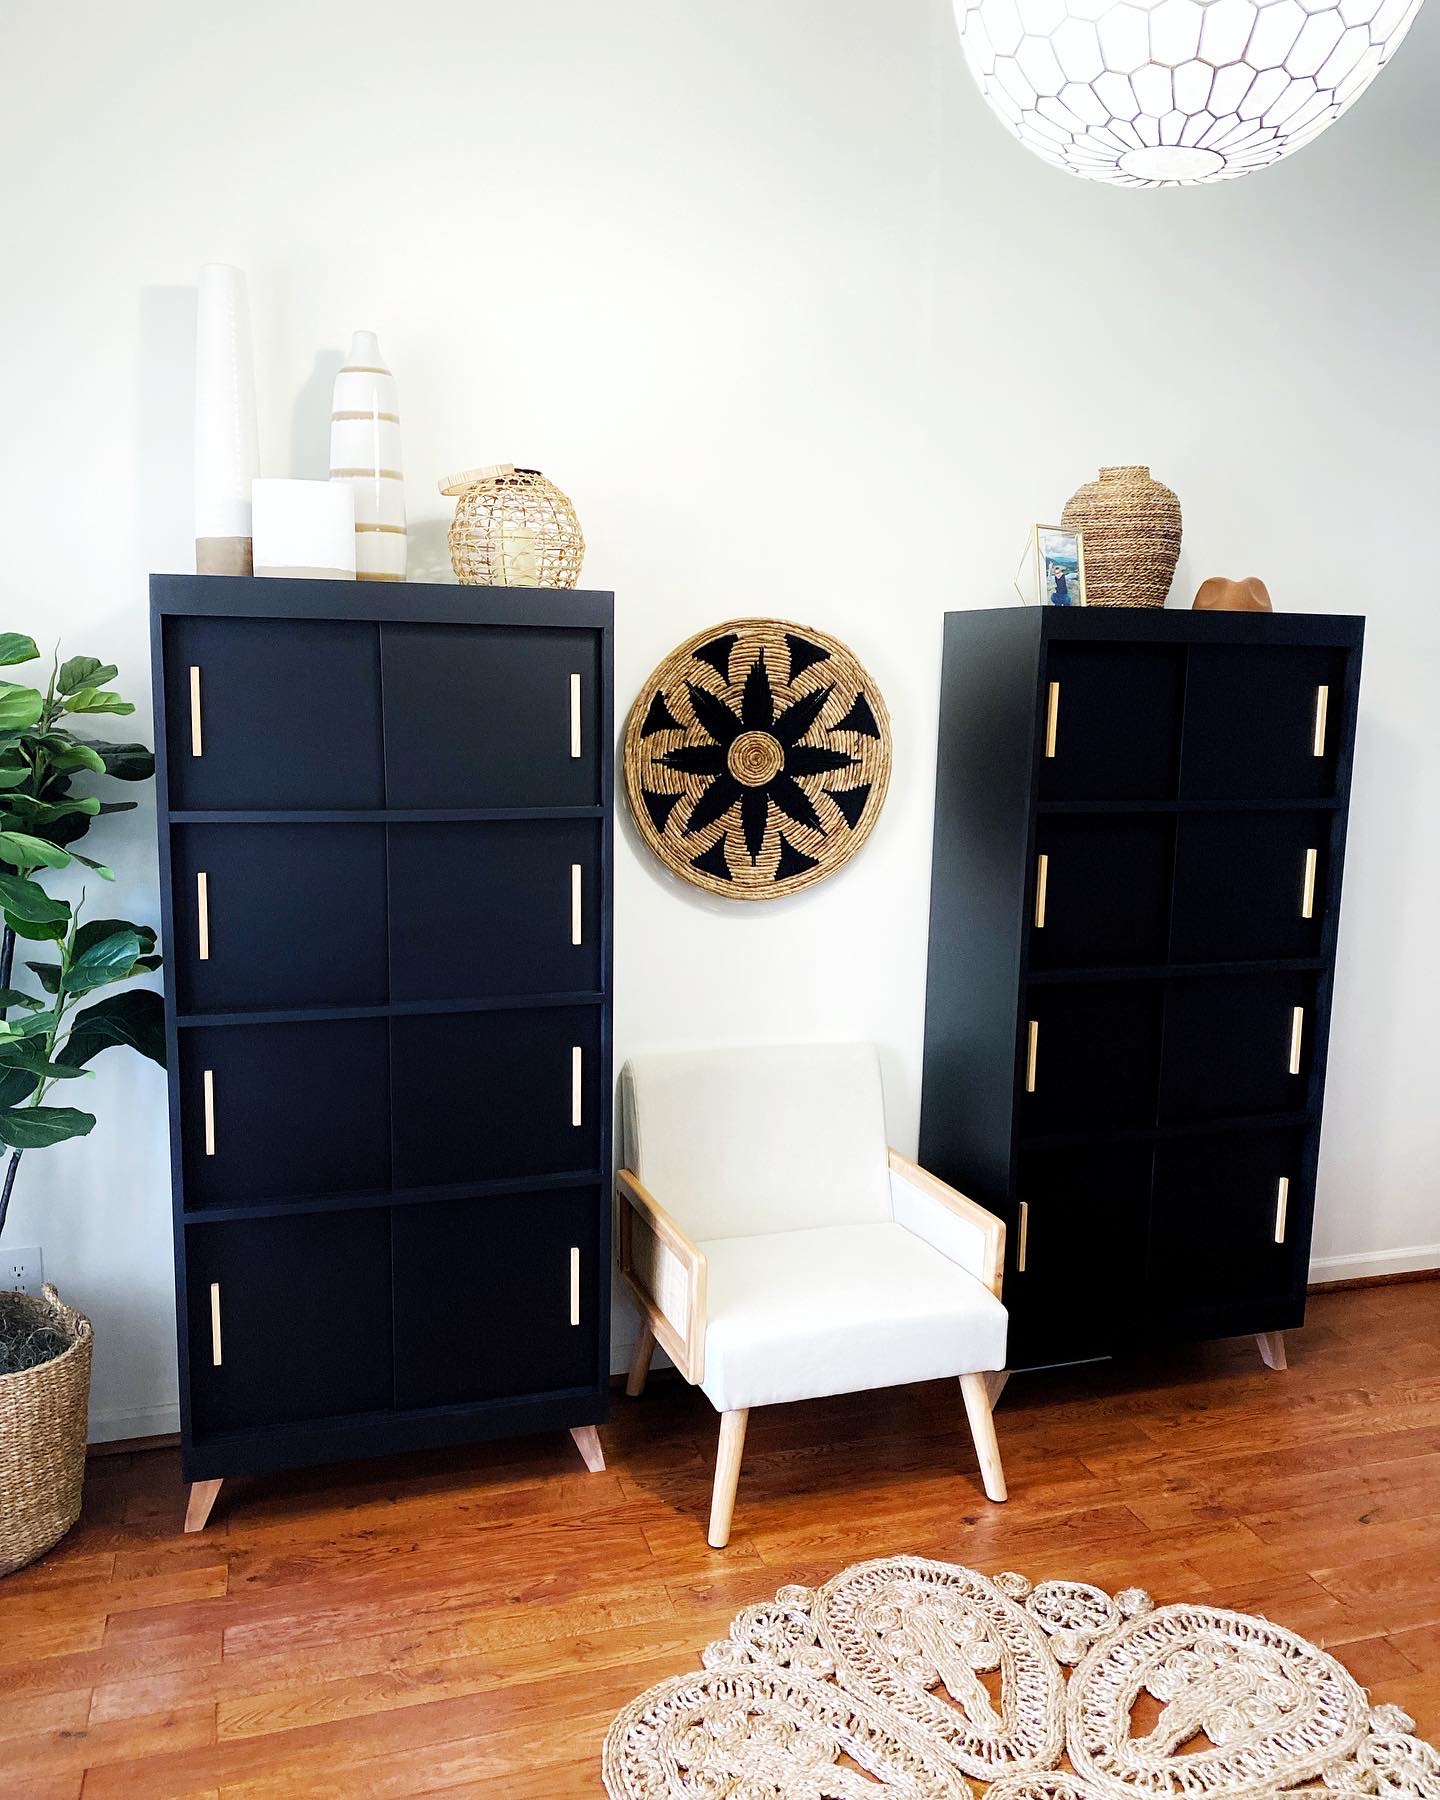
'I estimate I spent about $350 in total. When I initially started looking for bookcases the cost brand new was anywhere from $300-$700 a piece! I saved a ton of money buying from Facebook marketplace and refinishing them on my own.'
Lipstone's bookcase refinish came in at a reasonable cost, considering the difference, aesthetically, and the average price for a brand new bookcase (that looks this good).
'All of it was so worth it. I’d like to say my style is a cross between modern and boho and I couldn’t be happier with the way it pulled this whole room together. It was so rewarding finally doing a flip for myself and now I get to enjoy all my hard work every time I pass by this room!' Adds Lipstone.
You could take your budget even lower with a DIY bookshelf or by keeping your flip a little more simple. A quick clean, sand, and a new coat of furniture paint can often be all you need. The key is to find an original piece that needs less in terms of fixing up to start with so that there's less to replace in terms of hardware and trim.
Happy flipping!

I'm Cam, the former deputy editor of Real Homes who worked on the site from 2020 to 2023. As a renter myself, sharing a home with two friends (and my cat) in London, I know all too well the challenges that this can pose when it comes to creating your perfect setup. As someone who has always loved everything interior design-related, I cannot rest until a home feels right and I am really passionate about helping others get there too, no matter what their living situation, style, or budget may be. It’s not always the easiest to figure out, but the journey is fun and the results are so worth it.
After interior design, travel, art, and photography are my next big passions. When I’m not writing or editing homes content, I’m usually tapping into other creative outlets, exploring galleries in London or further afield, taking photos, scribbling, or drawing!