How to paint a shed – outside and in
Discover how to paint a shed and give yours a great new finish this weekend


If your garden shed is letting your backyard down with a tired finish, it’s super simple to give it a whole new look. All you need is our step-by-step guide to how to paint a shed and you can turn an eyesore into a fabulous feature.
You might want to refresh a shed that’s weatherworn to protect the material from which it’s made from breaking down and ensure your garden building lasts. Alternatively, the idea of changing its finish, whether it’s to complement the shades of flowers and foliage, blend it into the background, or, rather, to make it an eye-catching feature, might appeal.
If you need a new version, check out our guide to the best garden sheds. But if a fresh finish outside as well as in is what’s required, just follow these steps to find out how to paint a shed.

1. How to prepare a wooden shed for painting
You will need to clean a wooden shed before you start painting. Use a general purpose cleaner and a stiff wire brush to remove any mud, other debris, or mould. Leave to dry. If there’s any mold, mildew, moss or algae on the wood, use a fungicidal cleaner and scrub to remove, then rinse, and leave to dry.
If the shed has any cracks or gaps, use an exterior wood filler to repair them. Leave to dry. This will need to be sanded down so it’s flush with the shed’s surface before painting.
If the wood has been painted or stained in the past, you do need to sand your shed back before painting. Use sandpaper and a block and, working in the direction of the woodgrain, sand it back to bare wood.
- Keep reading: 14 shed storage ideas to keep your garden organized
2. Choose a paint or stain for the shed
You can select between paints and stains for a garden shed. Which one is better for your shed will depend on the look you want to achieve. Bear in mind that both will protect the wood.
Paint will cover the wood and is great for transforming the appearance of the shed – whether you go for a subtle or bold shade. There’s a huge choice of colors on offer, making painting the best way to individualize a shed. Take a look at these shed paint ideas for inspiration.
Stain, on the other hand, penetrates the wood but the timber itself remains more apparent so your shed will have a more natural appearance. The range of stain hues is more limited with the majority being shades of brown, although some other hues are available.
When the time comes to refresh and maintain the shed once again, bear in mind that a previously painted shed will entail more work in preparation than a stained one because you’ll need to sand the timber down to bare wood.
3. Get ready for the first coat of paint
You’ll need to be able to access your shed all around for painting; trim back any foliage or tie plants out of the way to allow you to work.
Use dust sheets to cover plants and surfaces to avoid getting paint drips on them.
Cover handles with masking tape, and use it around windows as well so you don’t get any paint on the glass.
Check the instructions on your chosen paint to avoid applying it when the temperature is too low. You’ll need to avoid painting on a rainy day, of course, and if rain is forecast. Colder temperatures and humid weather means the paint may take longer to dry, so factor this in.
- Keep reading: 25 summer house ideas - add a garden building you love from the outside in
4. Apply paint to the shed
Using a paintbrush and following the instructions on the tin, apply the paint to the shed evenly, following the wood grain. Leave to dry for the time specified by the manufacturer before applying the second coat. Note that some paints specify that the second coat should be applied on the same day. You may need to apply a third coat of paint, as recommended on the tin, to give the shed maximum protection.
Sprayers are available for shed paint, which can speed up the job.
5. Remove coverings
Once the paint is completely dry, uncover handles as well as plants and surfaces around the shed, and untie any plants as necessary, too.
How to paint a metal shed
Metal sheds need regular painting to keep them looking fresh.
A metal shed should be cleaned and allowed to dry before painting. You will also need to remove any rust flakes using a stiff wire brush, and fill cracks – an auto body filler works well. Sand it flush to the shed. Wash the shed again before you apply paint.
Some garden paints can be used on metal sheds as well as wood versions, but priming will be required before painting. Choose a primer compatible with the paint you’re using and the metal of the shed. Alternatively, apply two coats of rust-inhibiting primer then follow with an exterior metal paint. As with timber sheds a spray gun can make the job quicker.
How to paint a plastic shed
The advantage of having a plastic shed is that it doesn’t need maintenance in the same way that a wood or metal shed does, plus it comes in the color you choose. On the downside, they aren’t generally designed for painting. The exception to the rule are Duotech sheds from Keter, which can be painted easily using a roller, allowing you to fully customize your design.
Paint the inside of a shed
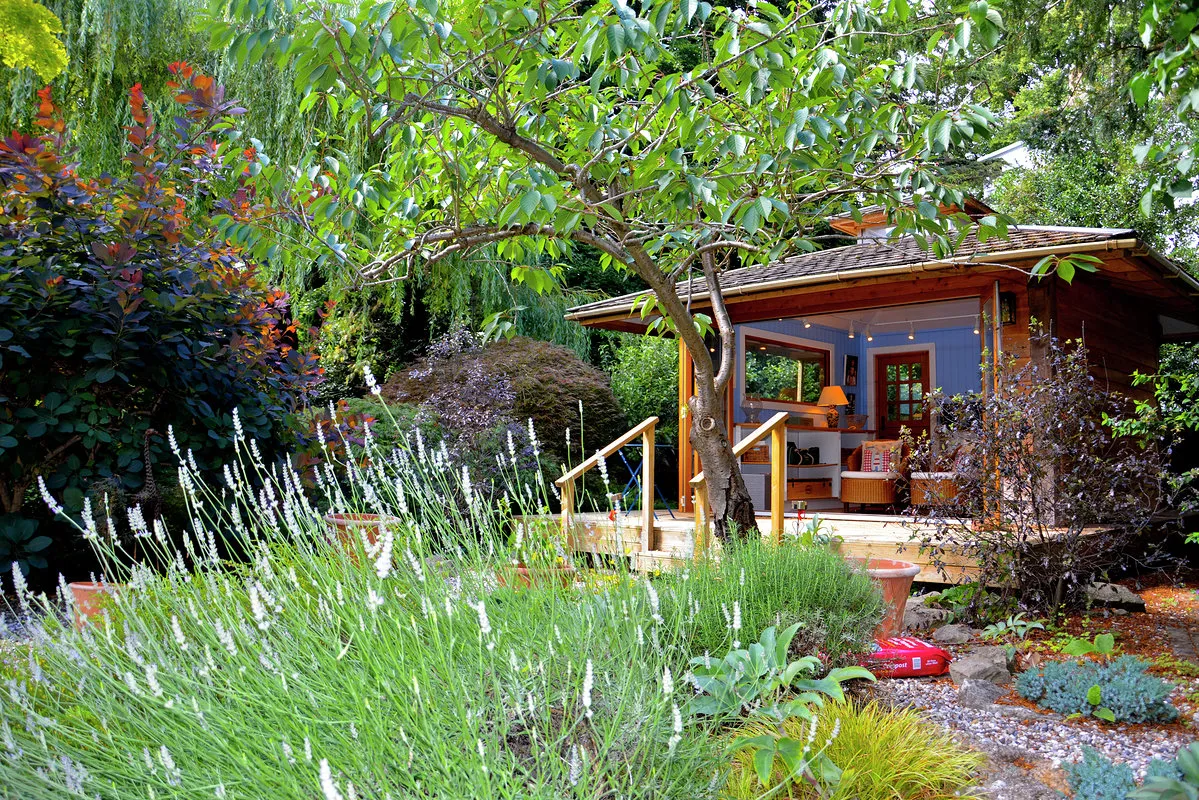
If yours is a she shed, doubles as a relaxation area as well as a place for storage, or you simply want to spruce it up inside so a stylish interior greets you as you get out the gardening tools, you can easily paint the inside of a shed, or use a stain if a more natural effect is your preference.
Follow the same procedure as for the exterior of the garden building, cleaning before you begin and filling gaps if necessary. Make sure you ventilate the shed well when you’re painting the inside, keeping the door and any windows open.
