How install a washing machine step–by–step
Here’s how to install a washing machine like a pro, in under an hour.

Get small space home decor ideas, celeb inspiration, DIY tips and more, straight to your inbox!
You are now subscribed
Your newsletter sign-up was successful
So, let’s be honest, no one wants to have to outlay a ton of money for washing machine installation at the moment, do they? But is there another option, I hear you ask, it’s pretty technical, isn’t it? Don’t worry, we’ve got you covered and you can learn how to install a washing machine yourself with our handy guide below.
You’ll only need a few tools and an hour or so.
This guide is the same for an integrated or non-integrated washing machine. For an integrated machine, you will need to install the door once you have finished installing the machine.
You will need:
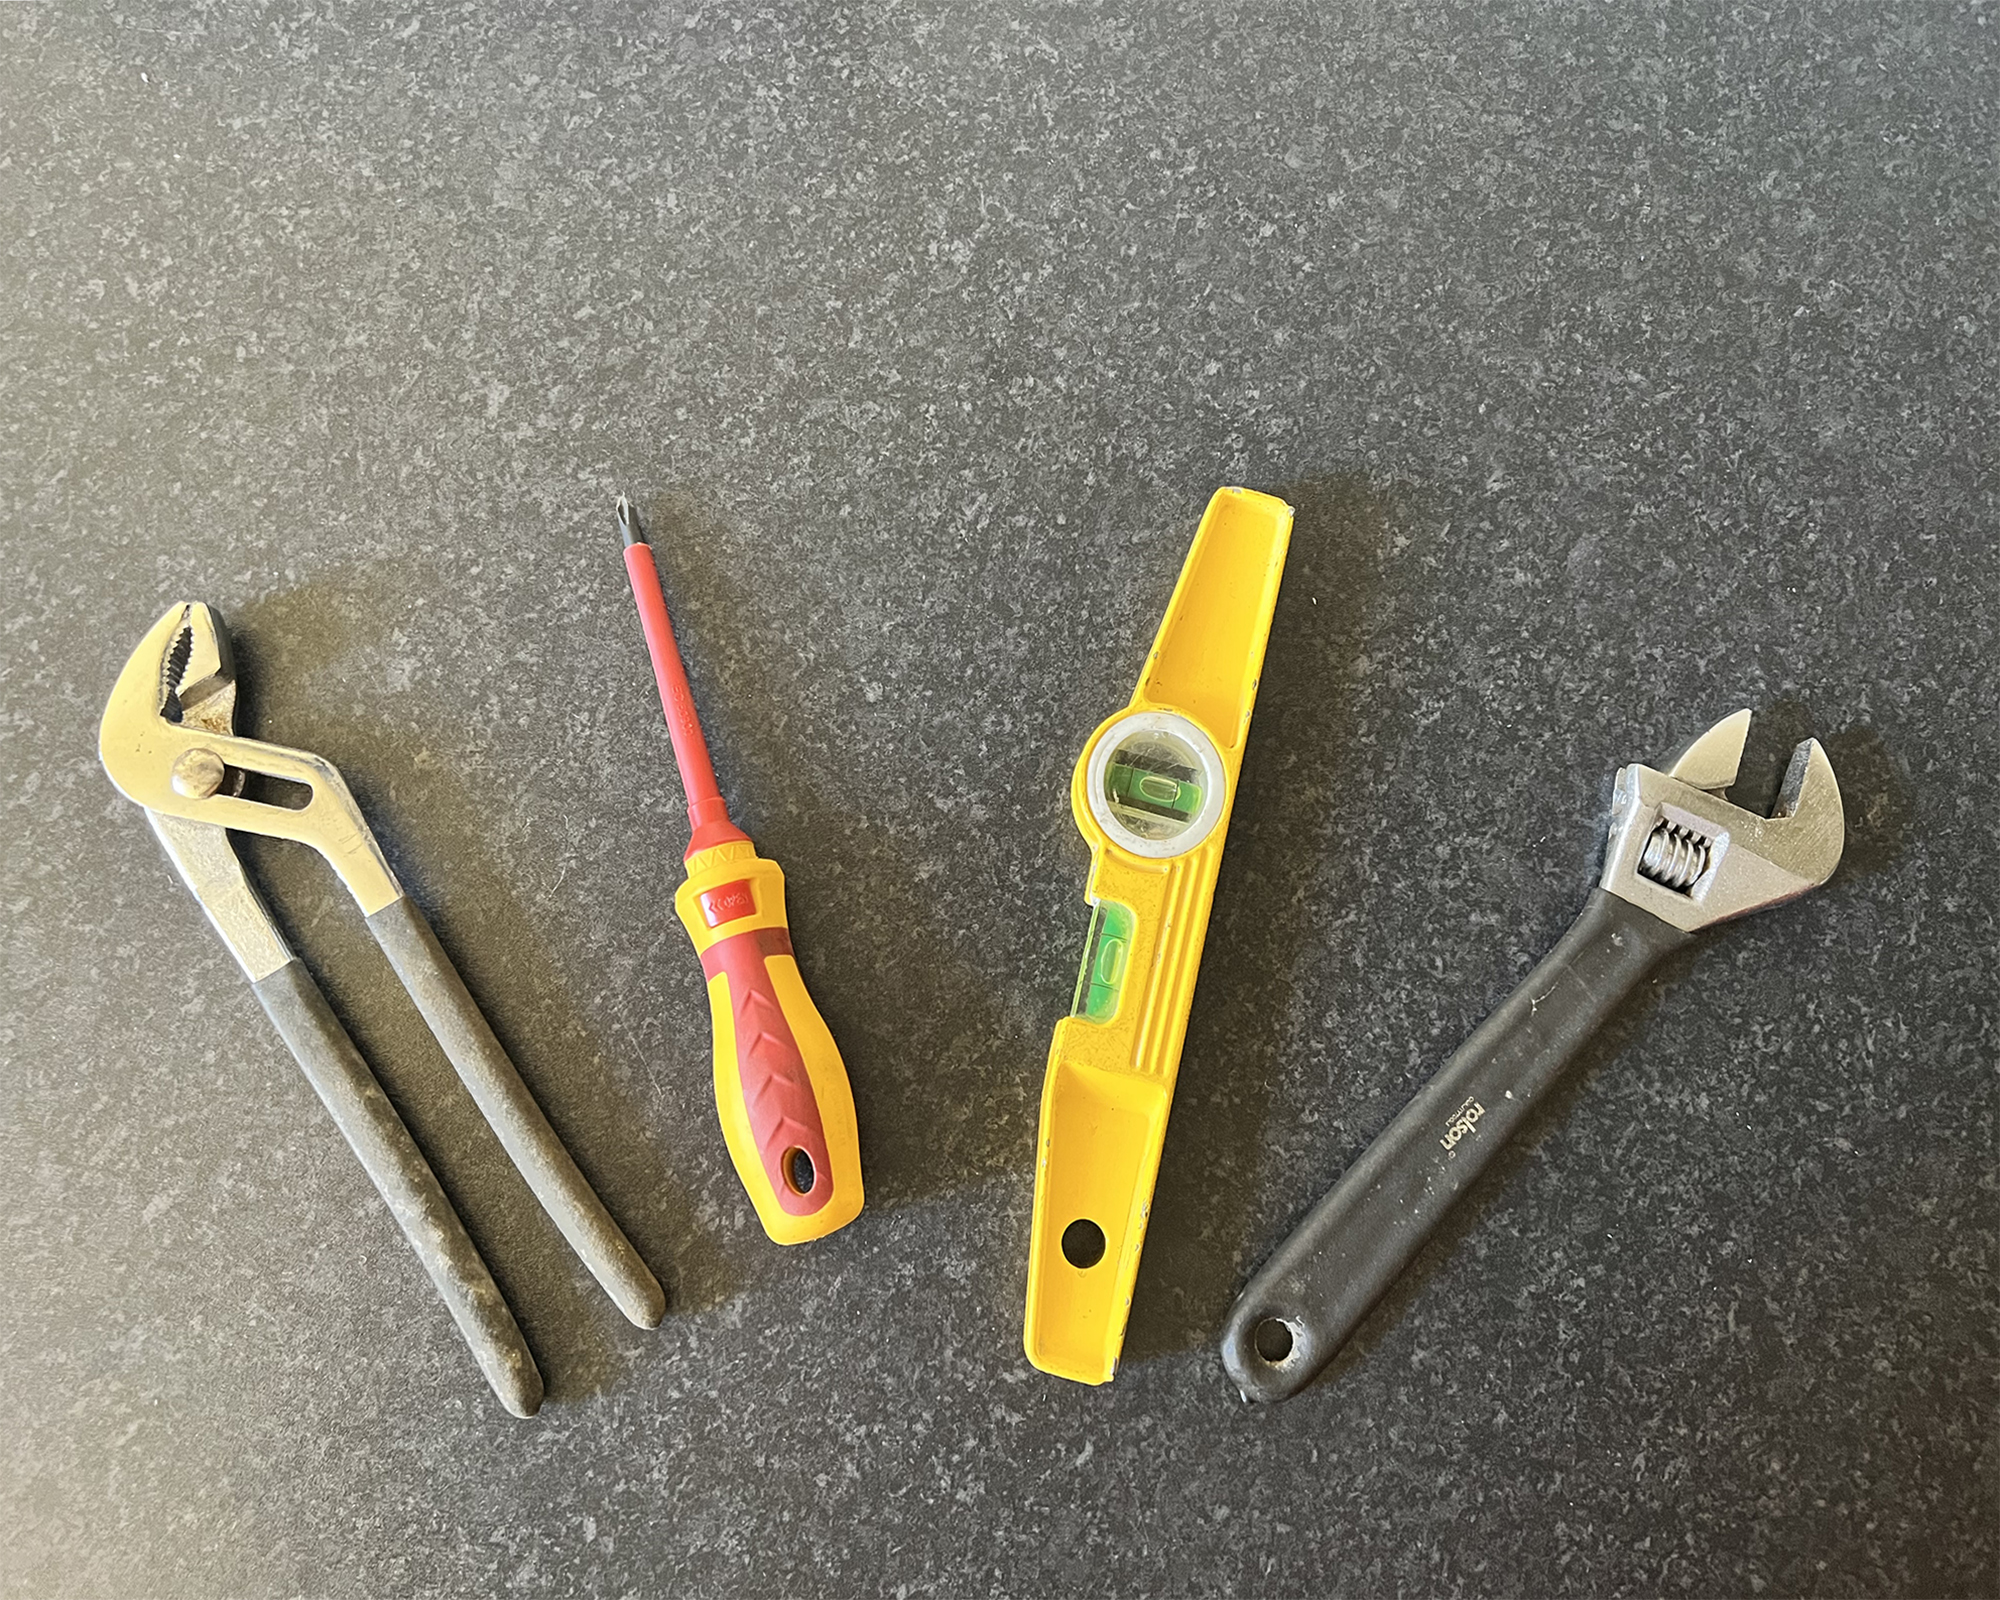
Before you start:
You should at this stage have a spot ready for your washing machine, like in your utility room. The kitchen is often where it's kept in smaller UK homes. You should also have the drain, water supply and a power point located.
These are normally already installed in the space. If they aren’t then I’d recommend speaking with a plumber and an electrician about the best place to install your machine before continuing.
Step 1: Remove the transit bolts and insert the clips
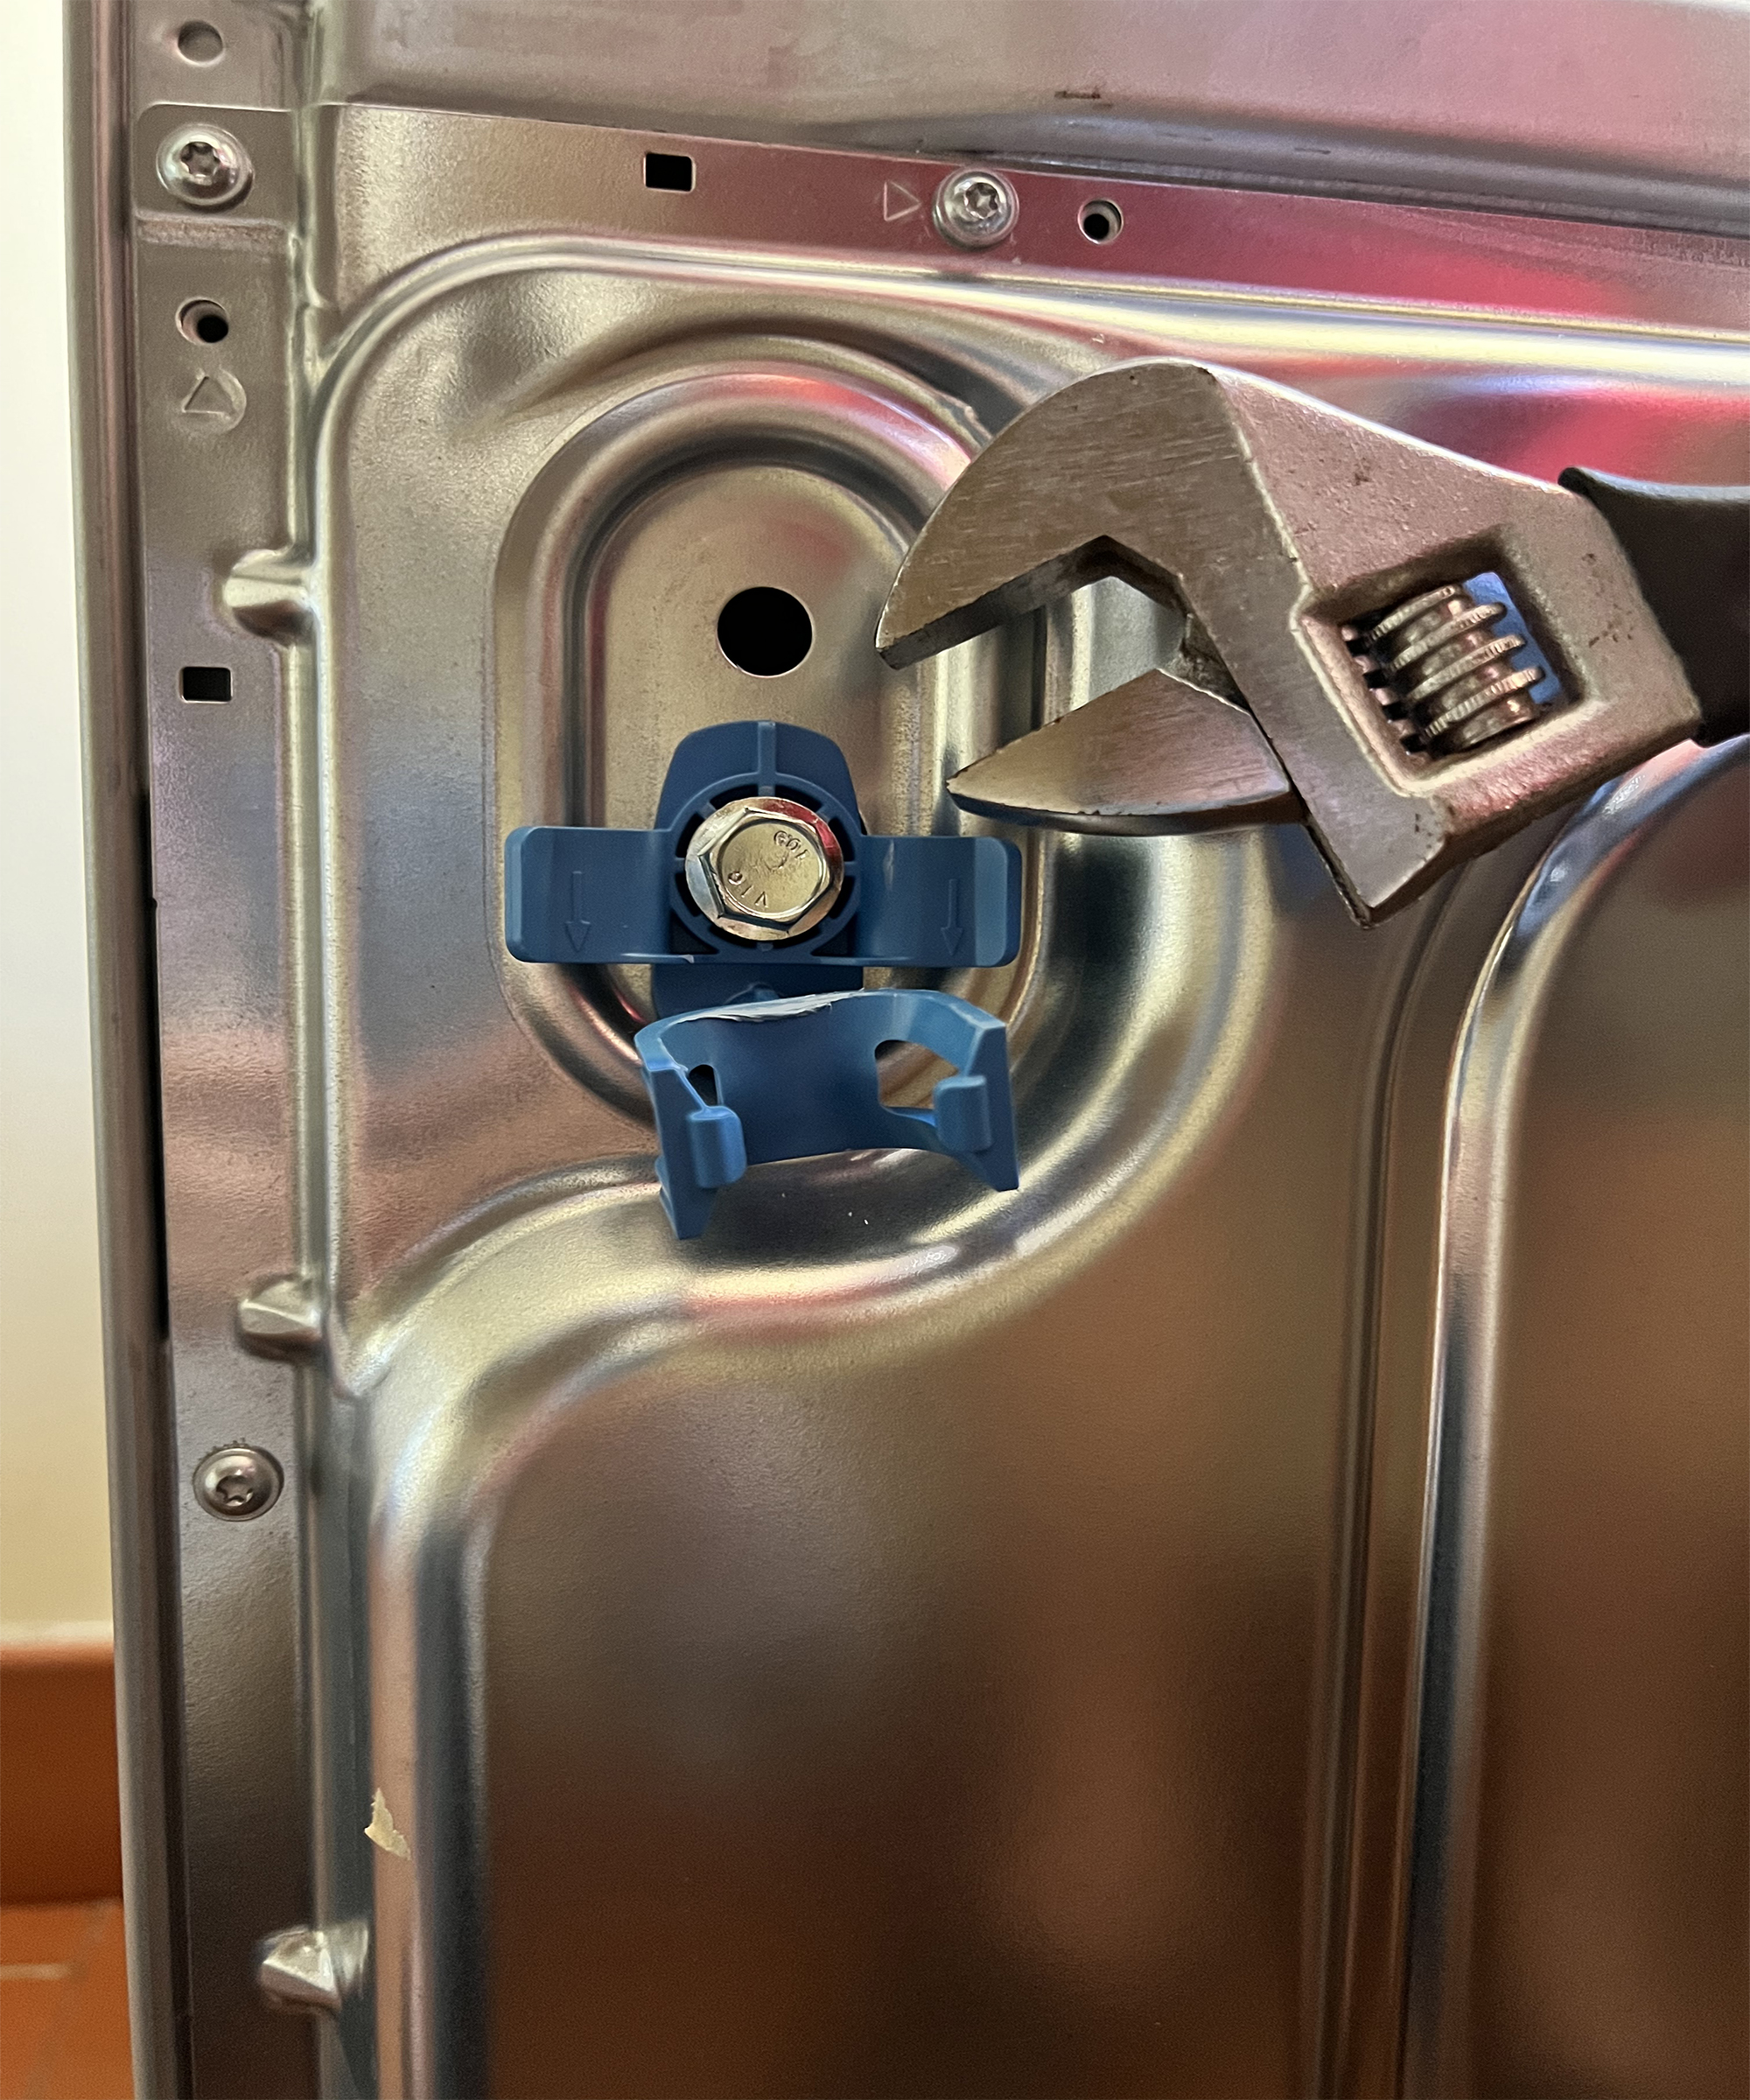
When your washing machine arrives it will usually come packaged up, with four transit bolts installed in each corner. You don’t need these transit bolts for installation, they’re simply for transit as their name would suggest. They hold the internal contents of the drum in place. This is because inside the machine there is a large piece of concrete, along with some other parts, that helps the washing machine function. If this moves around in transit then there is a risk that it will damage the machine however once the machine is installed, we want it to move around as this allows the suspension to work and ensures that the drum is cushioned. The main point is that the bolts are only for transit then you can recycle them!
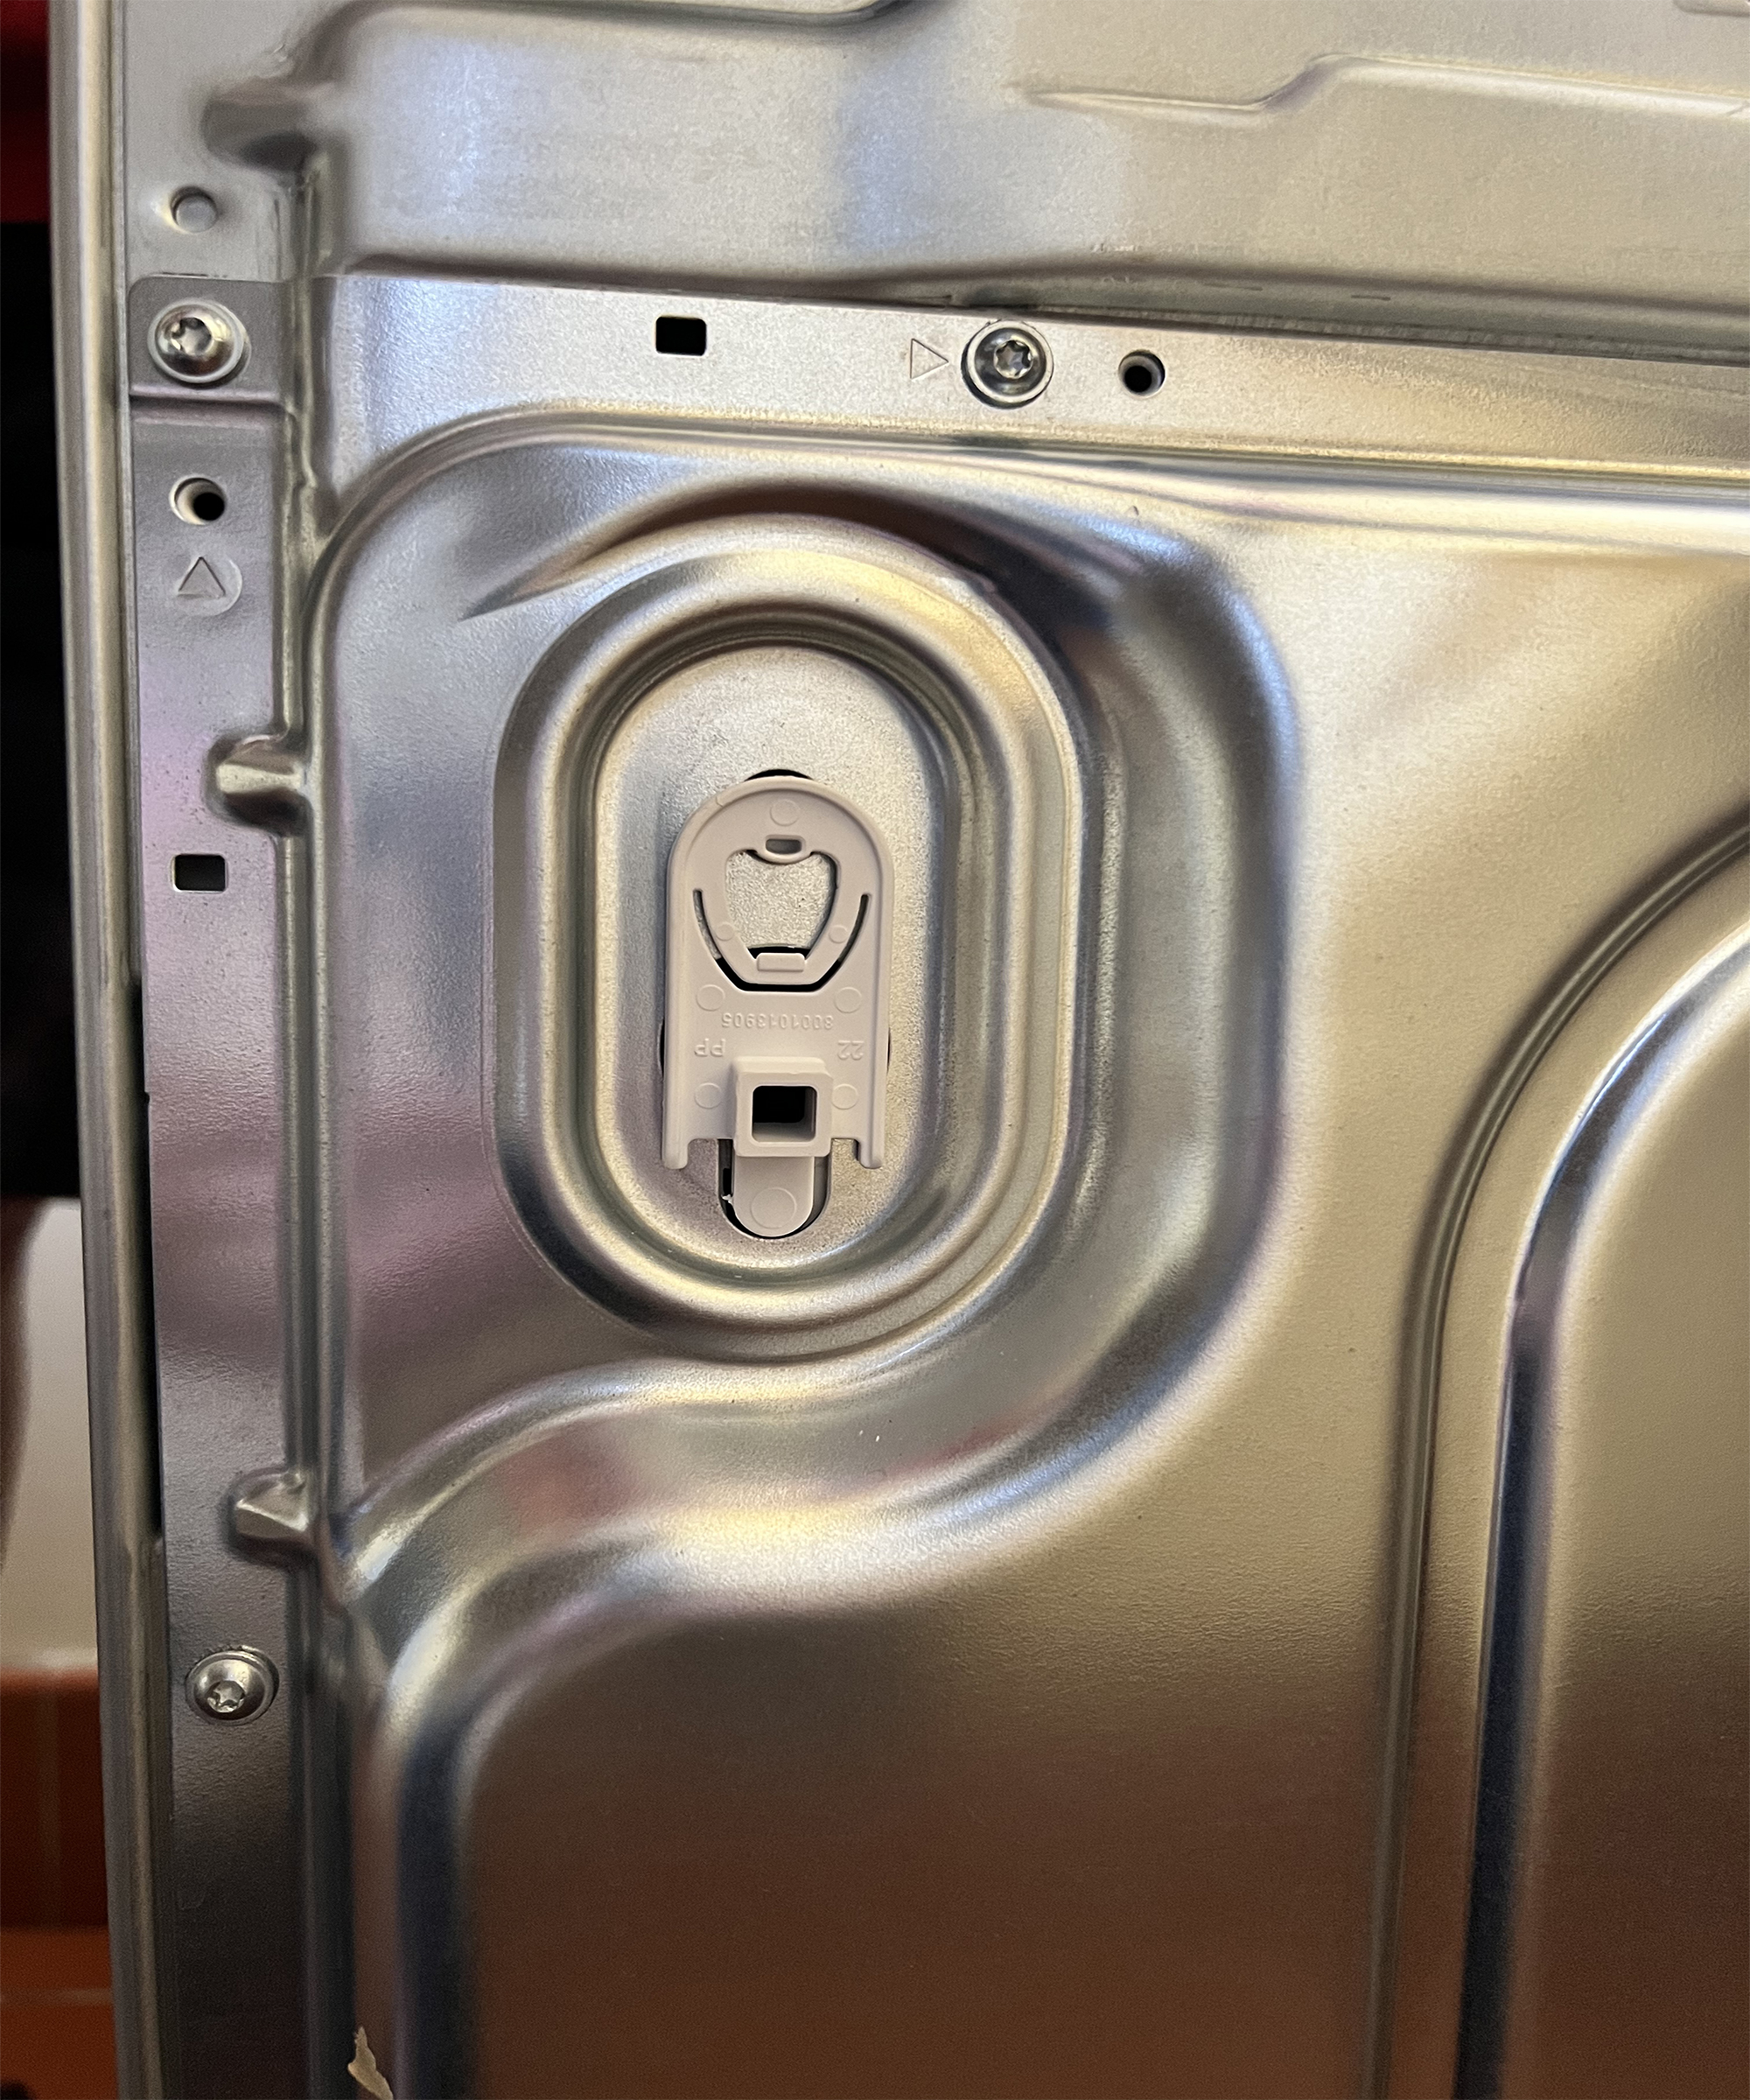
To remove the bolts twist them with a spanner like this one from Jetech, this will reveal a hole under each bolt (there are usually four, one on each corner of the reverse of the machine). You can then insert the clips (which will have come with the machine) into each hole. These will be small clips that slot into the hole and then spring out to expand and fill the gap, usually you simply push them into place.
Get small space home decor ideas, celeb inspiration, DIY tips and more, straight to your inbox!
Step 2: Adjust the leveling bolts
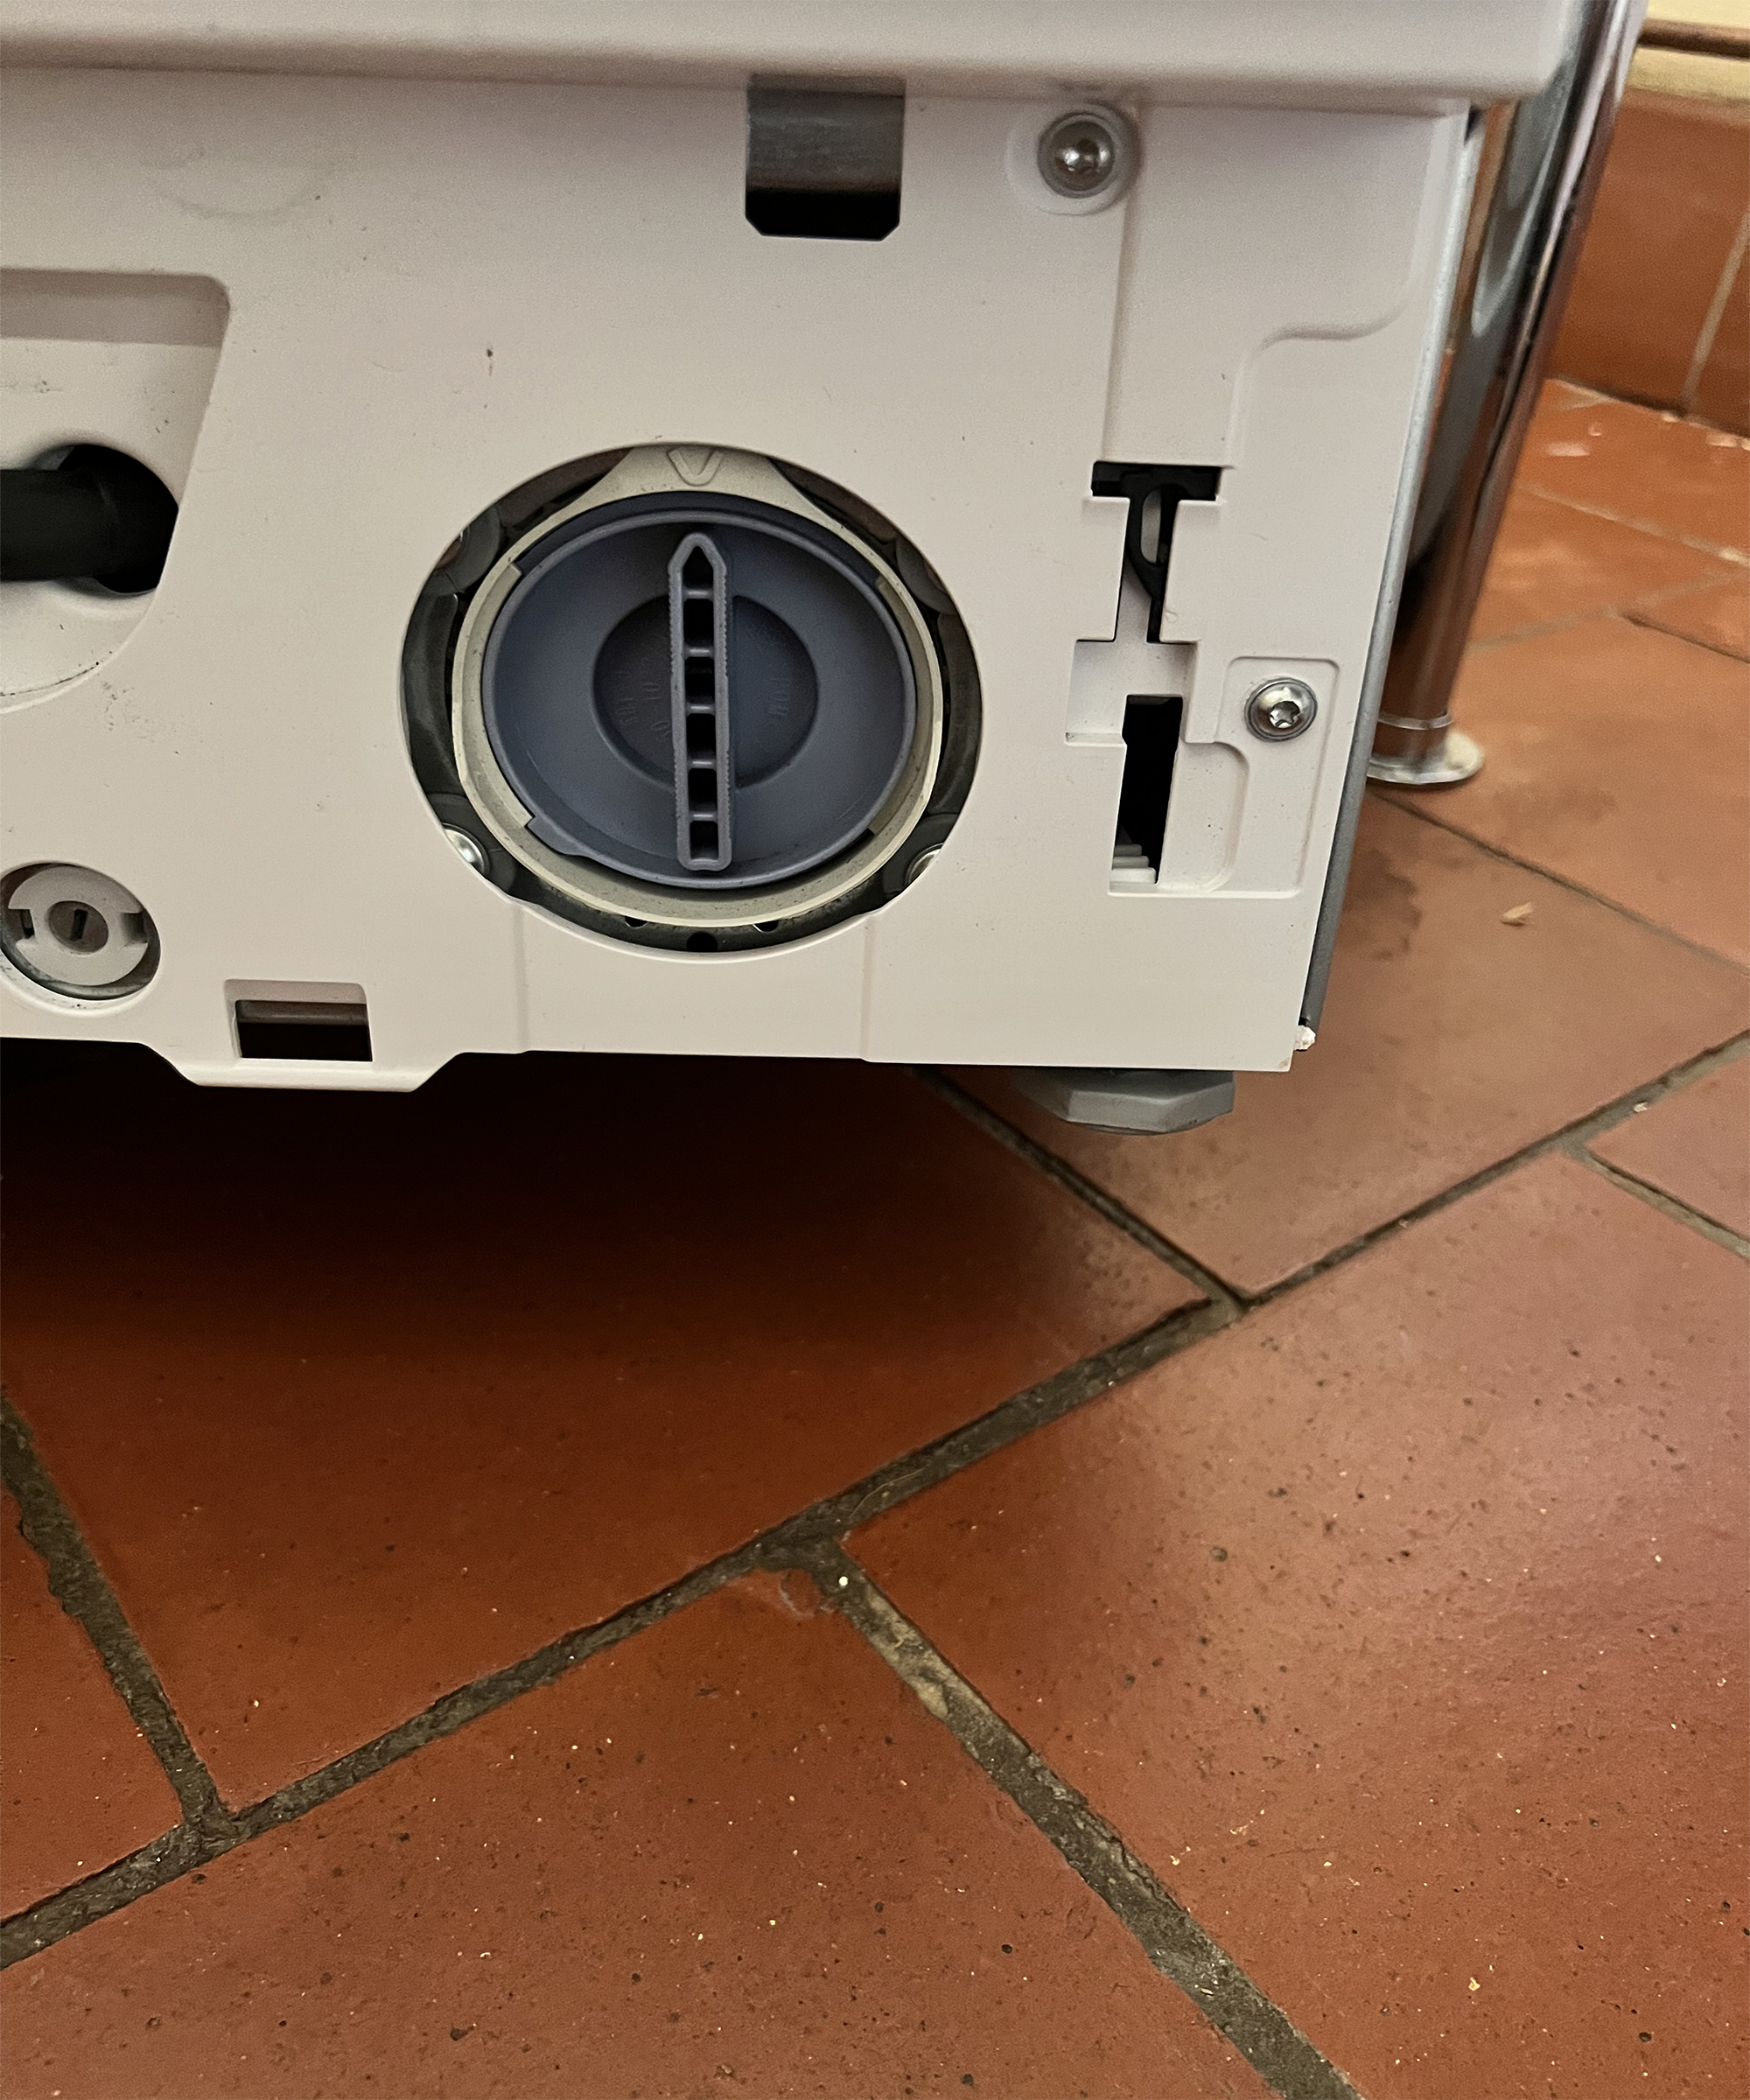
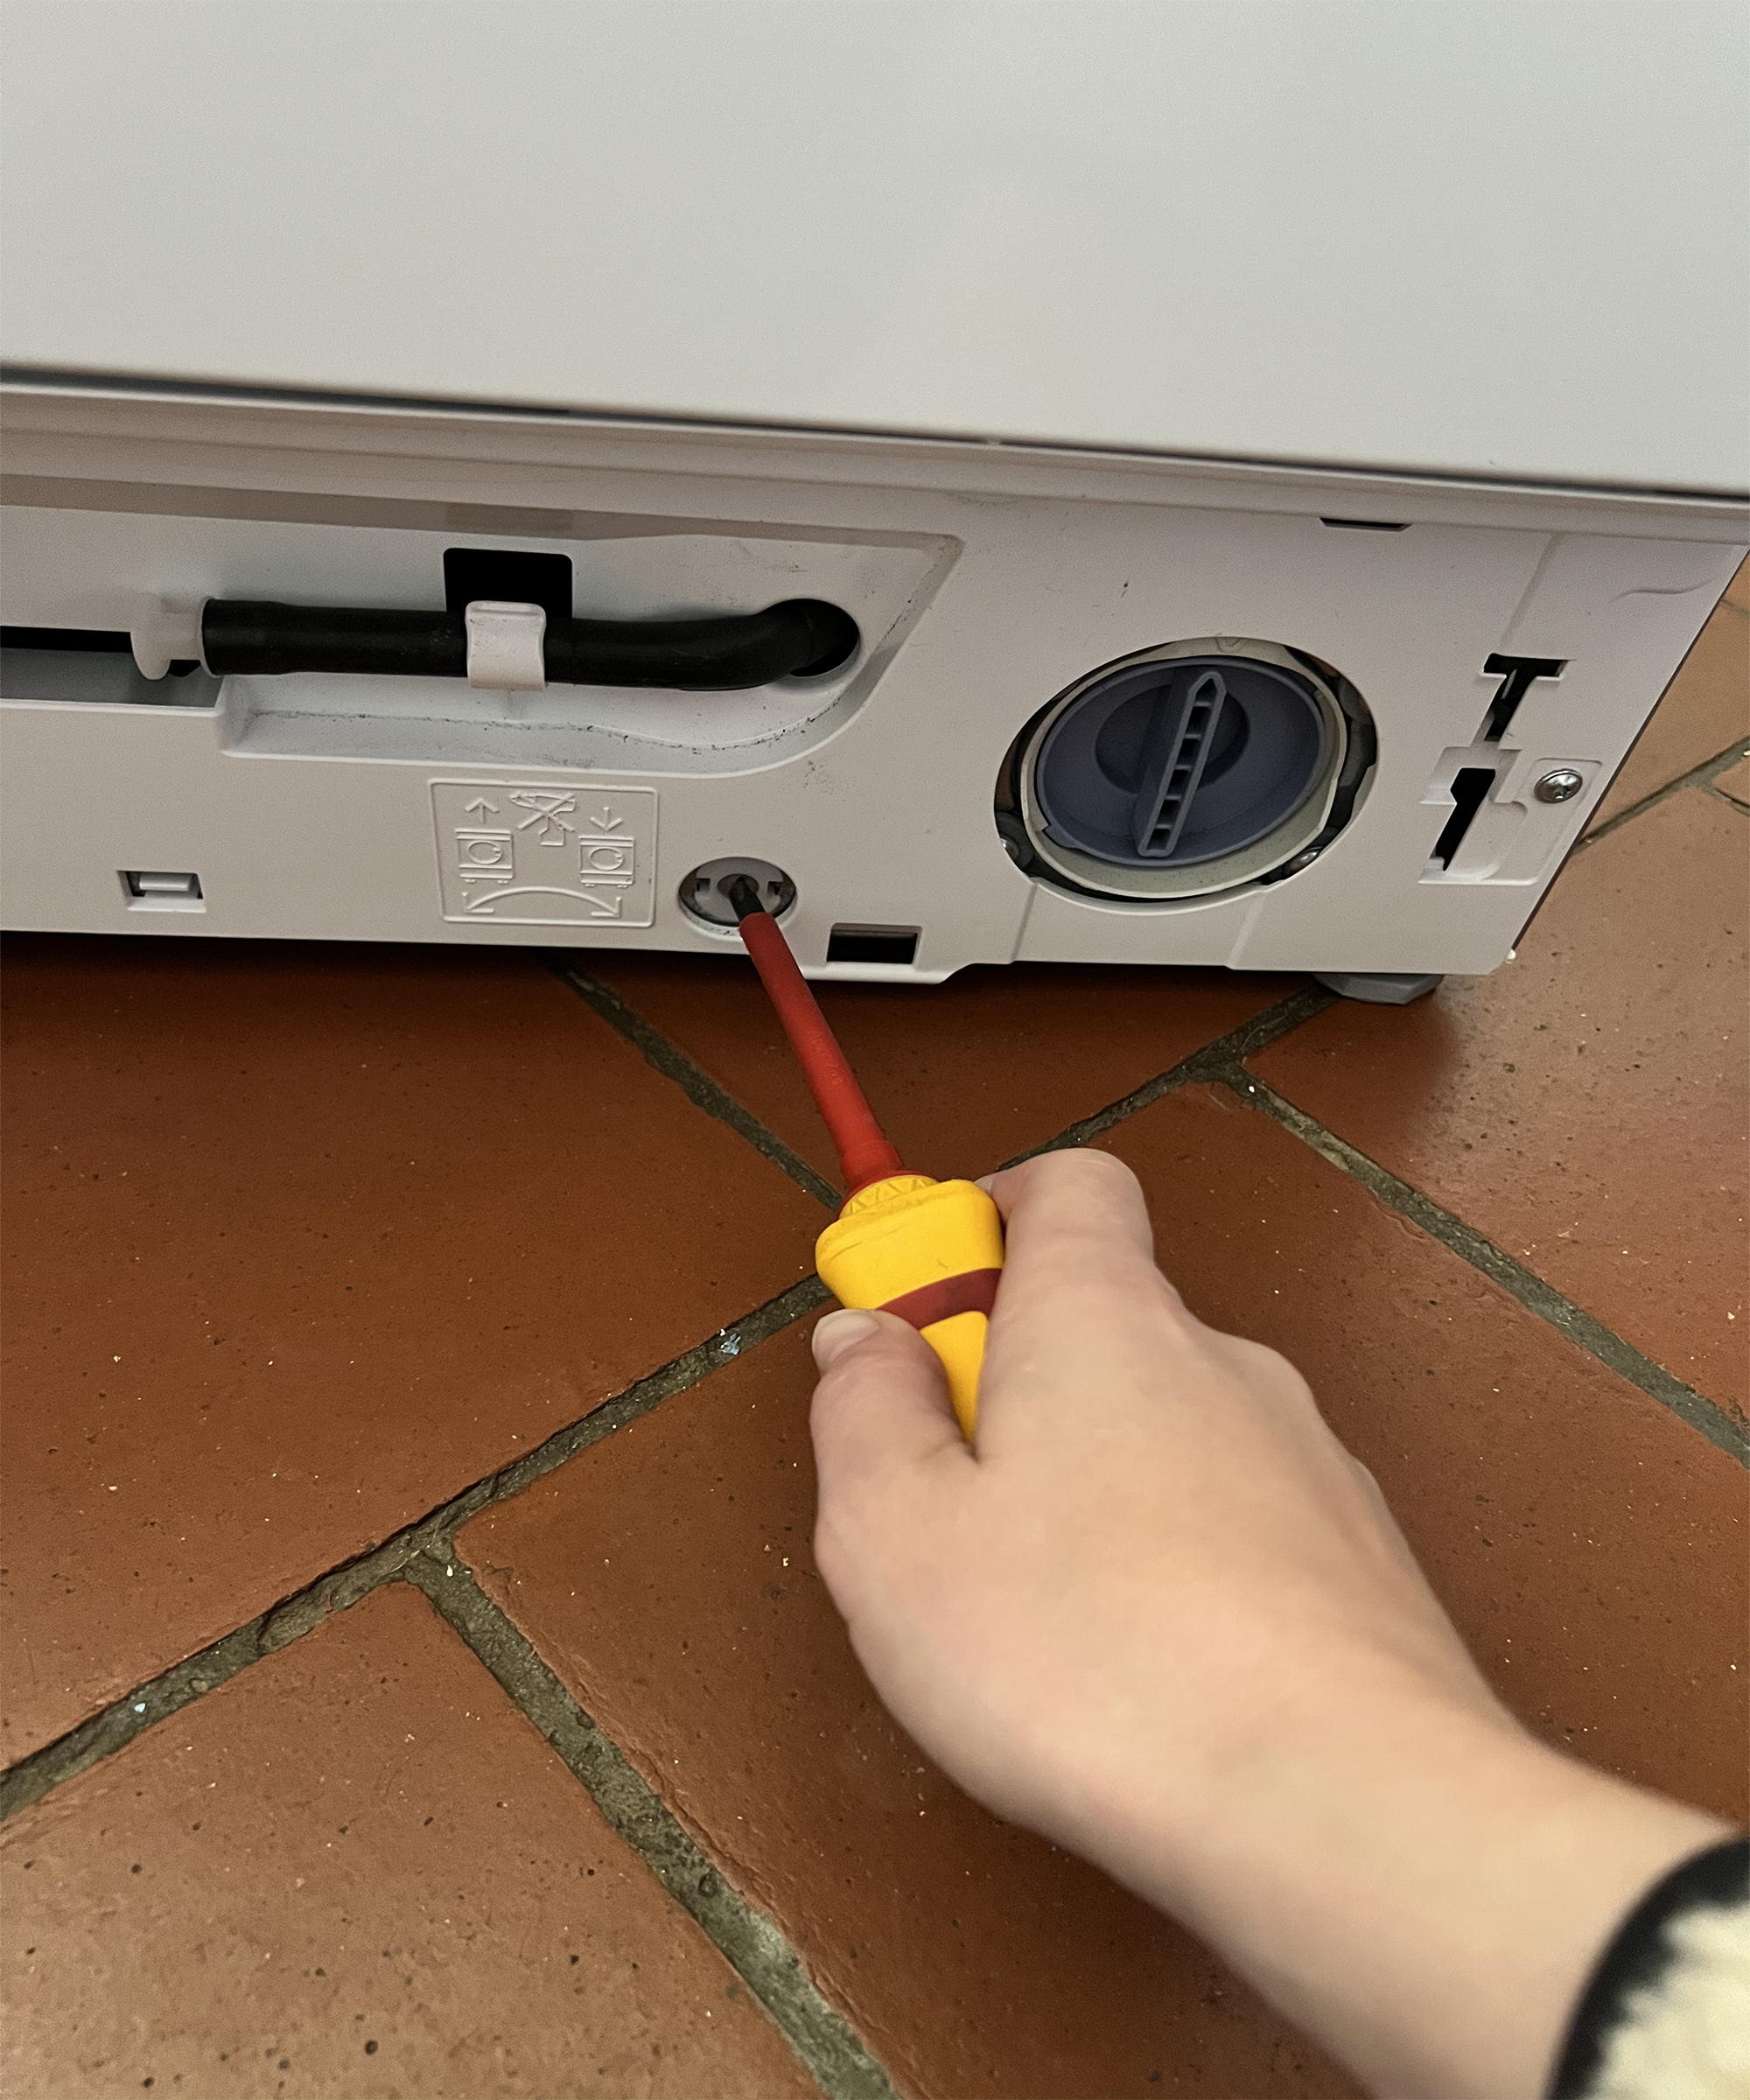
Washing machines usually have four feet and four leveling bolts which control whether the feet are raised or lowered. There are two at the front and two at the back. The purpose of these feet is to help ensure the appliance sits on the ground properly and is level, however, you need to move them out of the way for installation so that the machine can be easily moved around. Usually, the front feet are already raised up into the machine, but the back are lowered. Using a screwdriver, like this one from AMM adjust the leveling bolts so that they raise up and lift the feet up. This will mean that underneath the machine is now flat and easier to maneuver.
Step 3: connect the hoses
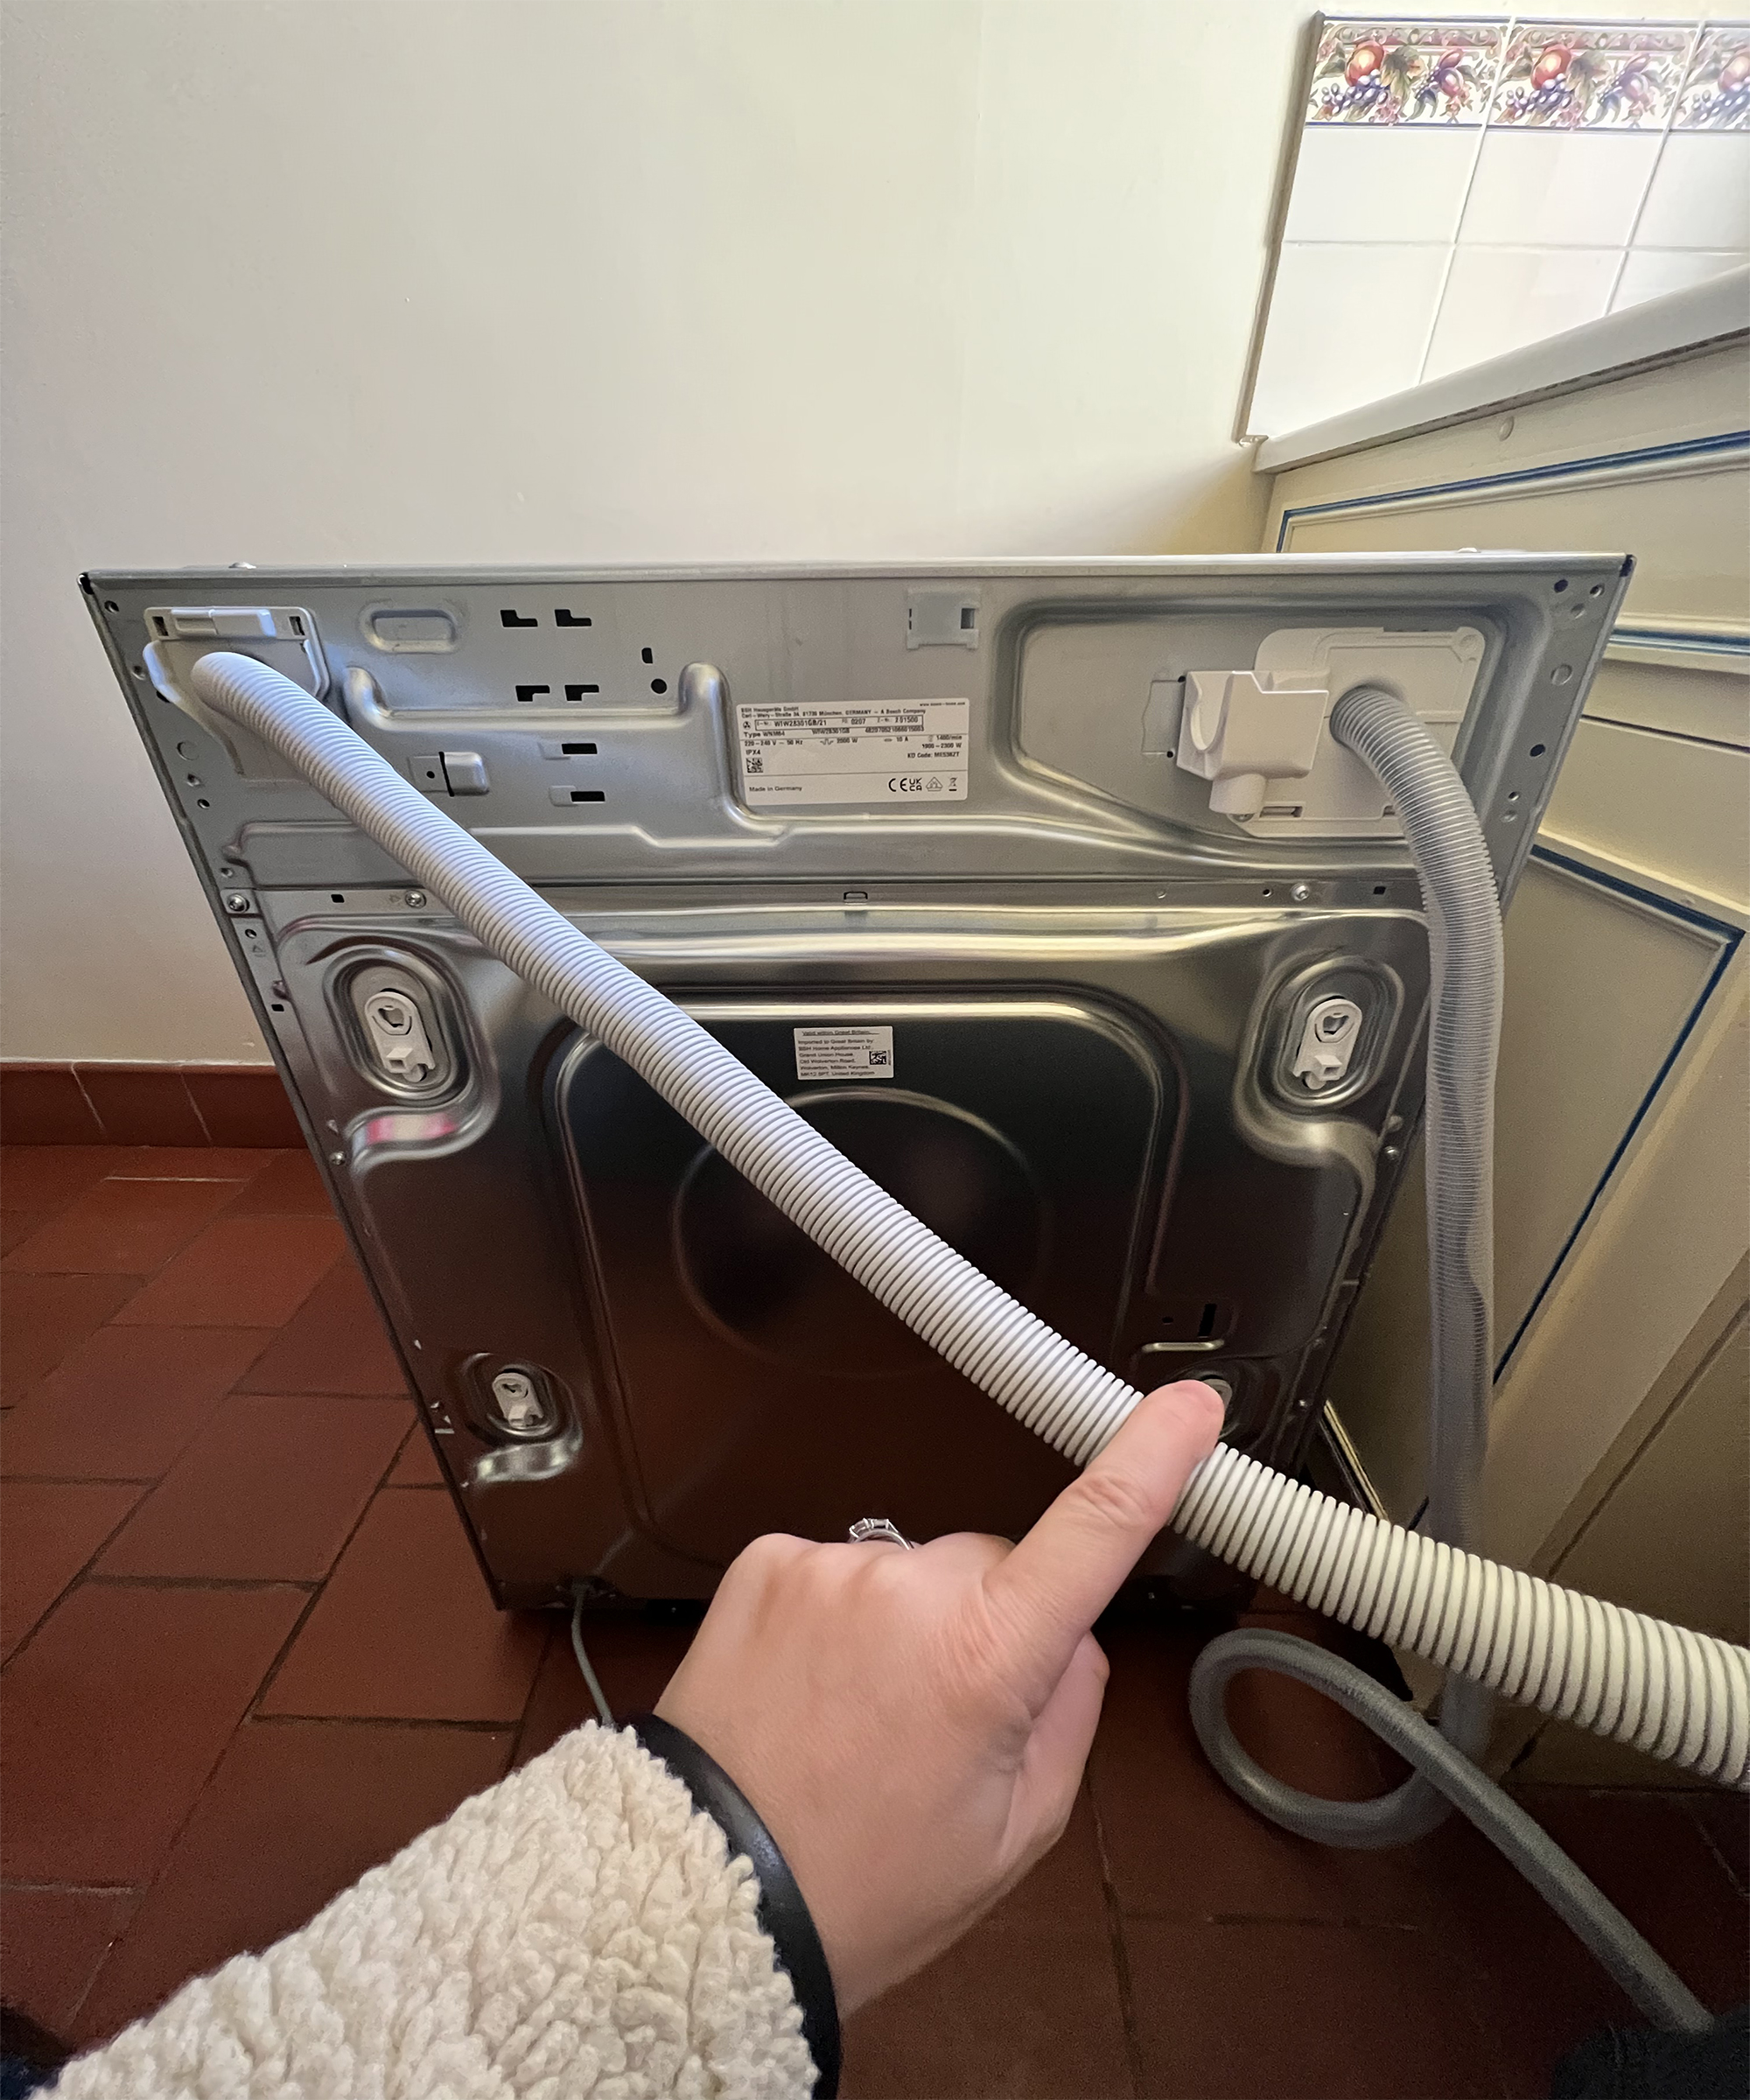
On the back of your washer, you will have two hoses, one for filling the machine, which you connect to the water supply and the other for the drain.
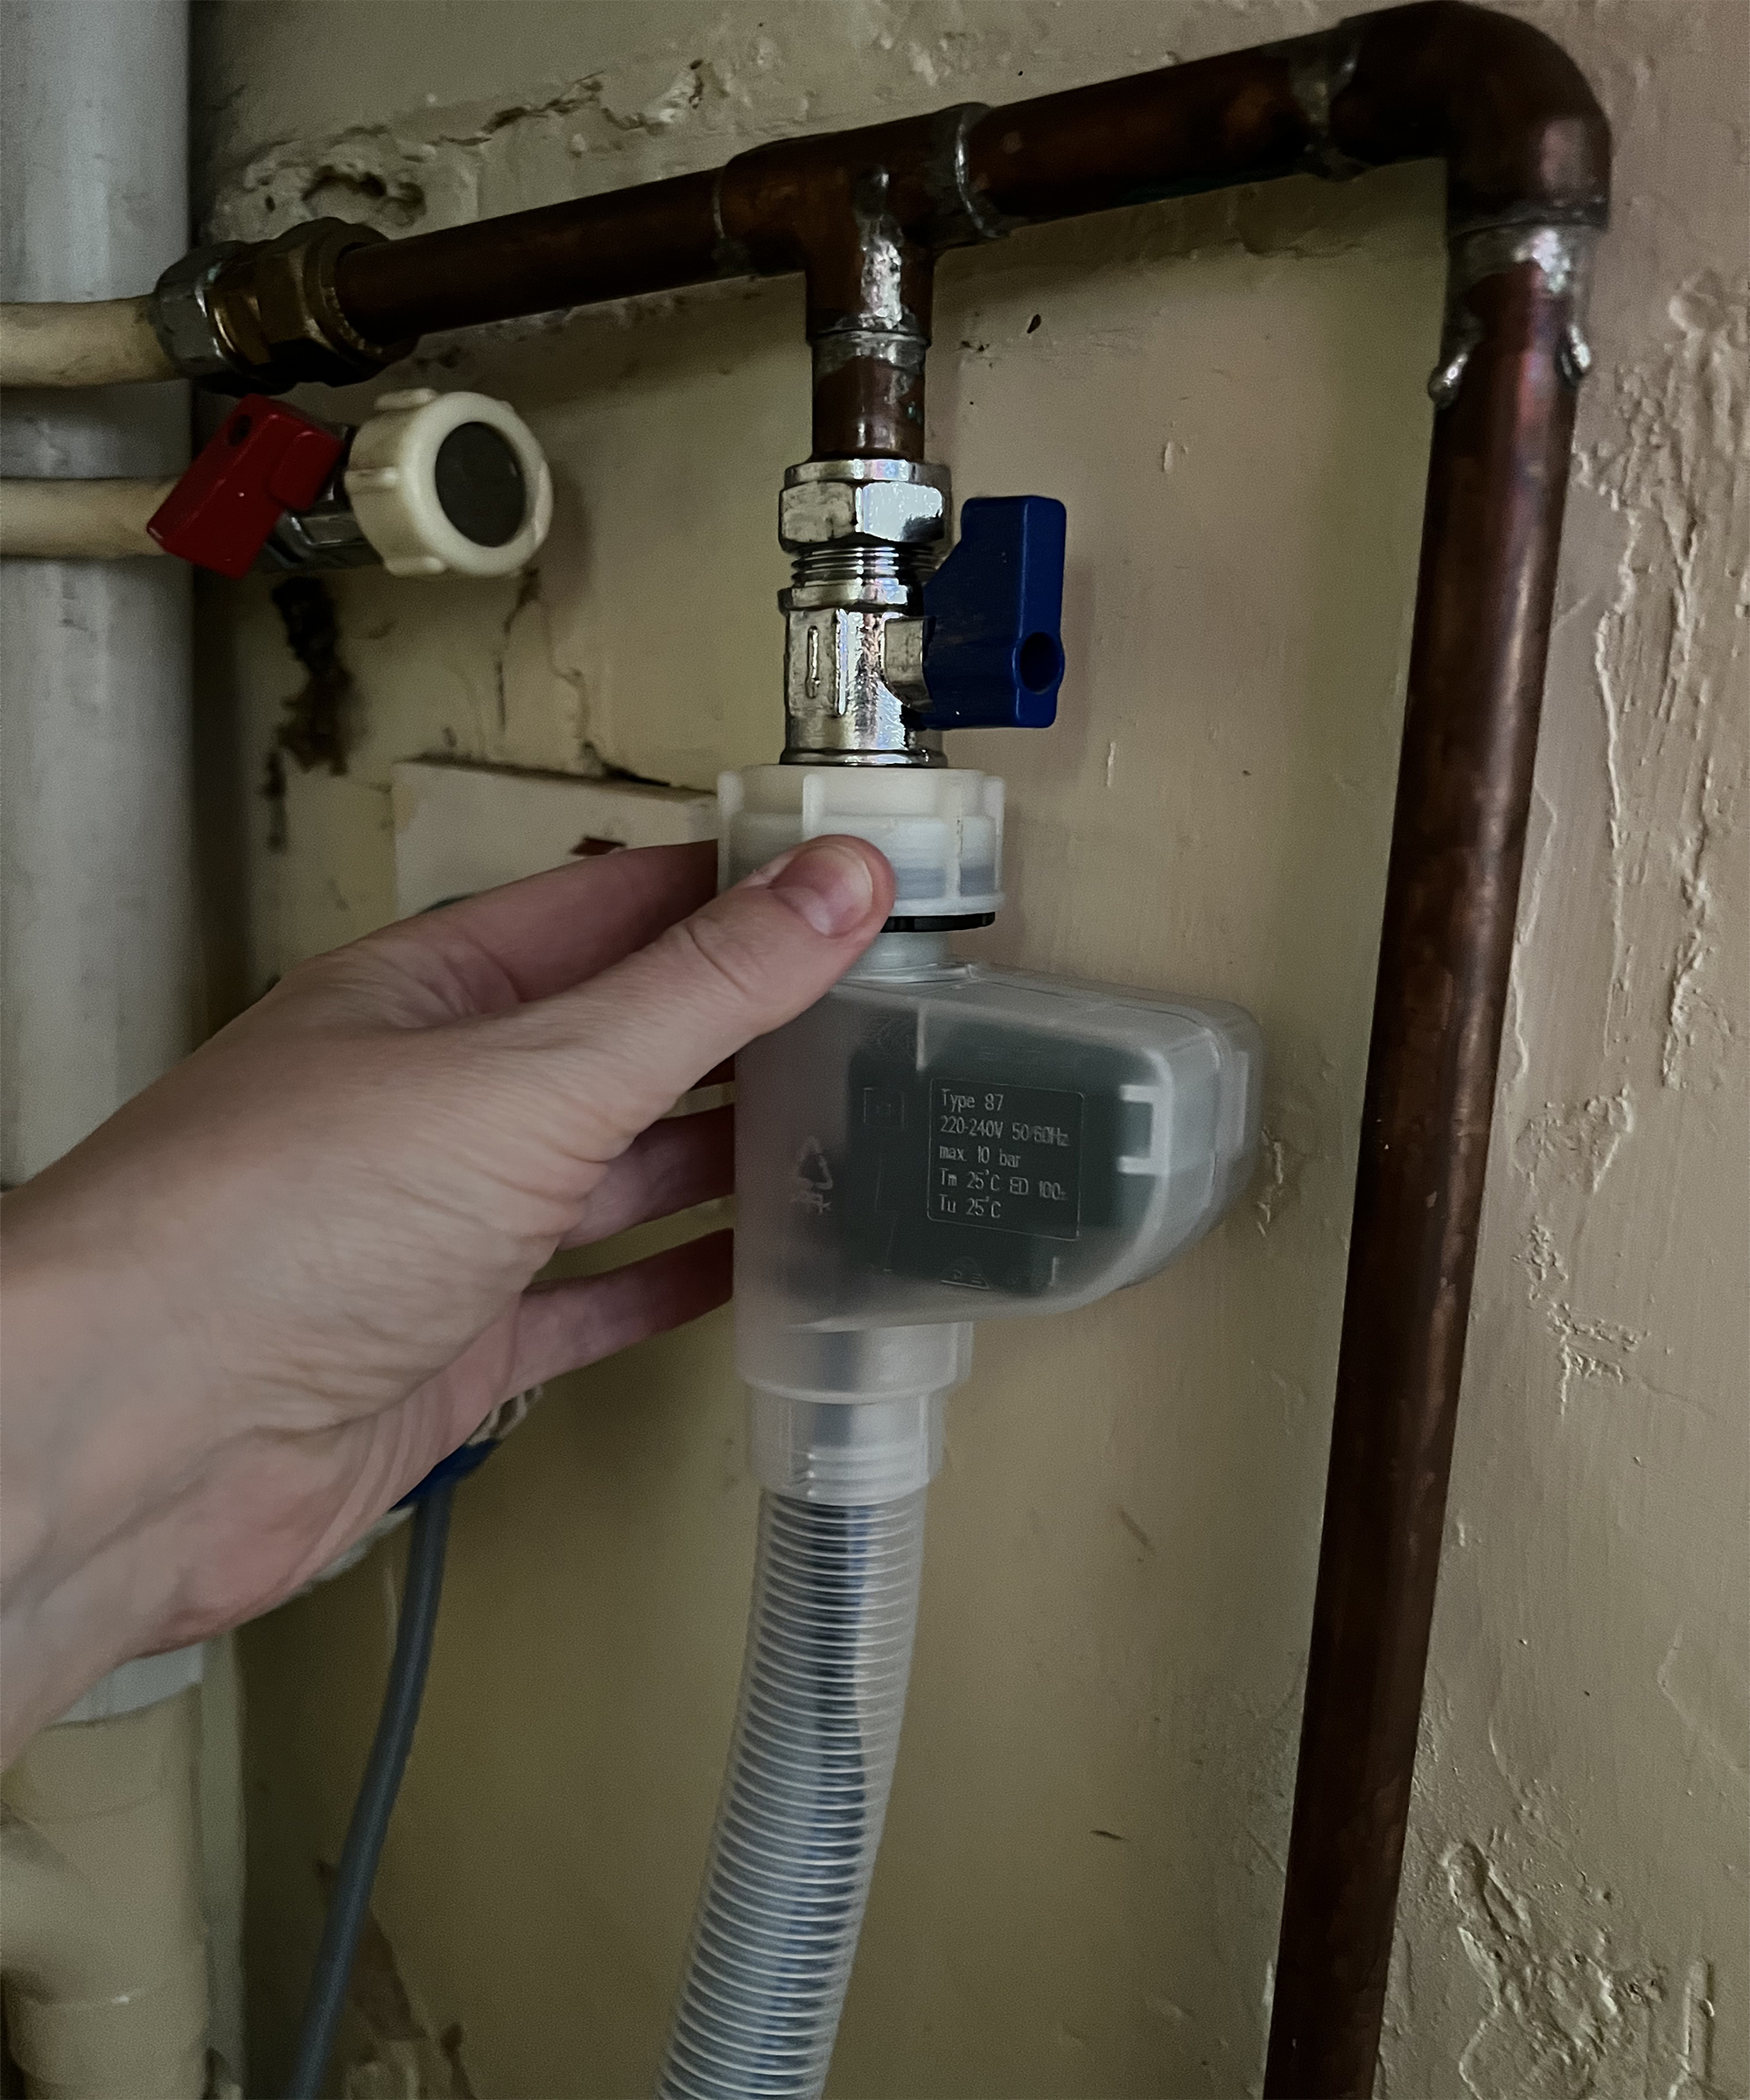
To connect the filling hose to the water supply, screw it on with your hand and then tighten it with a spanner. Feed the second hose down into the drainpipe. You need to make sure it gets down to the spot just above the u-bend; it must be far down enough so that it doesn’t flip out when water is pumped through it, but not too far into the u-bend that it will obstruct the water from coming out.
You will find a clip like the one shown in the picture below in your installation kit, this is the tube clip that prevents the tube from coming away once water is pumped through.
Once you have found the ideal spot for the hose, attach the clip to the hose, ensuring it is tucked into the pipe.
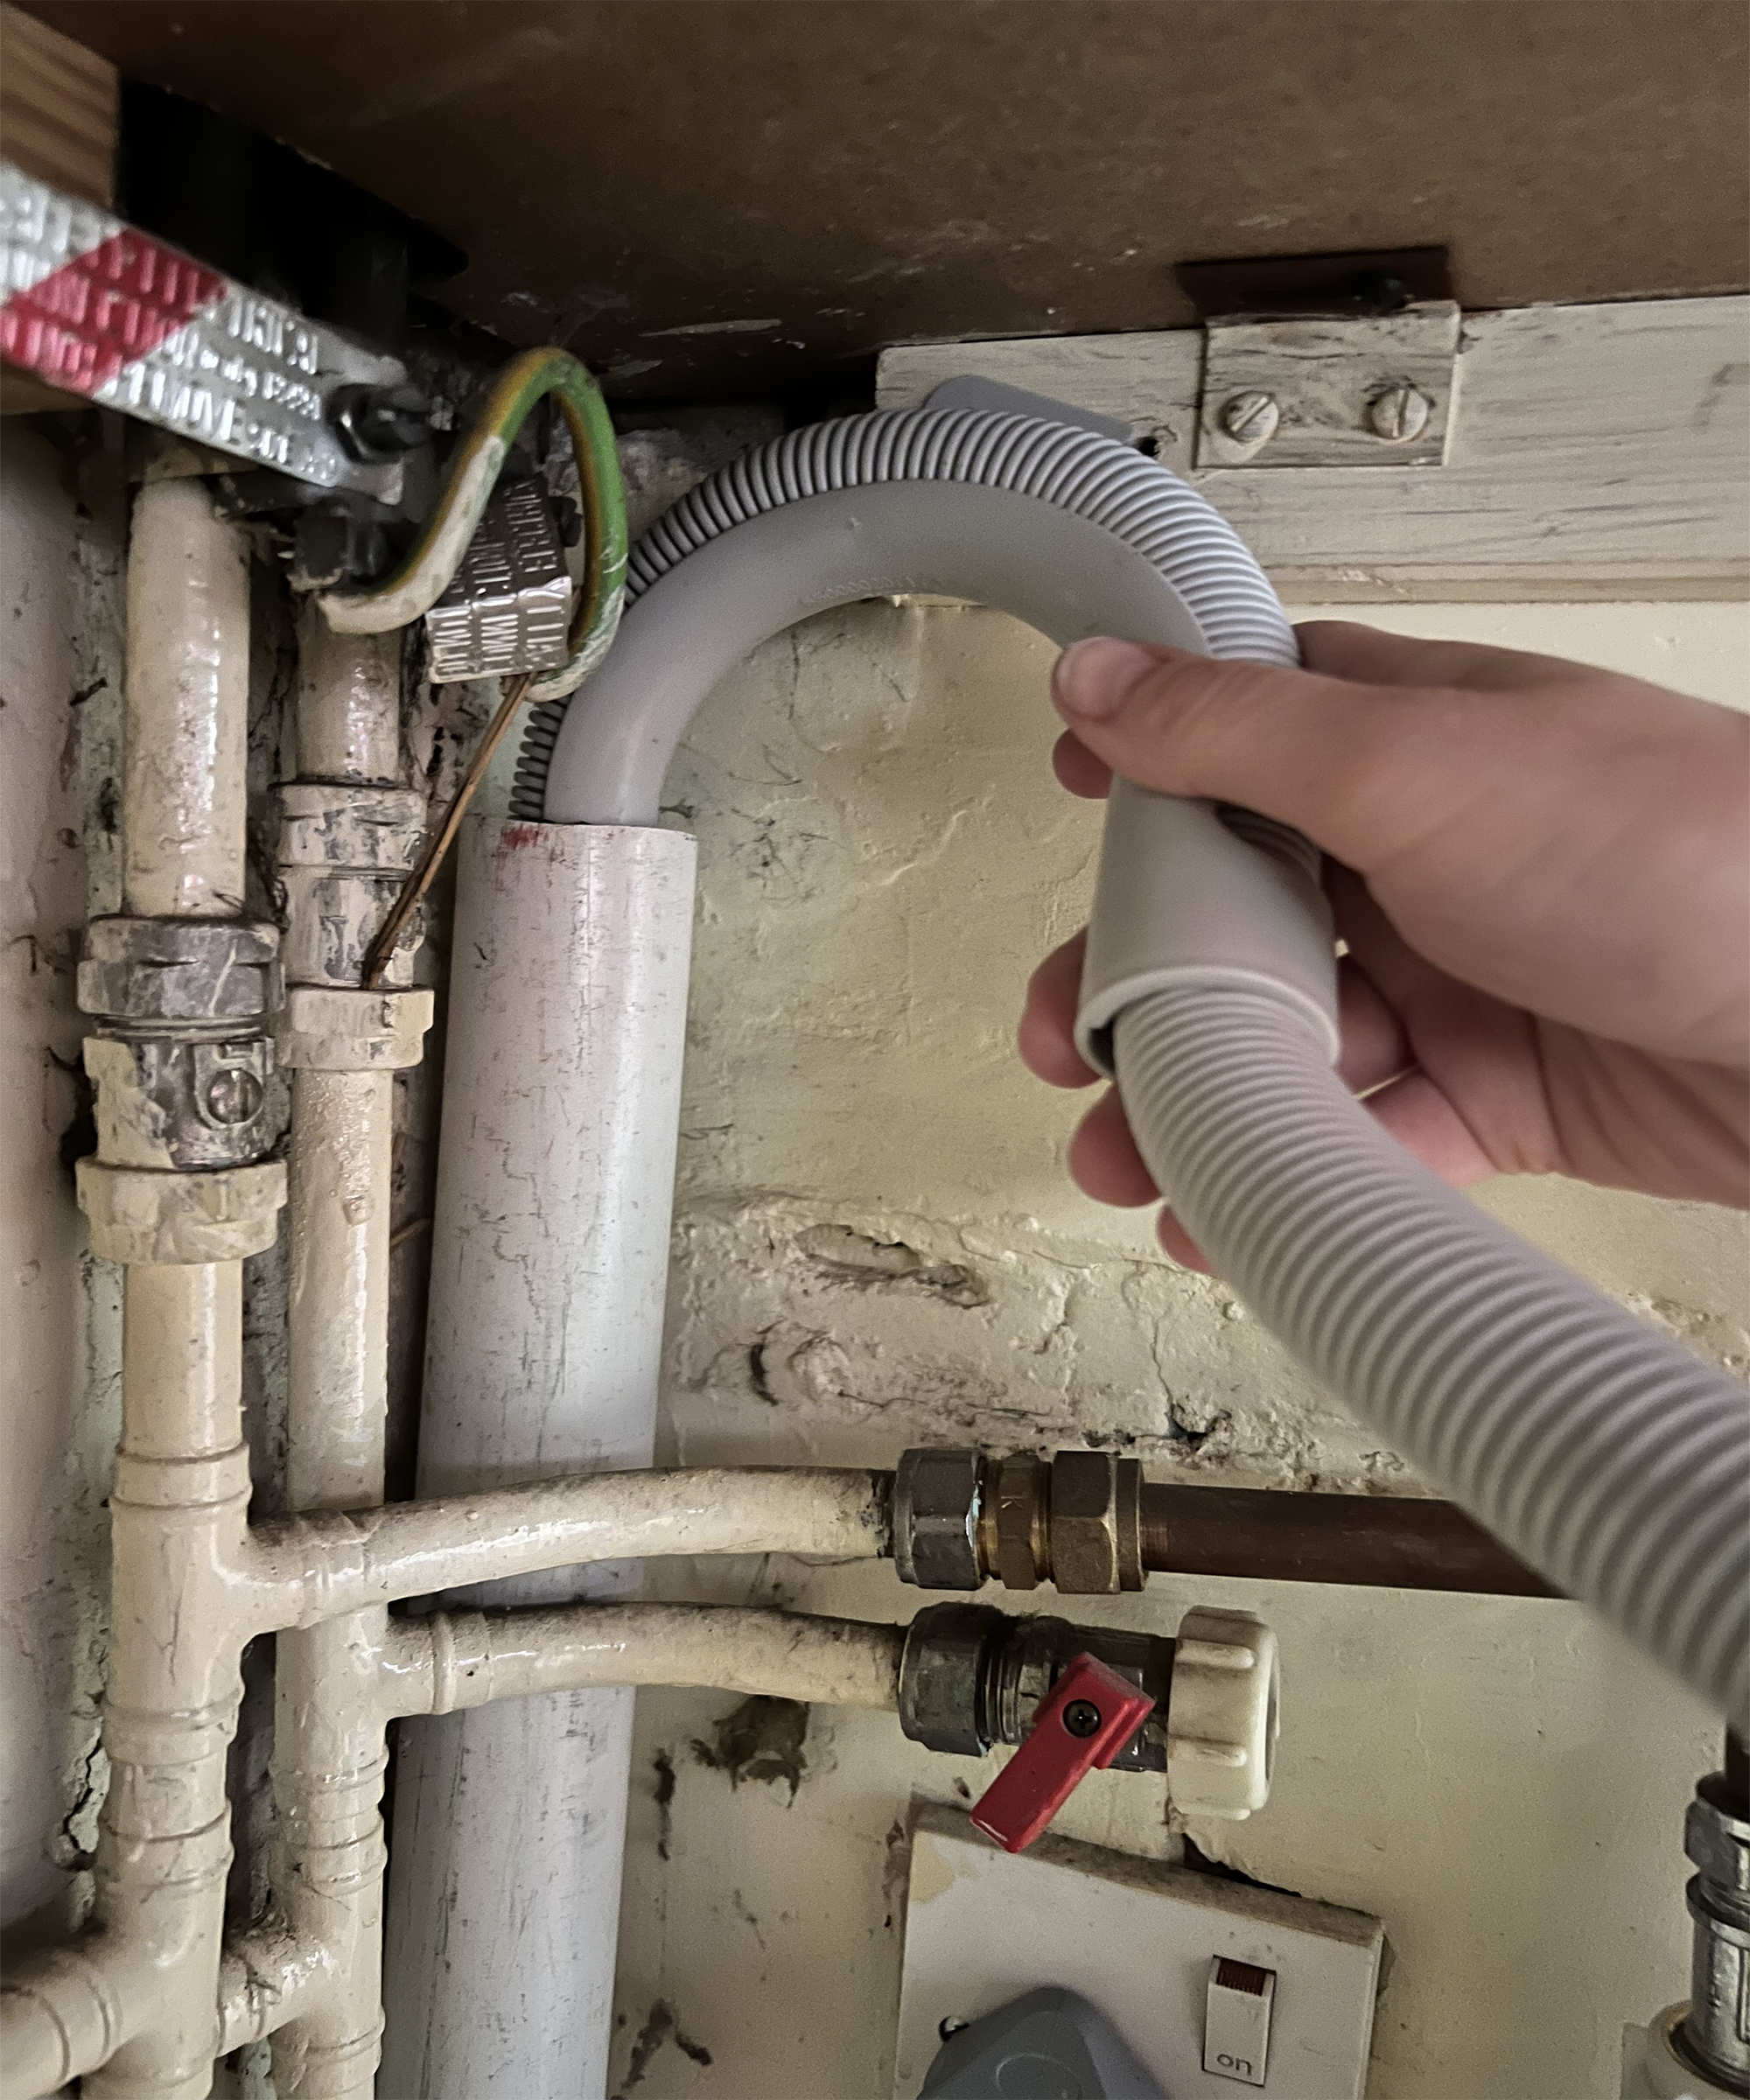
Step 4: position your machine, level it and switch on
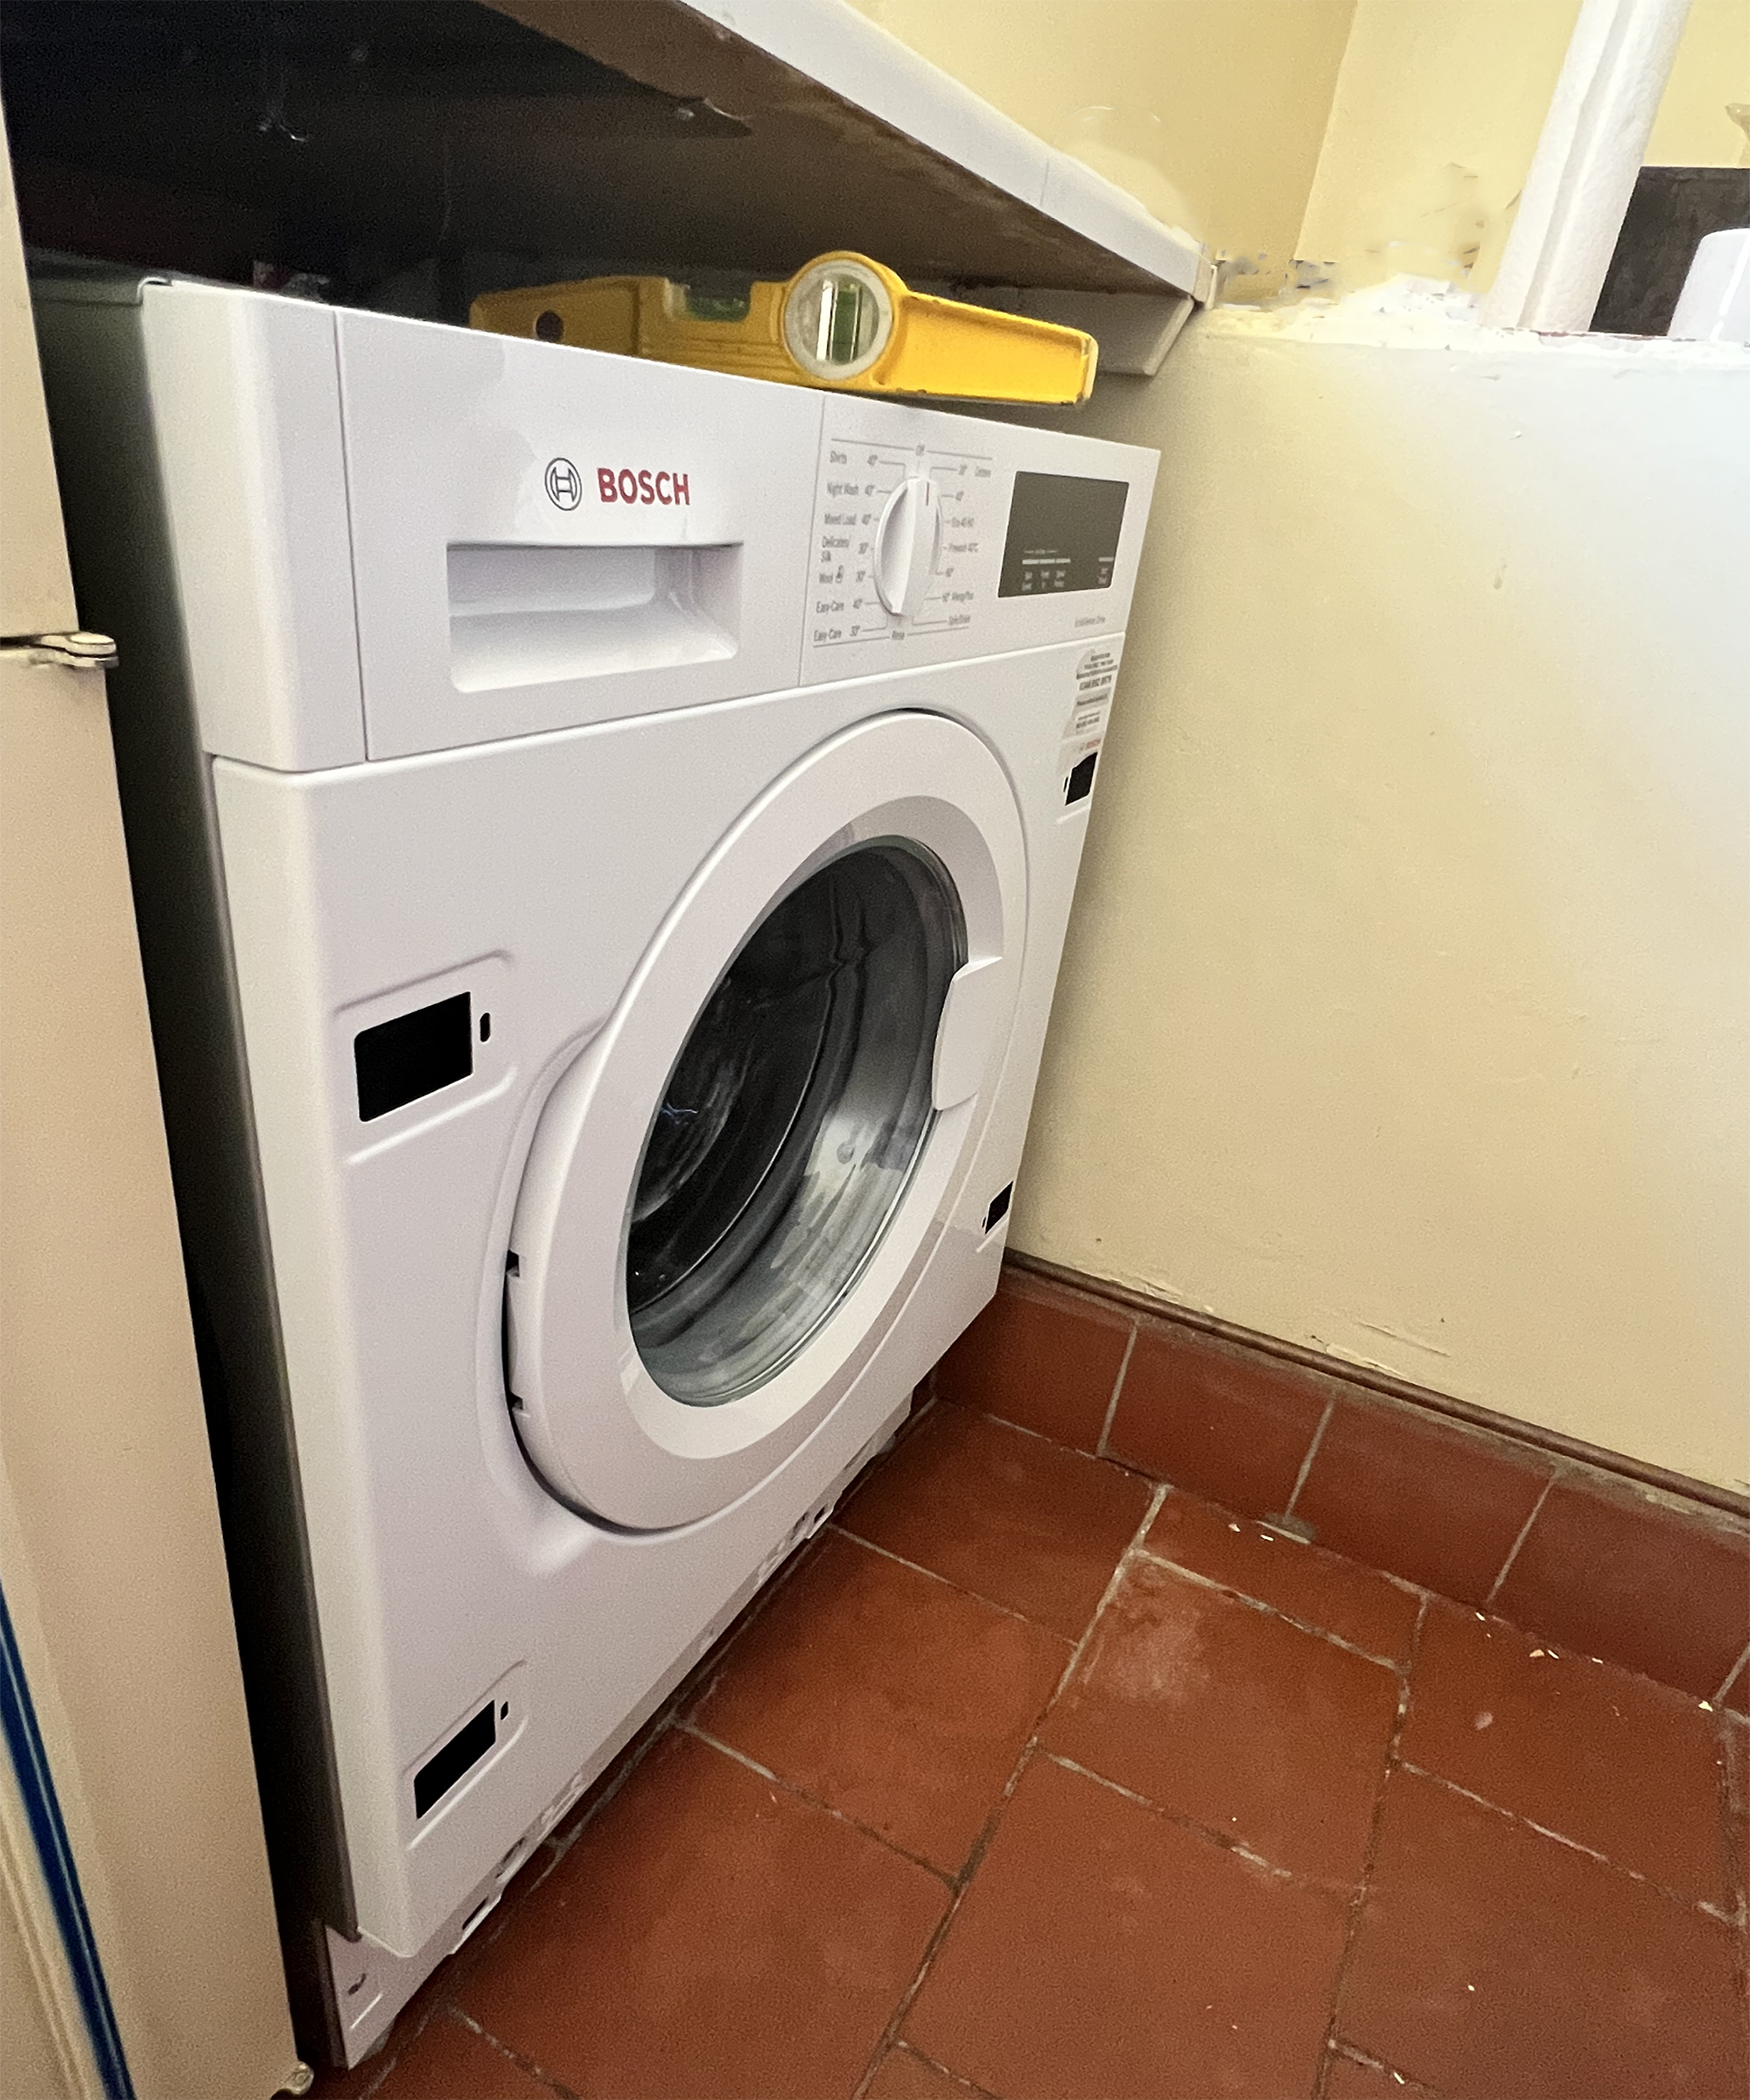
Once both hoses are installed, plug your machine in and then slide it into the position you want it to be so that the hoses and power cable are behind it.
Make sure that you don’t trap the hoses when sliding it into place as you may damage or restrict the water flow. Lower the feet and then level your machine.
Place a level like this one from Amazon basics onto both the side and top of the machine, ensuring that it is level and adjusting the feet and position until it is so that it spins properly. Once you’re happy with the position, you can run a short test wash as per the manufacturer's instructions to ensure it is all working properly.
Of course, if you have any concerns with installation or run into any problems, pause what you're doing and contact your local plumber. Otherwise, by following these steps along with the washing machine manufacturer's instructions you should have your appliance up and running efficiently in no time at all.
Make sure you take care of your new appliance too. Keeping a washing machine clean will mean it runs efficiently, making laundry a breeze and increasing its longevity. It's a win-win!

I’m a DIY and renovation expert from a family of renovators; it's in my blood! Renovation is my passion and I love sharing my knowledge, either through my Instagram renovation tips or my renovation course. I love seeing how it helps others build the confidence to create their dream home without it costing the earth!