If you have a cupboard under the stairs or an extra storage cupboard in your apartment, chances are it’s a jumble of coats, umbrellas and a hoover. But one DIY fan has proven that it can be a brilliant place to transform into a DIY pantry, particularly if you’re short on space in the kitchen.
Jasmine, co-founder of Female DIY Collective, had been using her understairs cupboard for food, baking equipment, and a whole load of shopping bags. Like most home cupboards it wasn’t as organized as it could be.
Struggling for space in the kitchen, she got to work. ‘On New Year’s Eve I finally decided to end the year with a bang - a project to declutter and better organize the space,’ she says.
DIY pantry
Here's how the space started out, and how Jasmine created a dramatic transformation.
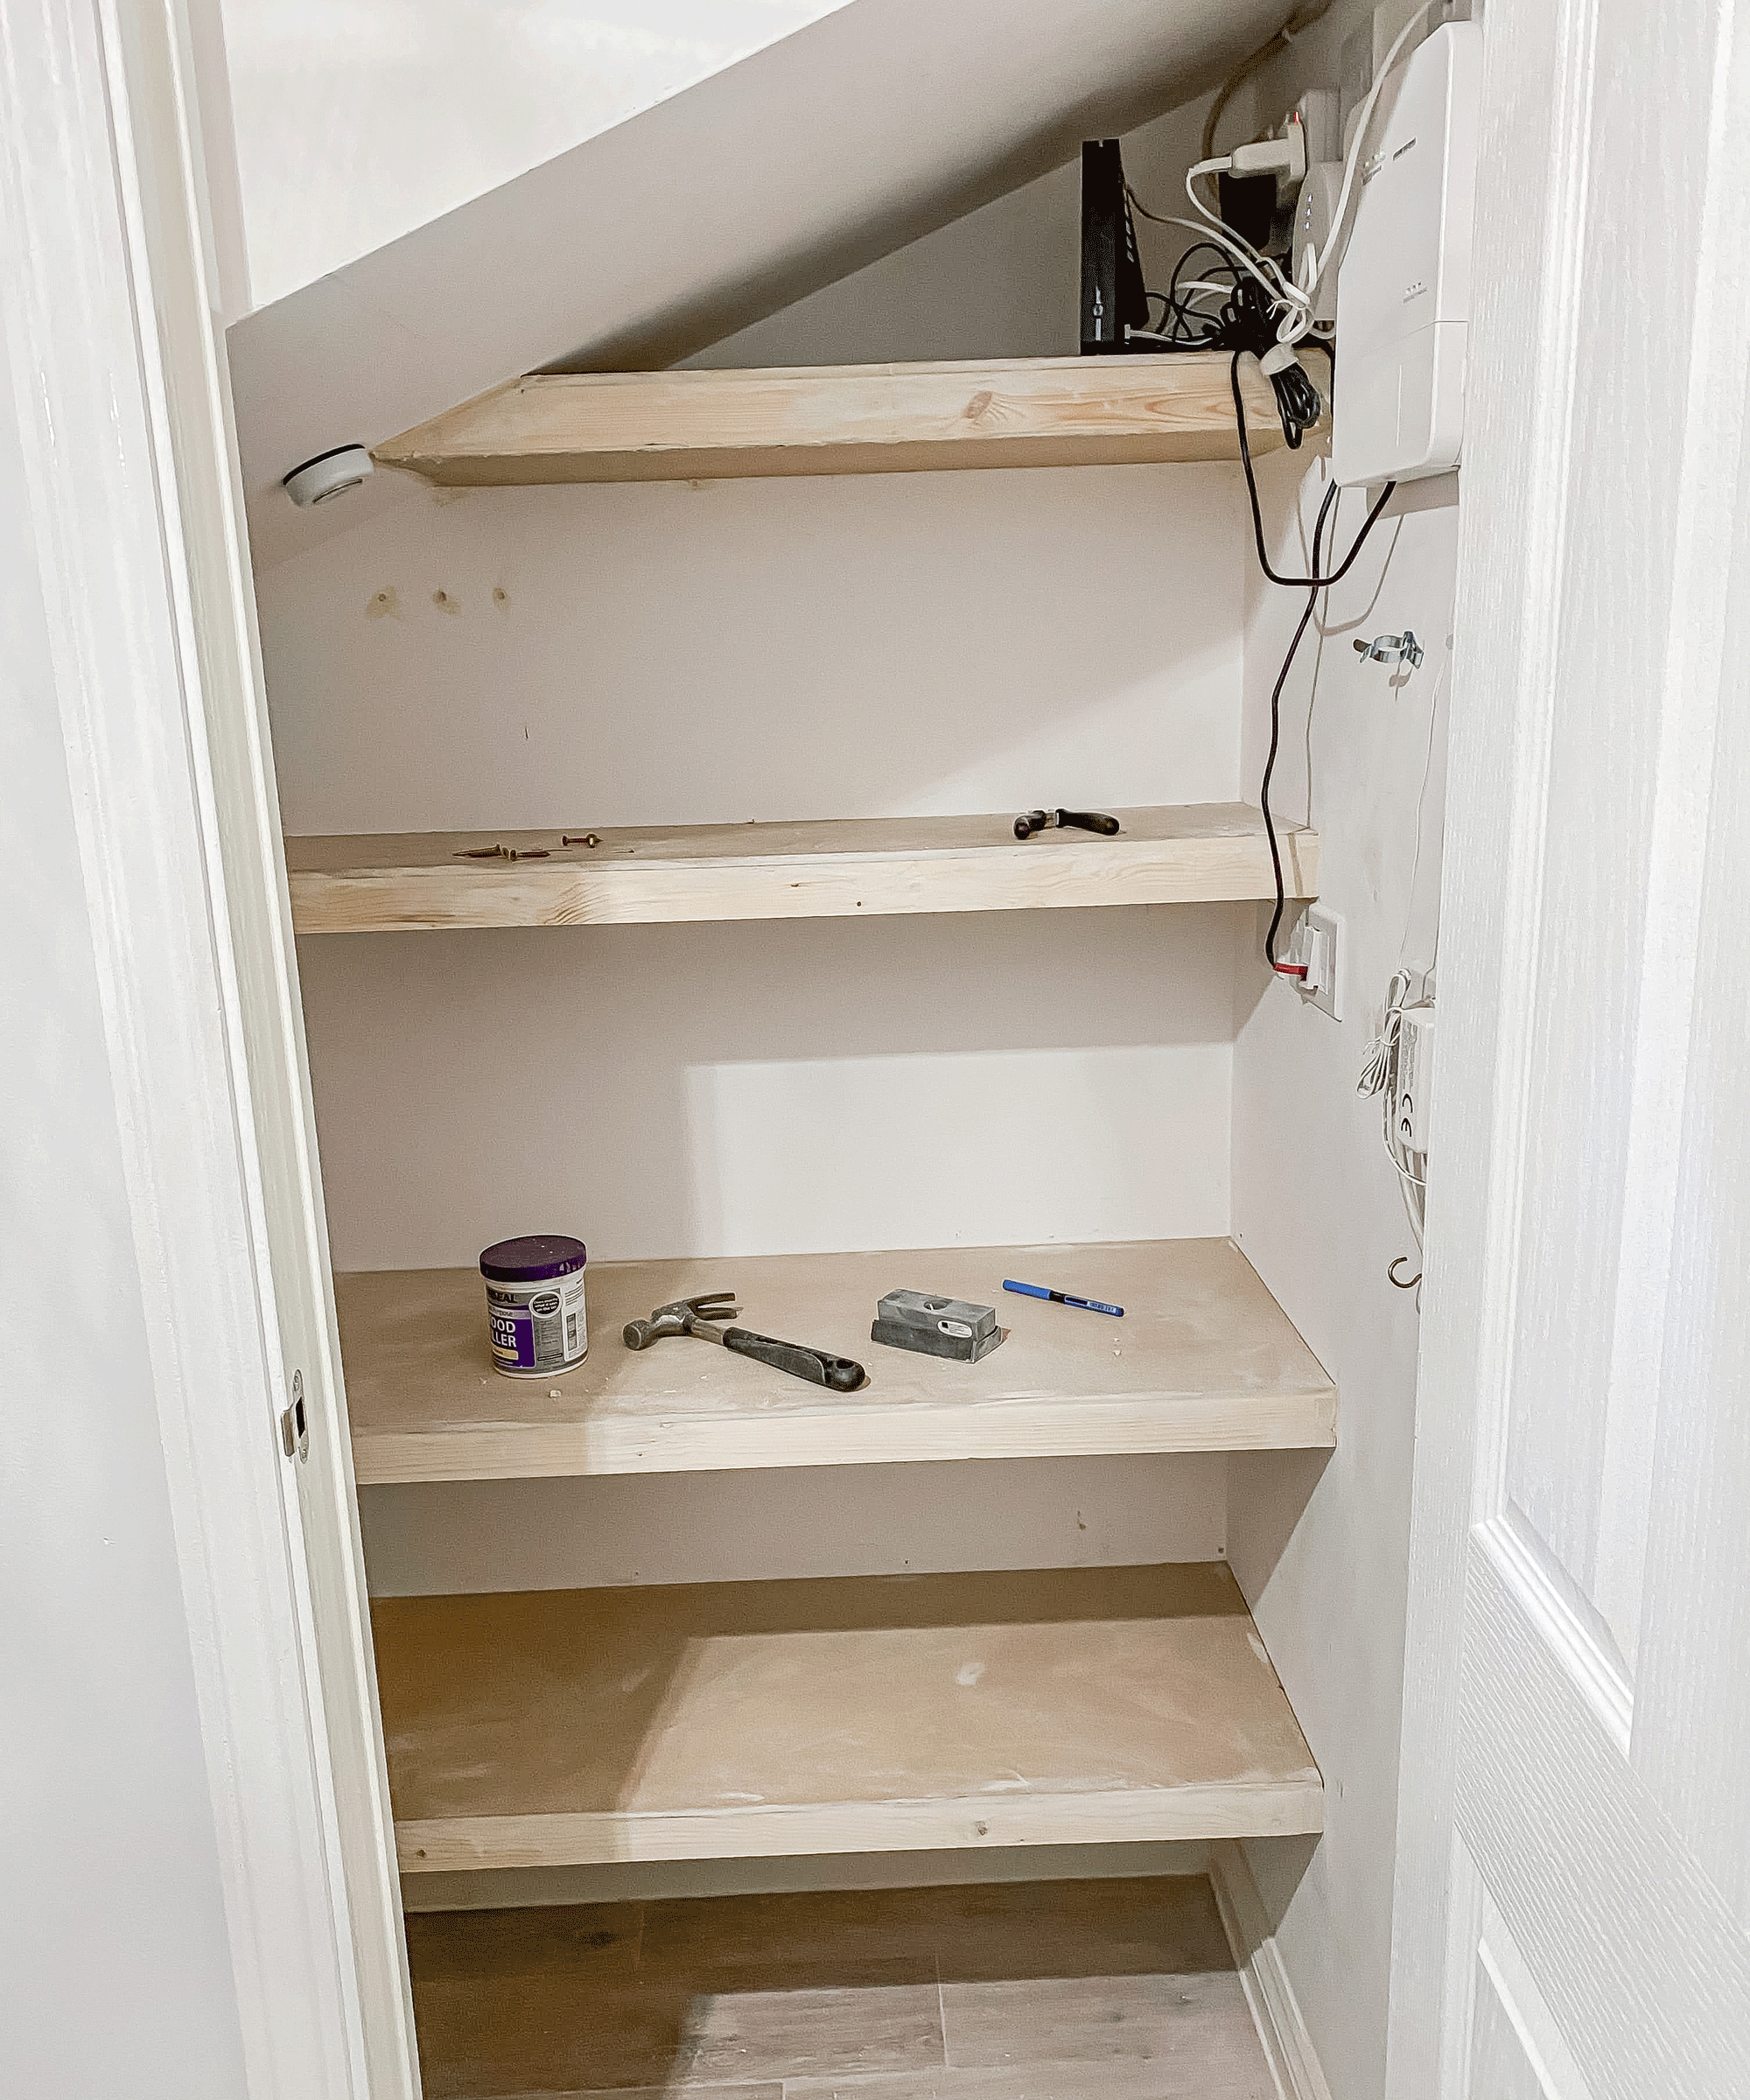
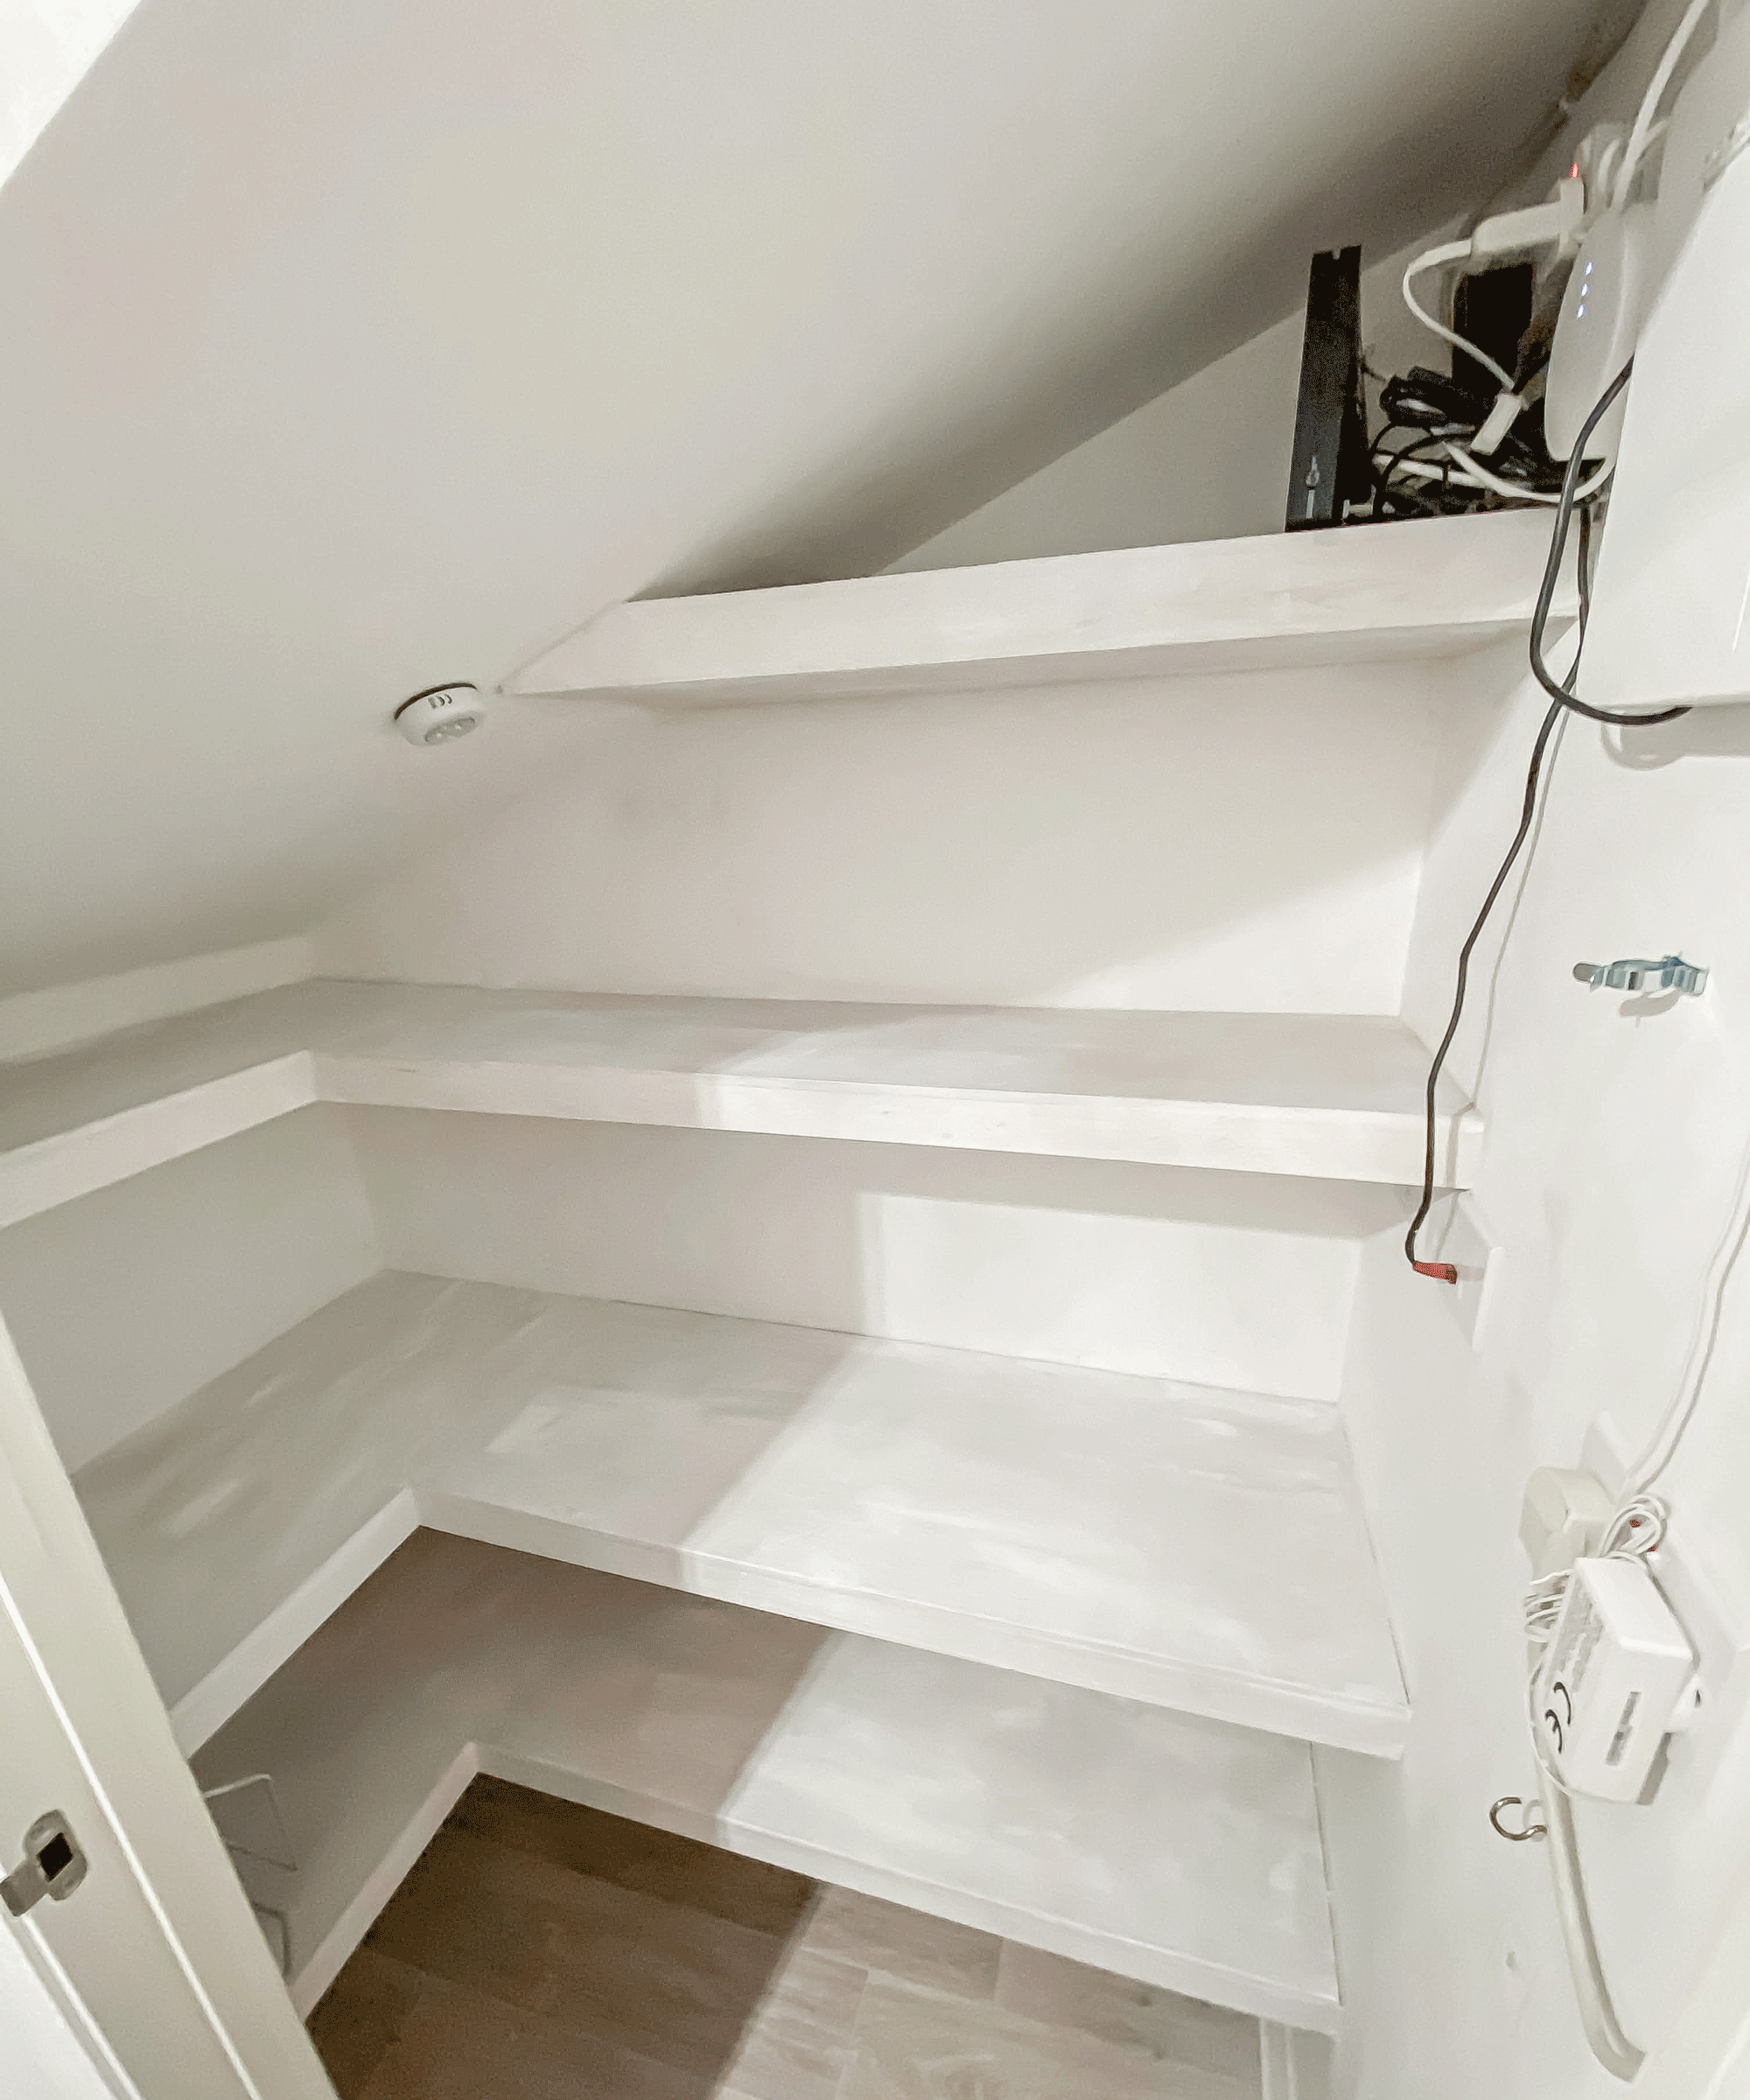
Before
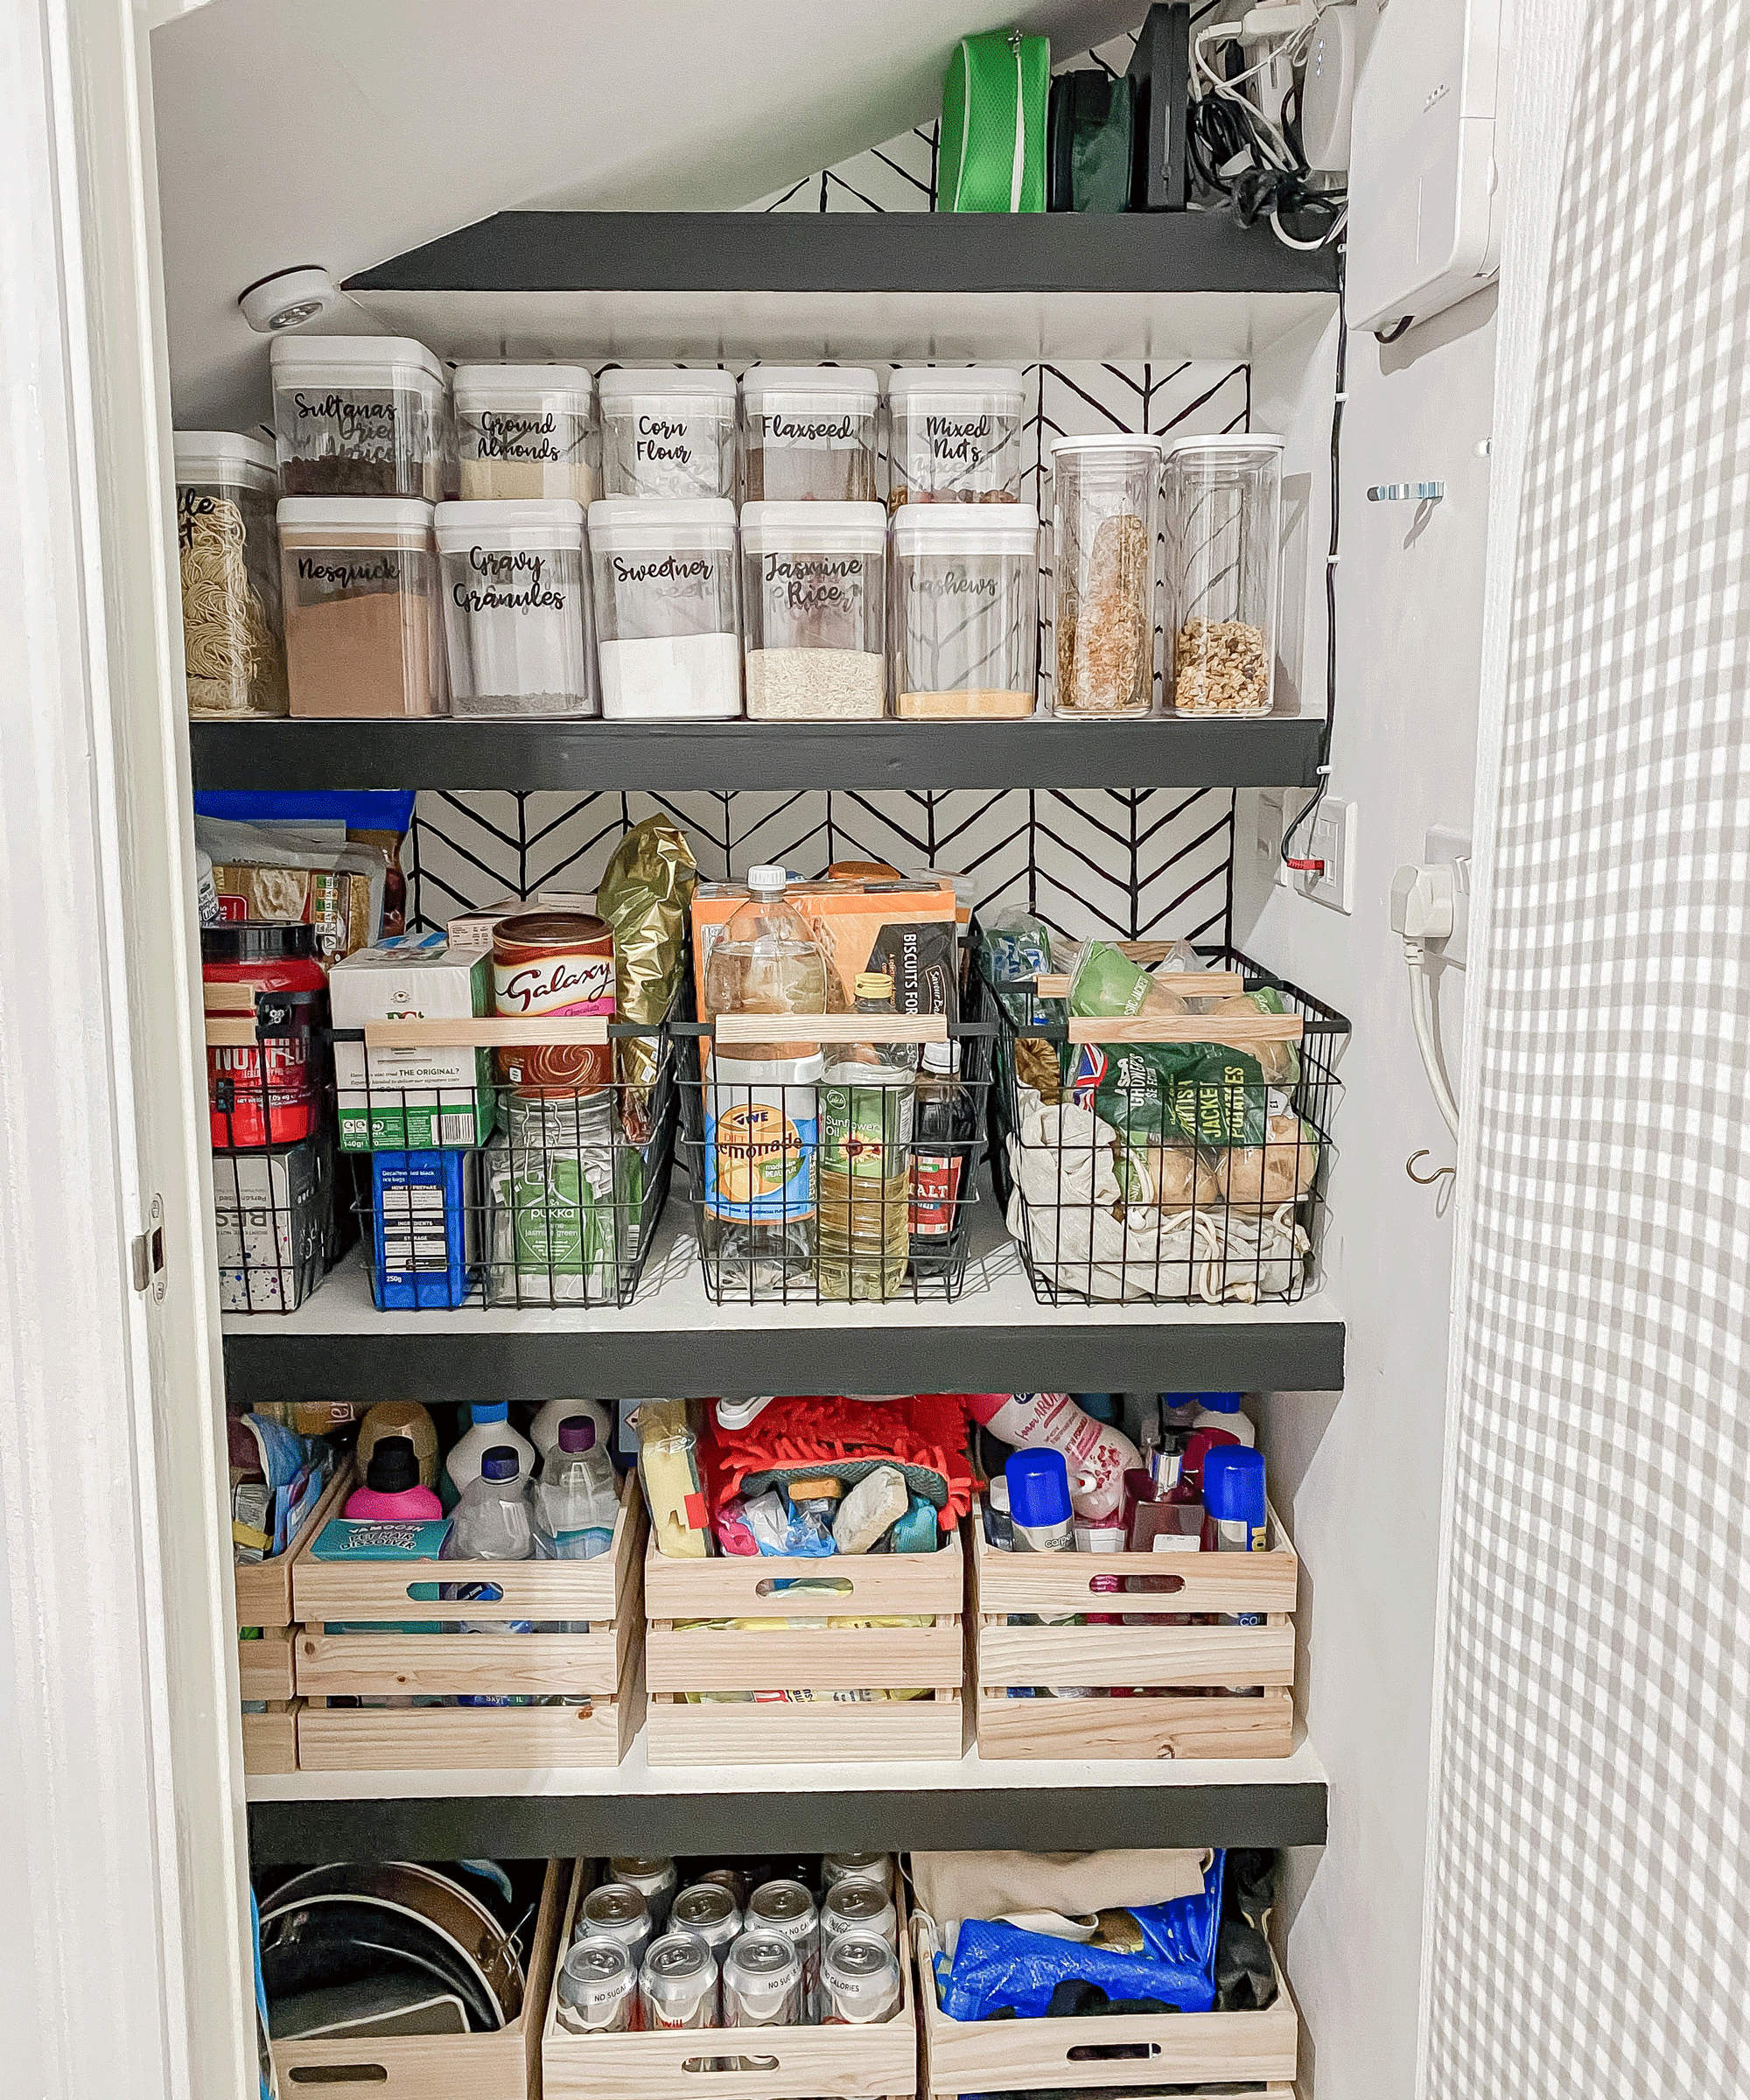
She had already built some floating shelves in an angled alcove in the kitchen, so applied the same logic and built shelves to go across the width and the depth of the cupboard, making an L shape of shelves.
Jasmine made the top two shelves 10cm shallower than the bottom to make the space feel bigger. She then spaced them out so that her storage baskets would fit between the shelves.
She made the shelves out of timber and MDF. However, to ensure they were extra secure she used a stud detector.
'I used a stud detector to mark where the stud work could be found as attaching the frame to these will ensure the shelves are strong and sturdy,' she explains.
'The back wall was external and so needed masonry wall plugs for the same level of sturdiness. For areas where the frame would only hit one stud, I used plastic heavy duty cavity wall plugs and made sure to screw into at least one stud for each side of the frame, even if it meant screwing at an angle into the corners of the wall.’
‘Predrilling pilot holes in the frame timber to make sure it didn’t split, I screwed straight into the studs or into pre-drilled and plugged holes to get the base frame attached, before moving onto the center supports and front support pieces.
‘To attach these, I used a pocket hole jig and attached the center supports evenly spaced and screwed into the back frame pieces, ensuring it was all level. Pocket holes are really strong joins when building frames and furniture - I swear by them!' she says.
'Once the frame was built, I cut the MDF sheeting to size. After filling all the holes and seams with wood filler, it was time to prime!
‘I used a wood primer to prime the frames, tops and bottoms of the shelves and used wall touch up paint to cover and scuffs I’d made during the build. I then used some satin wood paint I had leftover from another project to give the tops of the shelves a wipeable finish, and used black chalk paint on the shelf edges, getting a perfect edge using masking tape.
‘Siliconing around the edges of the shelves for a seamless finish, I’m super happy with the outcome!’
After
See also: Pantry storage ideas
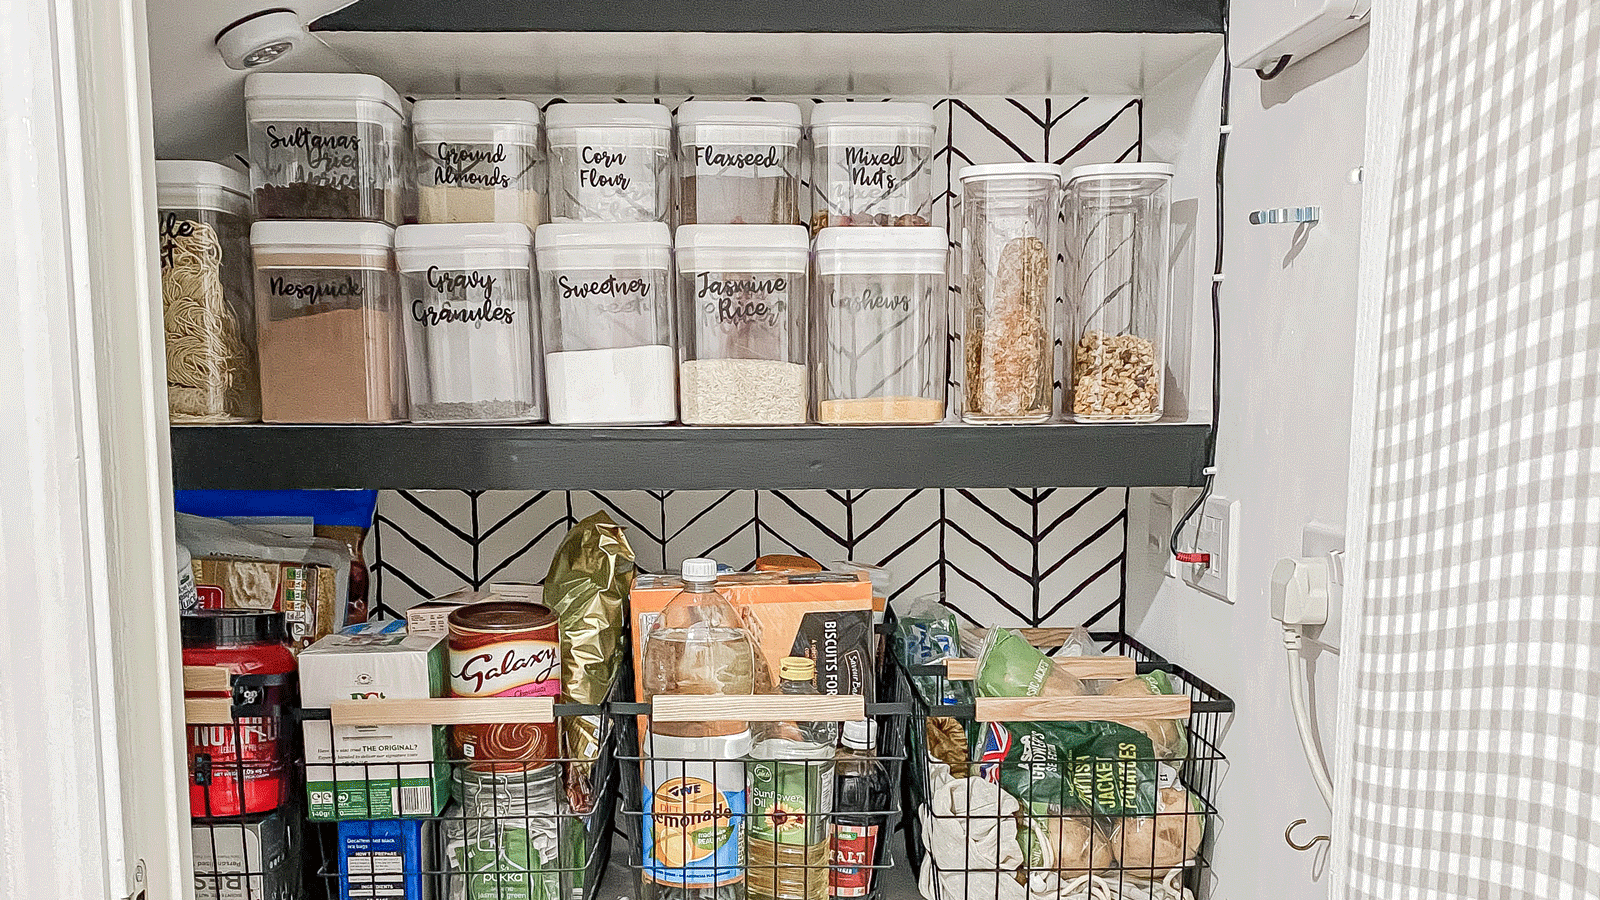
For the final flourish, Jasmine added a wall design. She used a pencil and drew out faux wallpaper on the wall, and then used a thin paintbrush to paint over the lines to create a bold back wall. ‘This was a killer on the wrist but so worth it!’ Jasmine says.
She added some finishing touches to the pantry build with some wire baskets and wooden crates for the bulkier items, and some personalized airtight containers to store dry ingredients and cereals.
Follow Jasmine on Instagram for more DIY and interiors tips - even if you've never touched a drill in your life, it's never too late to learn.