Before and after: A budget TV stand gets a high-end makeover
A DIY blogger transformed a budget TV stand into a high-style focal point for her home

Get small space home decor ideas, celeb inspiration, DIY tips and more, straight to your inbox!
You are now subscribed
Your newsletter sign-up was successful
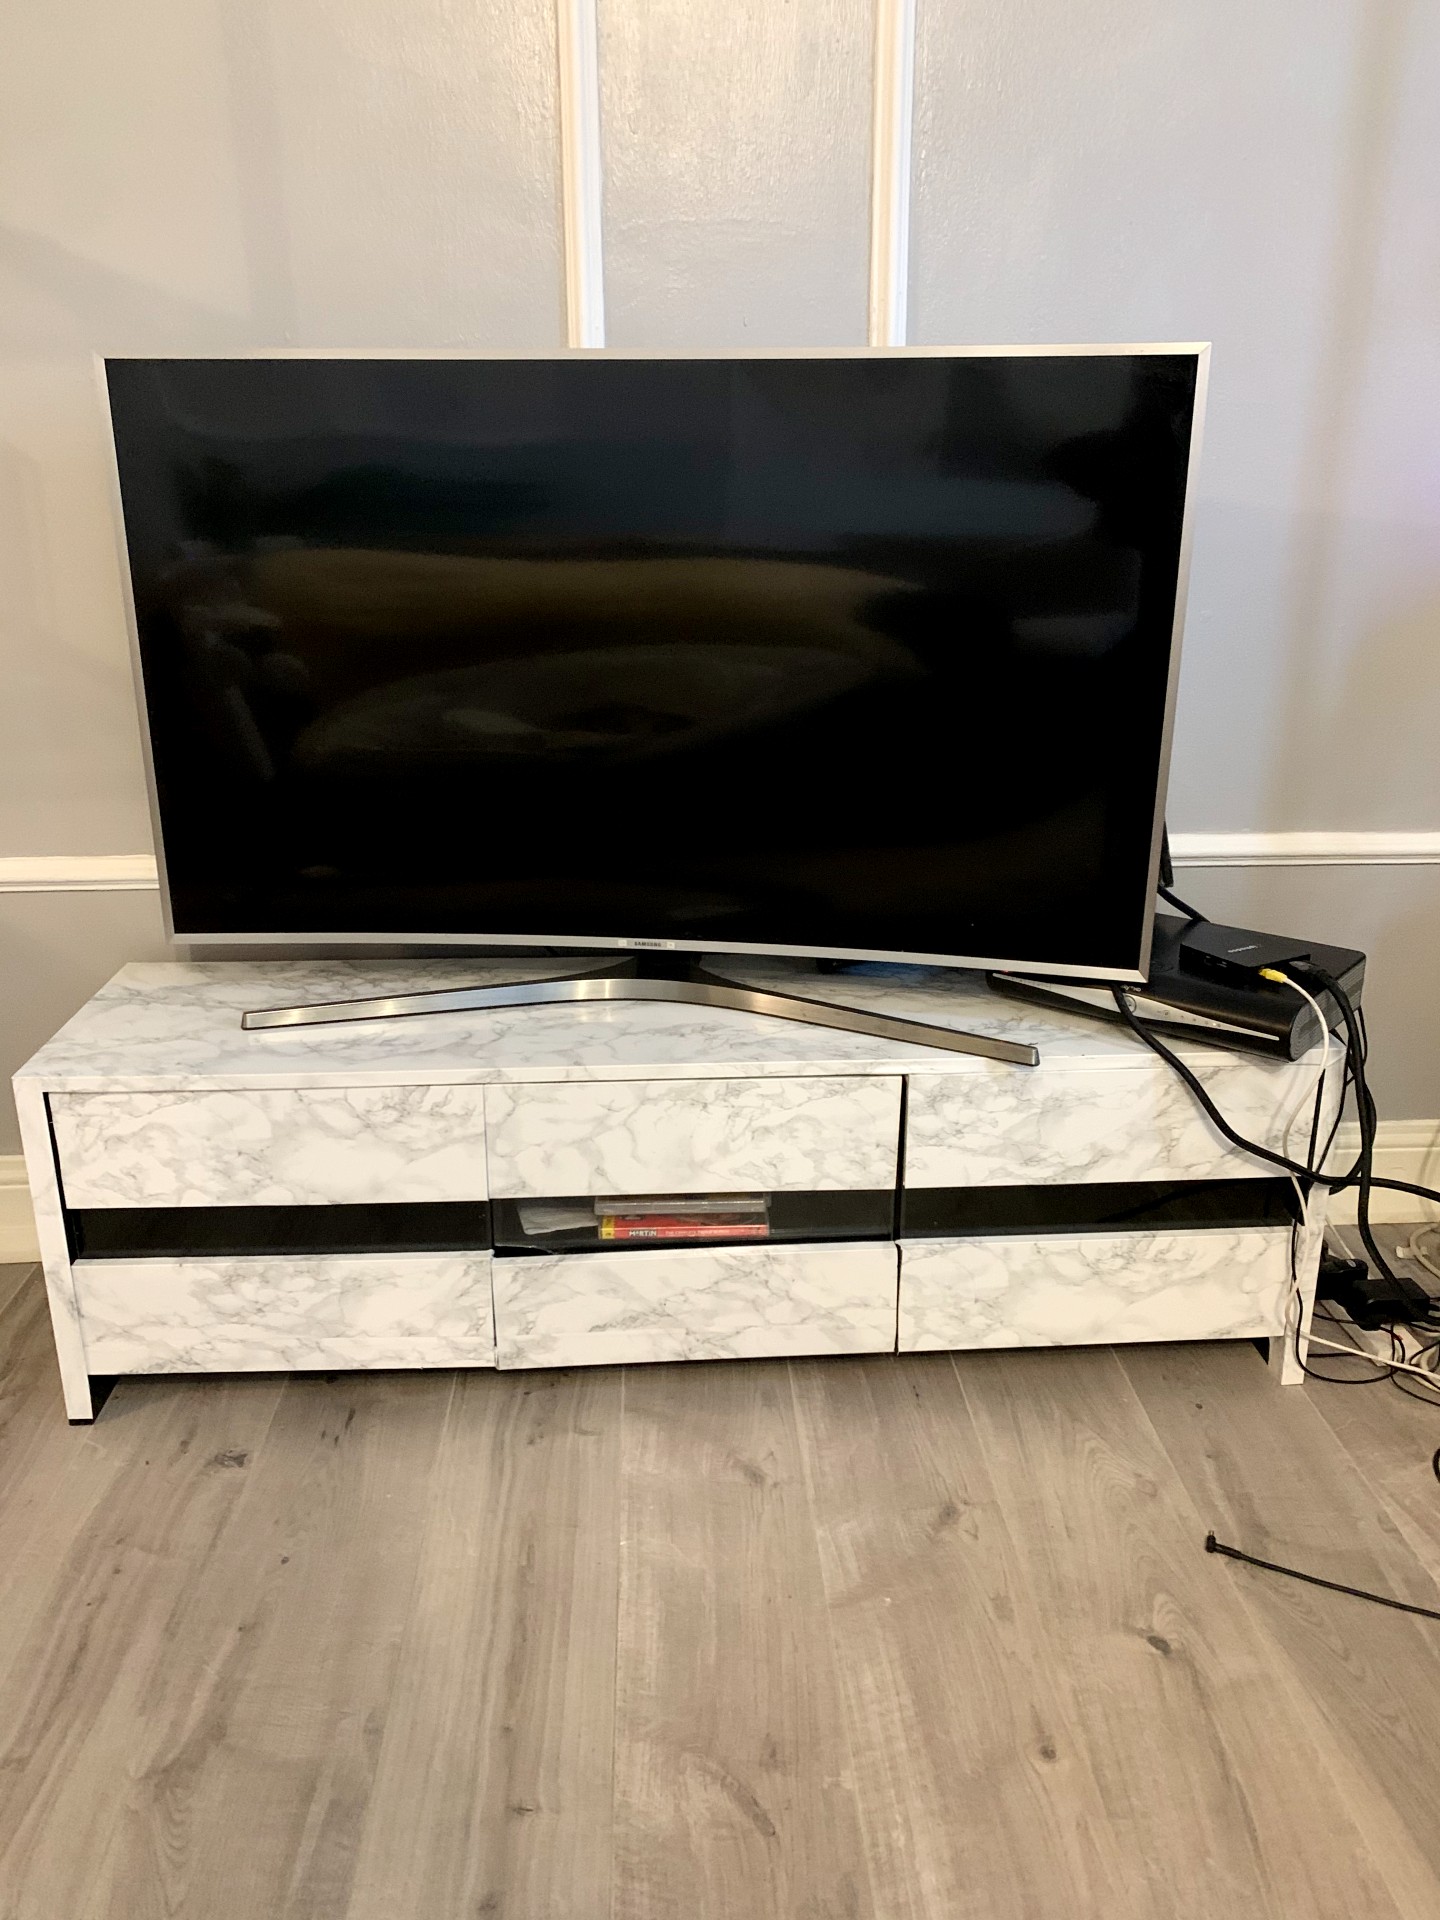
Let’s face it, as much as many of us try to steer clear of passing interior trends, even in our DIYs, there are some we just can't resist. Which is exactly what happened to me a couple of years ago when I used a peel and stick wallpaper to upcycle a TV cabinet. While the white marble adhesive roll trend is still very much in style for many, I personally have grown tired of it in my space. I mean it has been about two-and-a-half years! That being said, it was mighty time I re-upcycled my old marble wrapped TV cabinet!
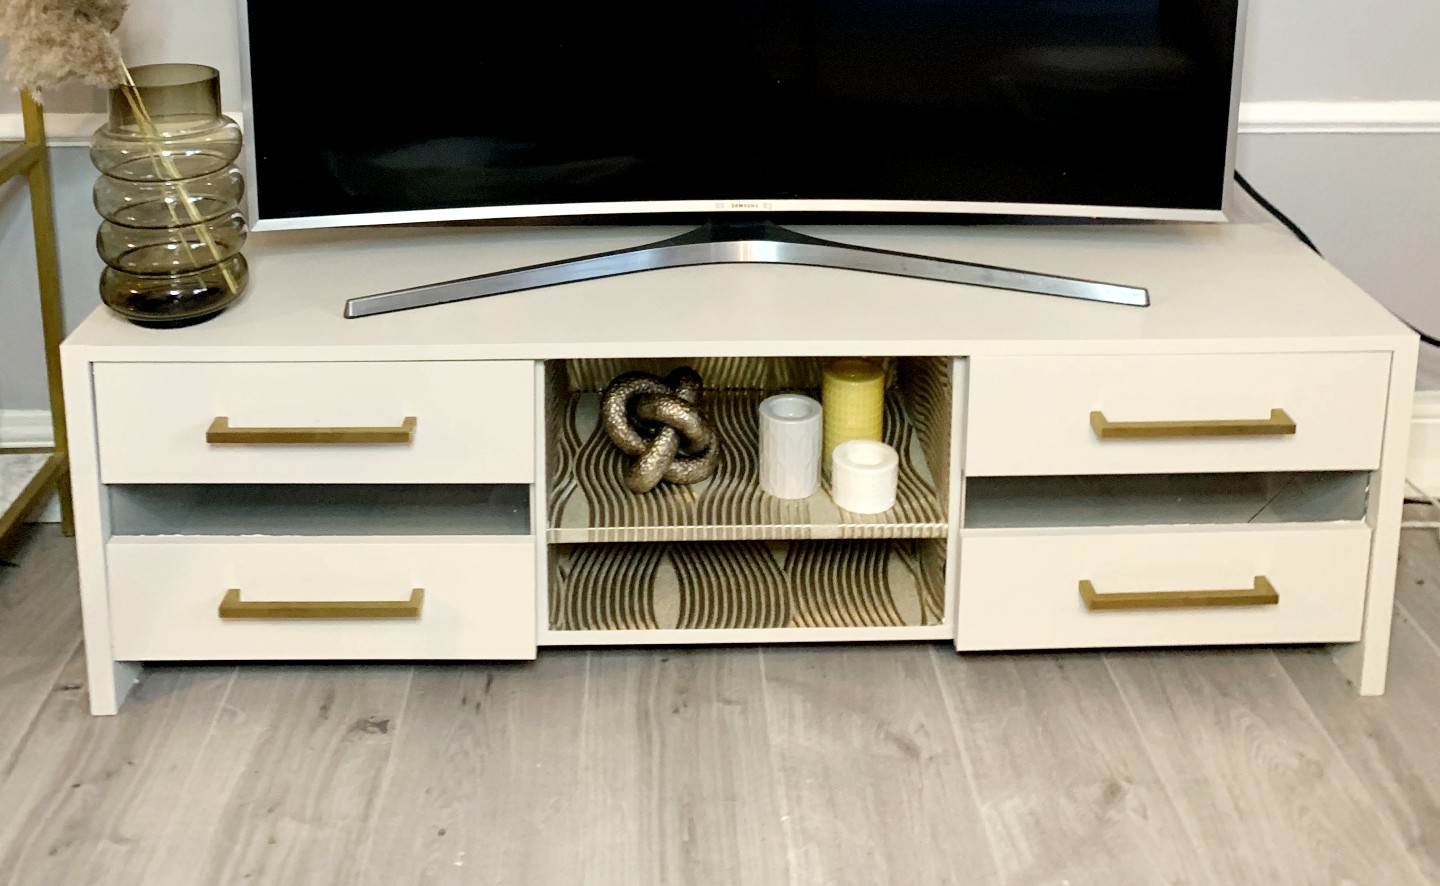
I decided to do this with simple paint and door handles. But I also wanted to add something a little unique to it, so I decided to remove the centre door which was damaged and add shiny gold wallpaper to create a focal point of the unit.
- Keep reading: How to paint furniture--Learn how to paint furniture and give your old pieces a new lease of life with minimal fuss
Here is how the TV stand looked before…
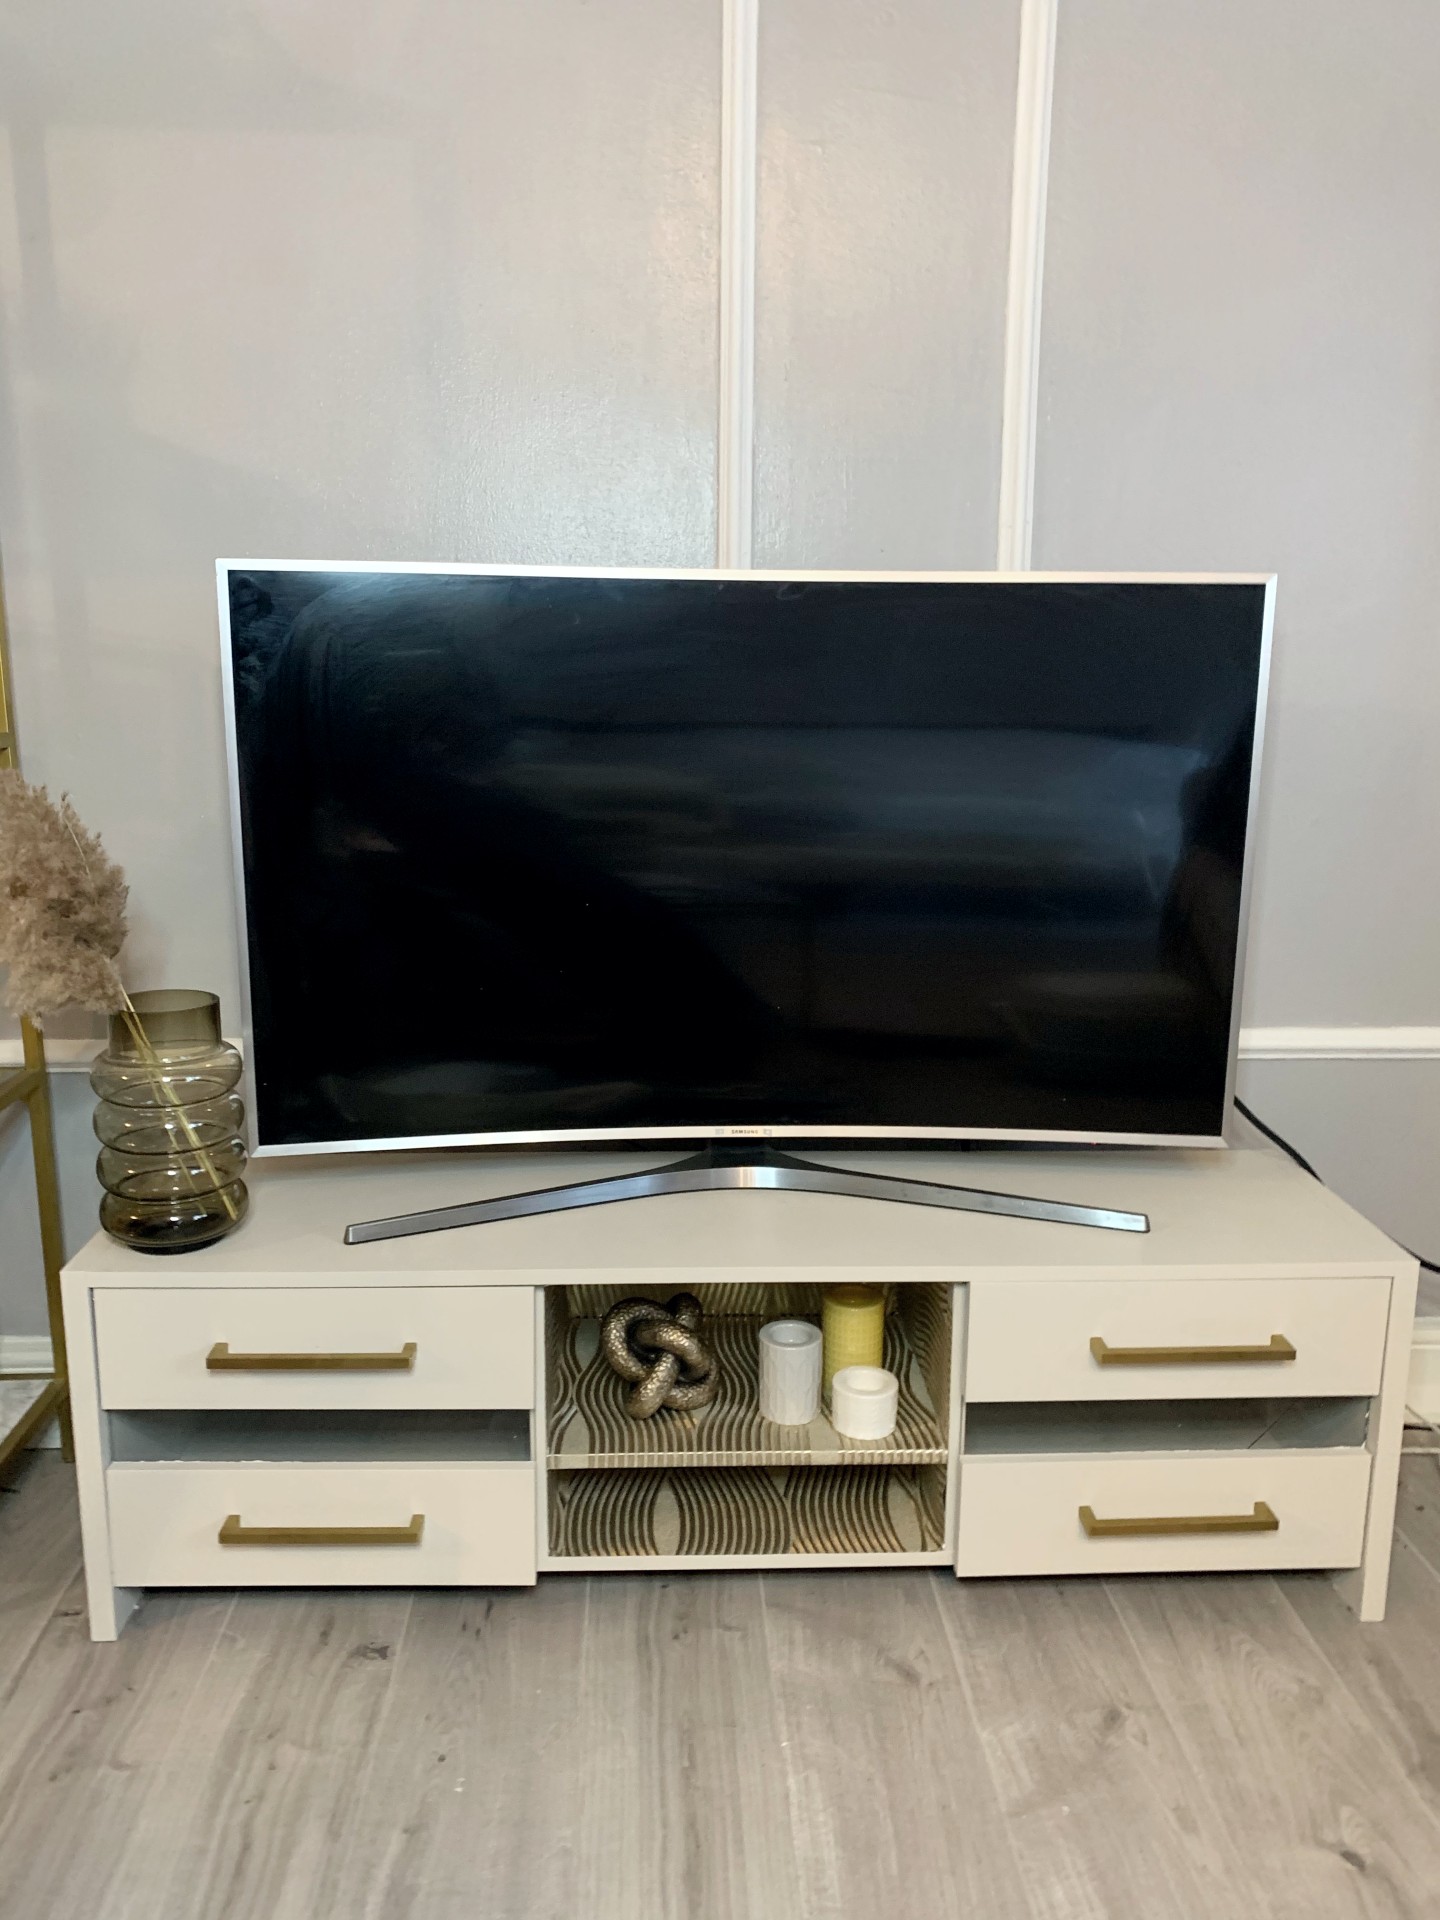
And here is how it looked after.
Lets go through the steps!
Step 1: Remove old wonky centre cabinet door
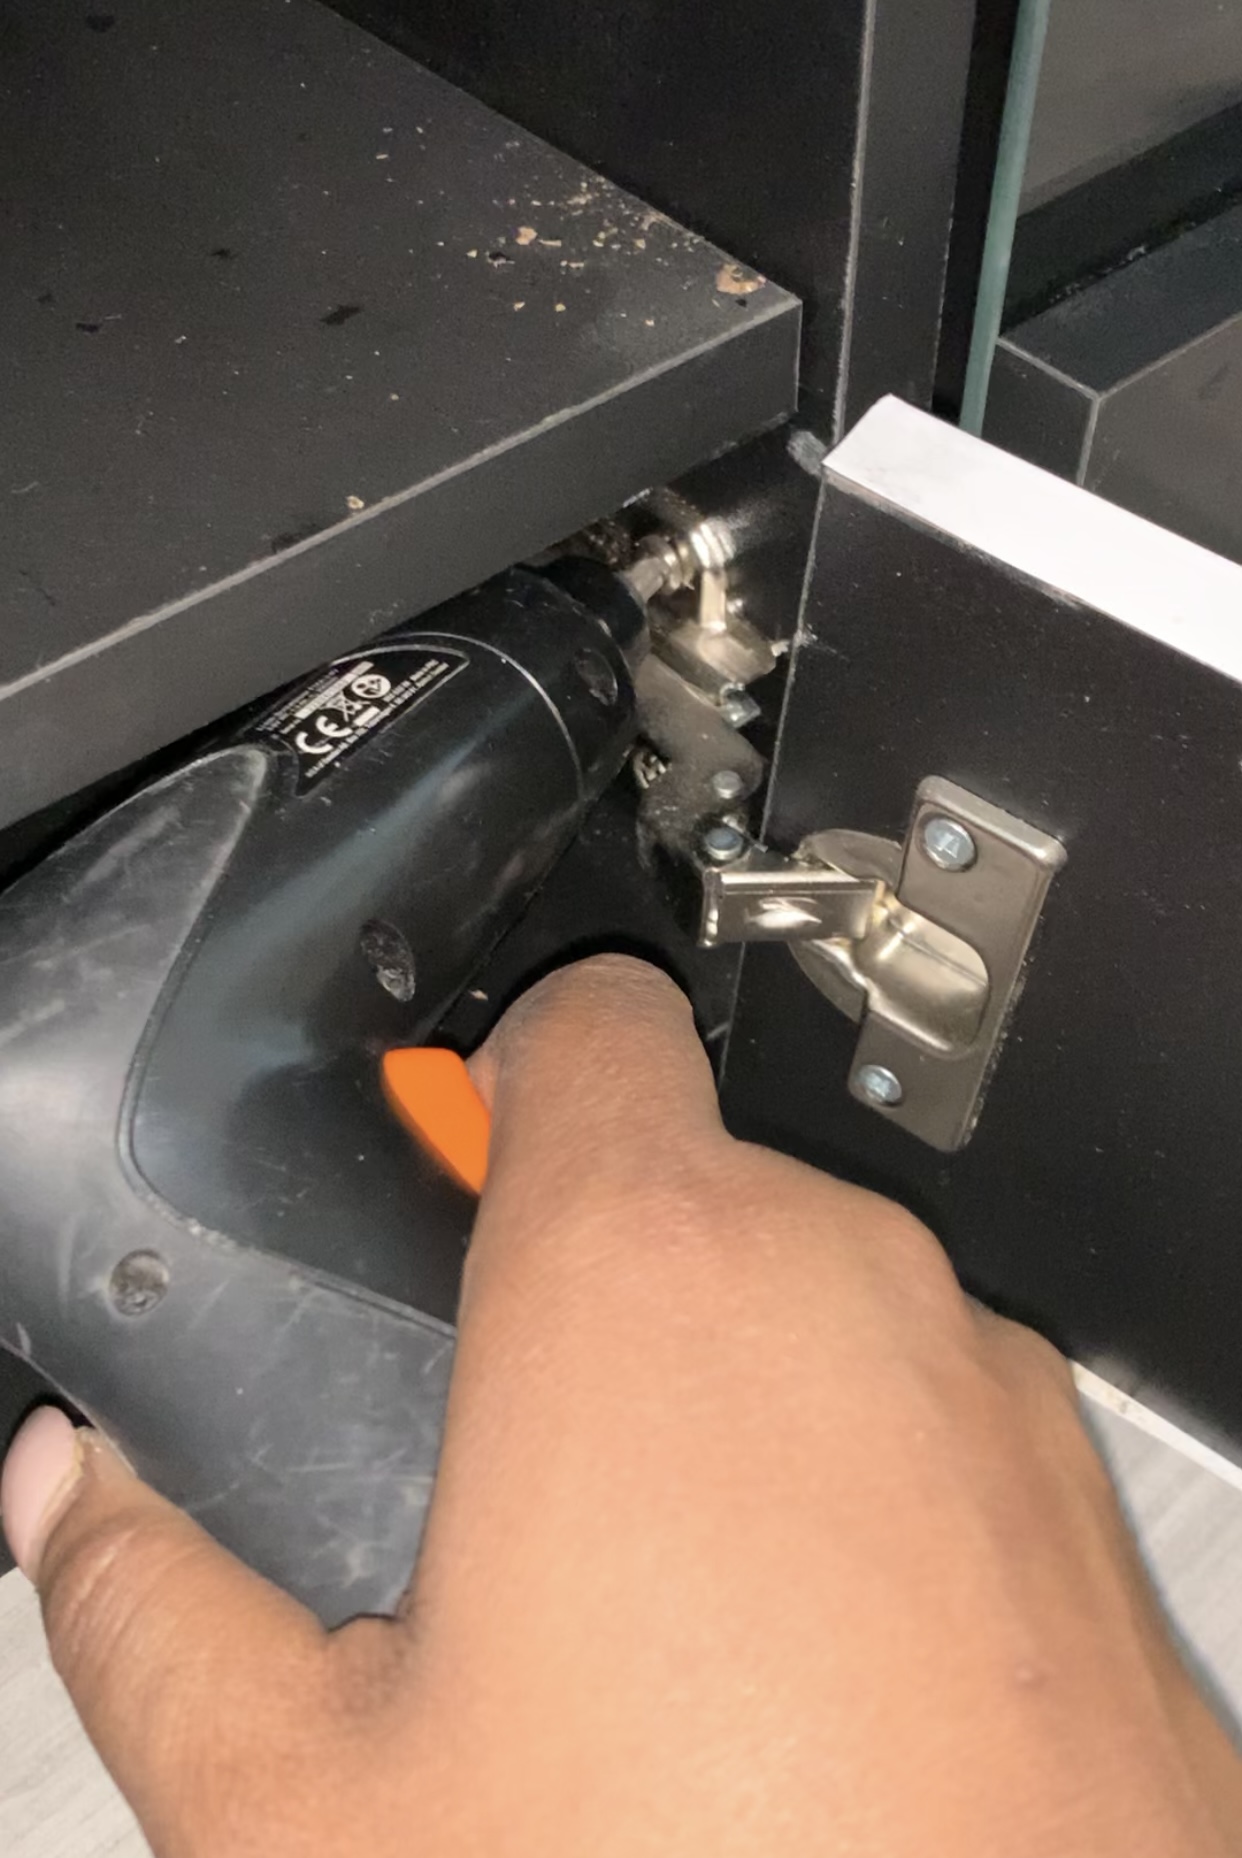
Using a manual or electric screwdriver, simply unscrew the hinges off the cabinet door from the inside of the unit. Then do the same to the hinge fixing in the unit (remember the holes will be covered by the wallpaper) and that part is done!
Step 2: Remove the old marble self adhesive roll.
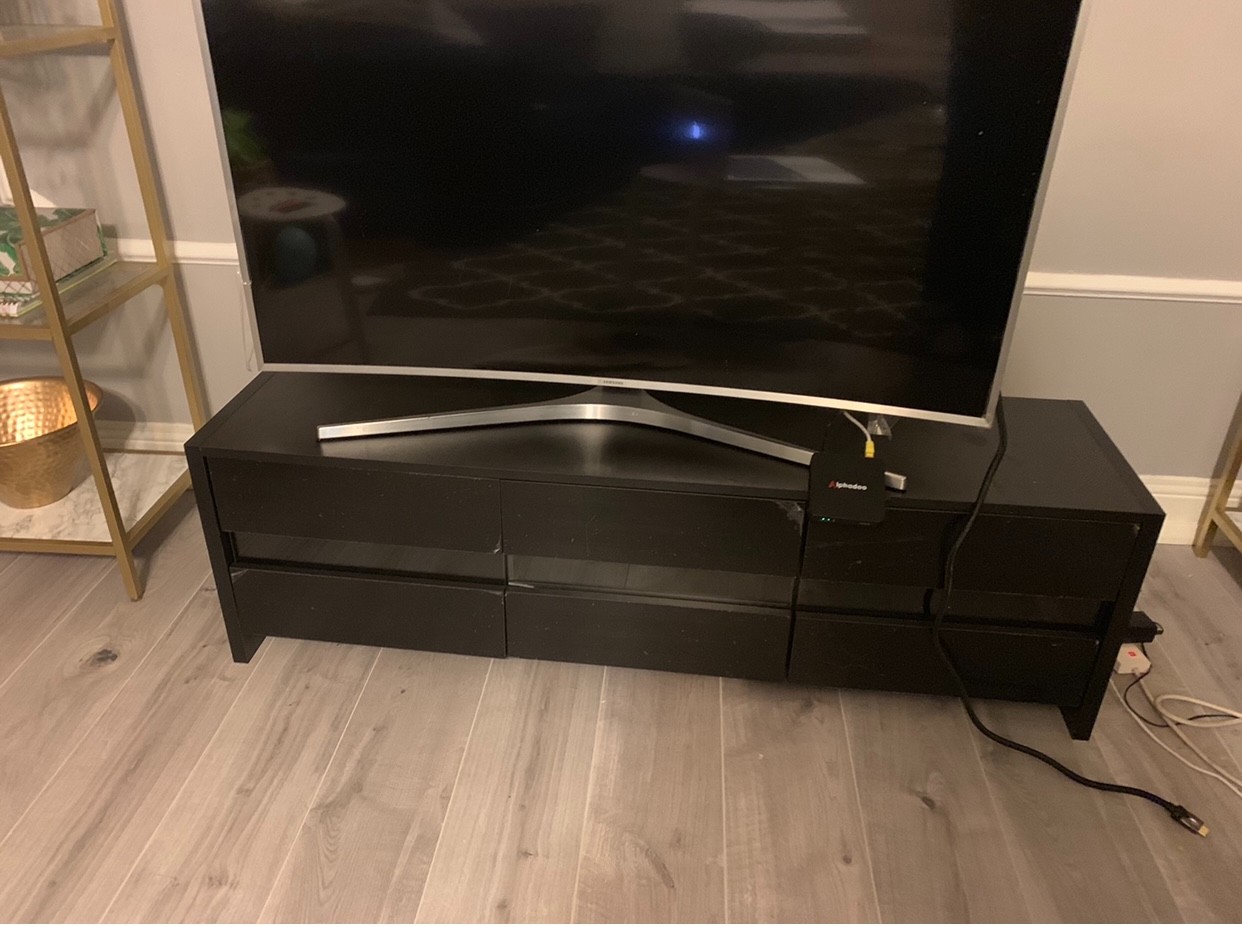
The TV cabinet back in its original state
This step is really simple. You can either attempt to simply pull of the paper from the unit or use a hair dryer to help lift it off without leaving much or any adhesive glue behind. I did the latter and it came off very easily.
Get small space home decor ideas, celeb inspiration, DIY tips and more, straight to your inbox!
Step 3: Clean and sand
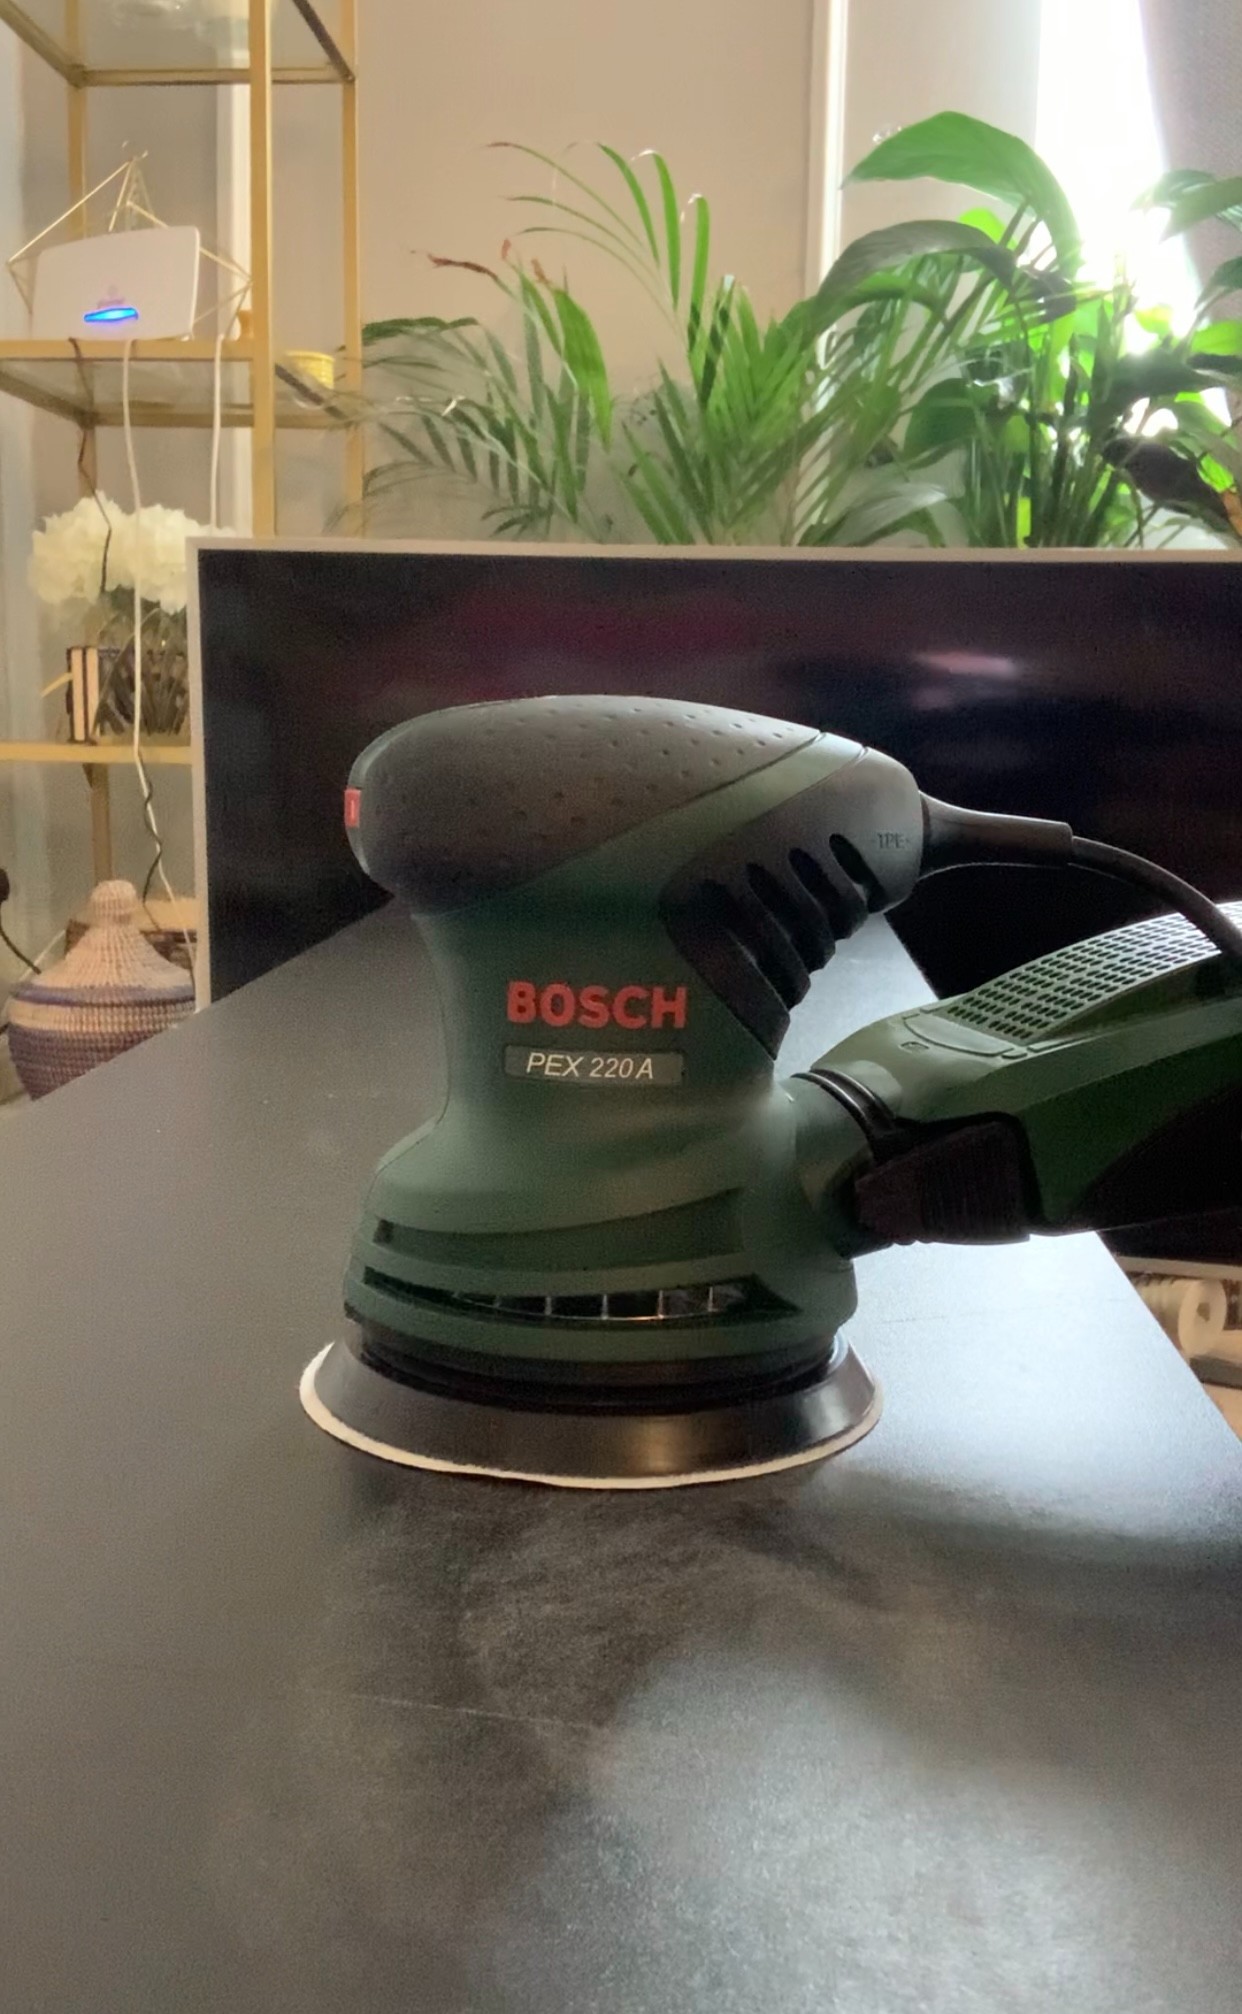
Despite using the hairdryer there may still be some glue from the adhesive left on the unit. Be sure to clean that off before sanding. If your unit is raw wood, you can skip the sanding stage and go straight in with undercoat or primer. But if like mine, you are painting on laminated wood, with or without a gloss finish, sanding down is essential to a smooth finish.
Using a Bosch orbital sander, I sanded down the unit very lightly. The great thing about this sander is that the dust and wood sanded off does not land on your floor or pollute the air inside. Instead, it is sucked up by the waste box attached to the sander. This is perfect for those days when its too cold or wet to sand outside!
Once sanded, clean again with water and or sugar soap just to ensure there is no debris left behind.
Step 4: Undercoat
For the undercoat, I used Craig and Rose light grey undercoat. I painted two coats because the cabinet was going from a very dark colour to a very light colour. I used a mini roller for an even finish and a small brush for corners.
- Keep reading: The best paint for furniture
Step 5: Door handle holes
This step can be done at a number of different stages. I preferred to do so at this point. You can either drill holes into the unit do get more practical use out of the handles. Or you could use No Nails Glue, if you aren’t confident with a drill.
To drill the holes in, you first need to mark where each hole needs to be and repeat the exact same for both doors to ensure they are symmetrical. The same marking would be used for the adhesive if you opt for the glue on method. Do note, TV cabinet doors often come with magnetic fixings that allow the door to bounce open when pressed, so you may never use the door handles to open the doors.
To mark out the holes, first use a ruler to mark the centre of the door and do the same with the centre of the handles. Once you decide on exactly where you wish to place them in height, align the handle centre mark with the door centre mark. Use a spirit level ruler to ensure it is straight and then trace around each end of the door handle. This will allow you to see the exact shape of the handle end and you can then mark out a centre hole or know where to place the handles if using adhesive.
Drill holes the same size as the screw. You may want to test this out on some spare wood if you have some. Once, the holes are in, you can paint them before putting them back on the unit.
Step 5: Finishing paint
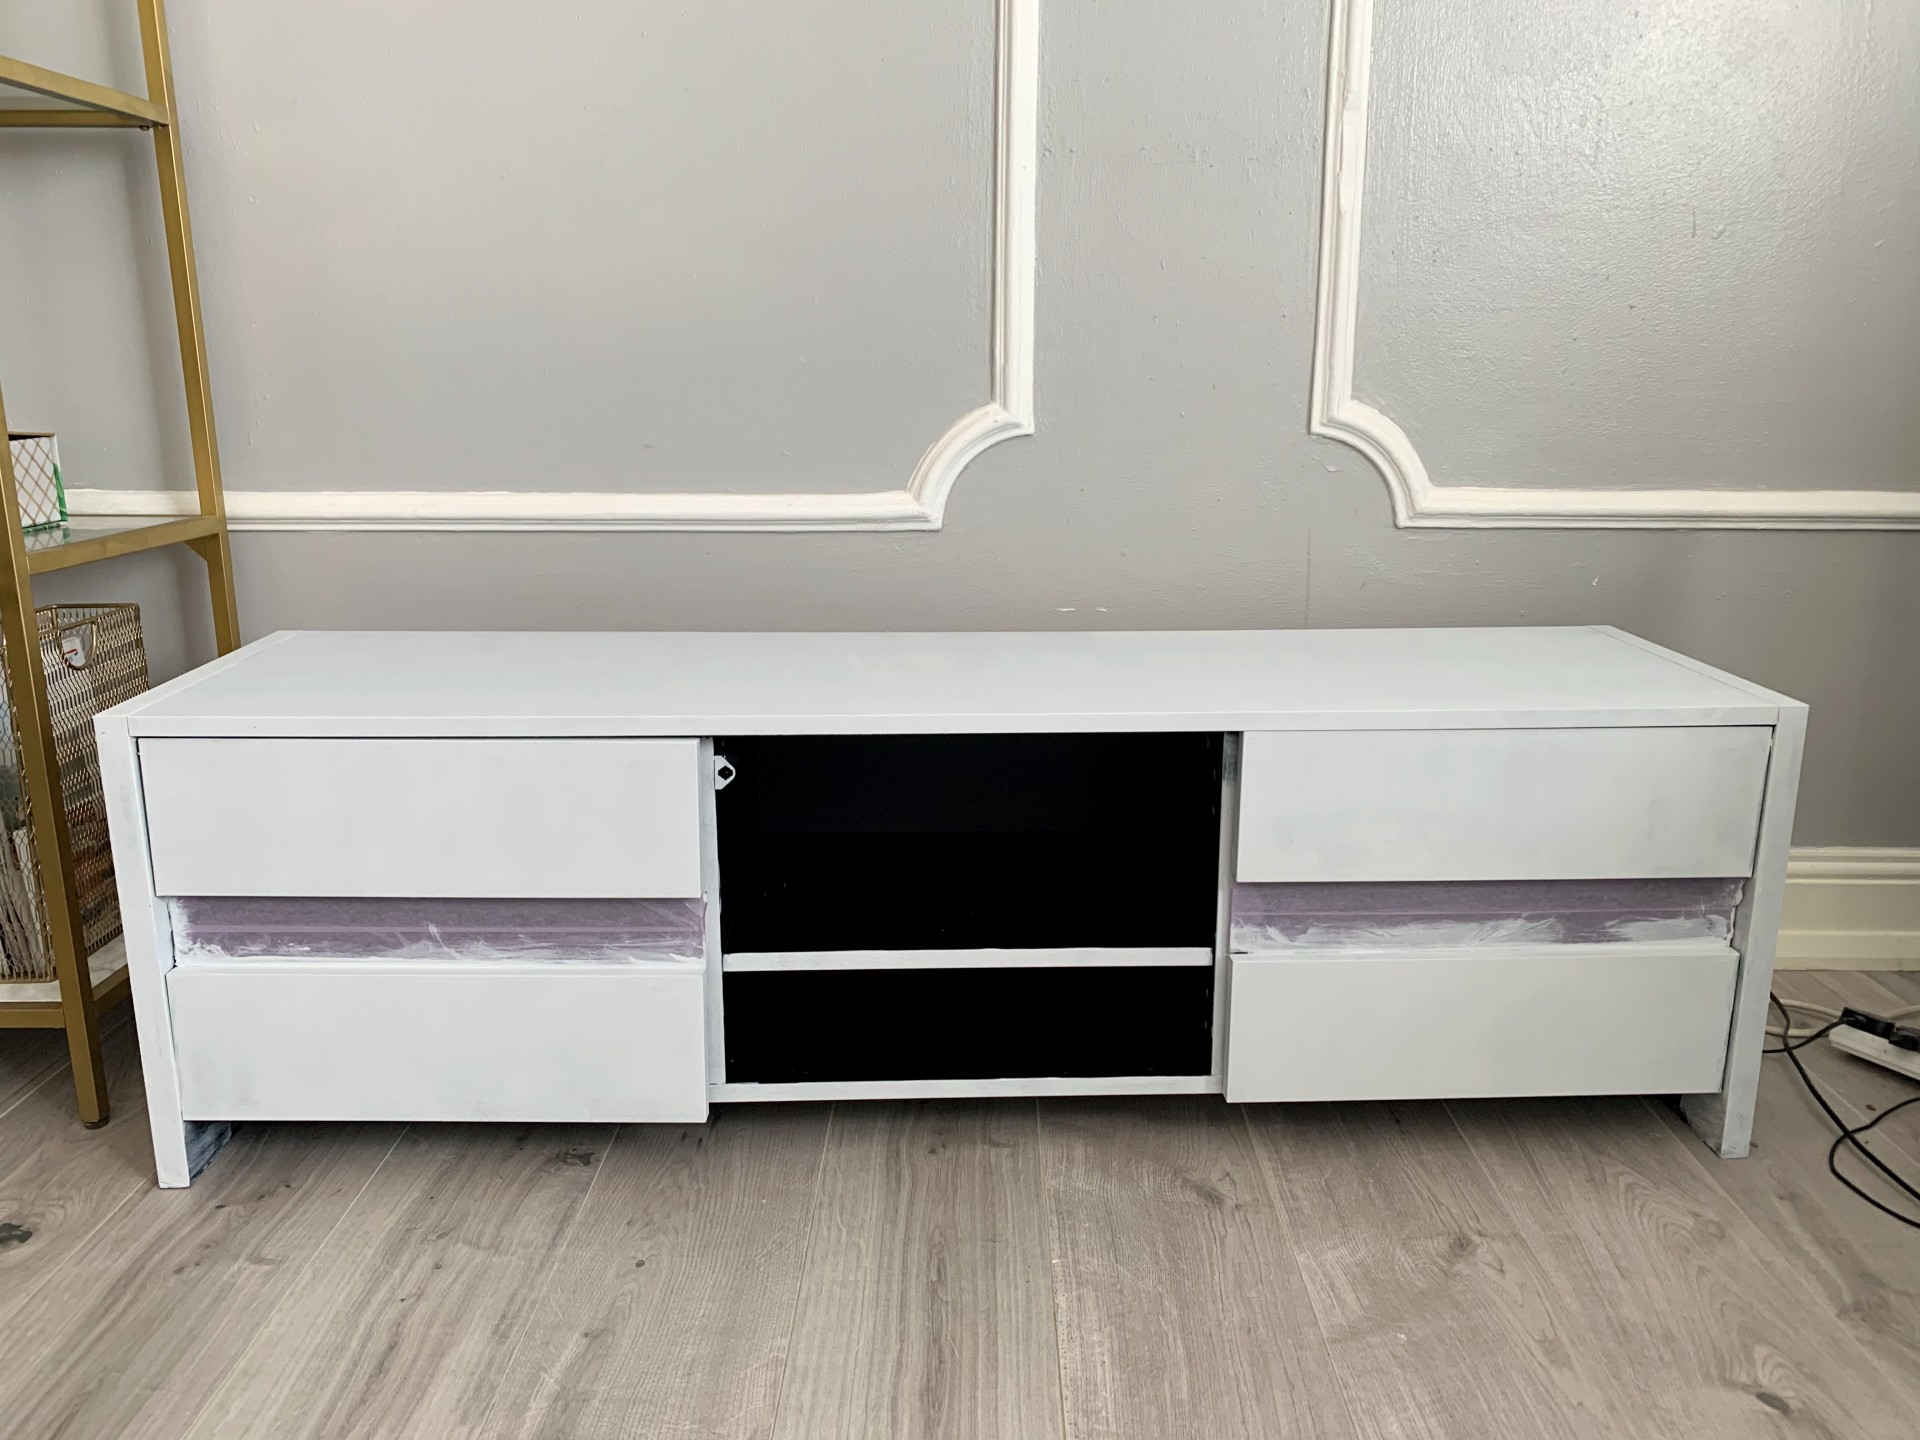
My living room has grey walls with white moulding, grey floors and gold metal shelving, so I used two coats of Craig and Rose, Pale Cashmere. The pale beige colour has the perfect warm undertones to compliment the gold accents and wallpaper feature. It also has a slight chalky finish which adds to its modern matte finish.
Don’t forget to paint the inside of the cabinet, if you have a glass opening like this one does!
Step 6: Wallpaper focal point
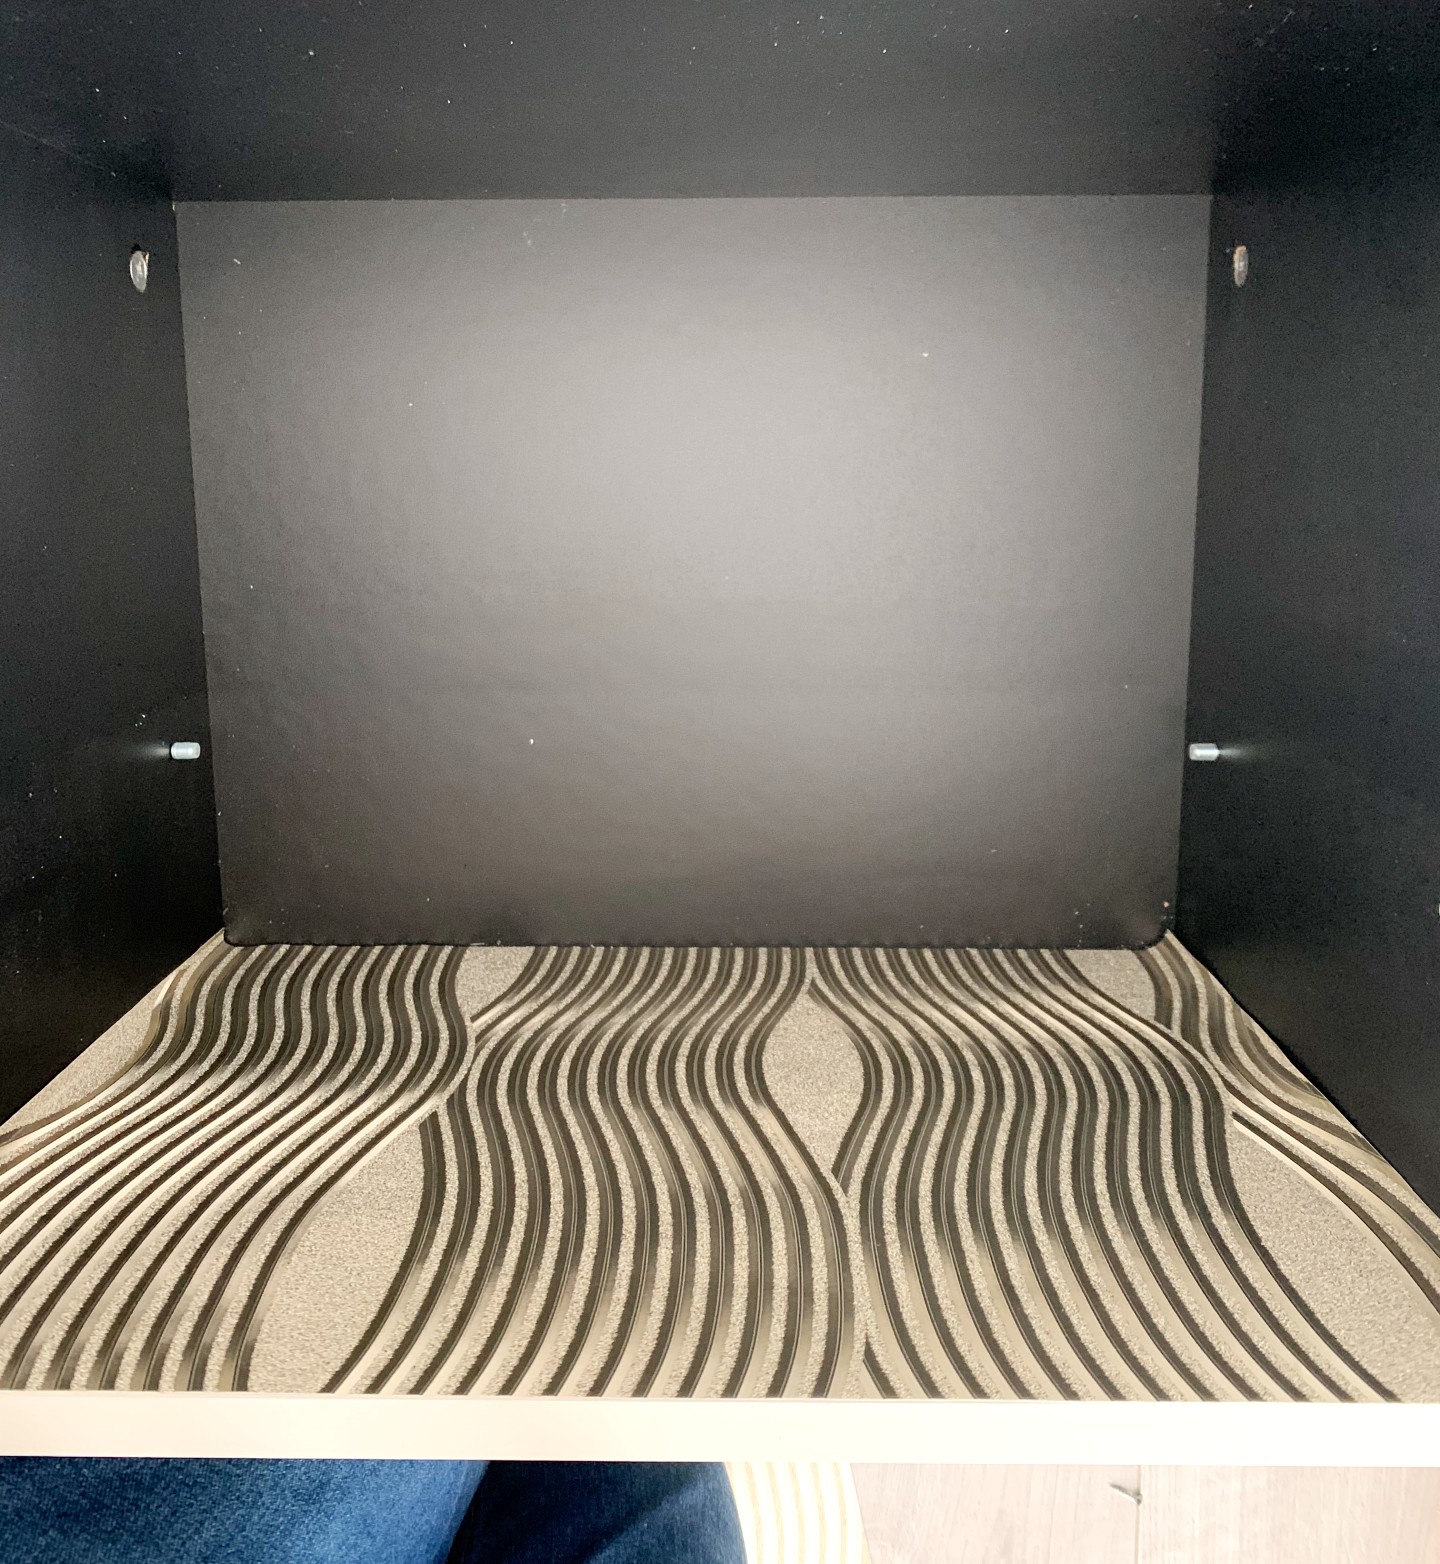

I am fast becoming a fan of using wallpaper to add interest to furniture in the same way it is used to create a focal wall in interior rooms! So including it in this project was a great way to add interest and style to the finished piece.
I lined the walls and shelf using the same standard wallpaper paste as is used on walls! The thing I love about wallpaper paste is that the paper is still movable until the paste dries. I measured out all the sides and cut accordingly.
Finally, I styled the unit with some complimenting coloured accessories from Next. And I absolutely love how it turned out!
The Craig and Rose paint, Arthouse wallpaper and accessories are all from Next. The door handles are from Amazon and the wallpaper adhesive from B&Q.
About the author
Alimah-Shadia Sitta is part of Real Homes' Real Experts panel. She's a UK-based investment banker, designer and DIYer and shares her favourite tips, projects, and ideas with us twice a month.
Alimah-Shadia Sitta is part of Real Homes' Real Experts panel. She's a UK-based investment banker, designer and DIYer and shares her favourite tips, projects, and ideas with us twice a month.
