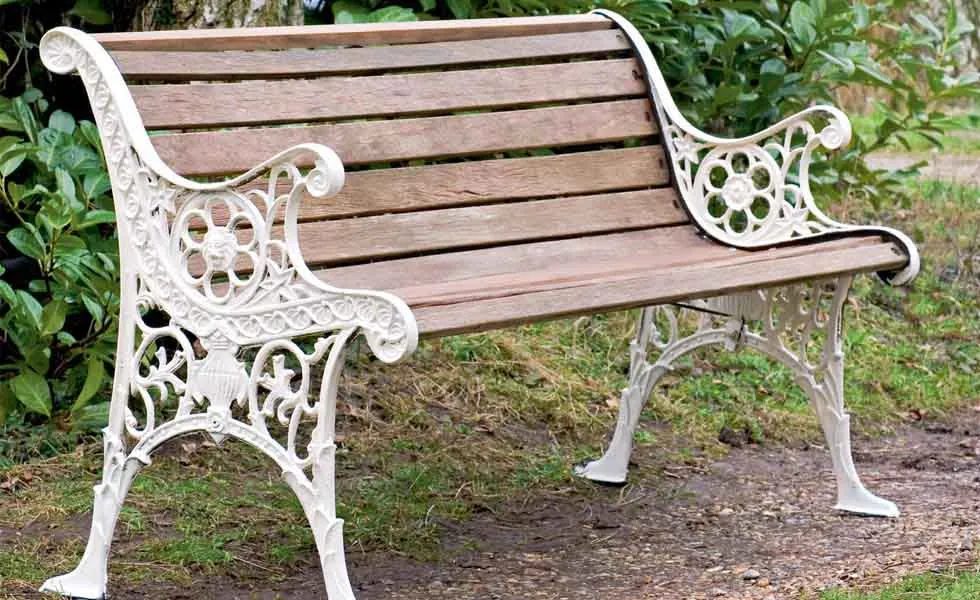
Wood and metal benches, especially vintage or antique ones, require regular maintenance. The Edwardian cast iron and wood garden bench we are restoring in the step-by-step guide below had been ignored for far too long. Sitting in obscurity at the end of the garden, it was covered in fallen leaves, moss and algae and some of the wooden slats were rotted beyond salvation.
Head to our dedicated garden ideas feature for more inspiration.
You will need:
- Scrubbing brush
- Wire brush and wire wool
- Screwdrivers and spanners
- Drill
- Release oil
(such as WD-40 Speciaist)
- Wood preservative
- Wood stain
- Danish oil
- Metal paint and paintbrushes

1. Scrub off algae and dirt
Brush away vegetation with a stiff brush. Fill a bucket with hot soapy water and give the bench a good scrub. Rinse with clean water. Once dry, examine the slats to see if any need to be replaced. Push a screwdriver into softened wood to test extent of decay. Remove nuts and bolts and take off rotten slats.
Article continues below2. Release jammed nuts and bolts
If the nuts and bolts used to fix the wood are rusty, try spraying with release oil and leave overnight. Still stuck? Find a screwdriver to match the bolt head. Hold in place and give it a sharp blow with a hammer to break through the corrosion. The last resort is to cut through with a hacksaw.

3. Replace rotten wooden slats
Using reclaimed wood to make new slats is the greenest option. Source wood at secondhand wood yards, such as the Brighton & Hove Wood Recycling Project, country auctions or salvage yards. Measure and saw to length, then smooth the cut ends with a sanding block.
4. Tone down the wood surface
New wood makes an obvious repair but wood dye helps blend it in. Use scrap wood or the underside of the slats to test wood stains until you find the closest match. Number each test patch and wait until they are dry before deciding on the shade.

5. Prepare the new slats
Lay the new planks on the bench. From underneath mark the positions of the bolts. To avoid splitting the wood when fixing it on to the bench, make a pilot hole with a small drill bit. When it just breaks through the wood, stop drilling and complete the hole from the other side. Repeat with a bolt-sized drill bit.
6. Fix the new slats to the bench
Push the bolts through each end of the plank and secure with the nuts. Once all the bolts are correctly positioned, go round and tighten all of the nuts. Hold the bolt head with a screwdriver and then tighten the nuts with a spanner. Dip each bolt into a little grease to help to keep any rust at bay.

7. Apply preservative and Danish oil
Apply a coat of preservative to the wood. When dry, apply Danish oil with a brush. Any surplus should be wiped off with a rag so it doesn’t congeal and go sticky. Leave at least four hours and apply a further two coats with the same method.
8. Spruce up the cast iron frame
Use a wire brush or wire wool to remove rust and any remnants of paint. If using all-purpose wood and metal paint, you will need to begin with a metal primer followed by an undercoat. Alternatively go for a straight-to-metal paint. Apply two coats, following instructions on the can for drying times.
Annual maintenance for your garden bench
- Twice a year, clean wood with warm soapy water and apply a coat of Danish oil. This offers some protection from the weather and keeps the bench looking good.
- Fix metal buffers to the bottom of wooden legs and, if they begin to show signs of decay, stand each leg in a jar of wood preservative overnight.
- If you have a shed, put your bench inside for the winter or give it a bit of protection under a plastic cover.
Where to place your garden bench?
- Do you prefer to sit in the sun or shade? Check which areas of your garden are in sun or shade at different times of the day. Once you’ve decided on the perfect location for your garden bench, you’ll need to do a little groundwork.
- Don’t just place the bench on the lawn or flower bed as the legs will be affected by the constant contact with wet ground. Excavate the grass or earth beneath and replace with shingle or place each leg on to a paving slab. This will make mowing easier, too.
- Use a spirit level to check the slabs are level – if the bench is permanently used on an uneven surface, it can strain and open up the joints.