How to restore wood doors – refinish and revive interior doors like a professional
Refinishing wood doors can give them a new lease of life. This is how to clean timber, repair any damage and more to restore internal doors to their original greatness.

Get small space home decor ideas, celeb inspiration, DIY tips and more, straight to your inbox!
You are now subscribed
Your newsletter sign-up was successful
If you've installed wooden doors yourself, or were lucky enough so as to inherit them in your home, ensuring they look their best and stay in great condition is a must. This project reveals how to restore wood doors, fill holes, cracks and gaps, refinish the wood and fix new ironmongery.
Over time, wooden types of doors can be tarnished by ingrained dirt and grime from dusty building work, sticky fingers and pets’ paws, and become marked from bumps and knocks, but they can be brought back to life with good, regular maintenance. Thankfully, refinishing wood doors is an achievable DIY, where simply cleaning and fixing up yours will successfully revive them, without a big spend and often without the need to strip the wood either as we've done so here. Follow our expert step-by-step guide to restore old wooden doors to greatness.
- DIY: How to paint a door.
How do you clean old wooden doors?
For our DIY we're using steel wool to cleanse the surface along with a wax and polish remover. You can also sand the door using both a palm sander for the flats and a hand sanding block for any grooves and detailing. This will help remove any staining and smooth out any pits as a result of damp decay and damage over time.
How to restore wood doors: step-by-step
To refinish wood doors, you will need:
- Wax and polish remover
- Steel wire wool
- Cotton cloths
- Doweling
- Saw
- Glue
- Mallet for making plugs to cover screw heads
- Wood caulk/filler
- Wax filler stick
- Filling knife
- Finishing oil
- Brass and copper cleaner
- Brass and copper polish
- Pair of hand-wrought tee hinges
Tip: Before applying new cleaning or maintenance products on a wooden door, always try them on an inconspicuous area first to test color, compatibility and end result.
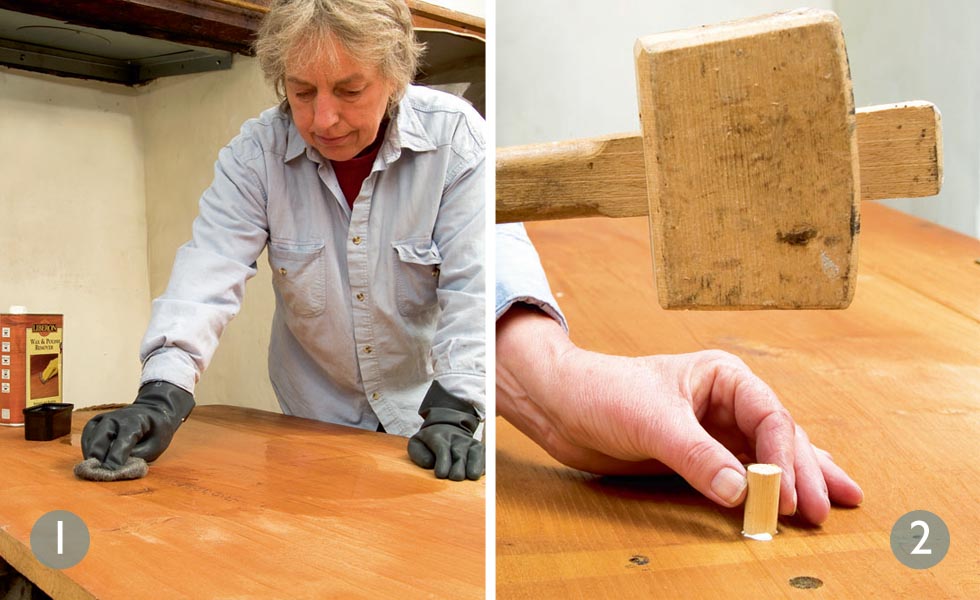
1. Deep clean wood doors
Wearing gloves pour some wax and polish remover into a bowl. Take a pad of fine steel wool to swab the surface with the solution working with the grain. Wait for a few minutes and while the wood is wet use a clean, cotton lint-free cloth to wipe away the dirt and grease from the wood door. Keep turning the cloth to reveal a clean face so that you wipe the dirt off rather than rub it in. Wait for 24 hours to allow the wood to dry before applying finishing oil.
2. Conceal screws
The screws used in the construction of this timber door were counter-bored and the heads should have been concealed with plugs of wood. The holes are deep, so for a neat finish we are using wooden doweling to make plugs. Choose a short length of a slightly wider diameter. Clamp it safely in a workbench or a G-clamp. Taper it to fit using a plane, file or coarse glasspaper. Ensure the hole is clean and apply glue liberally. Knock in firmly with a mallet.
Get small space home decor ideas, celeb inspiration, DIY tips and more, straight to your inbox!
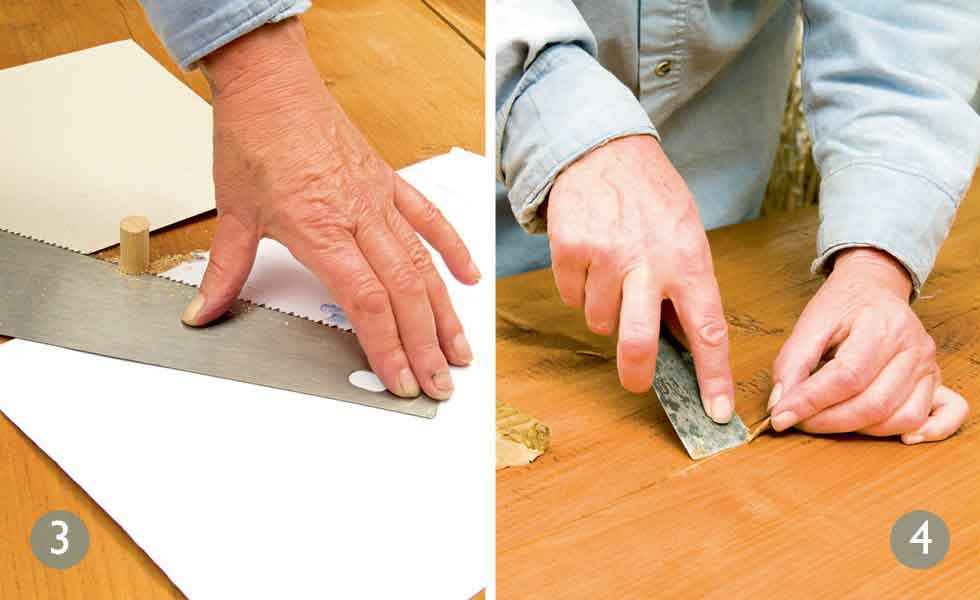
3. Finish carefully
Wipe away excess glue before it dries – a damp washing up sponge is ideal. Leave the glue to set completely. The peg can now be sawn off flush with the surface. A fine-toothed handsaw with its flexible unsupported blade is ideal for this job. Use the other hand to hold the blade level. Protect the wooden doors by placing pieces of thin card beneath the saw teeth. Rub smooth with a piece of abrasive paper wrapped around the end of a pencil.
4. Fill any holes
Apply wood filler to holes, cracks and gaps in the timber door. See our piece on how to fix a hole in a door if it's a large gap. Remember to always replace the lid firmly on the can when using caulk and if it’s a bit dry a little water can be mixed in to make it more pliable. Wax filler sticks are also useful for repairing surface damage and they are available in a range of different shades to match the wood you are working with. Push firmly in with a filling knife. The wax becomes more workable if kept at room temperature for a few hours before use.
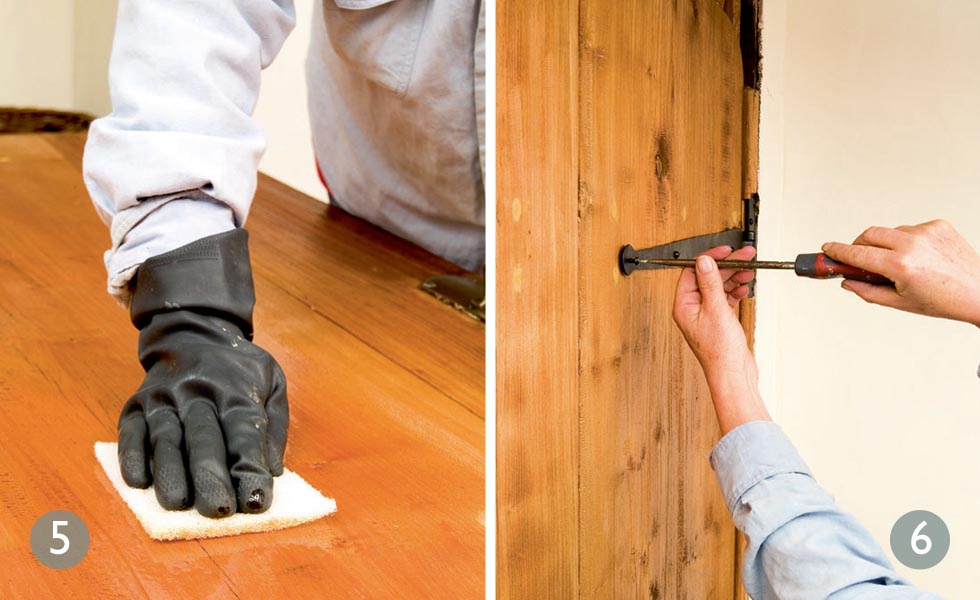
5. Restore shine to the door
A shiny door is often the intended outcome when refinishing wood doors. Using a brush, cloth or plastic scouring pad, apply an initial coat of finishing oil to nourish and enhance the natural color of the wooden doors.
Allow to penetrate for 10 minutes then wipe off any surplus oil with a clean cotton cloth. Apply further coats at intervals at no less than 5 hours. The more coats applied the higher the sheen and the more durable the finish. Always wipe off excess oil. If allowed to remain it will become sticky and attract dirt.
6. Replace hinges
We have taken off the cheap, machine-made hinges that had become distorted and rusty. They are being superseded by a pair of handcrafted tee hinges, which are perfect for traditional wood doors. Fix onto the timber door first using the original fixing holes if possible. Alternatively hold firmly in place and locate new holes with a bradawl. Screw to door frame fixing with just one screw in each hinge. Open and close the door a few times. Make any adjustments and drive in the remaining screws.
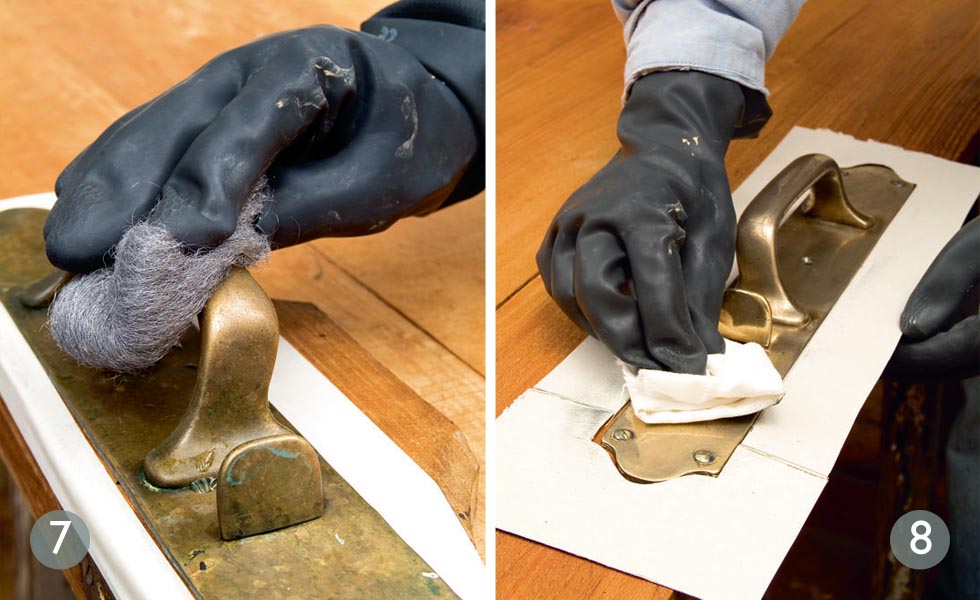
7. Remove tarnish
This brass latch is heavily tarnished having endured many years of neglect. Apply masking tape to protect the wooden doors from marking. Rub the metal with a soft cotton cloth soaked in brass and copper cleaner to remove all traces of tarnish. If it’s proving very stubborn pour some cleaning fluid in a bowl and use a pad of very fine steel wool (0000 grade) to gently rub away the discolouration. Rinse well and dry with a soft cotton cloth.
8. Polish up
Apply brass and copper polish with a clean cotton cloth, rubbing vigorously. Wait a few minutes and buff to a shine. To better clean brass and keep it looking good for longer rub the polished latch with a good quality wax polish. Make a card template of the latch and keep it with your polish – that way you can polish the latch without having to worry about spoiling the door. An occasional application of polish on the hinges will keep rust at bay too.
- How to fix doors that squeak, stick and more!
