How one DIYer upcycled old furniture with lollipop sticks (the results are fab)
DIYer Jessica Grizzle shares how she upcycled an old desk with lollipop sticks and a glue gun

You may call them lollipop sticks, popsicle sticks or even wooden craft sticks, but either way, they are amazing for upcycle projects. I recently refreshed an old desk with paint, but when it needed something extra, I looked to these simple sticks to create a lollipop stick herringbone table top. Since then, I have seen so many different project designs and I am truly impressed. If you’re looking for a new technique for your next project, look no further.
Lollipop sticks are made from wood, have rounded ends and come in a couple of different sizes. They are typically used for making ice lollies or for small craft projects, but now they’re used to cover cabinet doors, and even to decorate side tables. Who would have known?
Want to give this easy (but beautiful) DIY a try? Here's how I did it.
- See also: How to paint furniture
What you'll need:

To do this project, you'll need:
- Jumbo lollipop sticks
- A sturdy pair of scissors
- Soap & water (to prep your surface)
- Sandpaper (again for surface prep)
- A tape measure and pencil
- Wood glue, or a hot glue gun and wood glue sticks
- Wood filler
- Sander
- Varnish or paint
Choose a stick size
I chose to use jumbo lollipop sticks for my project rather than the normal sized ones, and for my first attempt, they were the perfect choice. Jumbo lollipop sticks measure 150mm x 18mm, my table top measured 1230mm x 560mm and I used approximately 340. I realised that a little quick maths was certainly going to be needed.
Cut the ends (or don't)
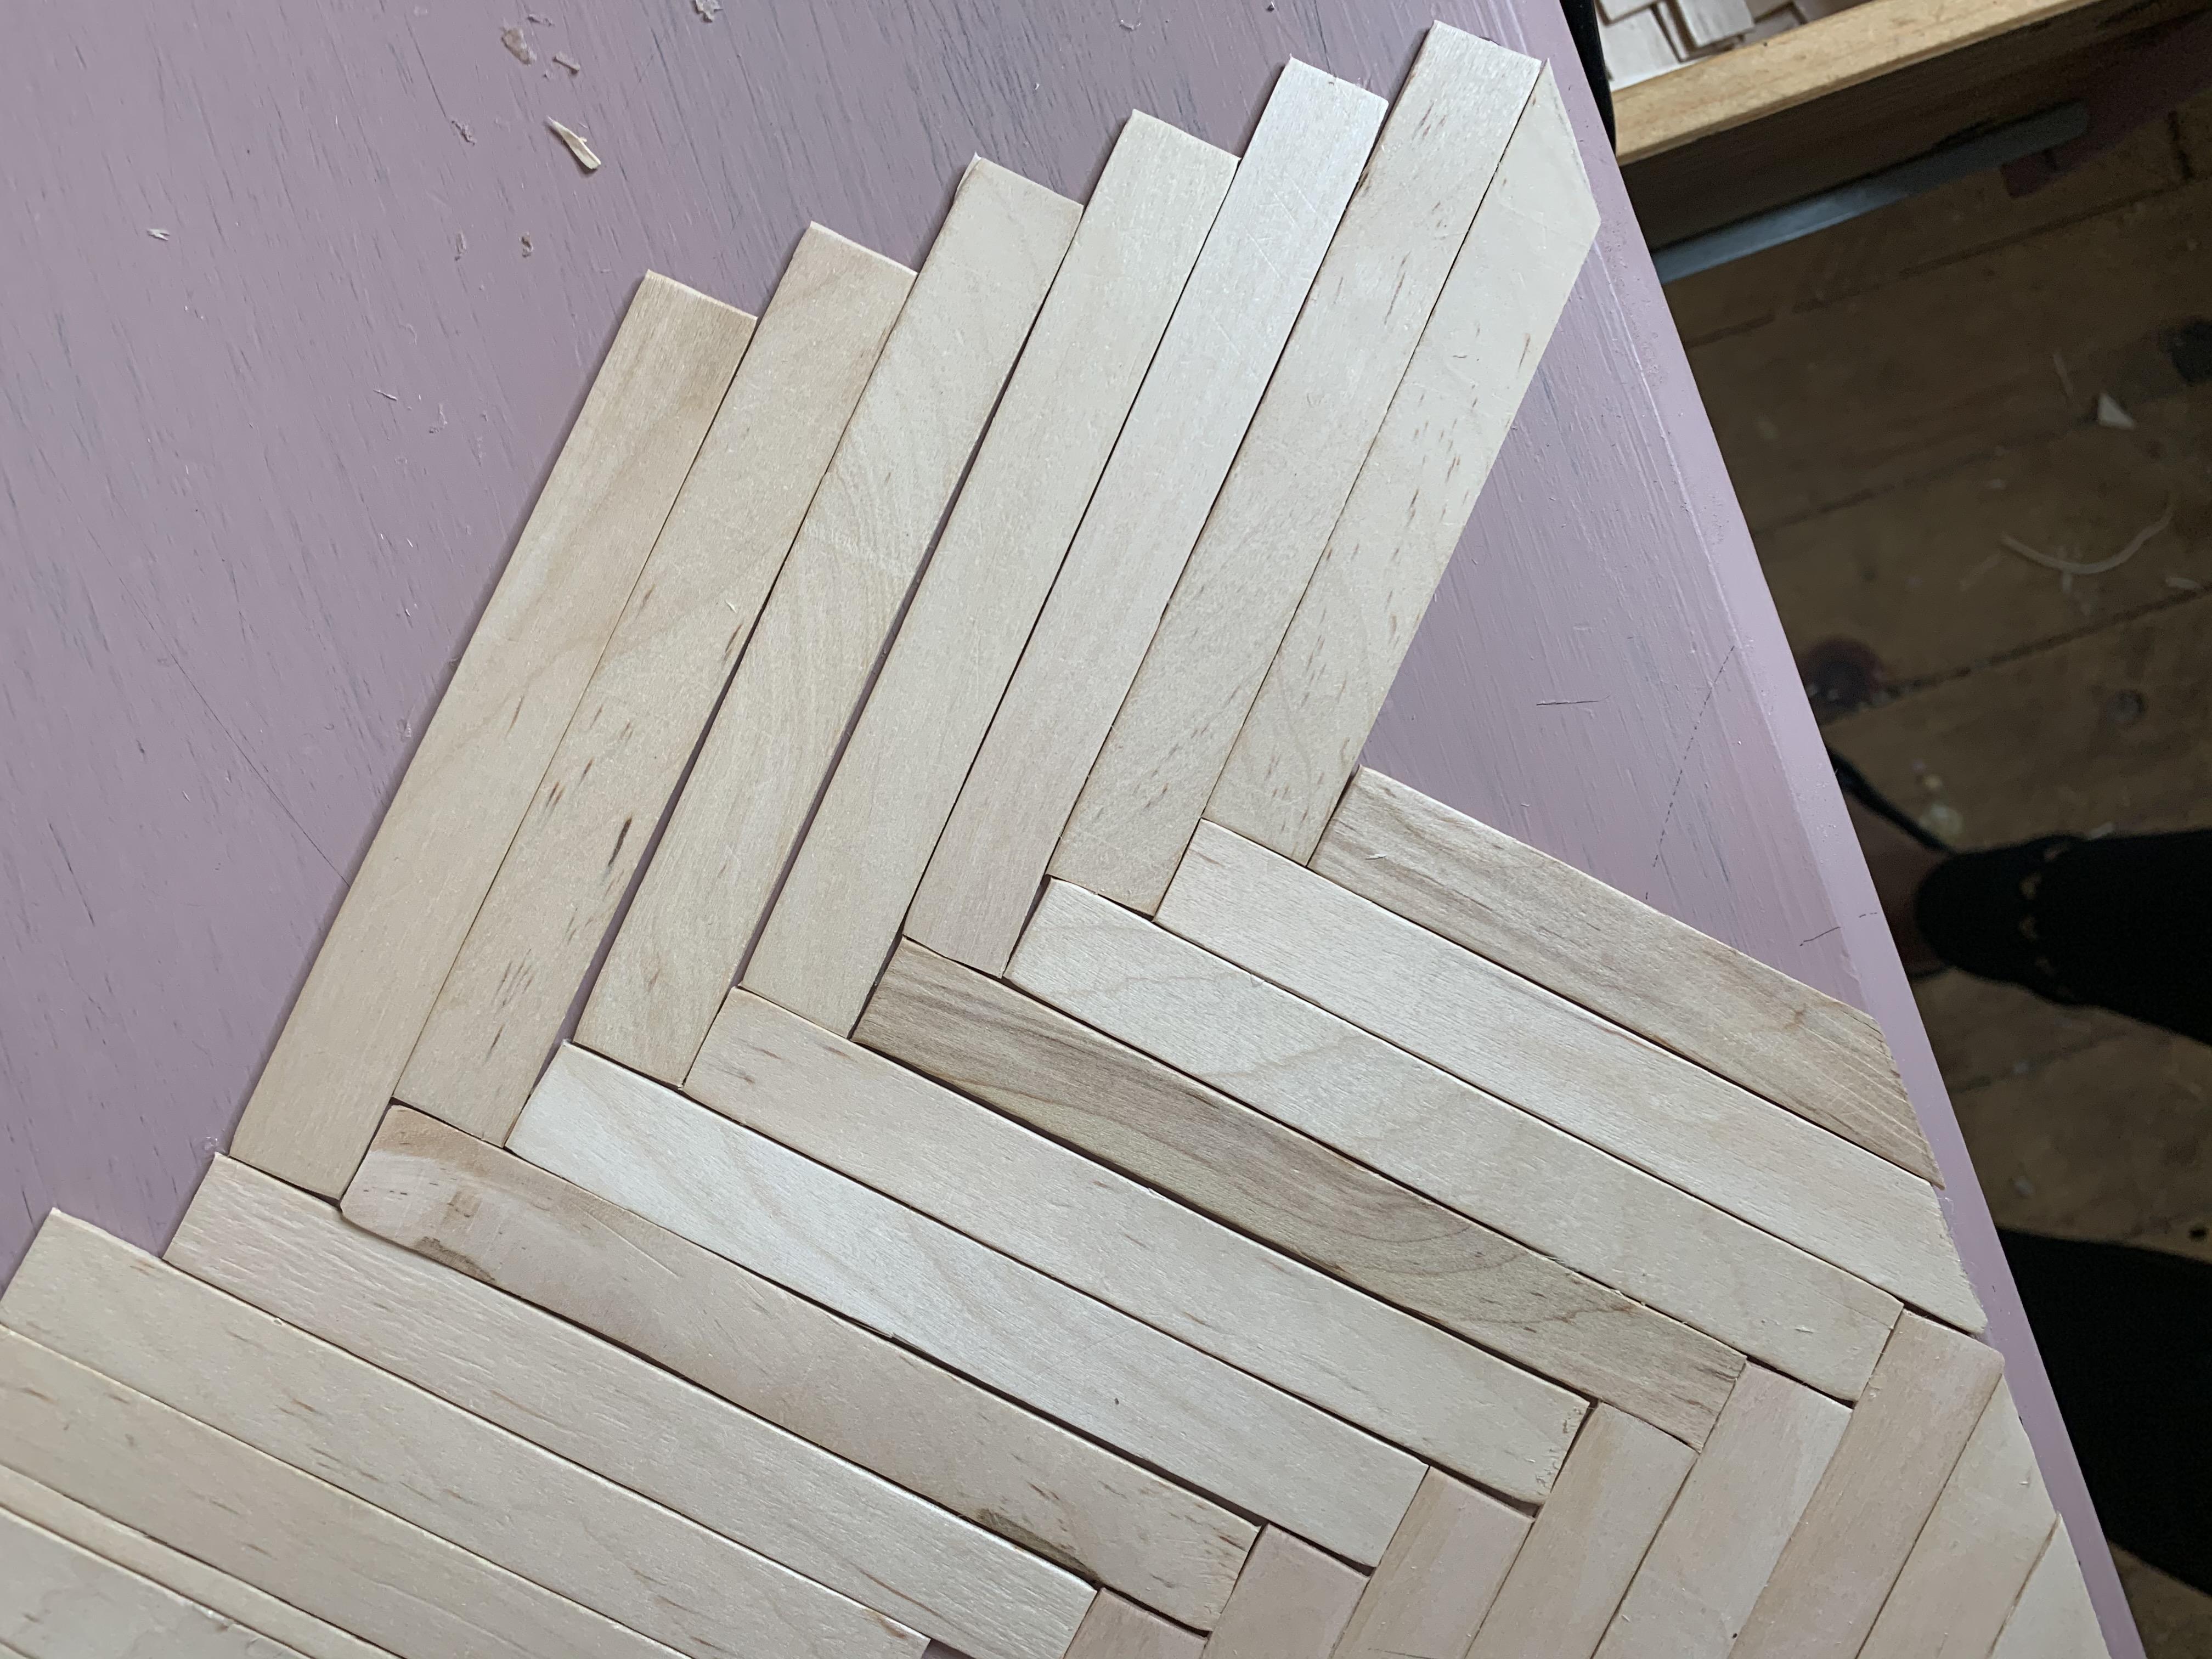
You’ll need to decide whether you’re going to cut the ends or not. I cut them so that the sticks would all be rectangular and fit together perfectly (or as perfectly as I could get them). If you choose to cut, mark one as your tester stick. This stick can be used to make sure the rest are all cut to the same length. This part is really important, especially if you are doing a design like herringbone. If any of the sticks are too long or too short, they can affect the overall look and make it hard to keep to the pattern. However, you may wish to come up with a completely different design which uses different lengths and doesn’t stick to a typical pattern. Go wild and see what you come up with.
The great thing about these sticks is that they are easy to work with, and easy to cut. I only had to use a pair of scissors and it did the job. I cut the sticks over a box so all of the ends would land in one place, and not end up all over the room. For an extra bit of safety, you should cover your eyes to protect them from any rogue wooden bits that may happen to fly off (trust me, this can happen).
Get small space home decor ideas, celeb inspiration, DIY tips and more, straight to your inbox!
It may take you a little while to cut, but once you’re ready, it’s time to prep your surface.
Prep your surface
I was upcycling a wooden desk, so I cleaned the surface with a sugar soap/water mixture and lightly sanded it. I wanted to prepare the surface so that the wood glue would attach well.
Plan your layout
If doing a herringbone pattern, it is important that you start at the centre and work your way outwards. You’ll want to mark the centre of the surface you’re working on and draw a pencil line all the way down. This will be the line you’ll follow when laying the first two rows of wooden sticks.
A herringbone pattern requires you to overlap the wooden sticks diagonally.
Get the glue gun
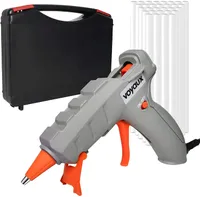
The most fun part was getting out my hot glue gun, a handy DIY crafting tool. I used wood glue sticks rather than ordinary glue sticks, but they pretty much work the same way. I applied a thin zig-zag line of glue to each stick before laying them down. You need to lay them down before the glue cools and solidifies, so be quick.
Hot glue gun with carrying case | Was £16.99, now £14.99
A simple hot glue gun will not only be helpful in this project, but you'll find it to be one of the most useful additions in your DIY toolkit. At under £15, this one is a worthwhile investment.
Cut the remaining sticks
You’ll notice small gaps near the edges where your pre-cut sticks will be too big to fit, this will require you cutting sticks to size. Place a stick in the gap, in the same overlapping pattern, and mark with a pencil where you need to cut it so it finishes flush against the edge of the surface. Cut along the pencil line, and stick in place.
Sand down the edges
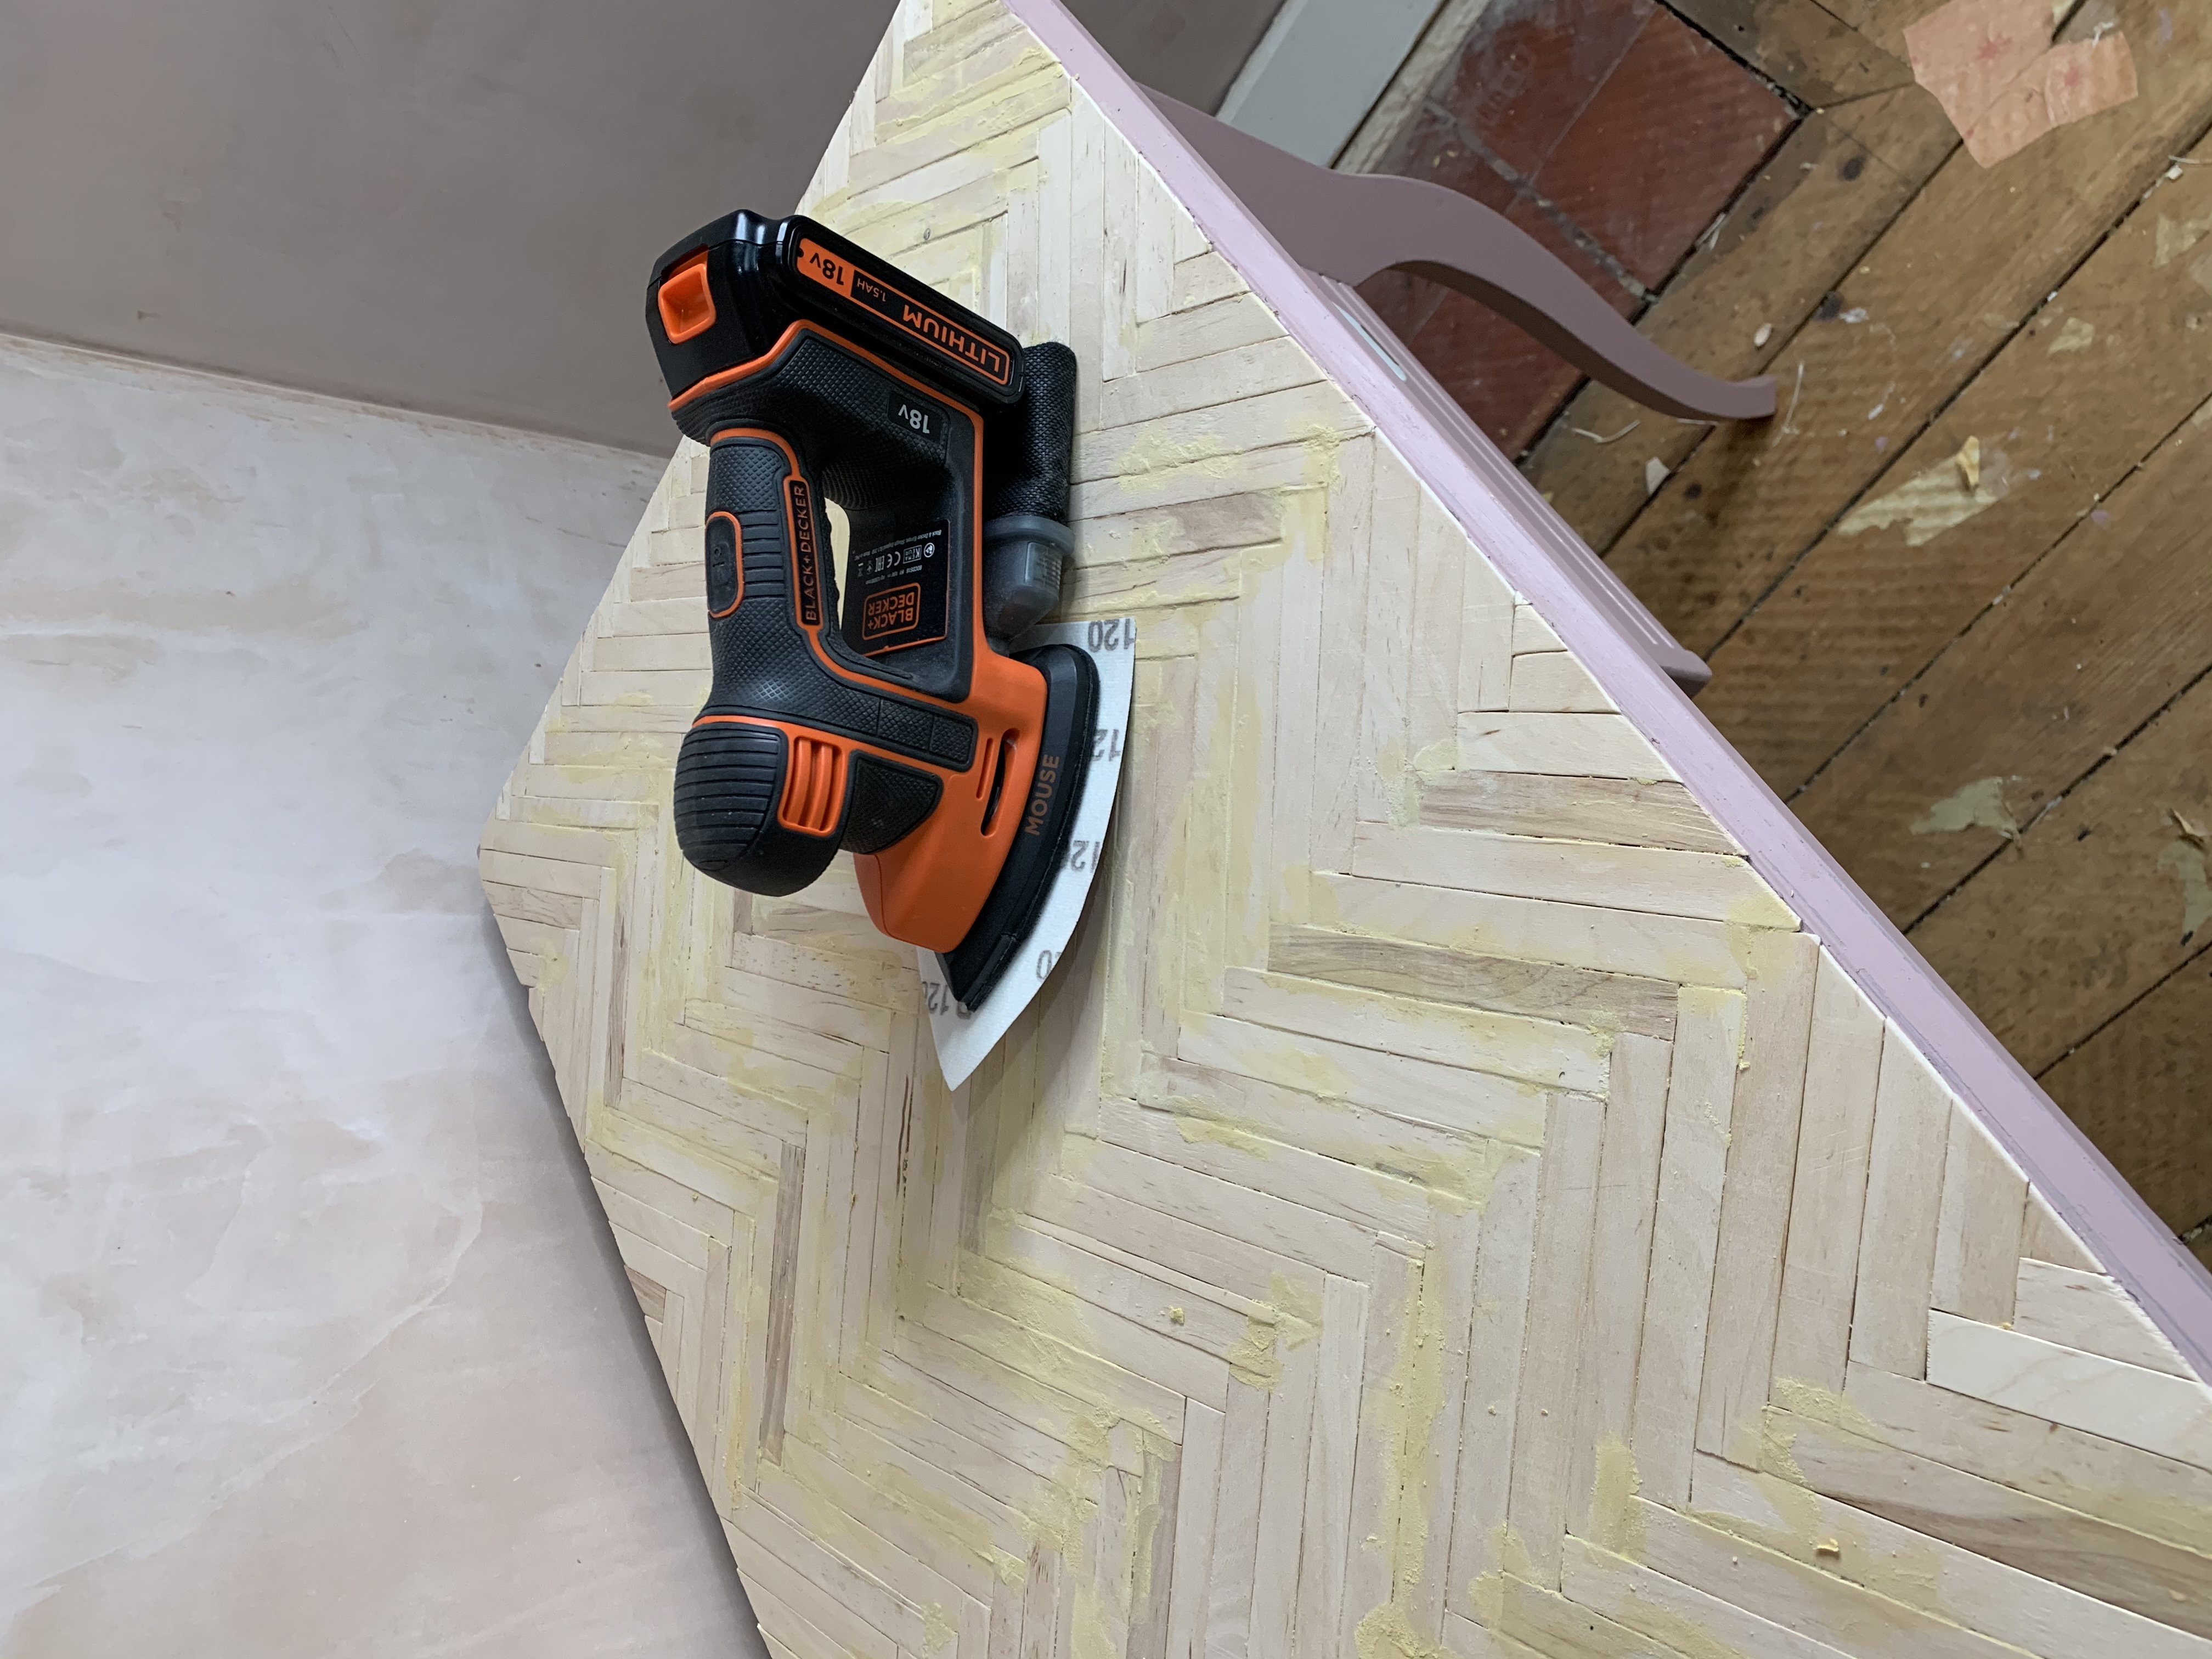
Once all the sticks have been laid, you’ll want to neaten up the edges with a mouse or orbital sander to get a nice finish. You can then choose to add a trim if you wish.
Add wood filler to the gaps
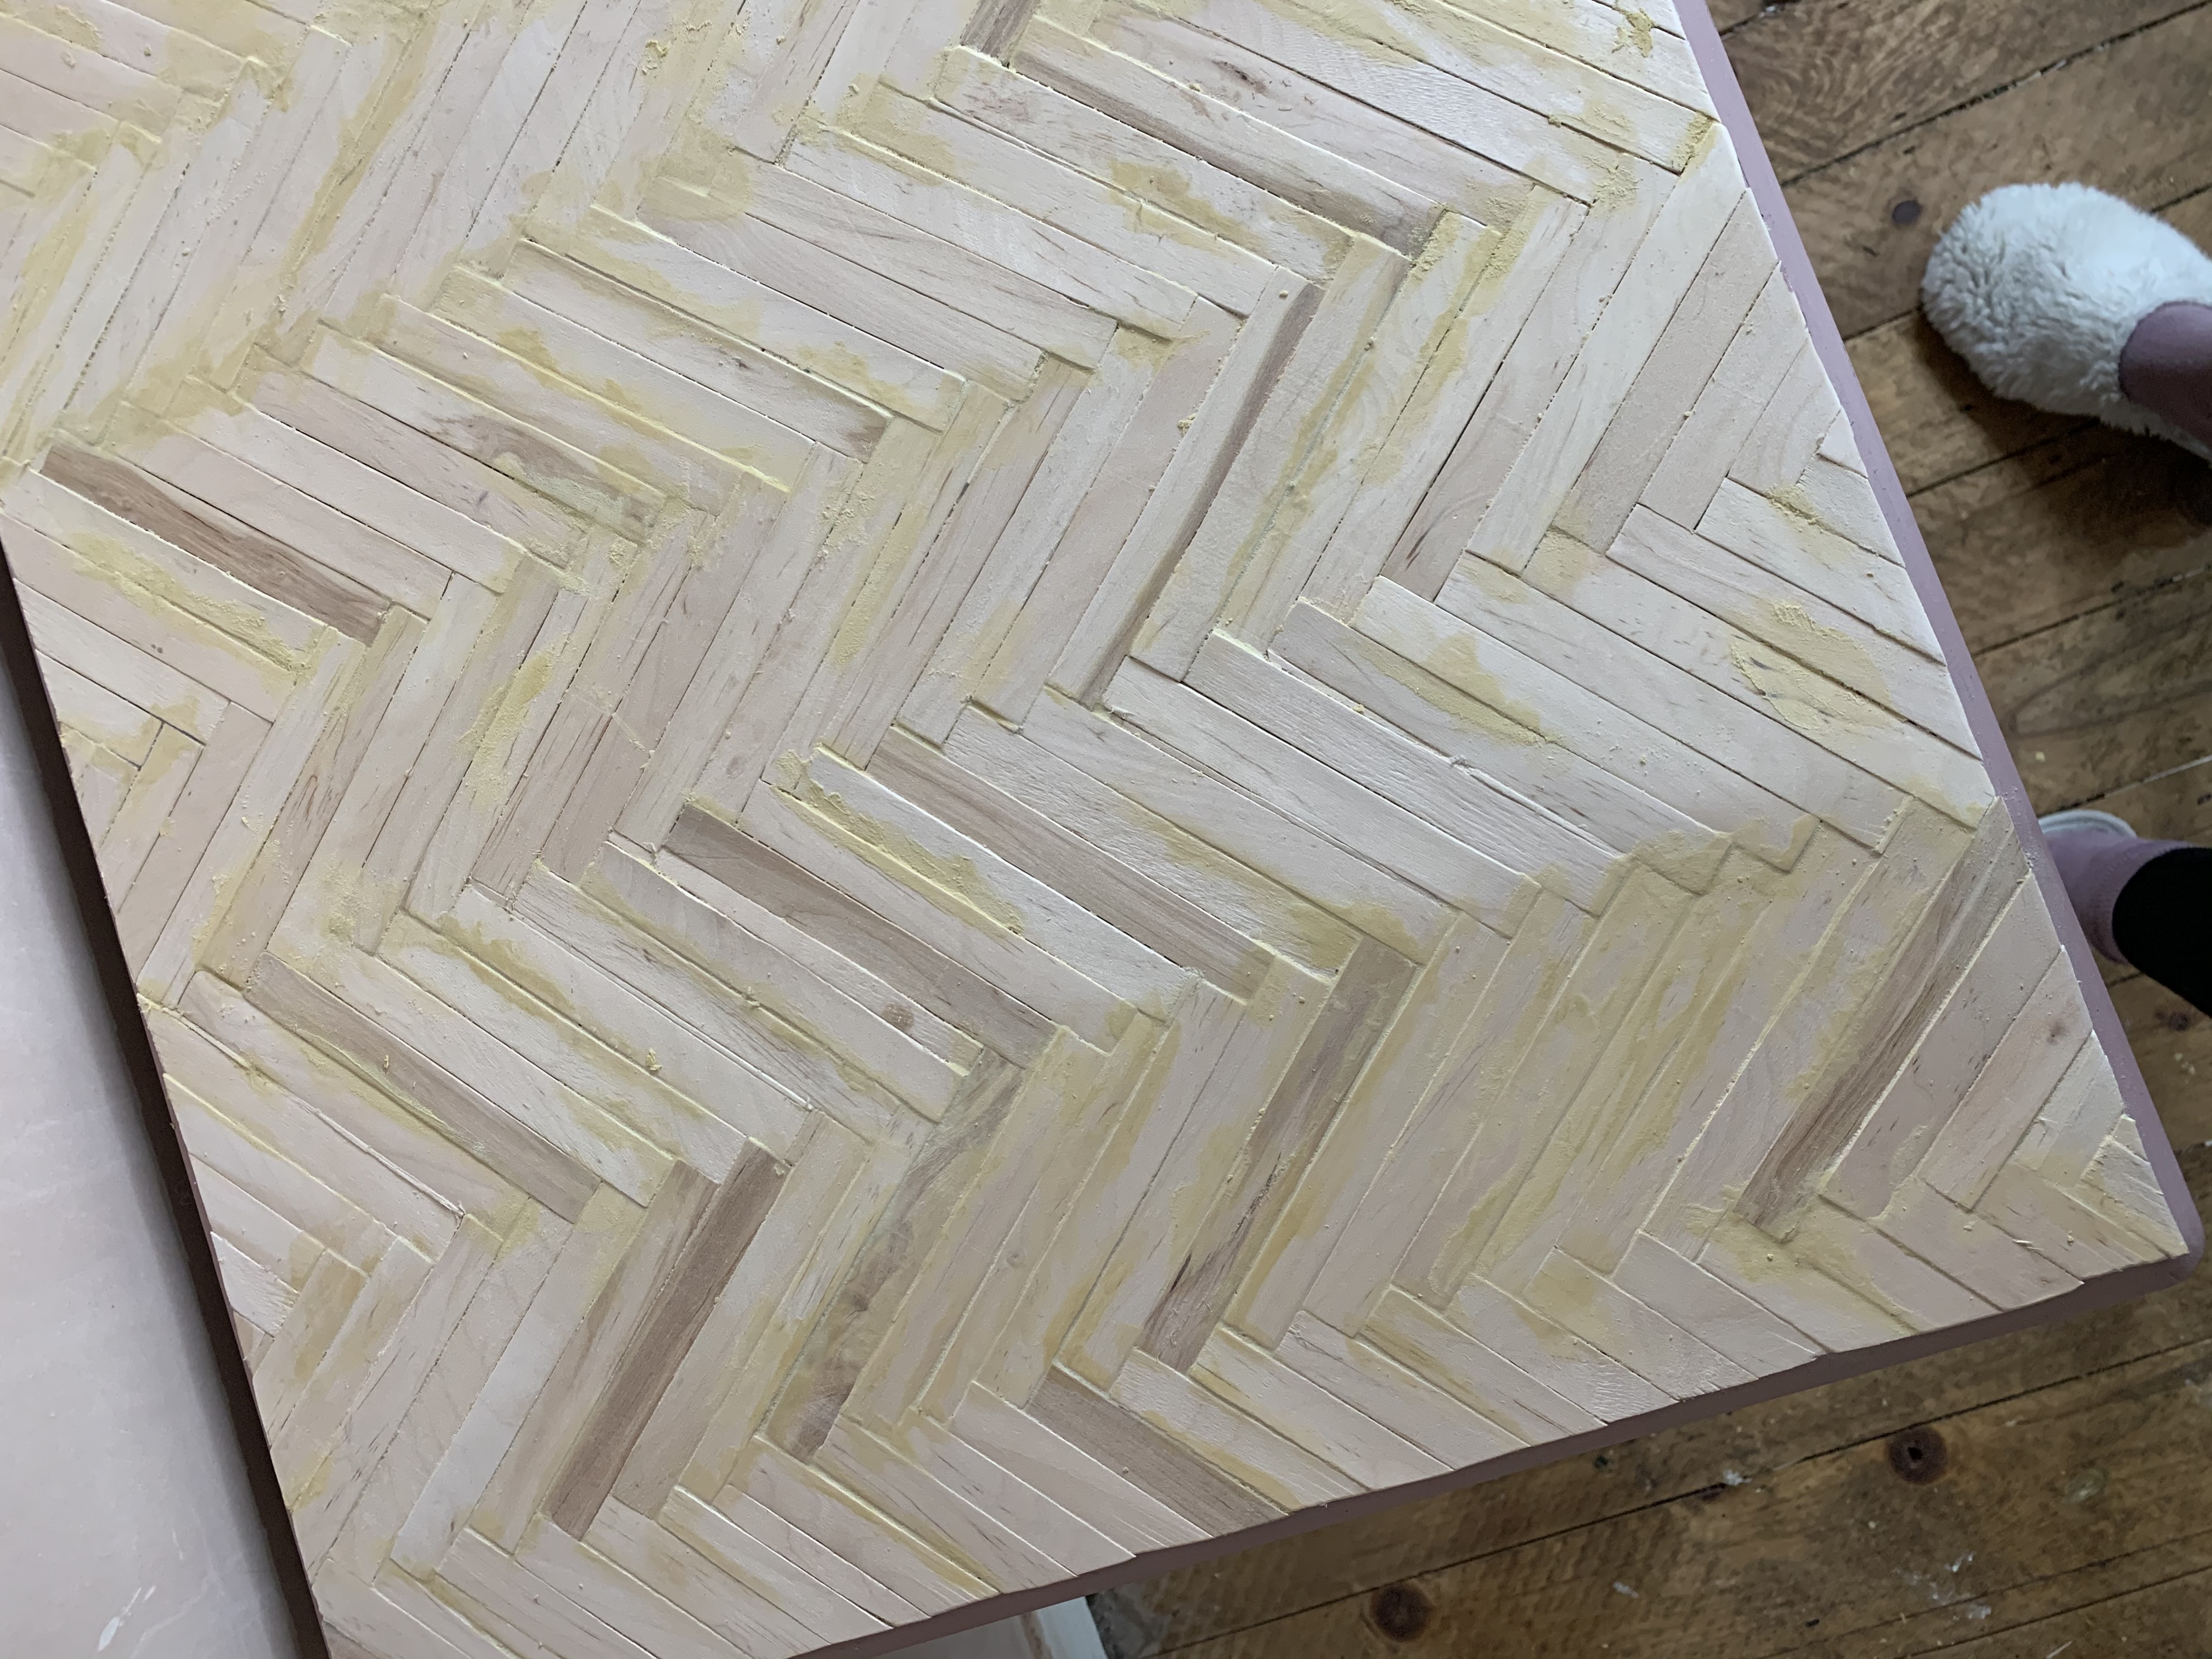
Unless your wooden sticks are perfectly joined together, you may want to use wood filler to neaten the surface and fill any small gaps. You can do this by putting the wood filler over the gaps and using a clean cloth to rub it into place. Wait for this to dry fully before you sand down the surface. You can do this by hand, but I used a mouse sander which helped with the large surface. I then used a cloth dipped in white spirit to wipe down all of the excess saw dust.
Add varnish (or paint)
The last step is to now protect all of your hard work! I loved the look of the natural wood so did two coats of a clear matt varnish all over the top of mine. You could also use PVA Glue, a wood stain, or paint it.
Now it’s your turn. Grab your lollipop sticks and create a masterpiece.
About the author

Jess Grizzle is a singing DIY Queen and multi-award winning home interiors influencer for @grizzle_abode. She loves to share her DIY projects as well as championing women to take on their own. She creates fun and exciting content with the aim to make her followers smile and be inspired.
She is also co-founder of the @femalediycollective, a growing female DIY community celebrating projects from women all around the world.
Jess Grizzle is a multi-award winning content creator and home interiors influencer. Her social media platforms include her Instagram @grizzle_abode which she started in May 2019. Here she shares the joys and trials of living in a home during a renovation and her many DIY projects.
Although she has always been creative, she really found her love for DIY once she and her husband became homeowners. She realised quite quickly out of the two of them, she was the one with the desire to buy power tools and learn new DIY skills.
She found her passion of championing women to do DIY and take on their own challenges. This led her to become a co-founder of the @femalediycollective, a growing female DIY community celebrating projects from women all around the world.
