How to use a drill like a pro – master all your DIY projects
The only Combi drill 101 you'll ever need
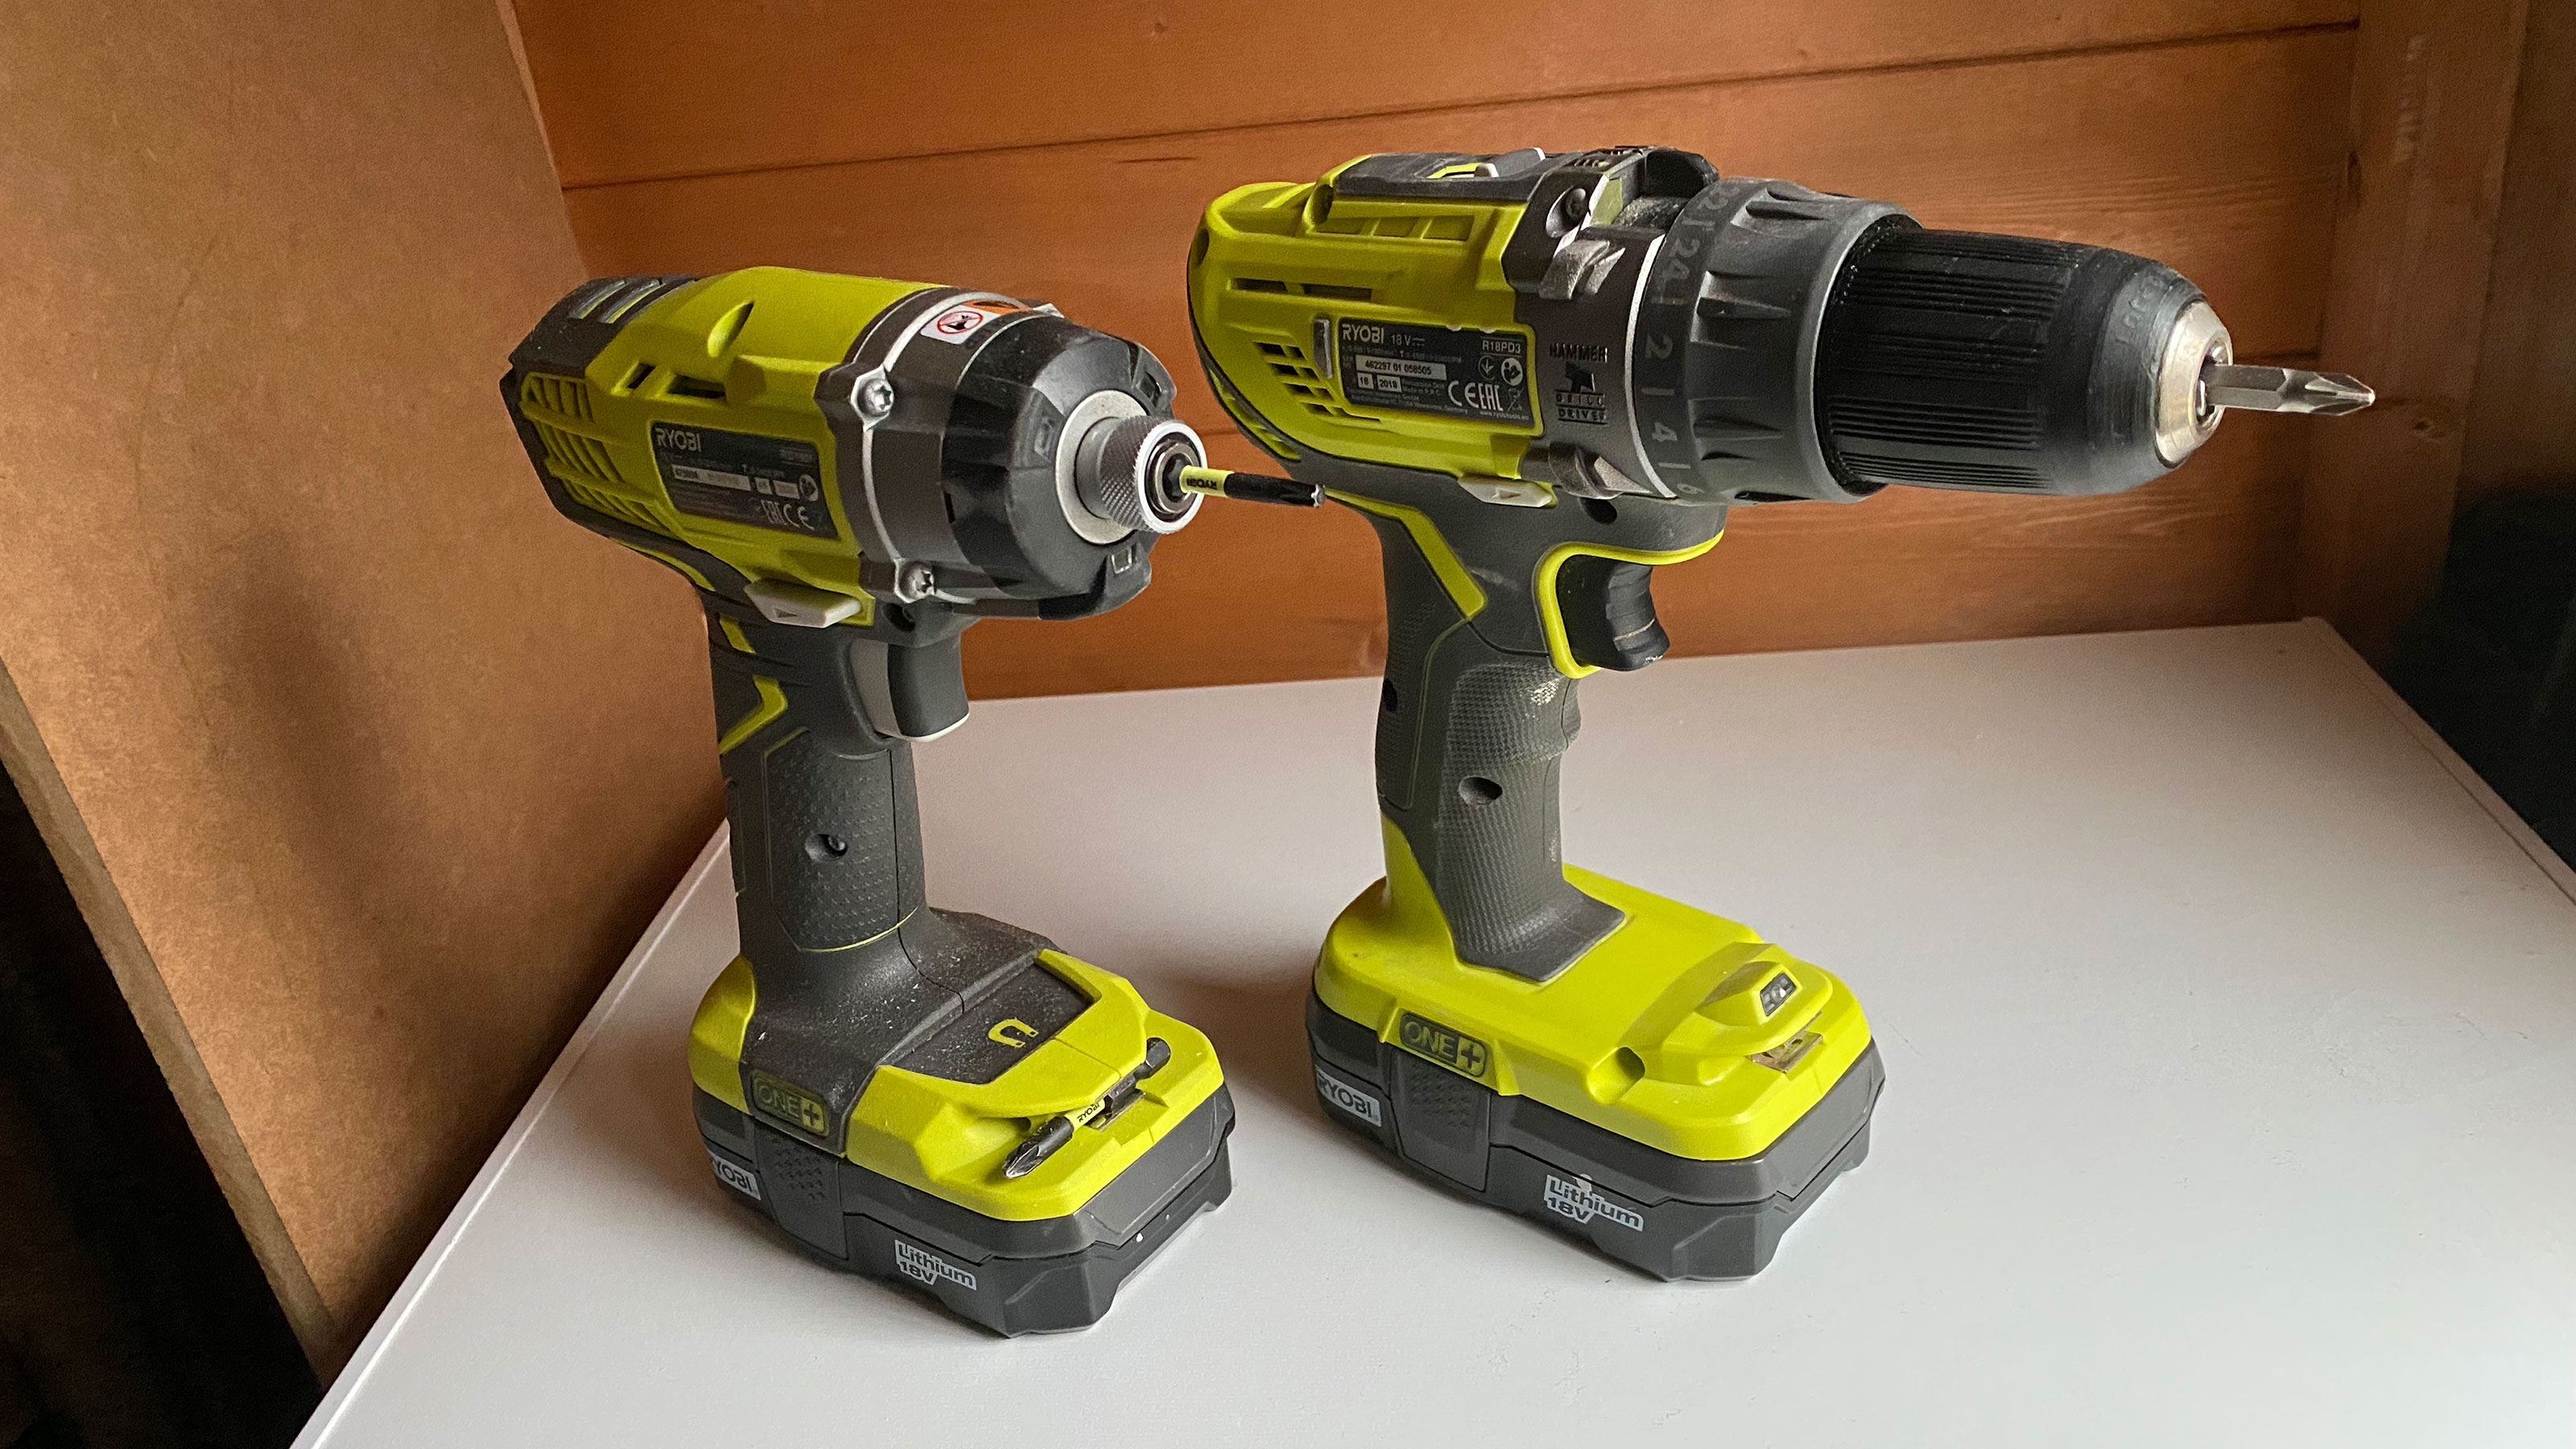
One of the most essential power tools you need when starting out in DIY, the humble Combi drill. Whether you’re a new homeowner or finally want to make a start on sprucing up your home without the need to call in a handyman, knowing how to use a drill properly is a must to complete all your DIY projects safely and successfully.
To assist you with that, I’ve put together the little guide below to help you learn what the buttons and numbers mean, how to use one, how It differs from other drills and what else you may need when drilling into different materials.
How to use a Combi drill 101
A post shared by Jasmine | DIY for Beginners (@_ohabode)
A photo posted by on
There are three main different categories of drills: a traditional drill, an impact driver, and a hammer drill as well as 16 types of drills that fit within these categories.
A Traditional drill, a category that includes the combi drill (which will be covered in this article), is the most common drill you’ll come across as it’s a pretty good all-rounder and will be your most used tool in projects too.
Impact drivers, which usually have a shorter body and a quick release chuck, are better for heavy duty screw tightening like when constructing decking or building furniture when you really need some force to drive the screw into. The driver rotates like a traditional drill, but when it meets resistance, it combines the rotation with a turning pounding action to put more power behind the screw or bolt.
Hammer drills are a lot heavier and require two hands to operate. They are heavier duty than a traditional drill and are used for the bigger jobs like drilling into masonry and concrete. The hammer drill also combines rotation with a downward tapping action to melt the drill bit through tough materials.
What to look for when buying a combi drill
When picking out the best drill for you and your project, you’ll want to buy a lithium-ion battery that’s either 18 or 20v. Lithium-Ion batteries are high performing, more powerful and last longer than other batteries. A keyless drill means you can easily change the drill bit without the need for a special key to loosen the chuck.
Get small space home decor ideas, celeb inspiration, DIY tips and more, straight to your inbox!
The main parts of a drill
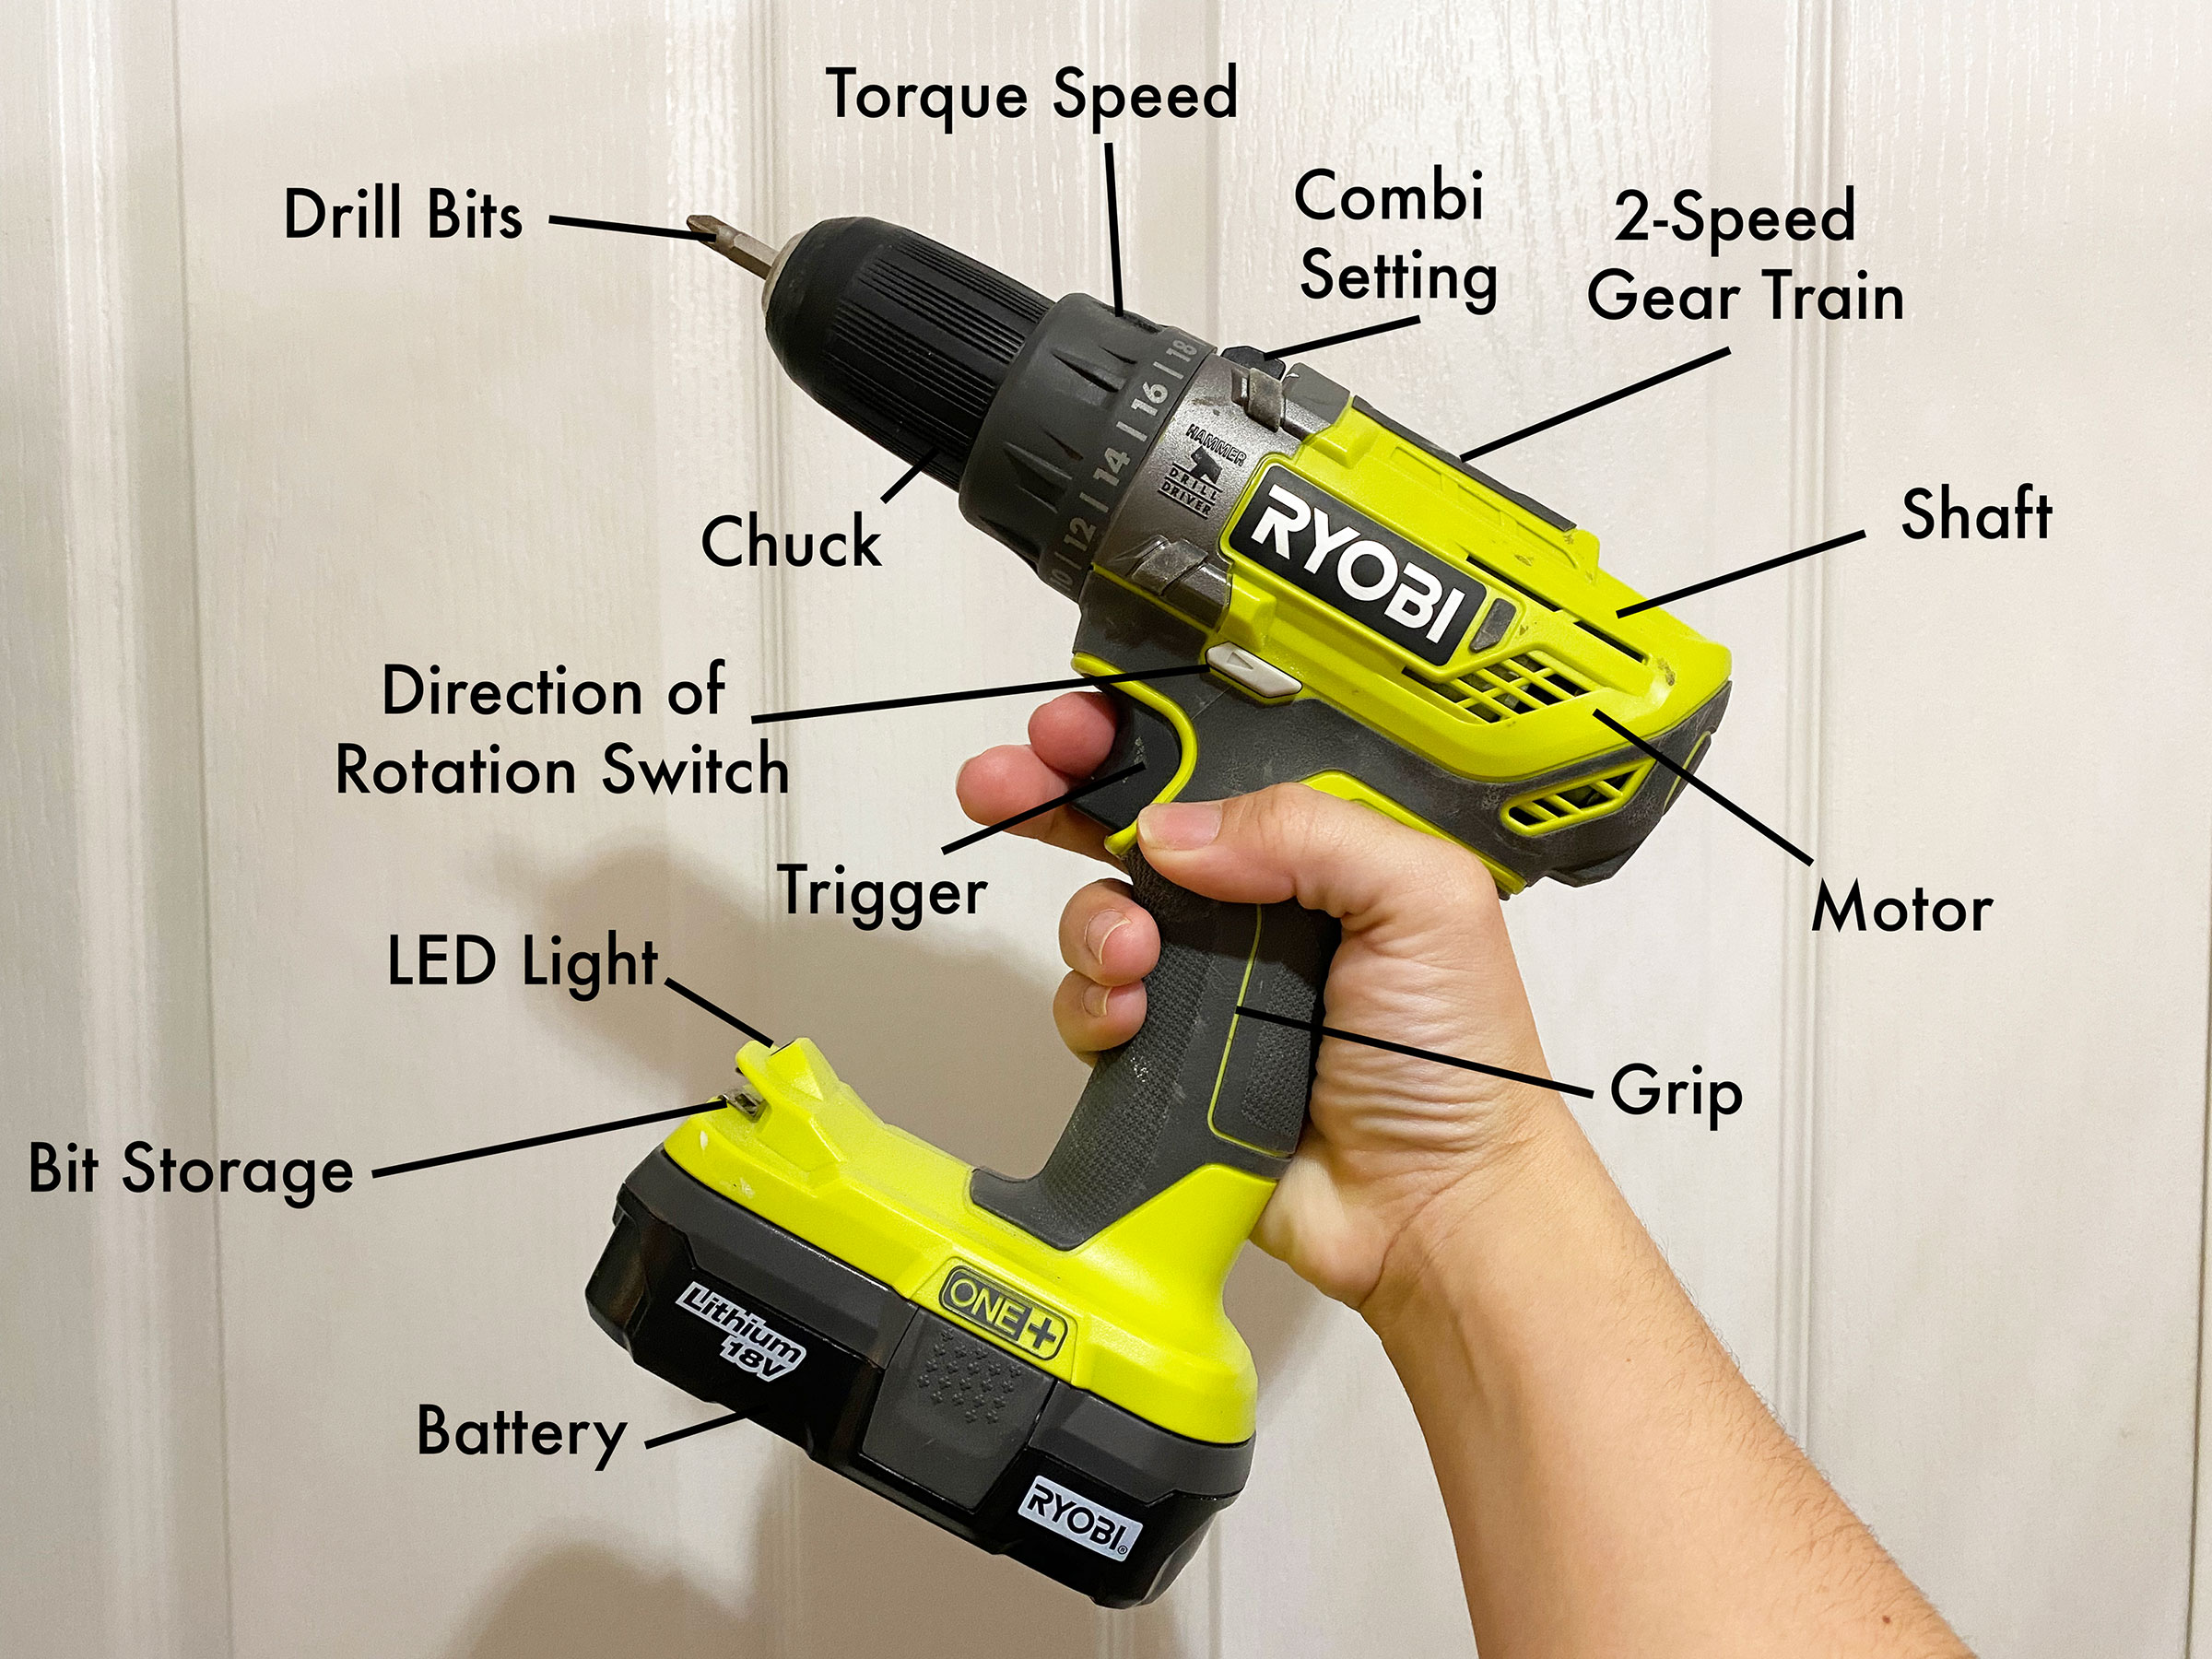
There are six main parts of a drill: the chuck, the shaft, the motor, the grip, the battery, and the different types of drill bits.
The other components that make up the drill include:
- The trigger: Which controls the speed the chuck rotates – the more you squeeze it in, the faster it goes.
- The torque speed: Which is for use when driving in screws - the higher the number, the stronger the torque.
- The gear train: Found on the shaft, it allows you to switch between high and low speeds.
- The combi setting: Which is unique to combi drills, allows you to switch between modes – drill, screw/driver, or hammer.
- The direction of rotation switch: This is your forward and reverse switches.
- LED light: Finally, many drills have both an LED light to give you more visibility whilst using the drill, shining a light to where the drill bit is touching the wall/screw, and a bit storage clip for the convenience of having a screw bit right there when you need it.
Safety when using Drills
If you have long hair, it’s a good idea to tie your hair up to prevent it getting caught around the drill bit. If you’re drilling into materials made up of small particles or generate a lot of dust when drilled, for example masonry or mdf, it’s sensible to wear a mask and some safety glasses to protect your eyes and lungs.
To ensure you don’t slip when using the drill, keep your drill bits sharp, always use the right one for the job and make sure the chuck is fully tightened. Additionally, if the material you are drilling or screwing into is loose, ensure that it is properly clamped down.
Basic Controls
There are three basic controls on a drill; a speed range switch, forward and reverse, and drive.
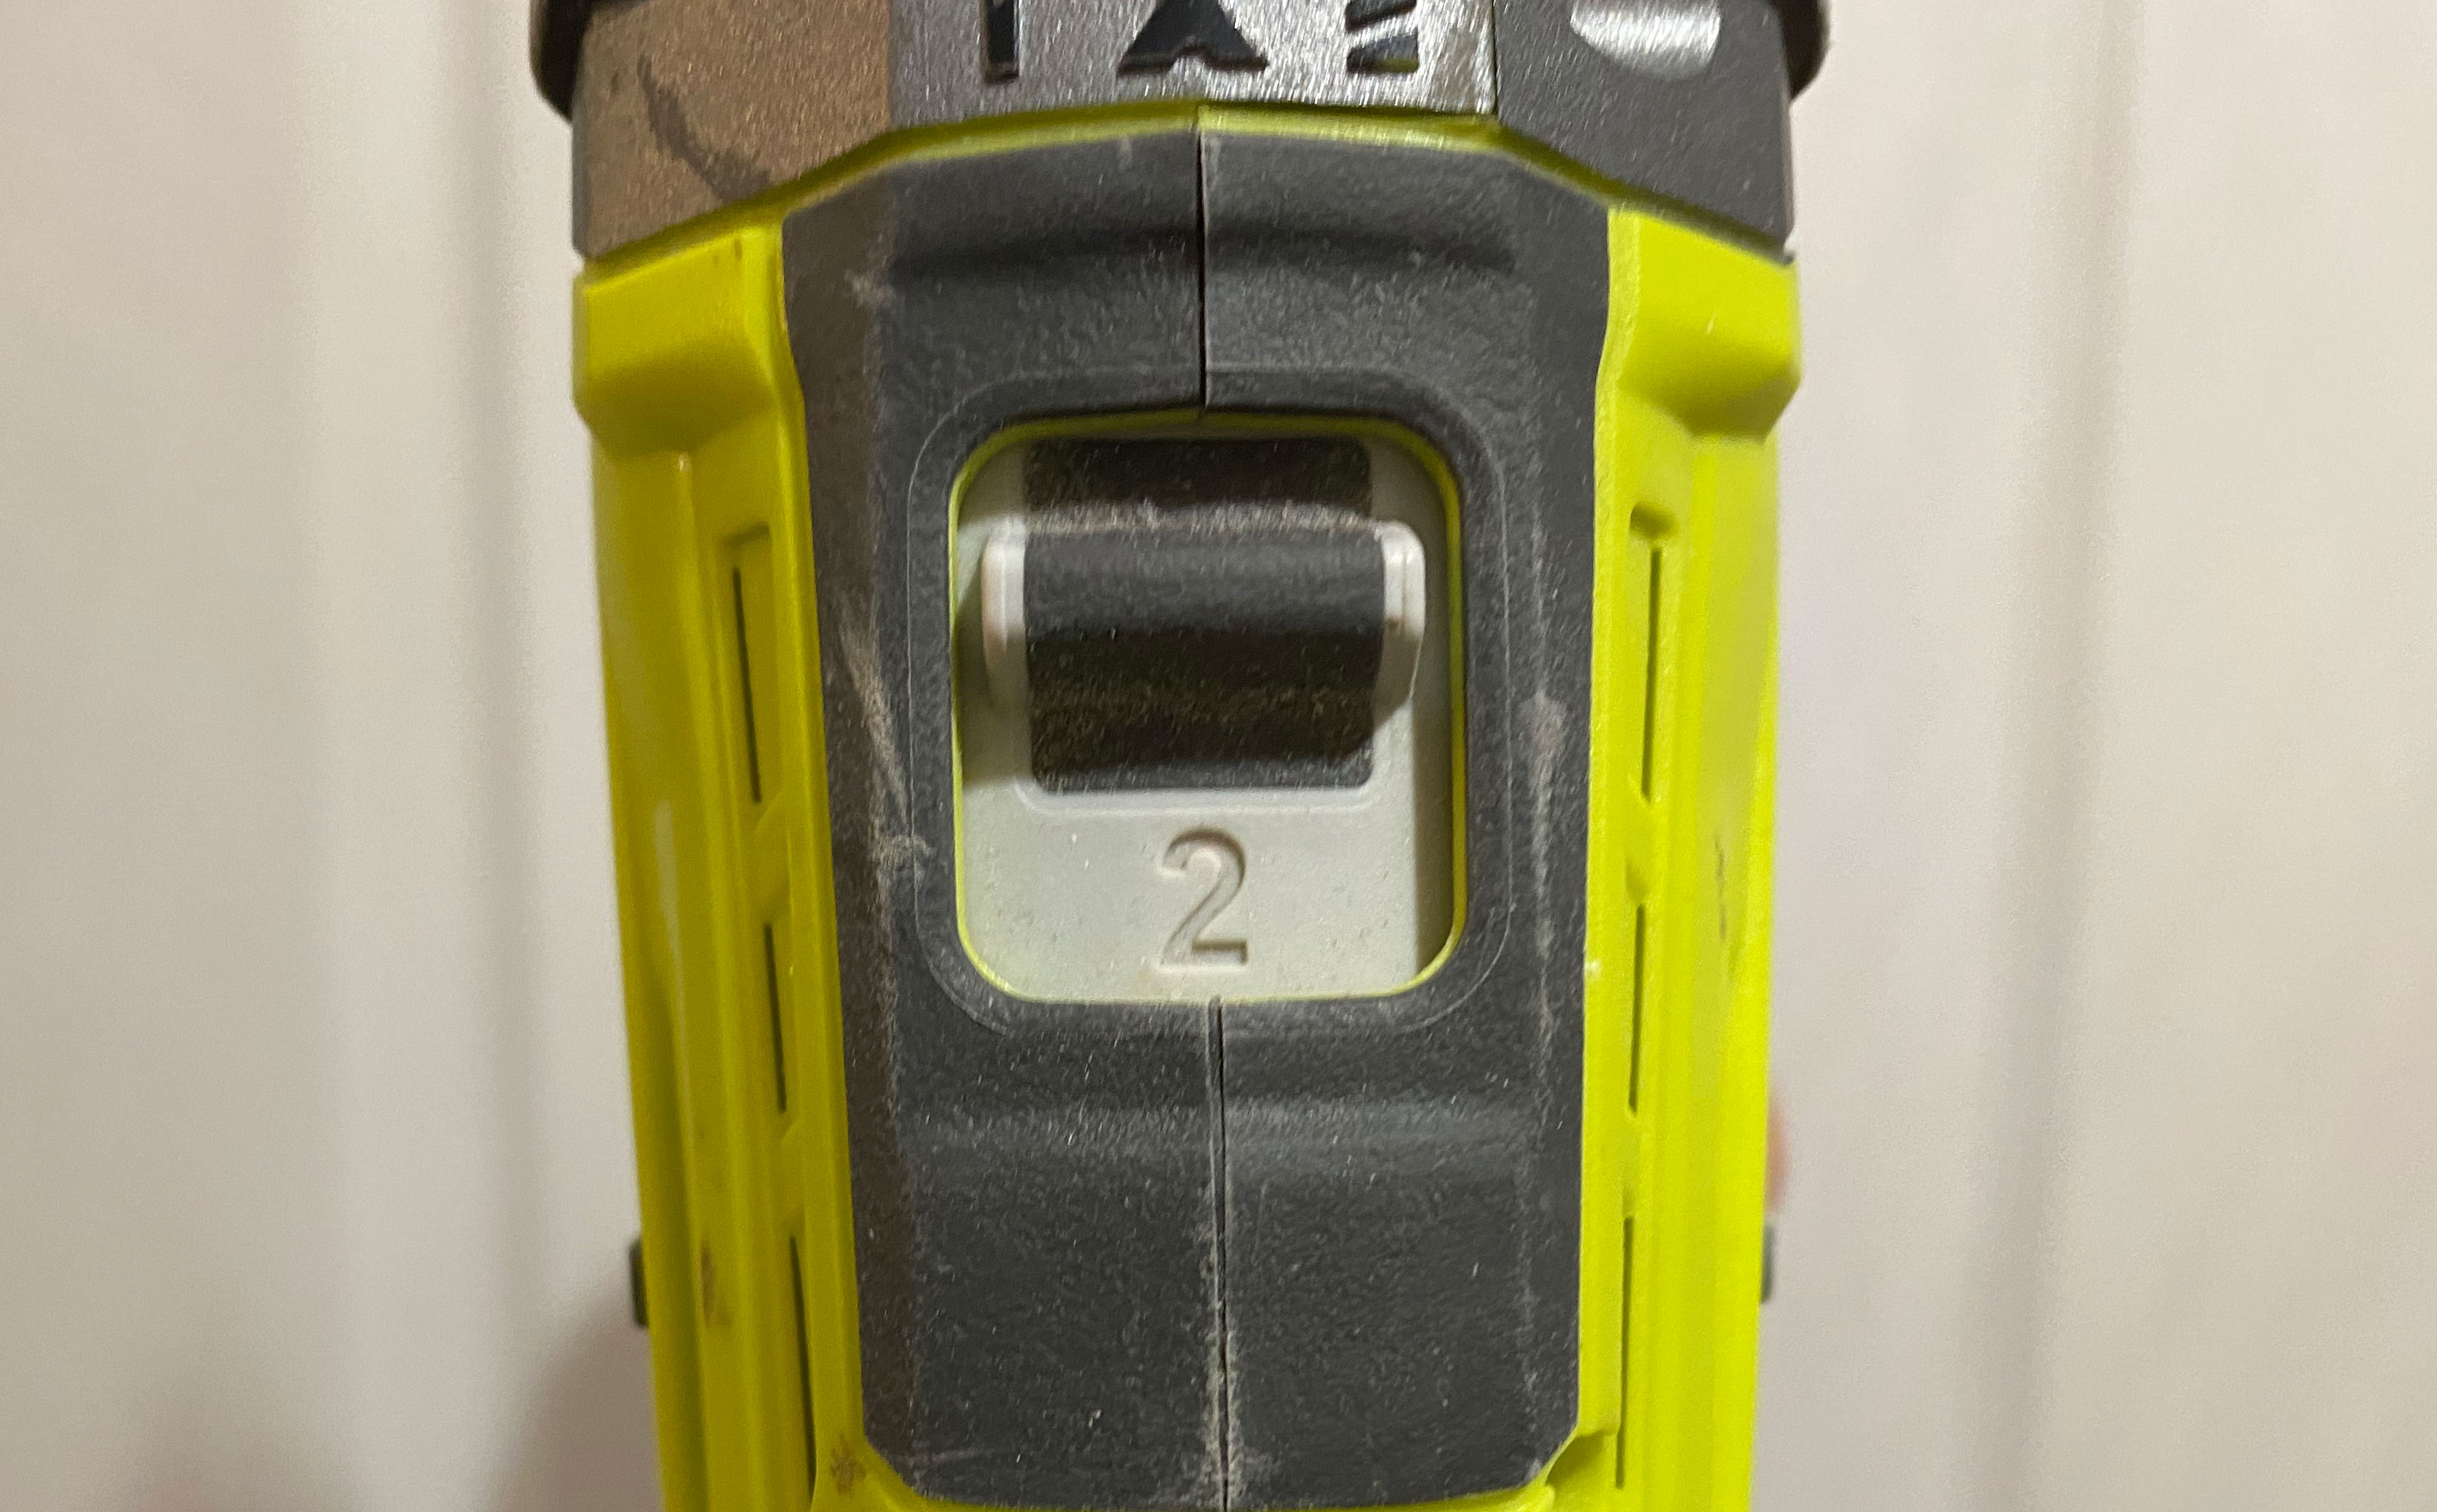
Speed range switch – 1 is high power, slow speed. This is used for hard materials such as metal and masonry. 2 is low power, high speed, which will be your general all-use setting.
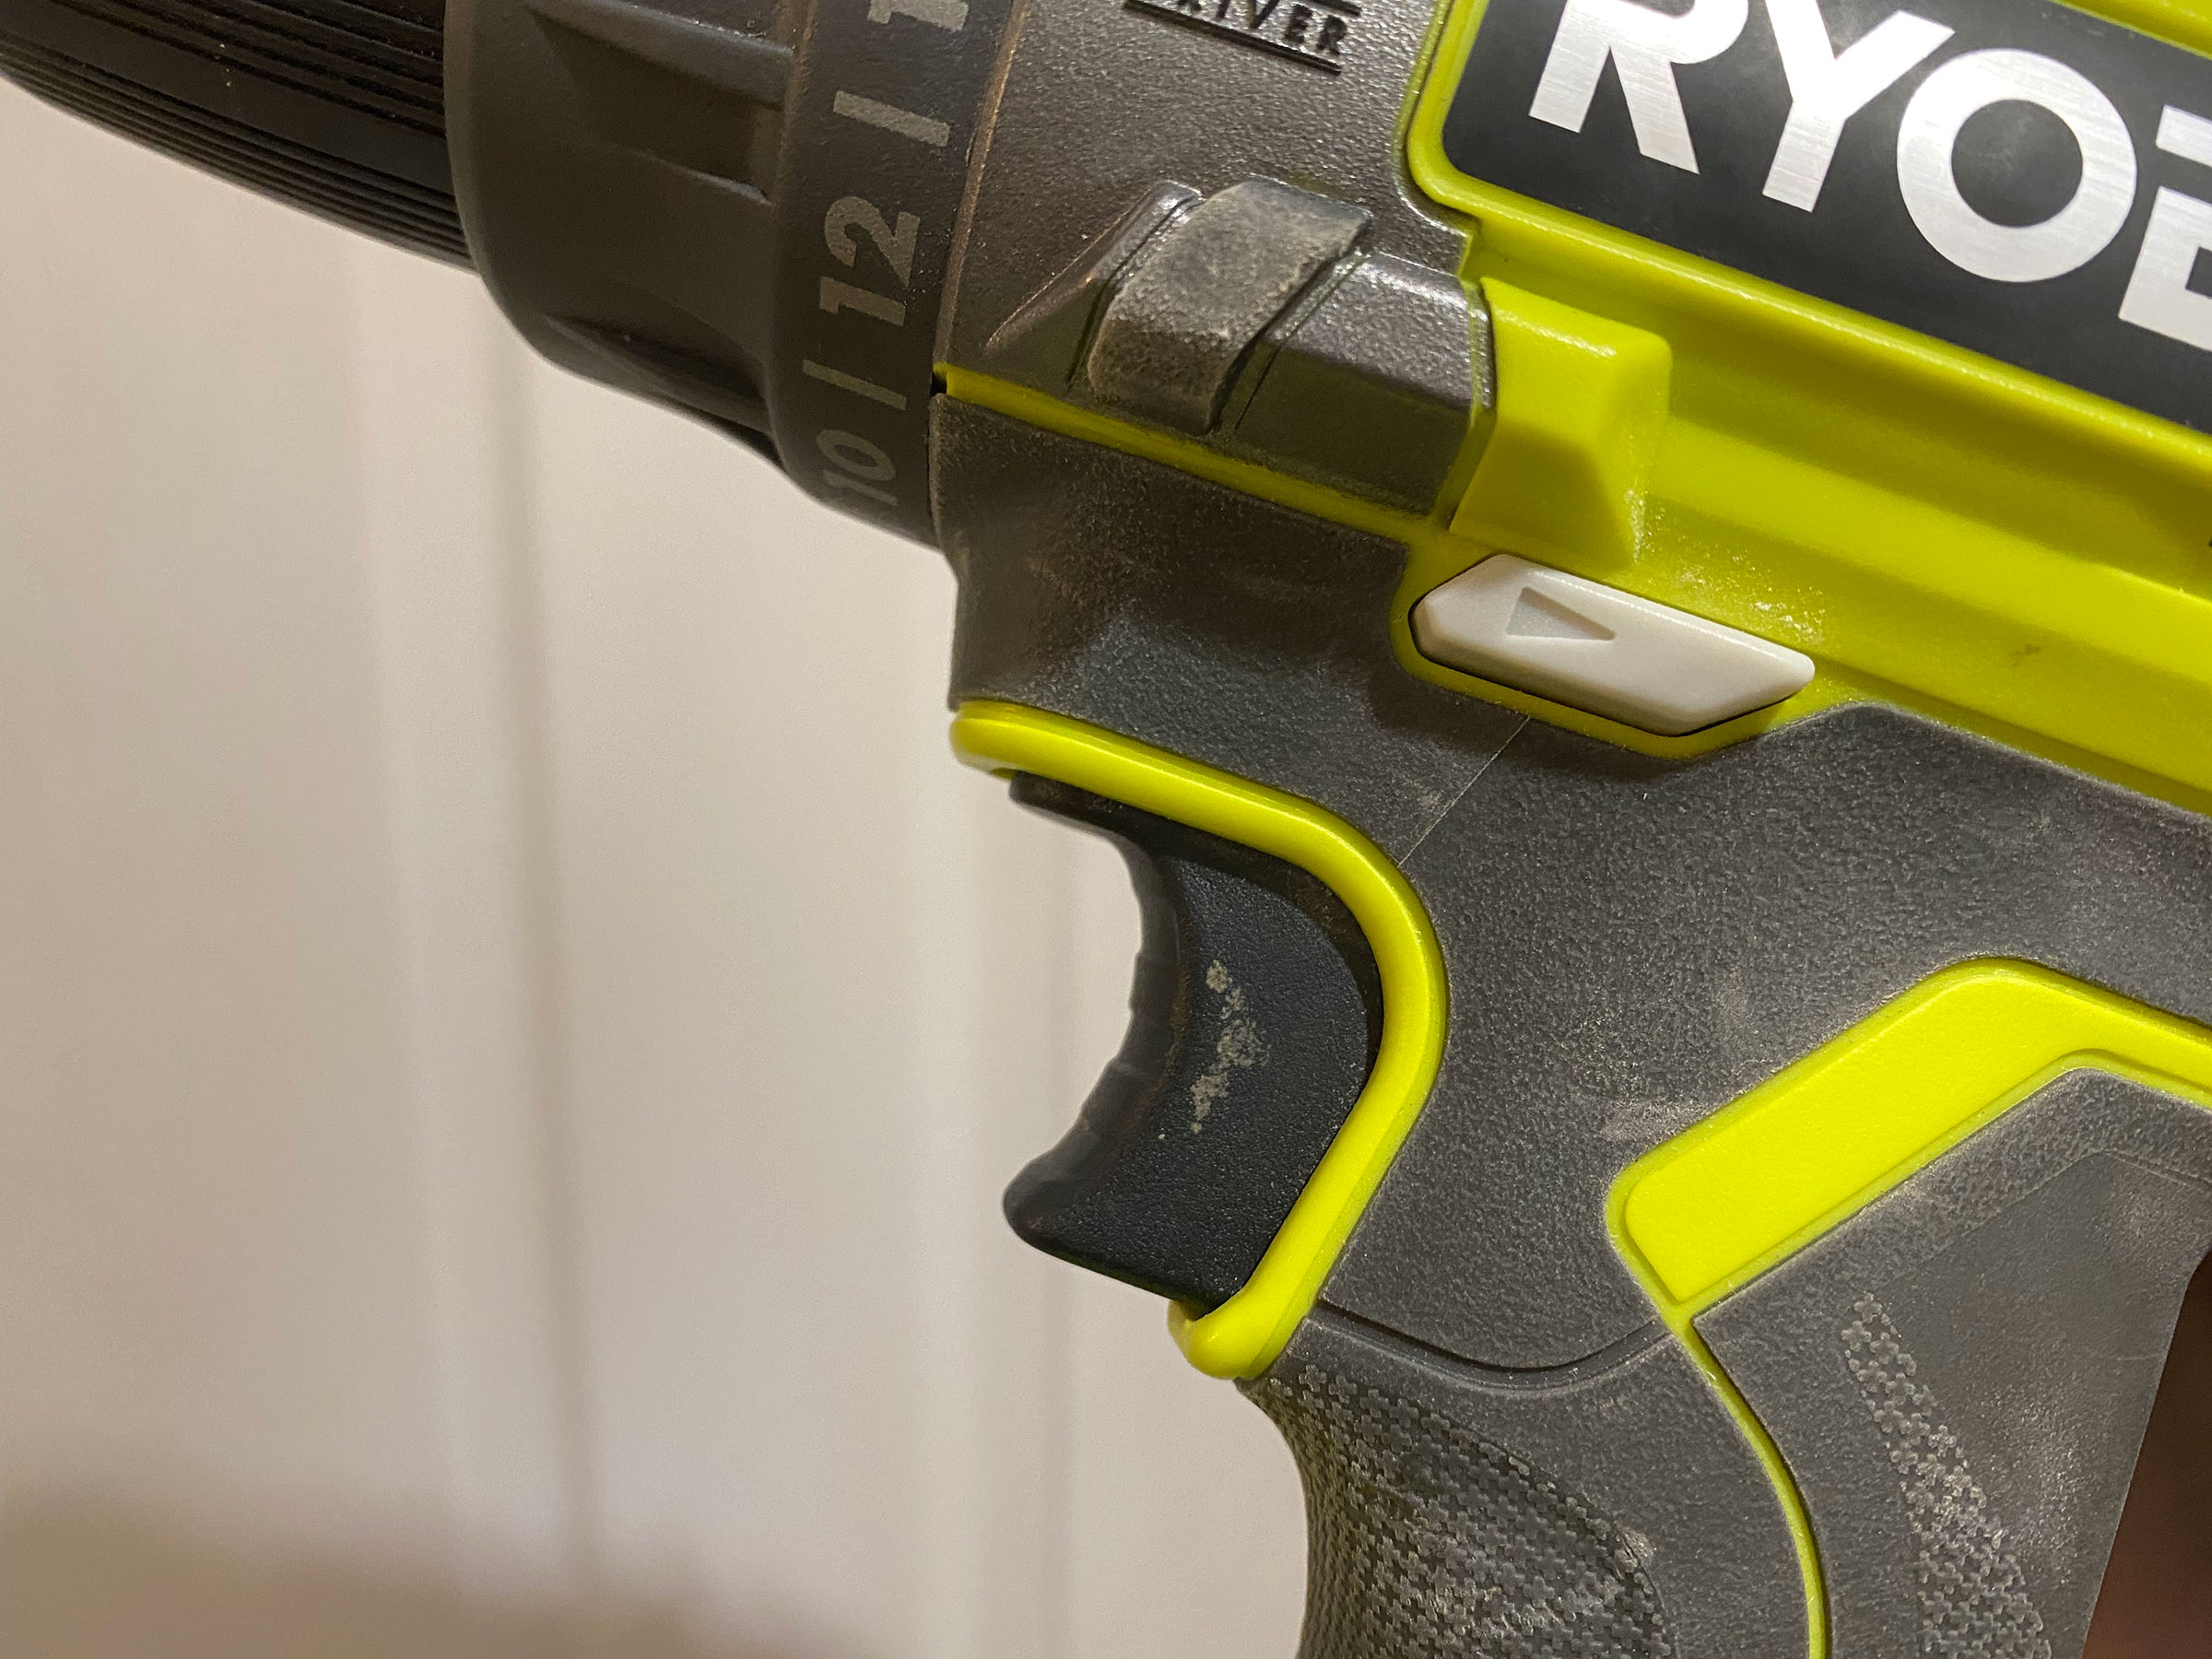
Forward and reverse – on the left side of a drill just above the trigger, you will find the reverse button. Pushing this in will put the chuck in reverse (anti clockwise) so that you can undo bolts and screws.
You will notice that on the right side, the forward button is now sticking out. Once you push it back in (pushing the reverse side out), will put the chuck into forward gear (clockwise) which is used to drill and drive in screws and bolts.
You can easily flick between these with your thumb and forefinger and they will usually have arrows on them so you can see which direction the button is for. When drilling, always make sure you have it on the right setting.
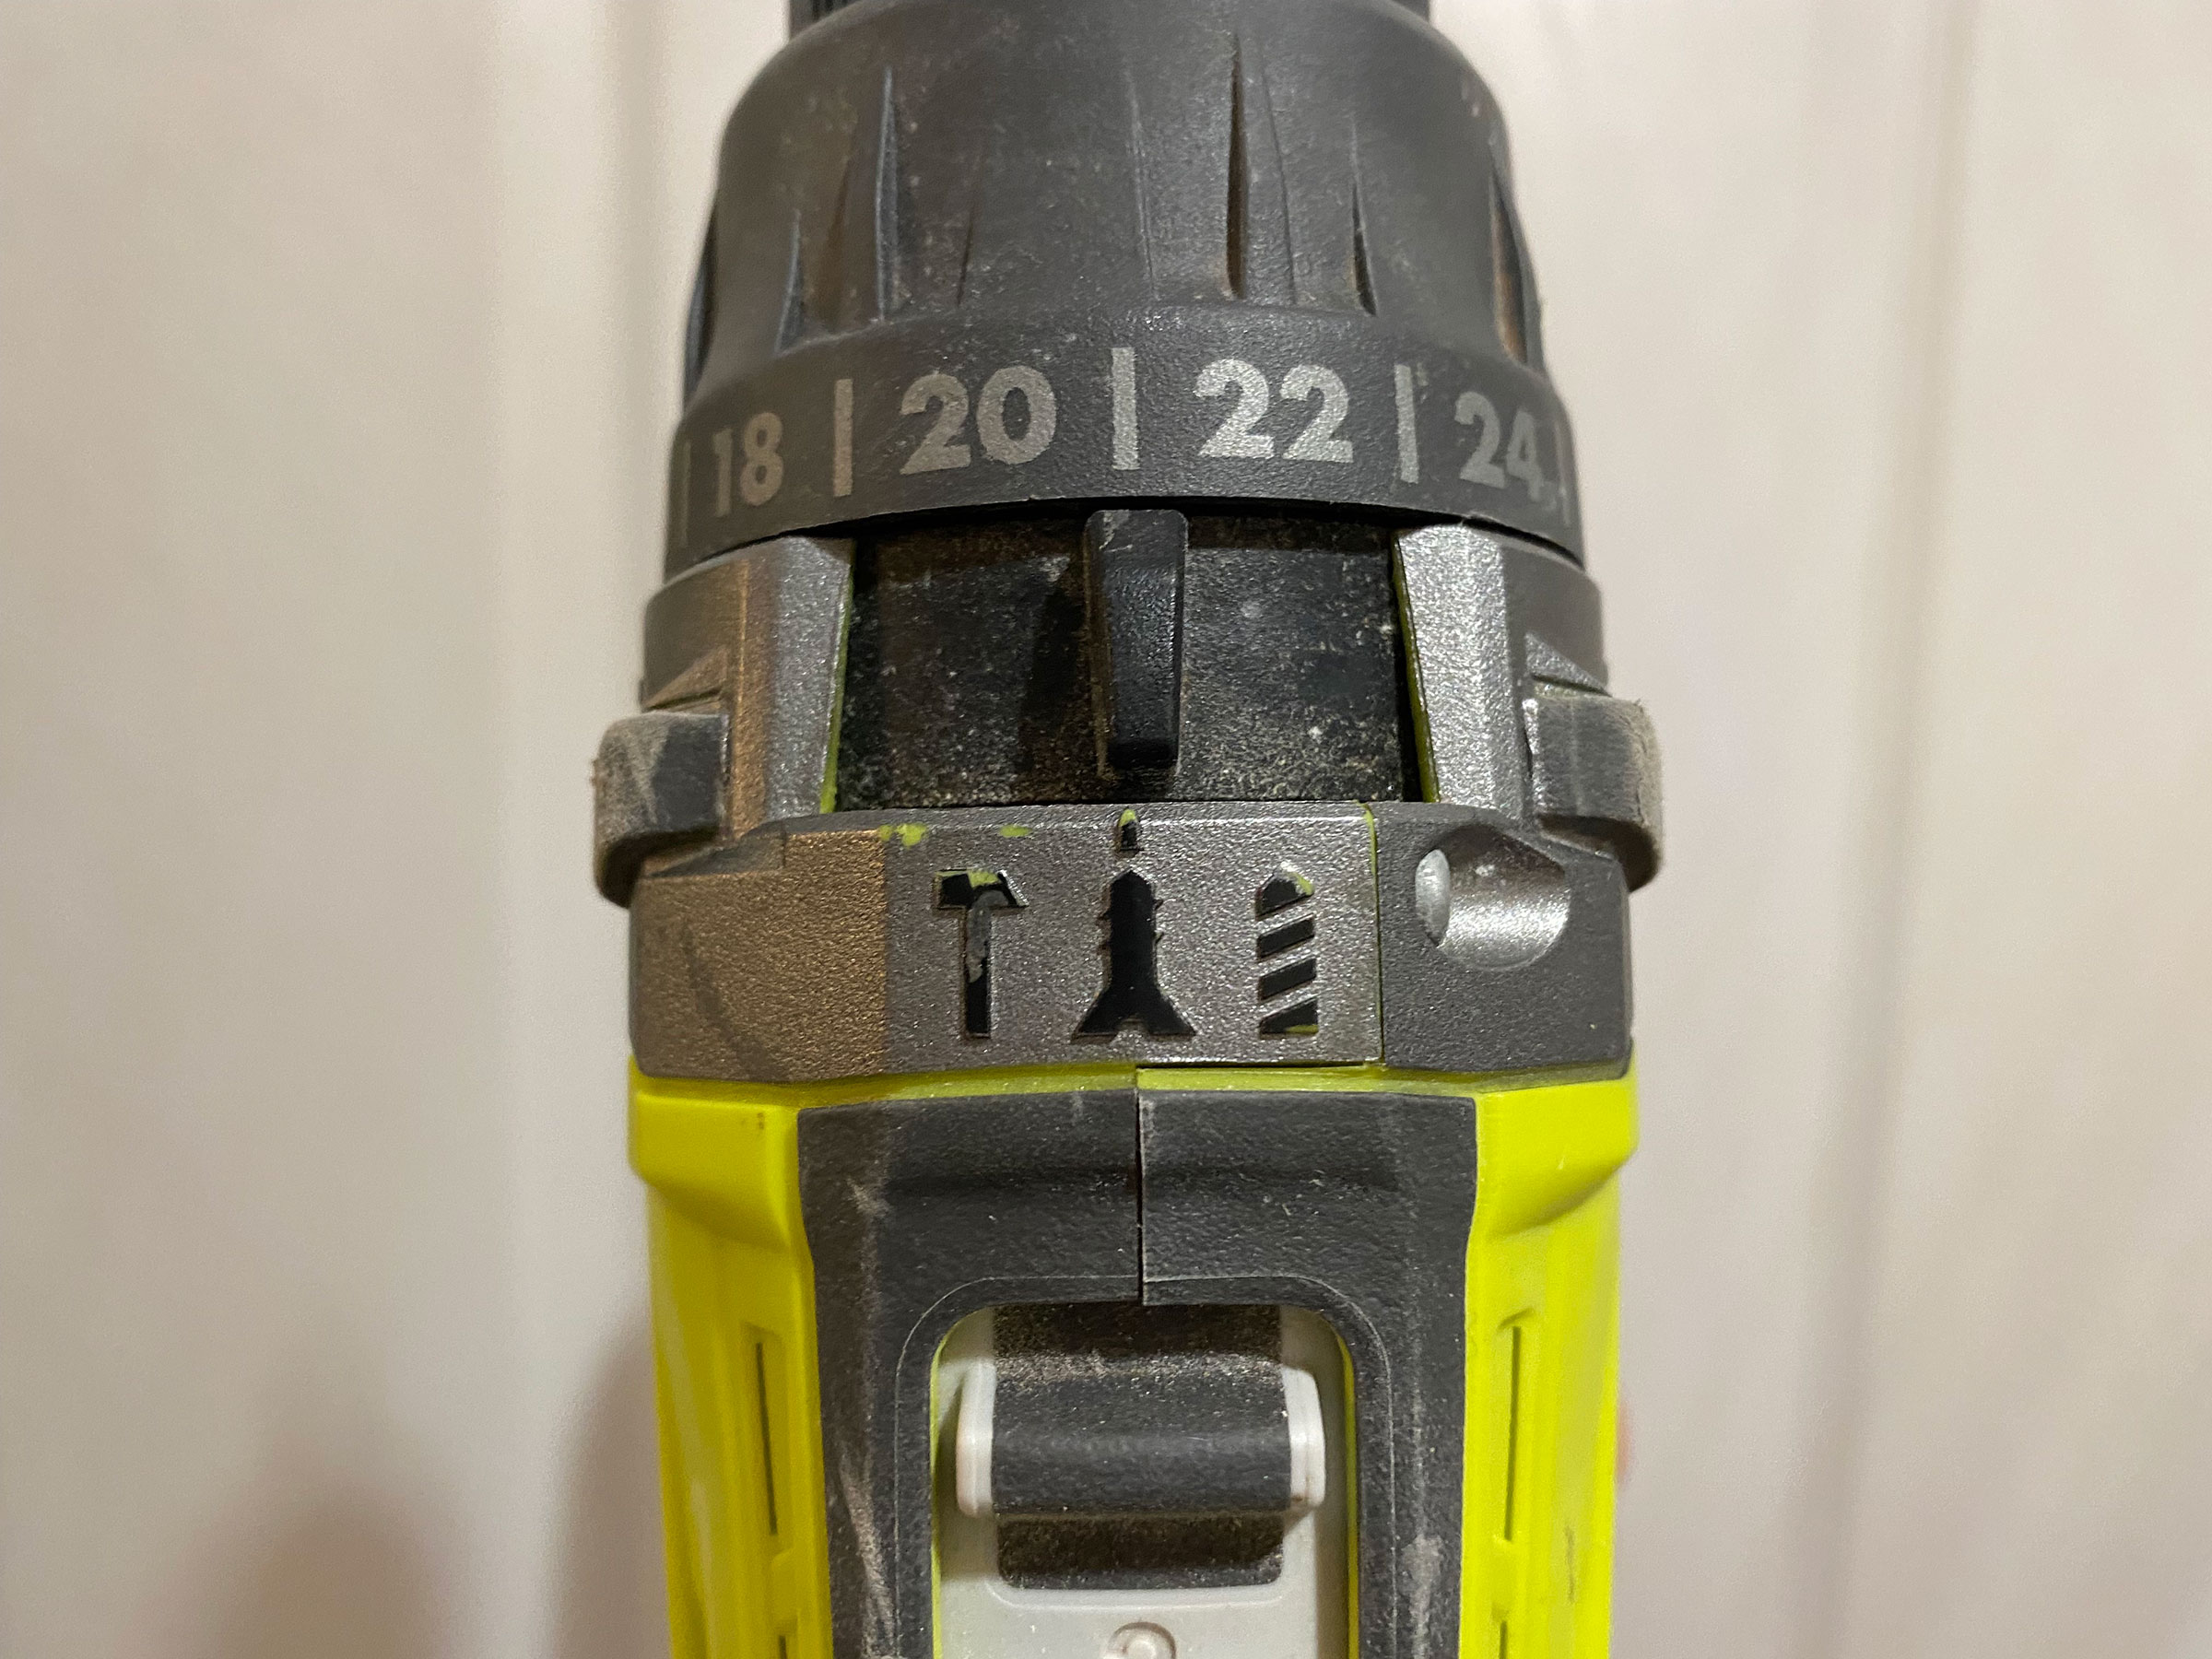
Different drill modes
Combi drills will usually have two or three modes, drill, driver/screw and hammer.
Drilling mode is for drilling holes in various materials and will automatically use the highest torque setting in the drill. If you’re struggling to drill through a certain material, you can switch to the 1 speed (high power, slow speed) or the hammer mode for help getting through.
Hammer mode replicates the features of a hammer drill, incorporating that hammering action to assist in your drilling task. This is a great mode for concrete and masonry. Use this in conjunction with 1 speed for maximum performance.
Driver/Screw mode is for loosening and tightening or driving in screws and bolts. This mode is where all the numbers on the chuck come into play.
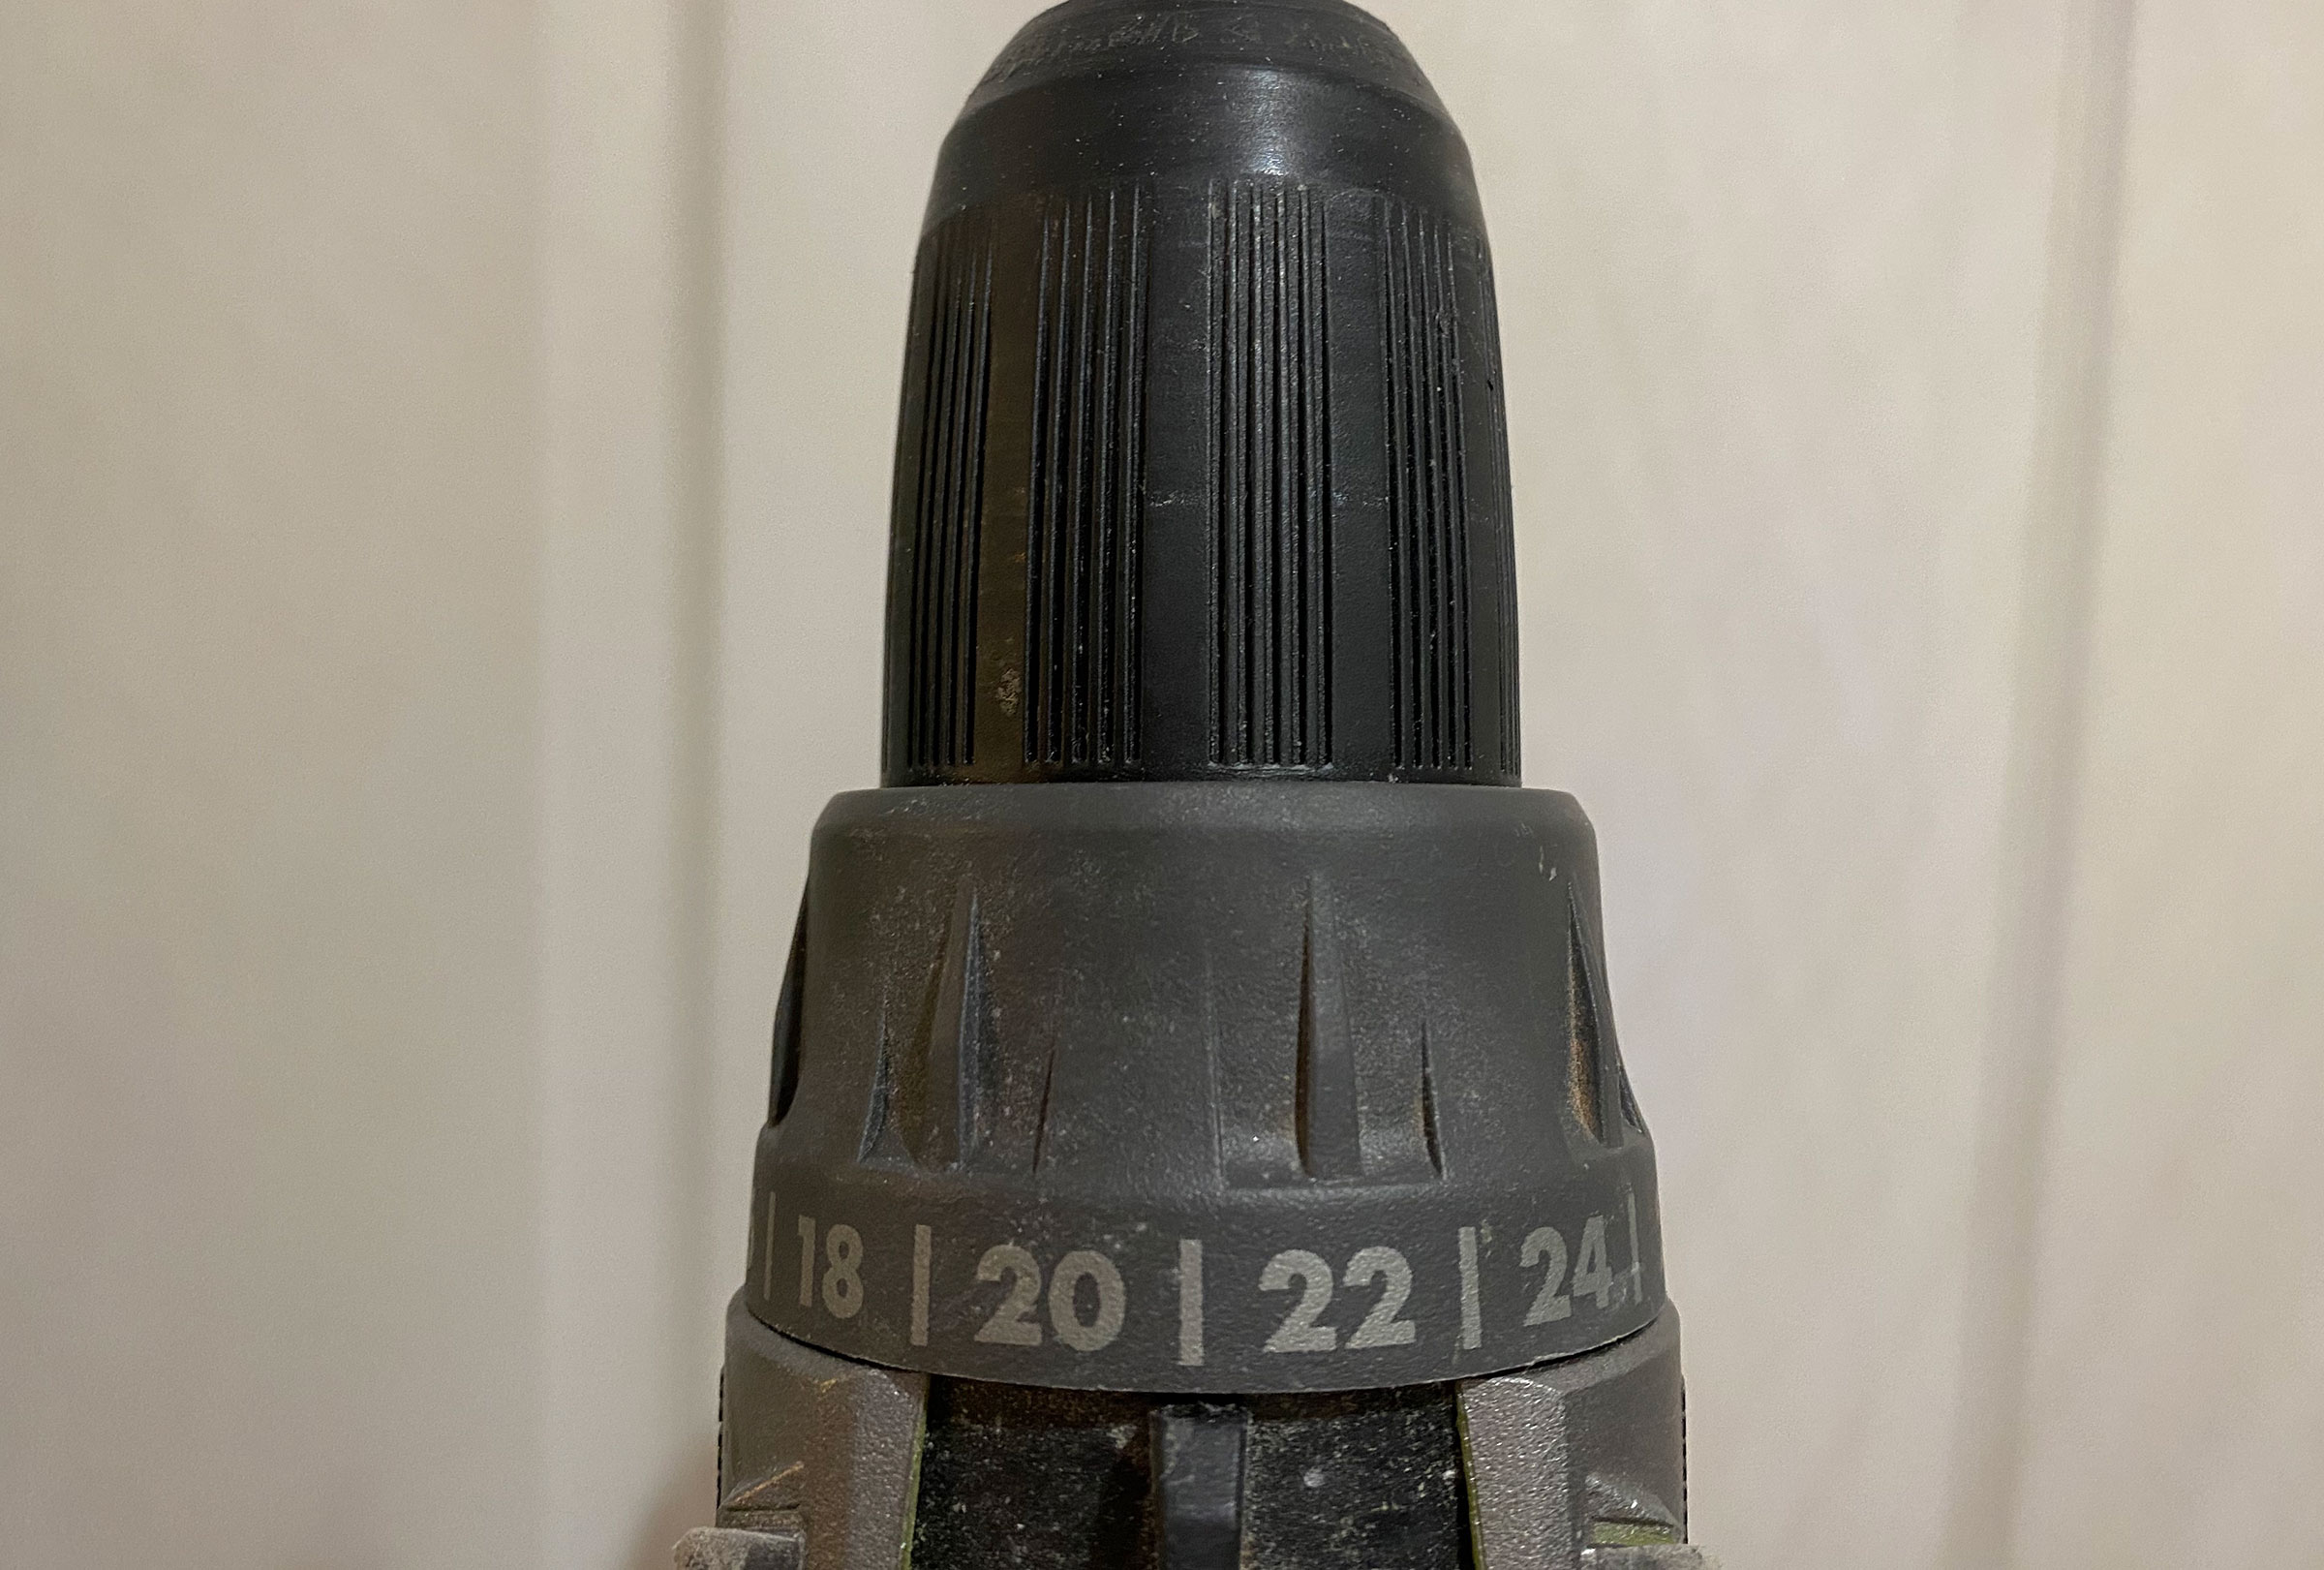
What do the drill numbers mean and how do I use them?
The numbers on the drill refer to the torque setting. They usually go from 1 right up to 25 or show in 2s – from 2 to 24. This is to be used in the screwdriver mode when tightening screws. In drill mode, the highest torque setting is automatically selected so changing the torque on drill mode won’t make a difference to the power.
In screwdriver mode, the torque is the amount of power or force that is being put into each rotation of the chuck to drive the screw into material. The higher the number, the greater the force. It’s best to start low, and when you meet resistance (a loud jarring cranking sound – which is when the clutch has engaged), turn the dial to apply more torque until the screw is as far in as you’d like. If you go in with too much torque, you can strip the screw head and then you may struggle to get it out again. So the lower the number, the shallower the screw will be driven into the material due to the low power, and the higher the number, the deeper the screw will be driven in, due to the high power/force being put upon it.
If the clutch engages due to low power, the driver in turn disengages. This means the chuck stops rotating because it’s met too much resistance. This stops you stripping the screw as mentioned, so always start low and work your way up depending on how much resistance the drill is getting when driving in the screw.
Changing a Drill Bit
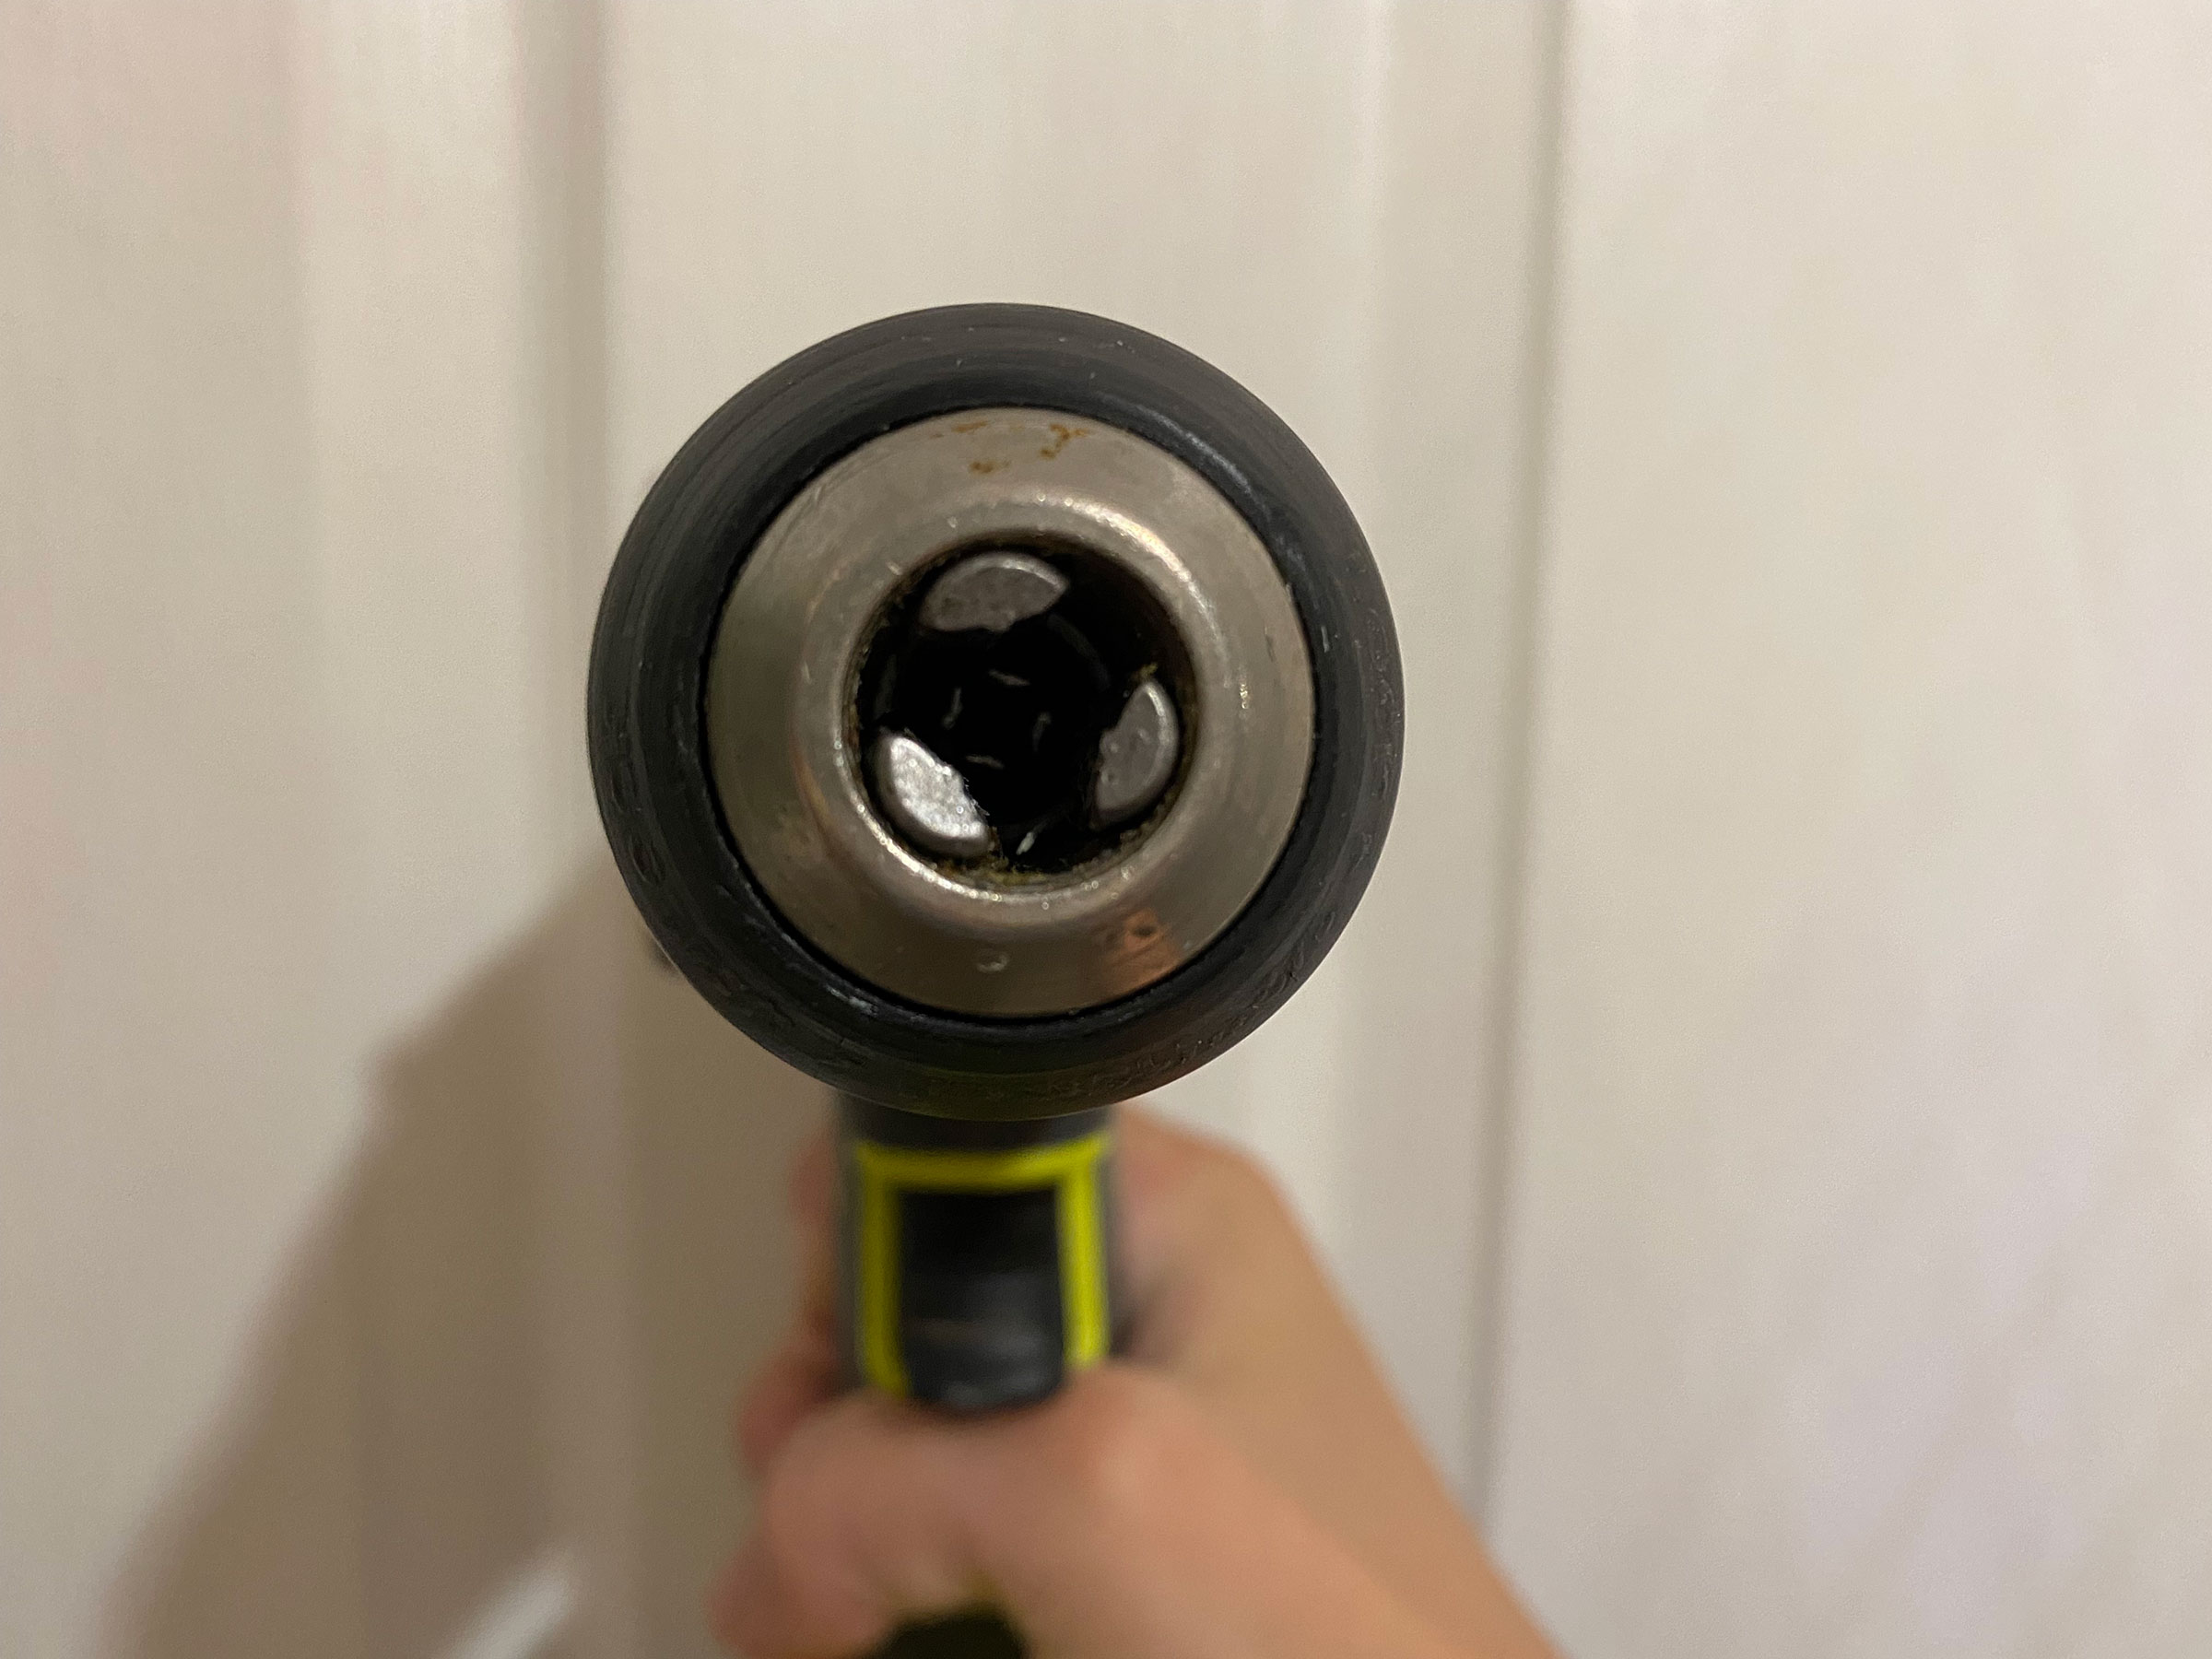
With a keyless chuck like on this drill, you just need to turn the chuck anti-clockwise (lefty loosey!) and it will open up the chuck collet which grips the drill bits. These three collets open wide and close right up. This means you can use drill bit sizes from 1mm to 10mm or sometimes even 13mm. Once you’ve selected the right size drill bit for the job, you can tighen the collets around the bit by turning the chuck clockwise (righty tighty!) tighten as much as possible to ensure it doesn’t come loose while in use.
A speedier way to loosen and tighten the collets is to pop the drill in reverse and hold the chuck in one hand while the other holds down the trigger. To tighten, put it in forward gear and repeat until the chuck clicks.
If your drill bit ever gets stuck, use some WD-40 and tap with a hammer to loosen the collets until you’re able to get it loose.
Jasmine Gurney is a DIY pro, inspiring women with power tools via her home improvement blog Oh Abode and on Realhomes.com.