
When we moved into our home in March of 2020, our primary bathroom design lacked a certain, well, pizzazz. It wasn't awful or falling apart, it was just boring and had little in the way of style or personality.
Almost immediately, we had a few major updates that were completed at the outset while we were in demolition mode: we had our plain vanity painted, installed updated knobs, and had new flooring selected and installed. Still, it felt like the room was missing something, so I knew that I would need to update the mirrors, plumbing fixtures, and other hardware and decor in time.
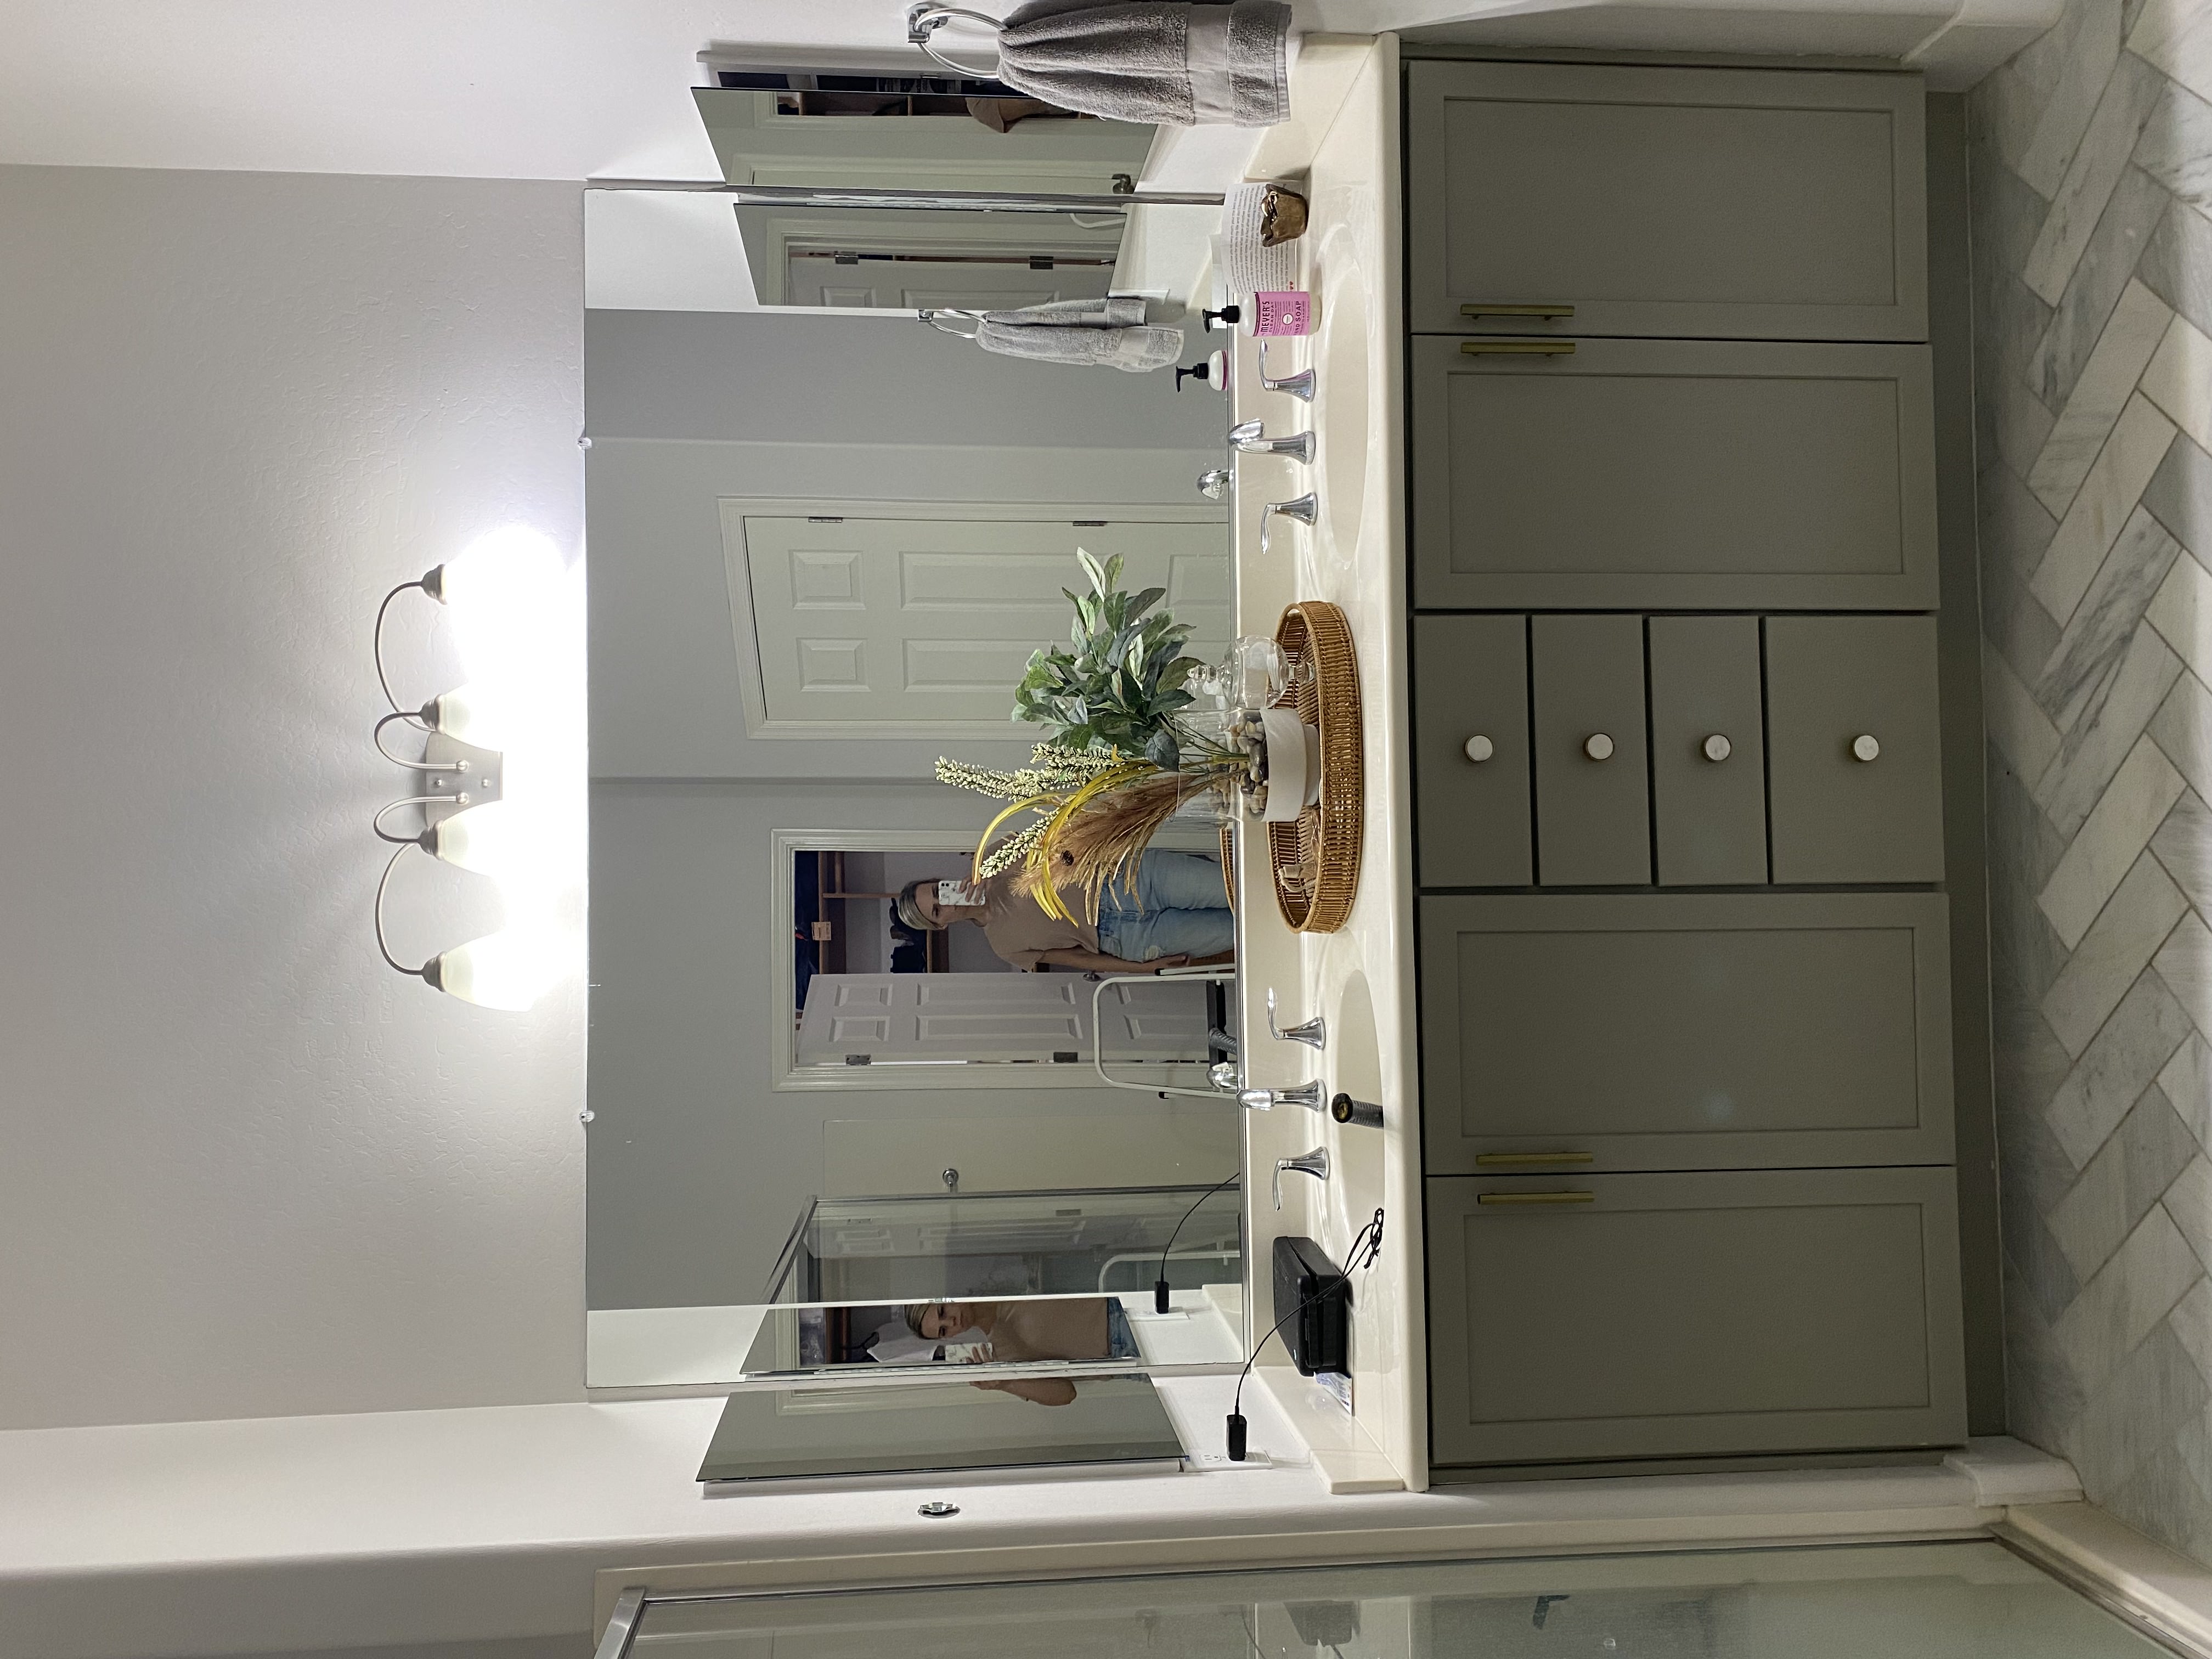
The bathroom after we did the first round of updates in early 2020. It was nice, but didn't wow.
In the months since our first bathroom update, we've been able to make some high-impact, but budget-friendly changes that have totally transformed the space, making it feel stylish, unique, and high-end.
I started by taking inspiration from the beautiful vanity color and flooring, which provided the perfect backdrop for this project. Here, I've listed out the the smaller, but impactful changes that I made to take this bathroom from boring to fab, plus a list of how much we spent on the project. (Note, the cost breakdown below is for the cosmetic changes, not the original changes we made when we moved in).
- See also: Bathrooms on a budget - the best cheap bathroom ideas for updating your space

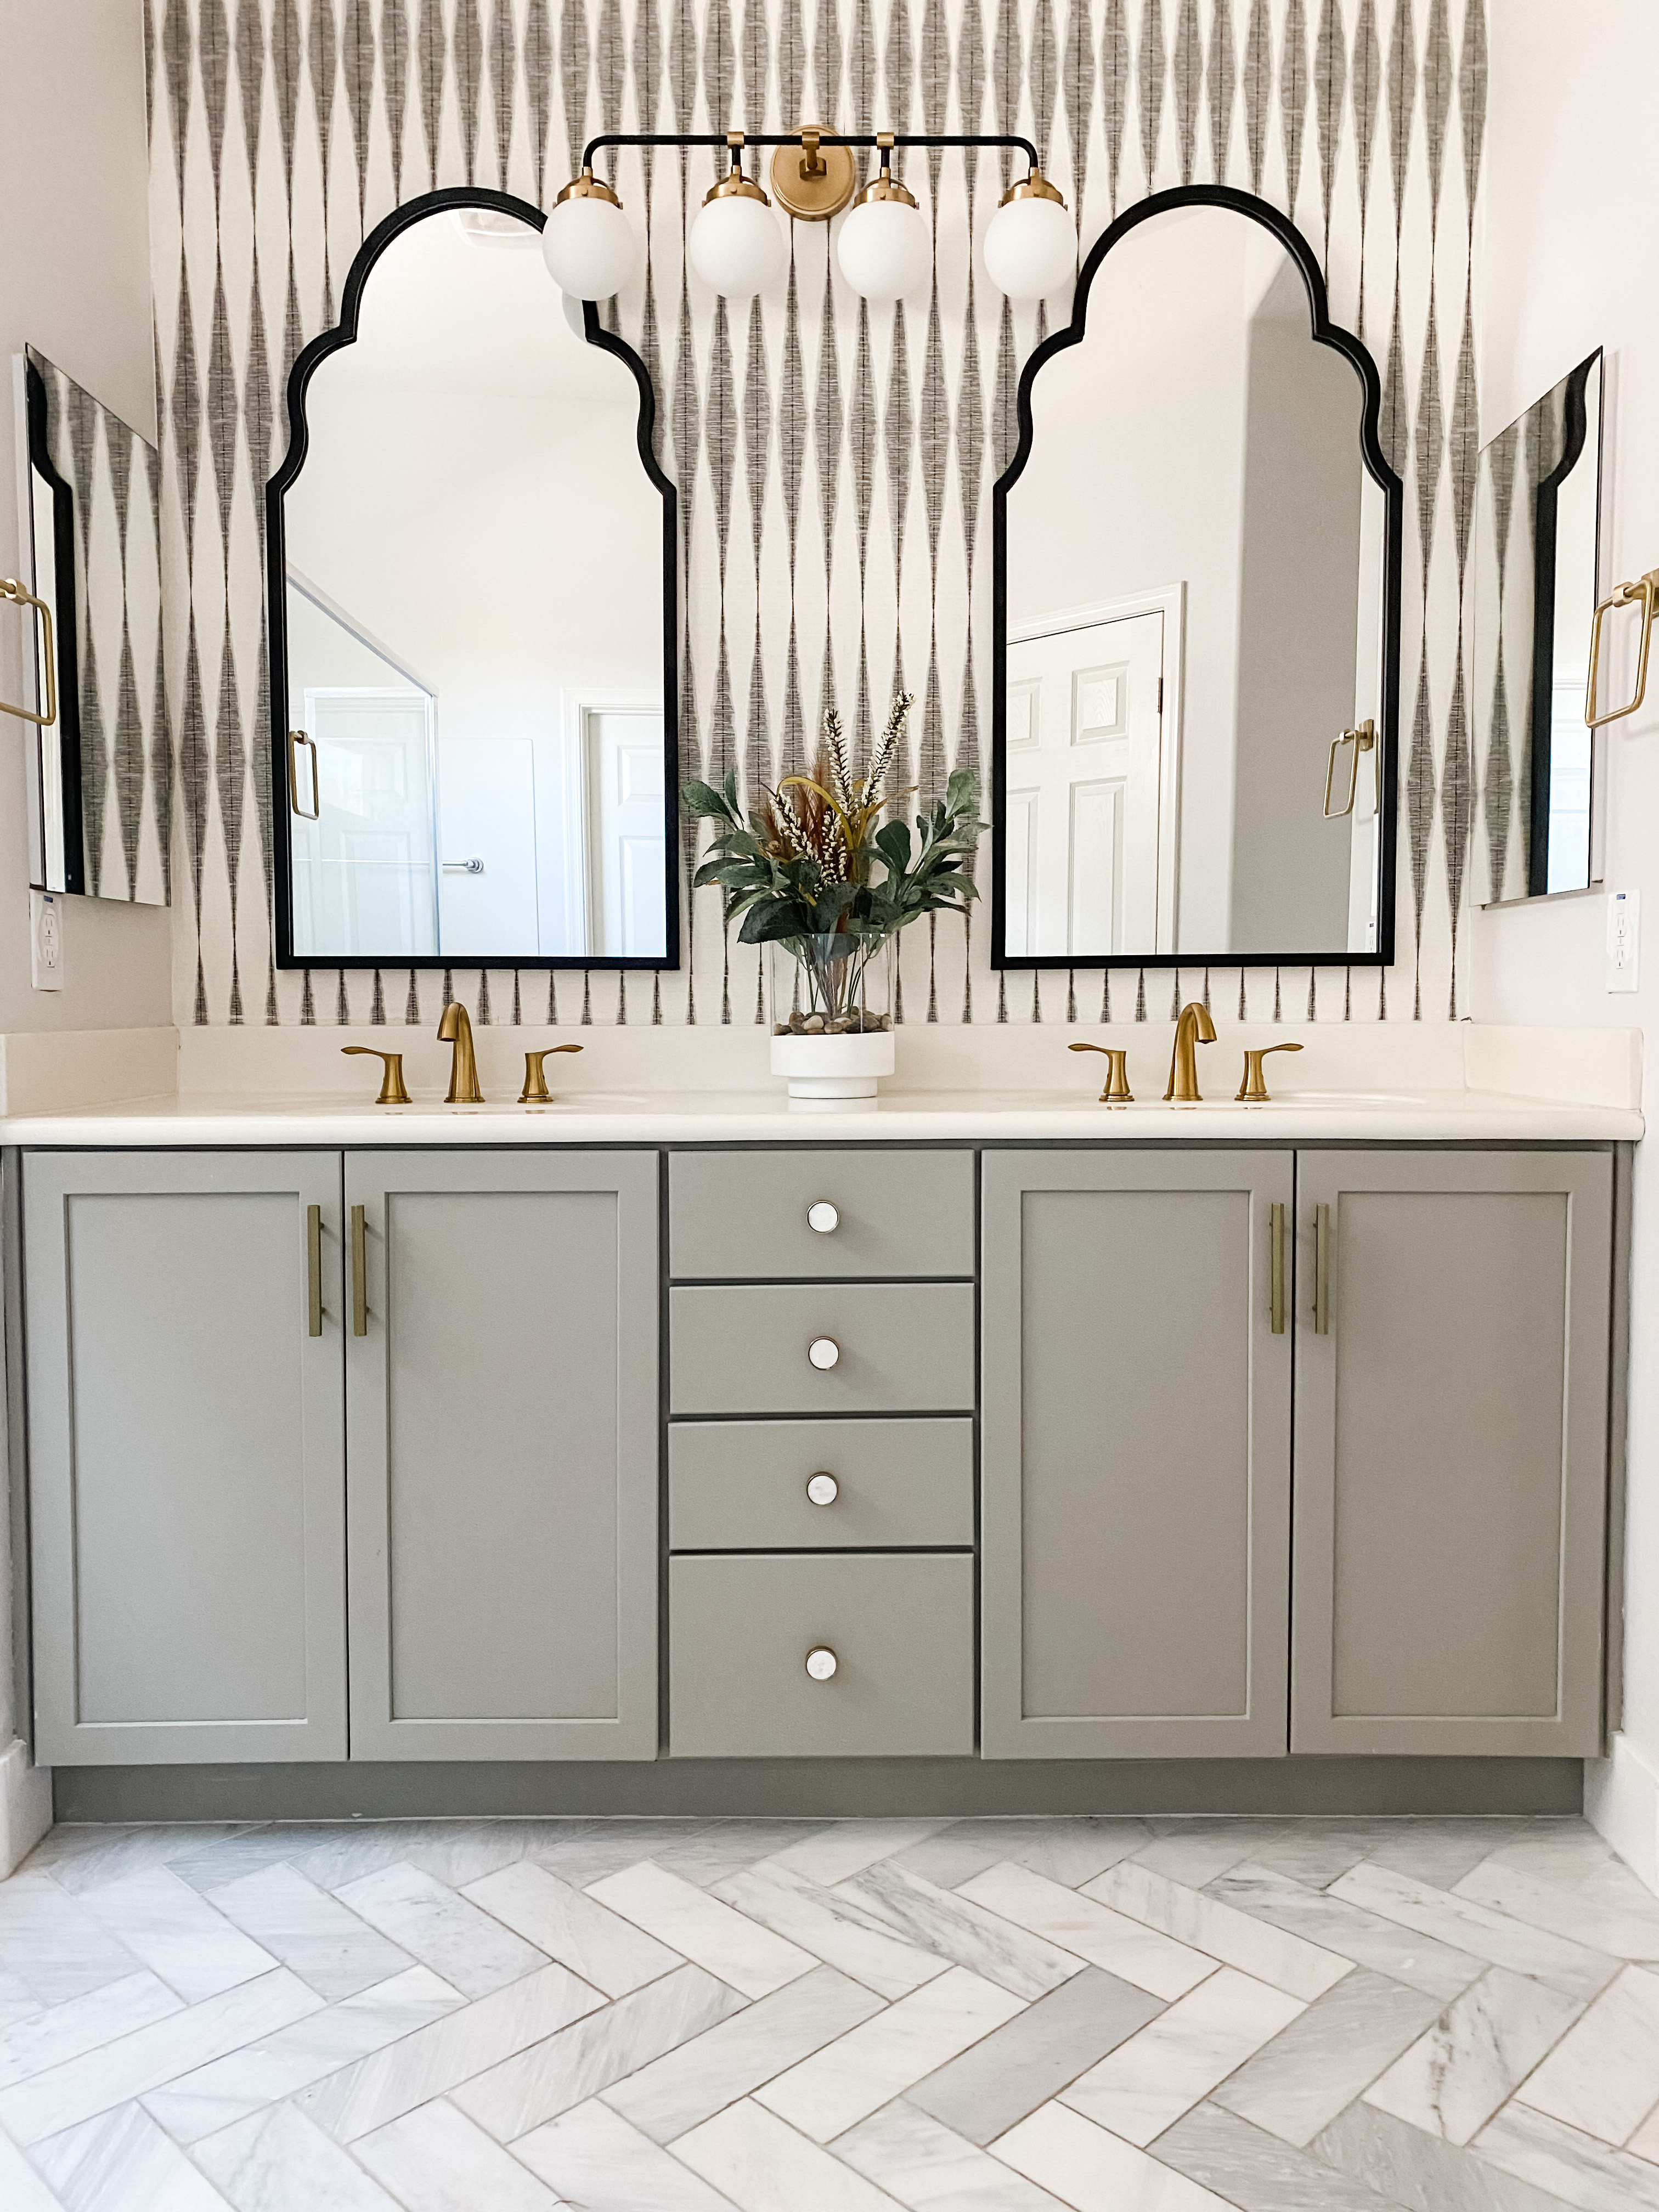
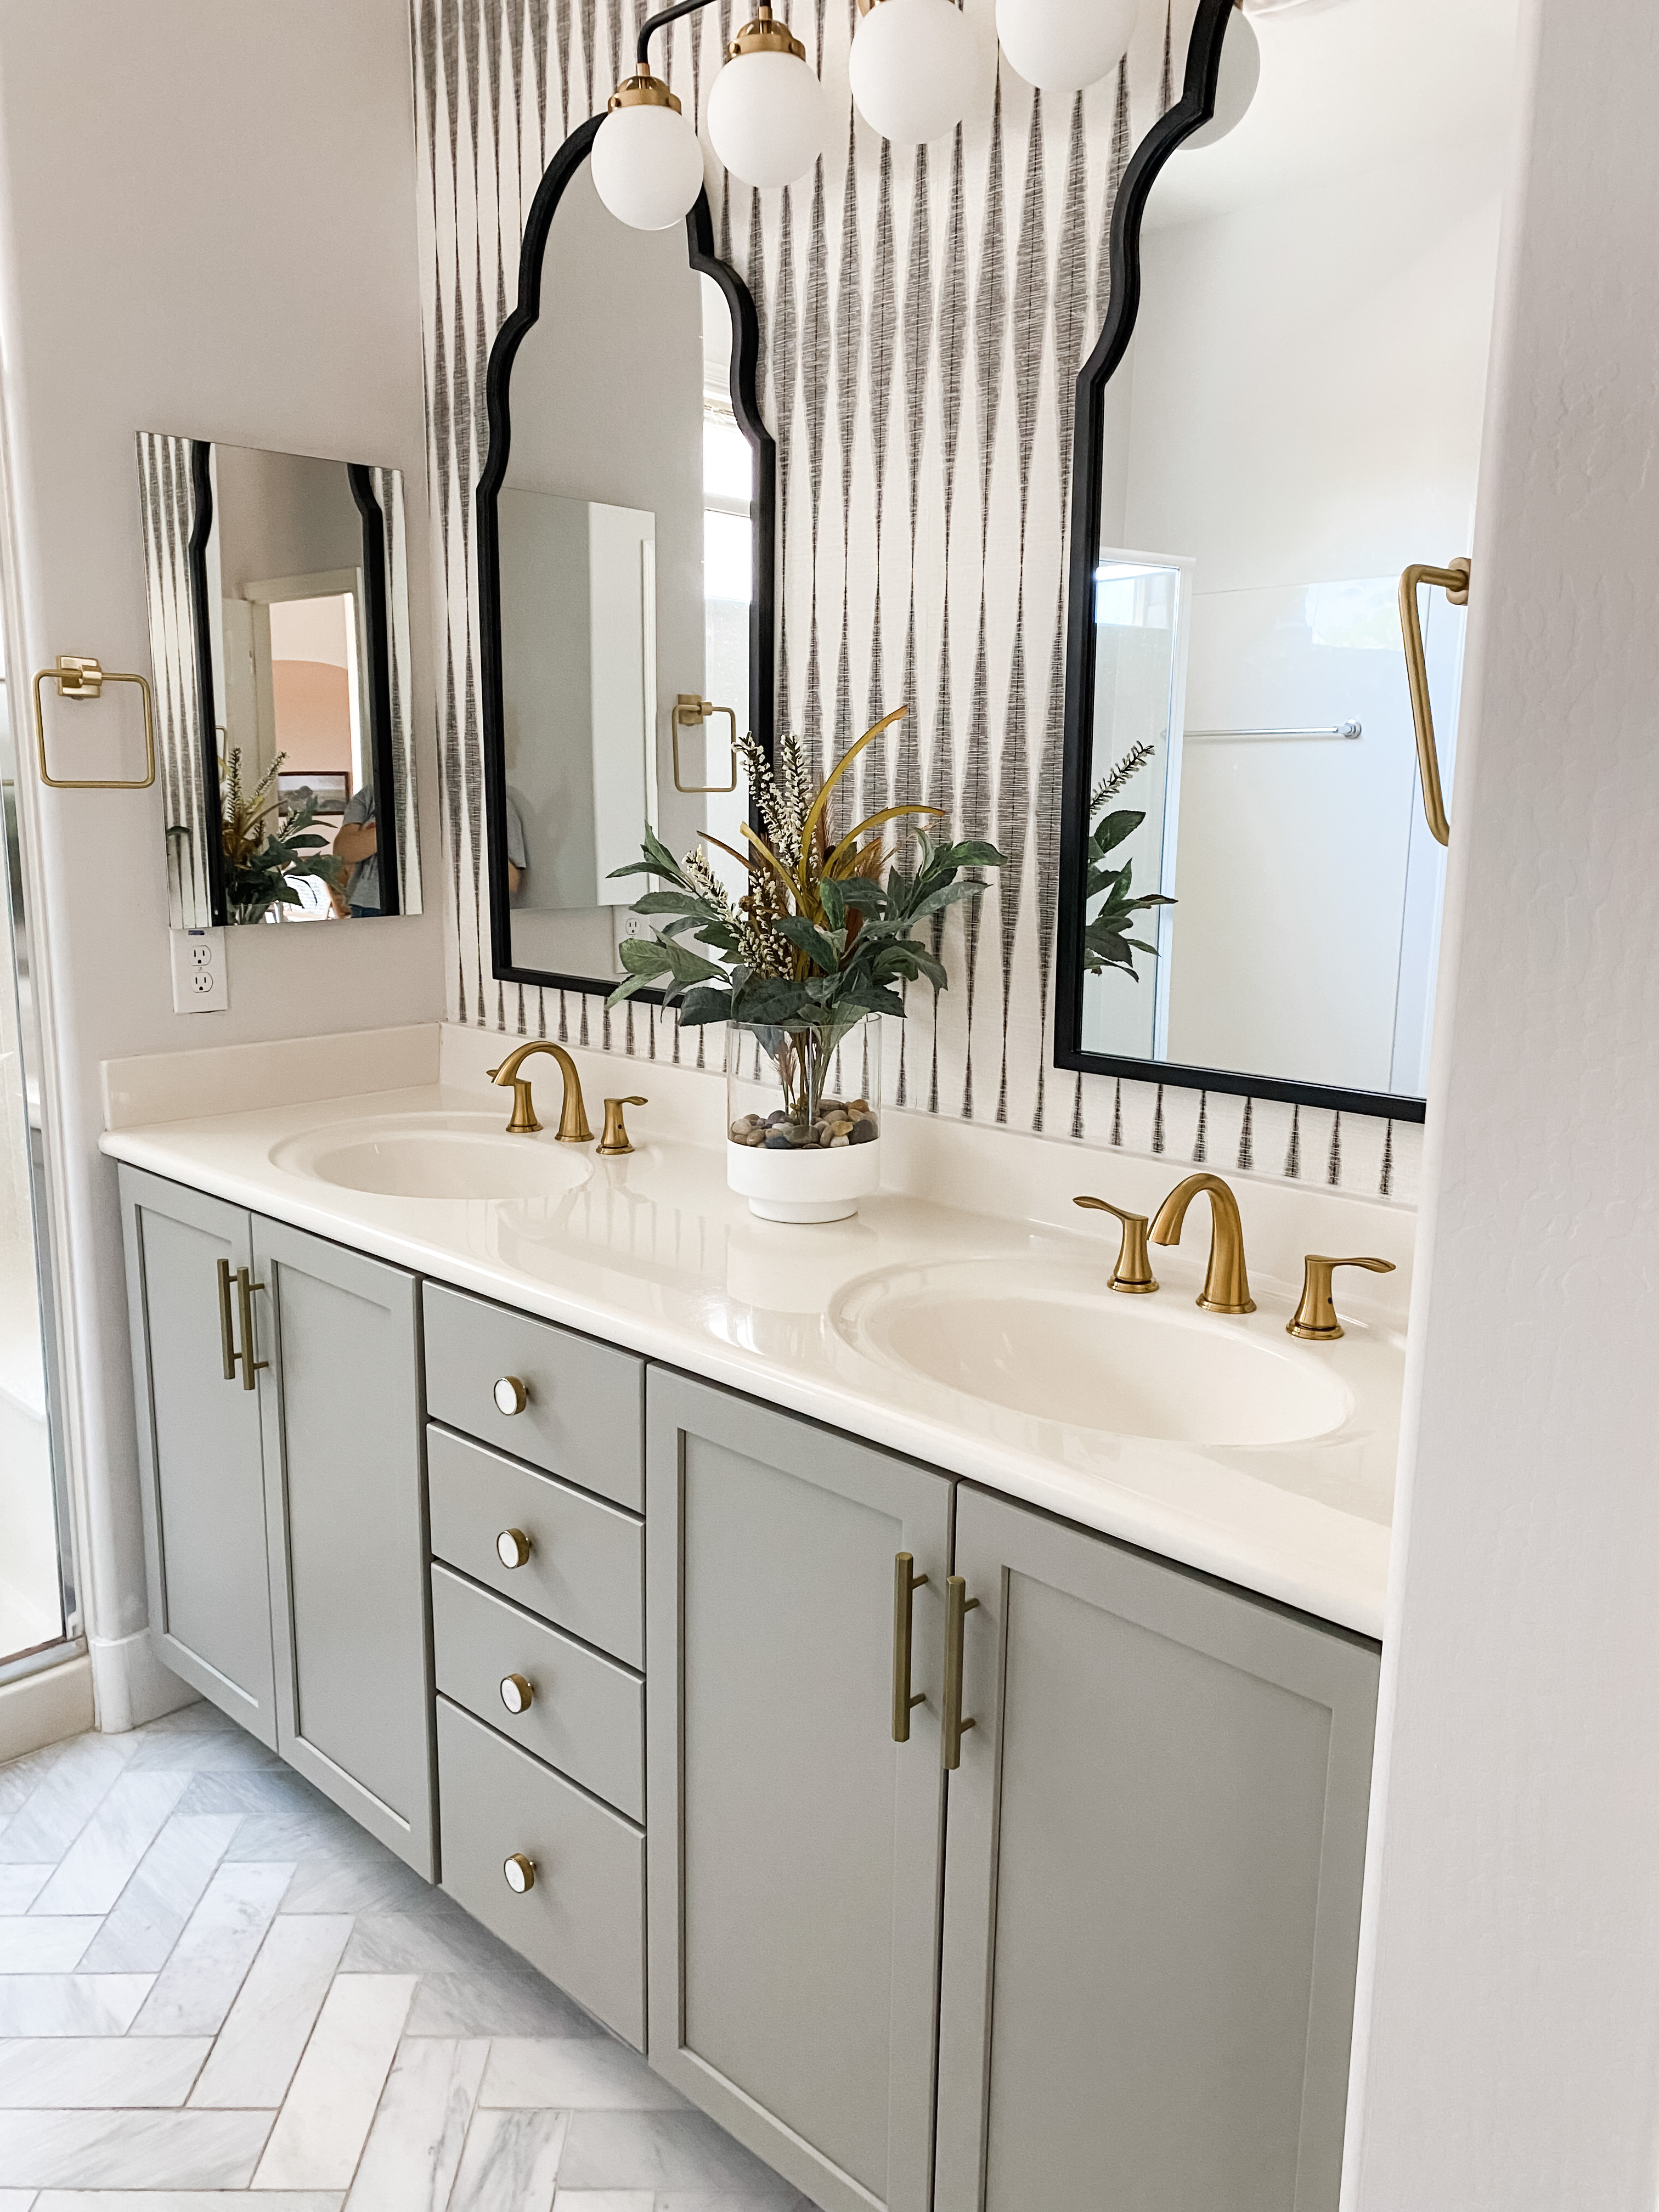
Our finished primary bathroom
1. Make a statement with wallpaper
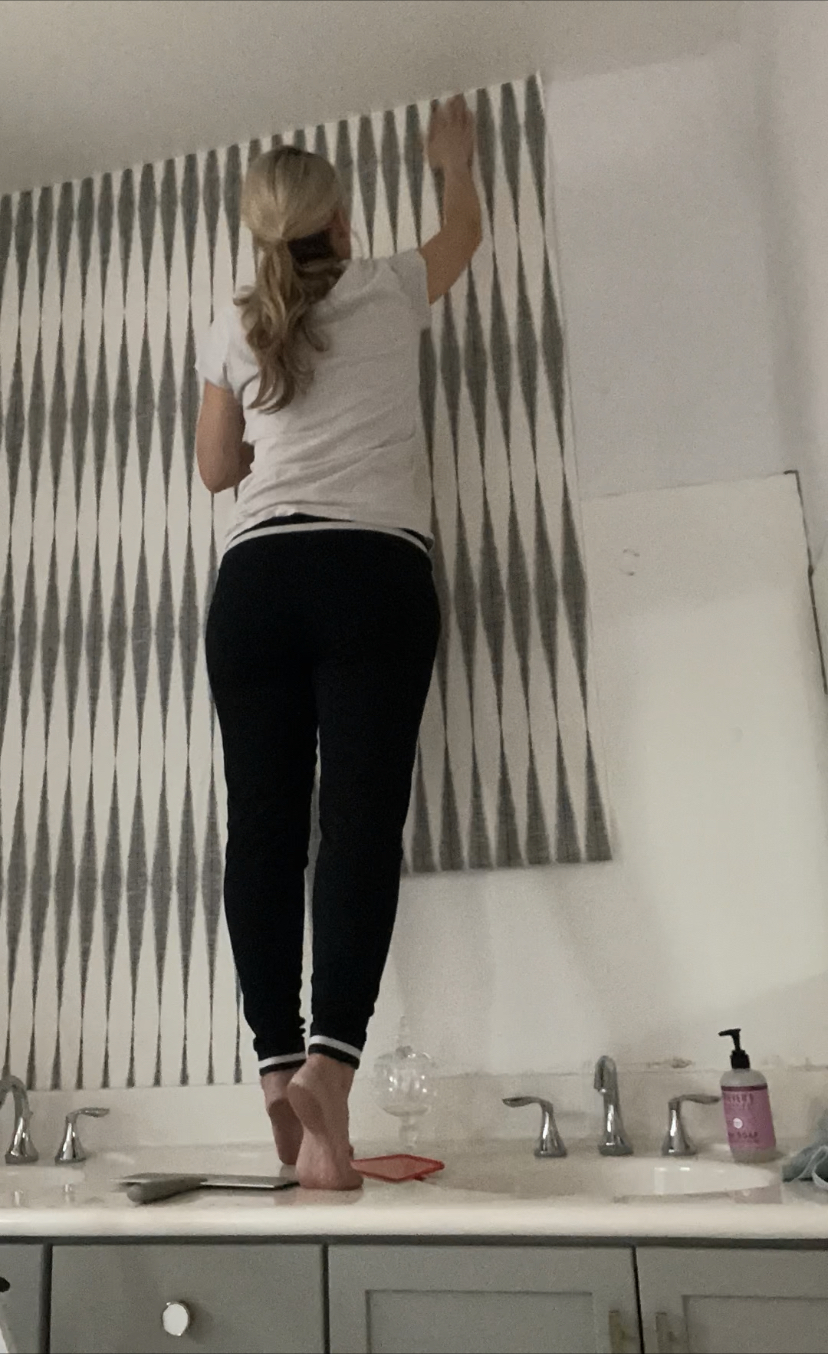
My latest obsession and favorite way to inject personality into a space is using wallpaper. I have now installed wallpaper three times, each a different application (unpasted, peel-and-stick, and pre-pasted.)
In my personal opinion, the latter is the easiest and the application I used for my bathroom. Prepasted wallpaper simply means that you don’t need to purchase additional adhesive because it’s already on the wallpaper. The glue is dry and just needs to be activated by wetting the back of the paper. I chose to do this by spraying the back with a spray bottle, letting it sit to allow the adhesive to activate and folding in half so the bottom half doesn’t stick to the wall as you try to apply the top half.
The bathroom wallpaper I chose is the Magnolia Home Handloom Wallpaper in black. This is a bold statement paper and totally works in this small space!
Get small space home decor ideas, celeb inspiration, DIY tips and more, straight to your inbox!
2. Update bathroom accessories and lighting

I wanted to stick with a brass motif since the hardware on my vanity is brass so I chose modern towel rings to replace the builder grade ones that came with the house. The towel rings and light fixture are both from Home Depot. The light is the Cafe 4-light brass and matte black by Sea Gull Lighting and the towel rings are by Elevate by Gatco.
To balance out the brass I wanted the mirrors to be a complementing metal. When I saw the Maria Metal Arched wall mirror from Kirkland’s I was hooked! All the things I love ... arched frame, matte black, and extremely affordable for a mirror so large.
3. Swap out plumbing fixtures
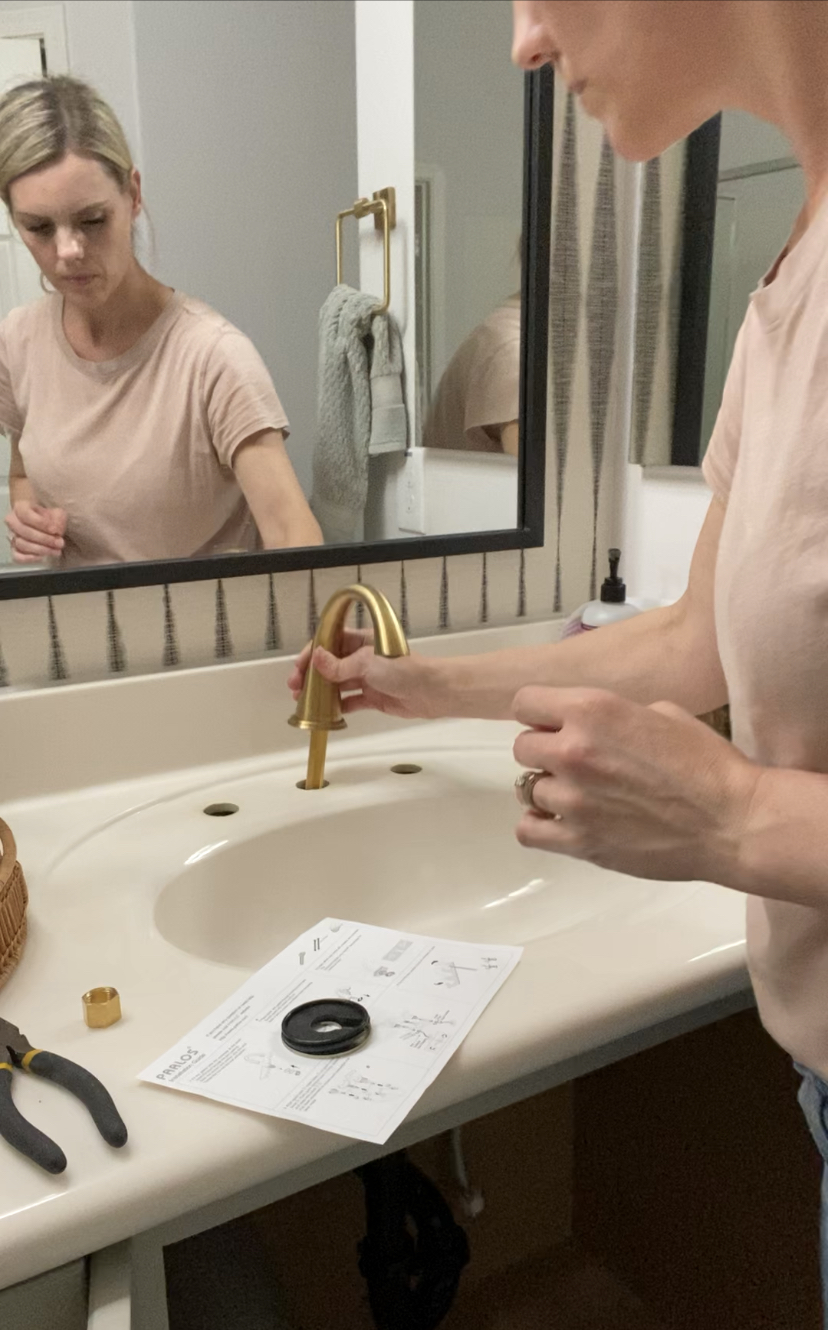
Lastly, the plumbing fixtures complete the look. I went for a simple faucet that would fit in the existing countertop since that wasn’t getting replaced. The understated brass faucet by Parlos Home was just right!
All in all, this primary bathroom refresh cost me a little over $600.
Here is the cost breakdown for our primary bathroom refresh:
- Wallpaper: $67.50
- Vanity light: $149.00
- Towel rings: $27.45 each x2 = $54.90
- Mirrors: $99.99 each x2 = $199.98
- Faucets: $76 each x2 = $152.00
Total: $623.38
I’m so thrilled with how this looks! I was also able to save money by doing all of the install myself and not hiring out any work. DIY projects always save the day.
I hope this motivates you to tackle a refresh of your own! If you like this project you can find many more by following me on Instagram @brookewaitehome.
I'm a mom of three with a passion for interior design and DIY! I am currently renovating a farmhouse along with my husband and running an Airbnb in our hometown. I would define my style as loving clean lines with a good mixture of old and new. I love a modern cottage look and have been very interested in vintage pieces as of late. When I’m not spending time with my family or dreaming up another home project, I love to read, eat good food, and binge-watch crime shows on Netflix!
