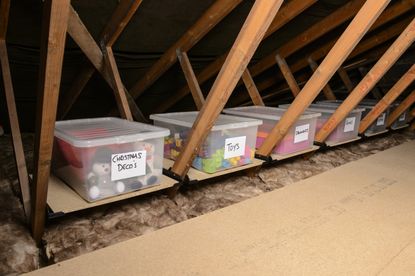
Turning your loft into an organised storage space is a great way to declutter the habitable parts of your home. After having a good clear out and getting rid of all of the things you no longer need, what do you do with the stuff you want to keep, but doesn’t need to be around for day-to-day use? We are talking about the Christmas decorations, luggage and sports gear that only comes out once or twice a year.
Putting them in the loft is the answer. But before you open that loft hatch and throw everything in, getting the space ready for storage use – safely of course – is essential. We have teamed up with Loft Leg to tell you how to turn your loft into a storage space, covering everything from boarding the space to making it accessible.
1. Check your loft is insulated, dry and watertight
Storing anything you value in a place that is likely to become cold and dirty is ill-advised. What’s more, for the energy-efficiency of your home (and to save on those heating bills) you will need your loft to be well-insulated too.
Check your roof for signs of damage and water ingress, asking a roofer to repair any faults. Then tackle the insulation. Insulation is available as rolls or battens that you lay between the ceiling joists. The current recommended depth of mineral wool insulation is 270mm, meaning that the joists will be hidden under the insulation. To move around the loft safely, place boards across the joists to hold your weight as you work.
2. Board the loft to create a floor
After insulating, you can add a floor to make the space usable. Most DIY stores offer tongue and groove loft boards that you can fit yourself. When it comes to fitting you will need to measure up first and cut your boards to size. Think about how you are going to get them in and out of the loft – you may need to buy narrower boards to fit through the hatch.
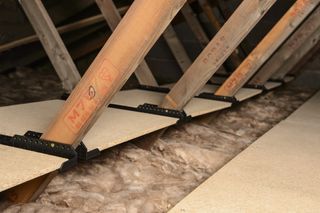
You might be tempted to lay your boards on top of existing joists, but as these are often around 10cm deep, this will squash the recommended 27cm depth of insulation Building Regulations requires.
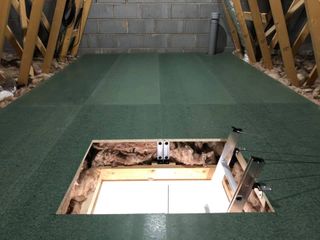
The simplest way to do this is by creating a raised loft floor with a product such as Loft Leg. This is an easy-to-fit product that can be screwed on to joists, raising the boards above the recommended insulation depth, while also allowing clearance for wiring.
Once your loft is boarded you will have a strong floor that is safe to walk on and use for storage.
3. Make the most of awkward spaces
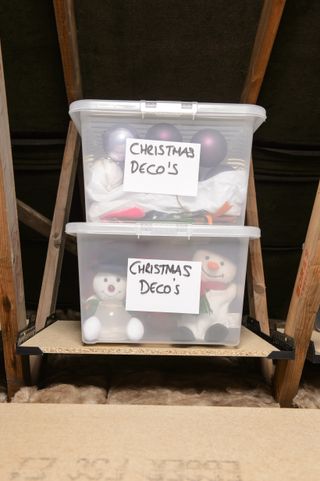
If you think that the space under the eaves is going to go to waste, think again. Create additional storage between trusses and around the sides of your loft with Loft Ledge. These are brackets that can be fitted to trusses for additional loft shelving – perfect for smaller items. Again, these allow plenty of room for insulation so damp is not a risk, and your loft’s energy efficiency won’t be impacted either.
4. Invest in quality storage boxes
For complete organisation, don’t forget to get plenty of storage boxes to house all of your possessions. Buy enough to split objects into simple groupings, being mindful not to overpack anyone box which will then be too heavy to carry down the loft ladder. We recommend clear boxes with lids so that everything is protected and can be easily seen. Label the boxes too so that you can quickly locate what you need.
If you can, arrange the boxes so that things you need more often are nearest to the hatch.
5. Don't forget lighting!
It is surprising how many people forget lighting when turning their loft into a storage space. This is essential for being able to find what you are looking for. It also makes using your loft safer as you won’t need to climb the ladder holding a torch – a big no no when carrying anything down the ladder too.
You will need an electrician if you are going to hard-wire any lighting, so for a quick and affordable option, why not choose battery-powered LEDs that you can fit yourself, anywhere you like.
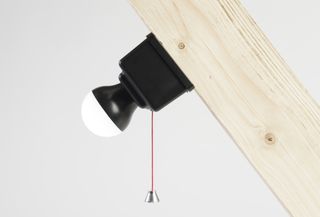
Loft Light is an ultra-bright battery powered LED light, equivalent to a 32 Watt bulb. It has been designed to spread light in the same way as a traditional incandescent bulb, requires very little power and therefore has a battery life of up to 4 years (based on 10 minutes loft use every other week)
6. Choose a strong ladder and a large hatch
If your loft hatch is quite small, you should consider getting it made wider for ease of access. This will involve cutting away plasterboard from the ceiling below – or lath and plaster in an older home – and fitting a new hatch. A capable DIYer should be able to do this, but hire a local builder to do it for you if you are unsure. It is worth the time and effort as a larger opening will make your loft easier to get in to and thus safer to use.
You should also choose a strong ladder that folds into the loft when not in use. Propping a ladder into a loft, or trying to access your loft by a step ladder is not very safe – especially if you are trying to get into your loft with nobody to spot you.
So there you have it. Six steps to maximise your loft for storage and hopefully lead to a clutter-free home.
